Guide to Enabling and Disabling Safe Mode in Windows 10 and Windows 11

Despite the fact that modern computers are known for their stability, they are still not immune to various errors, including those related to the operating system. Moreover, there is always a risk of catching a virus on the internet. So, what should you do if you encounter such problems? In such situations, switching the device to Safe Mode can help. Let's figure out what it is and how to enable or disable it in Windows 10 and Windows 11.
What is Safe Mode?
Safe Mode is the startup of the operating system with a limited set of drivers and files necessary to perform only the most important functions. To identify the exact source of problems, you can add and exclude some parameters. For example, enable Command Prompt or network drivers in the initial set of functions. Moreover, Safe Mode can help you resolve device overheating issues and improve the performance of its components.
How to Enable and Disable Safe Mode in Windows 10 and Windows 11?
Safe Mode is enabled through the system recovery screen. However, in different situations, you can reach it in various ways. Let's look at each of them.
In the Settings section for Windows 10
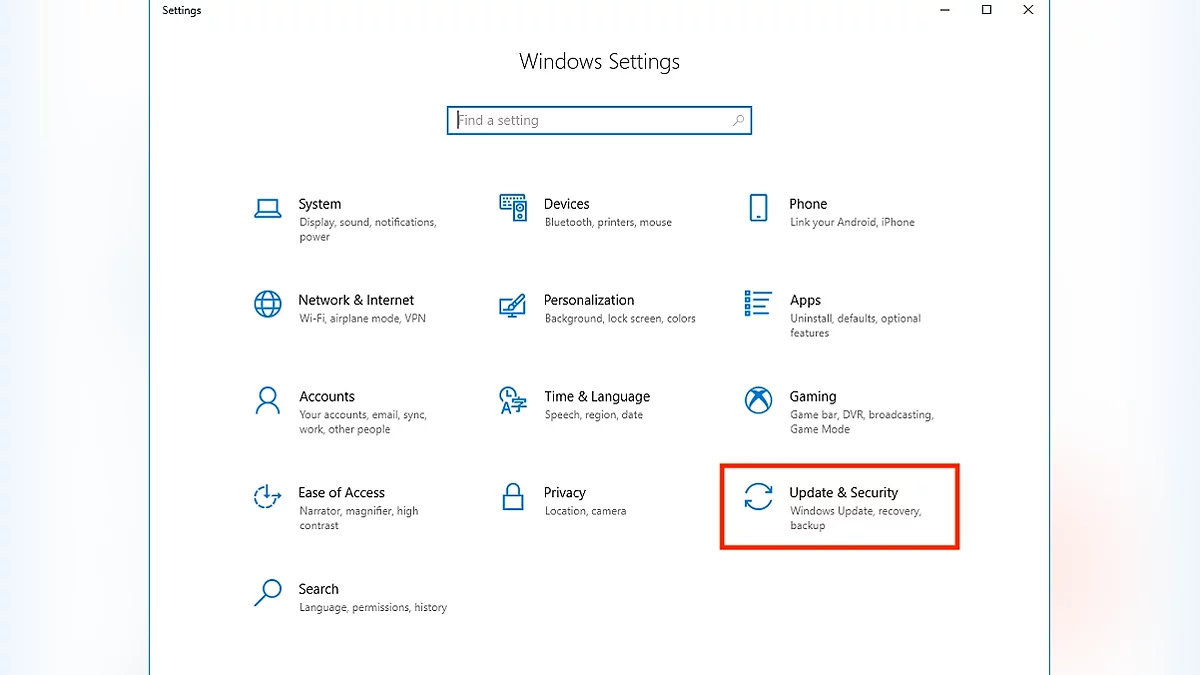
First, open the settings through the Start button menu or use the application search. After that, you will need to go to the Update & Security section.
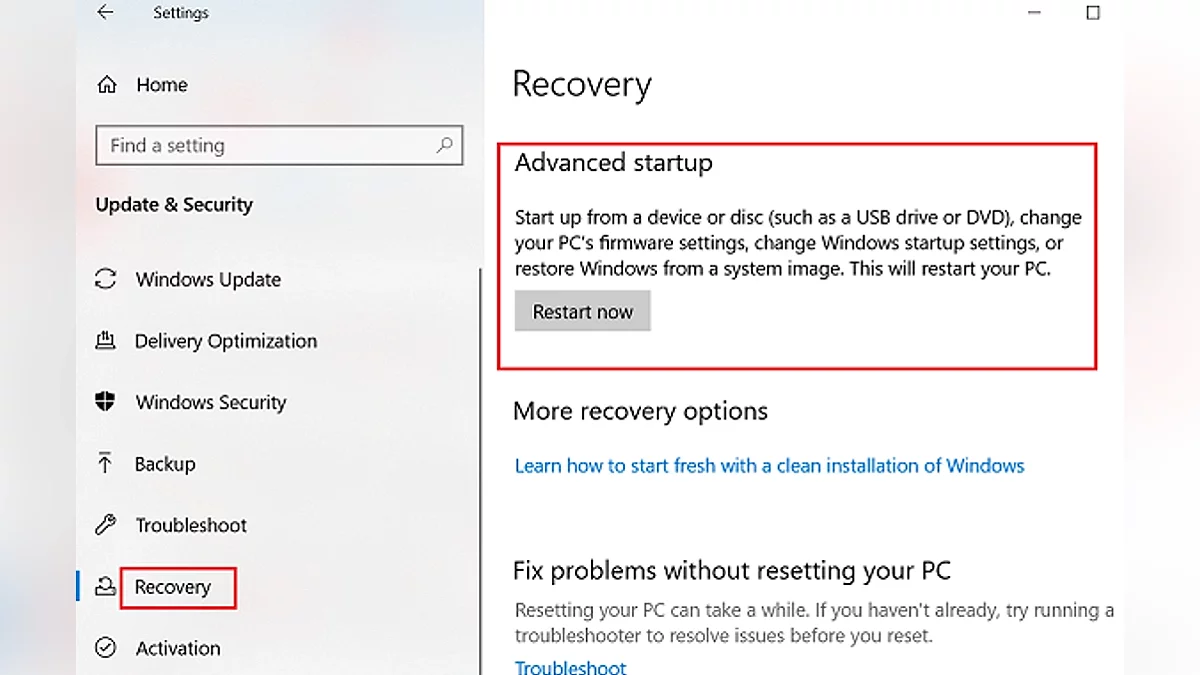
Select the Recovery option and click the Restart now button.
In the Settings section for Windows 11
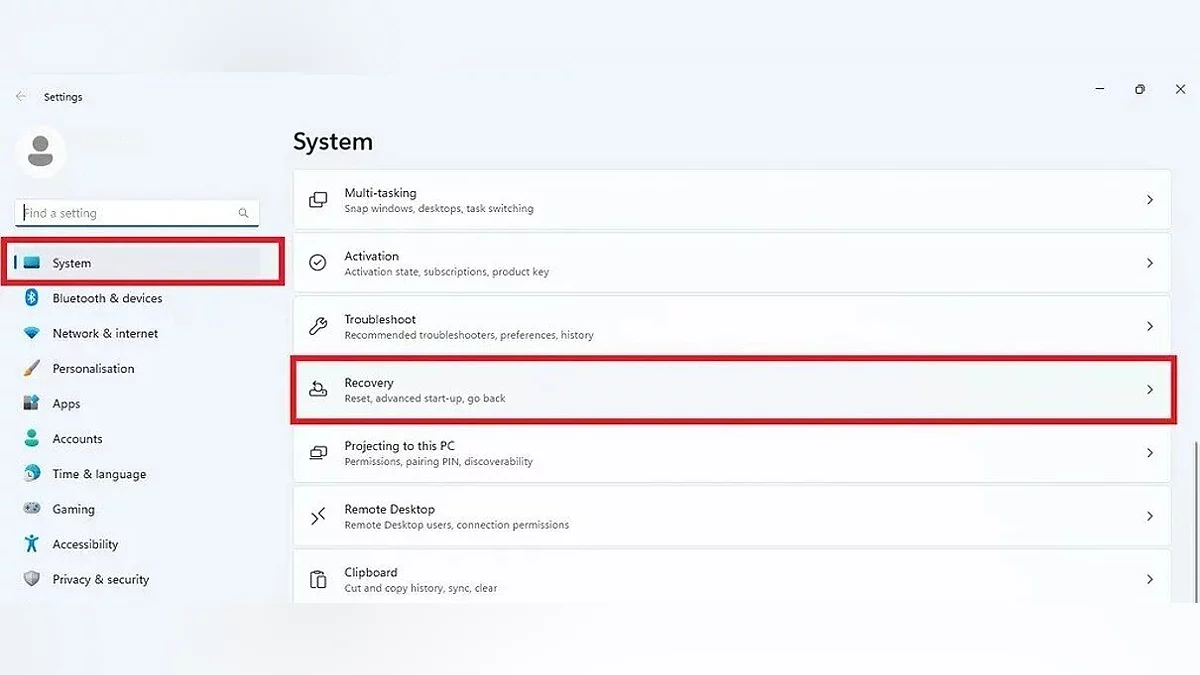
In this case, you will need to open the Settings app similarly to Windows 10, select the System option, and then click on the Recovery block.
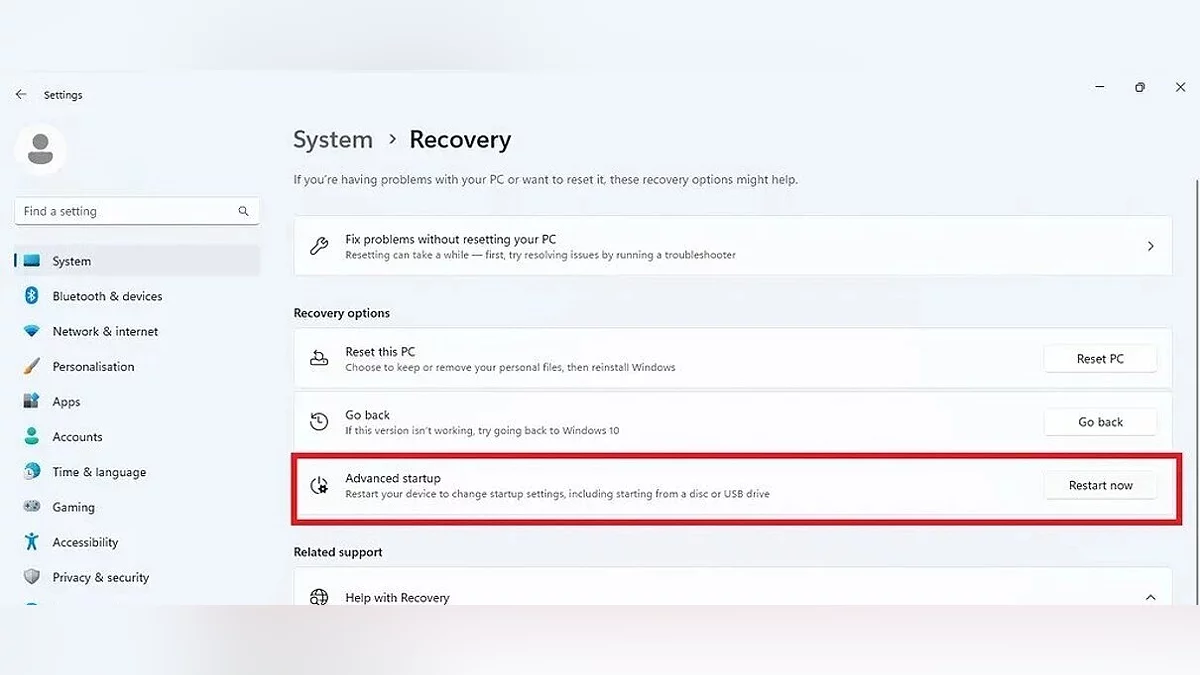
After that, next to the Advanced startup options label, click the Restart now button to open the recovery screen.
On the Login Screen
Hold the lower-right button and, after selecting the Restart option, hold Shift. This will open the recovery window regardless of the operating system version.
From a Blank Screen
Start the computer at least twice and wait for the Windows logo to appear on the screen, then hold the power button to turn off the device. During the third startup, the recovery block should be displayed on the screen. Press the Advanced options button to select the necessary functions.
Further Steps
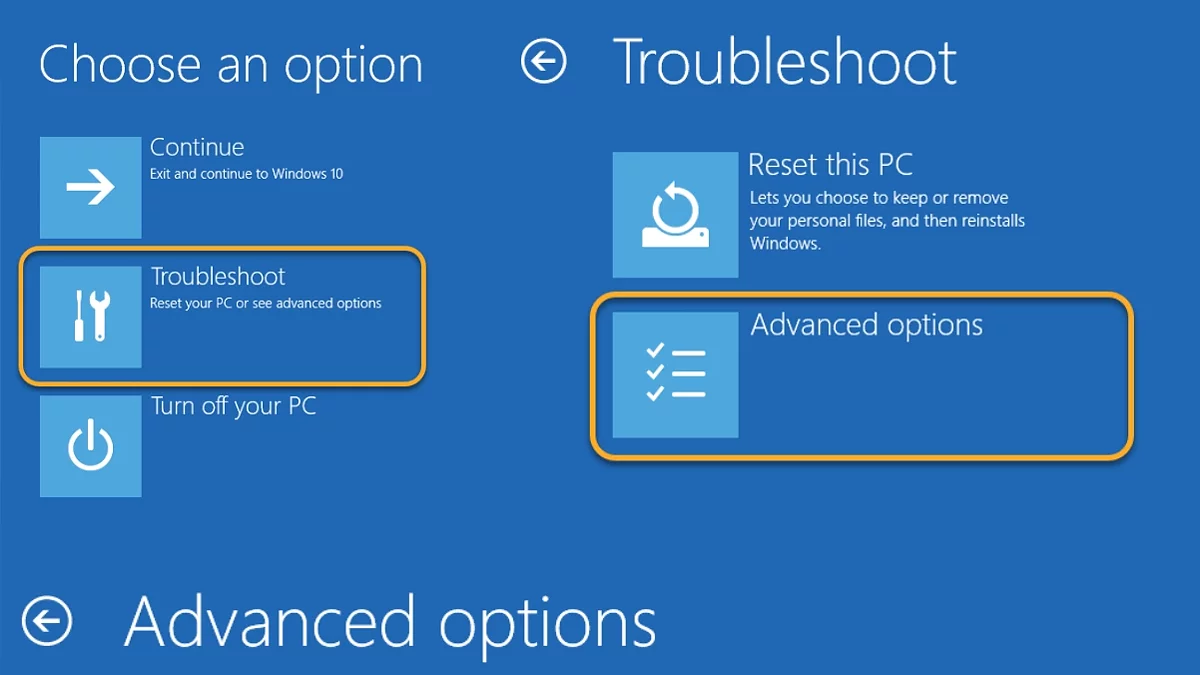
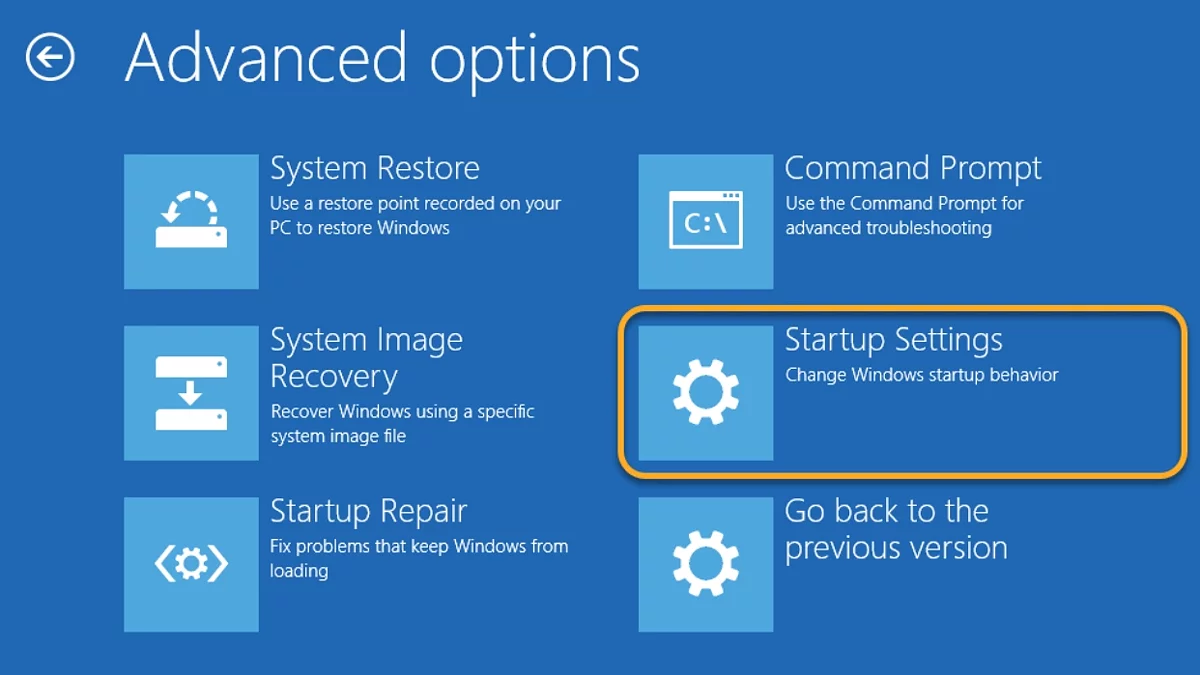
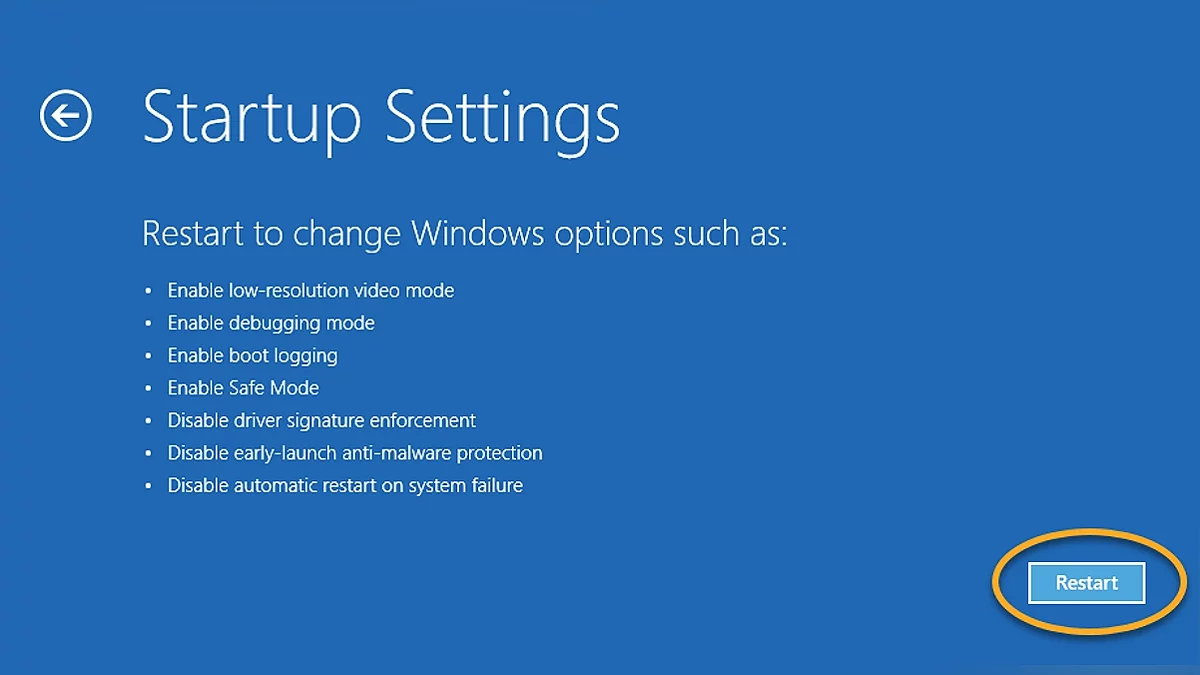
In the sequentially opening menus, select the values Troubleshoot, Advanced options, and Startup settings. If the last option is missing, you can select it after clicking the See other recovery options block.
All that remains is to press the appropriate button and wait a little.
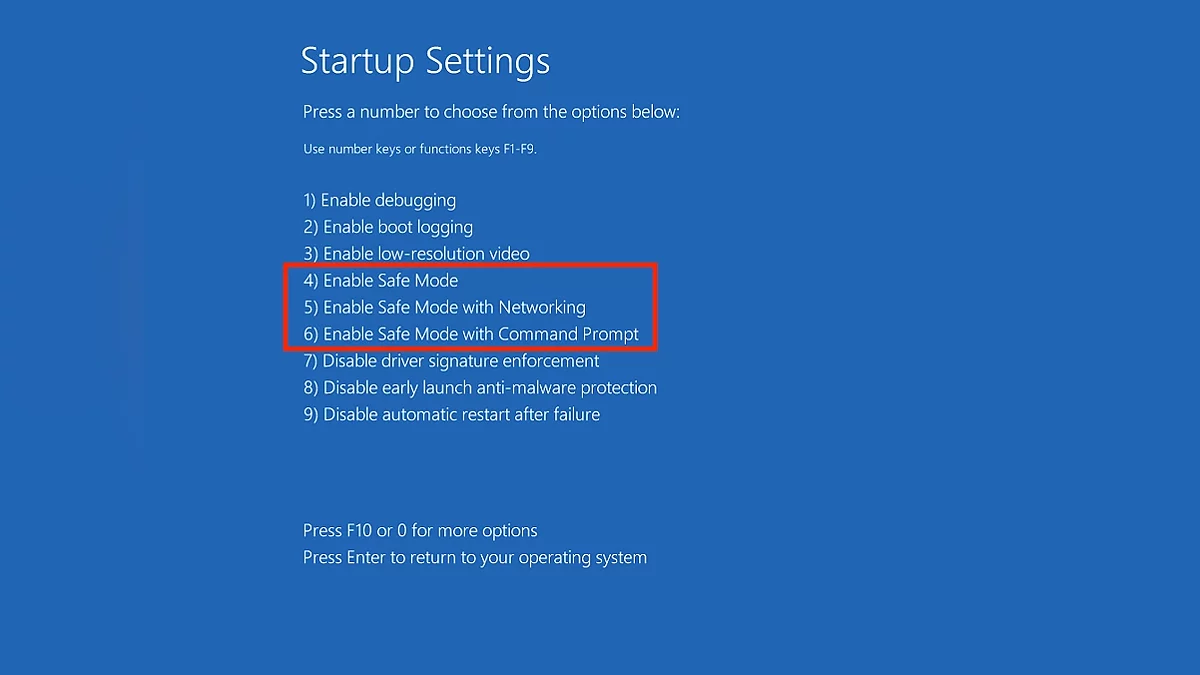
Now choose any of the options from 4 to 6 that suits you. After that, depending on your decision, press the appropriate key from 4 to 6 or from F4 to F6. The computer will start in Safe Mode.
To exit it and activate the normal version, simply restart the computer. We will consider the case when this solution does not help below.
What to do if Safe Mode does not turn off?
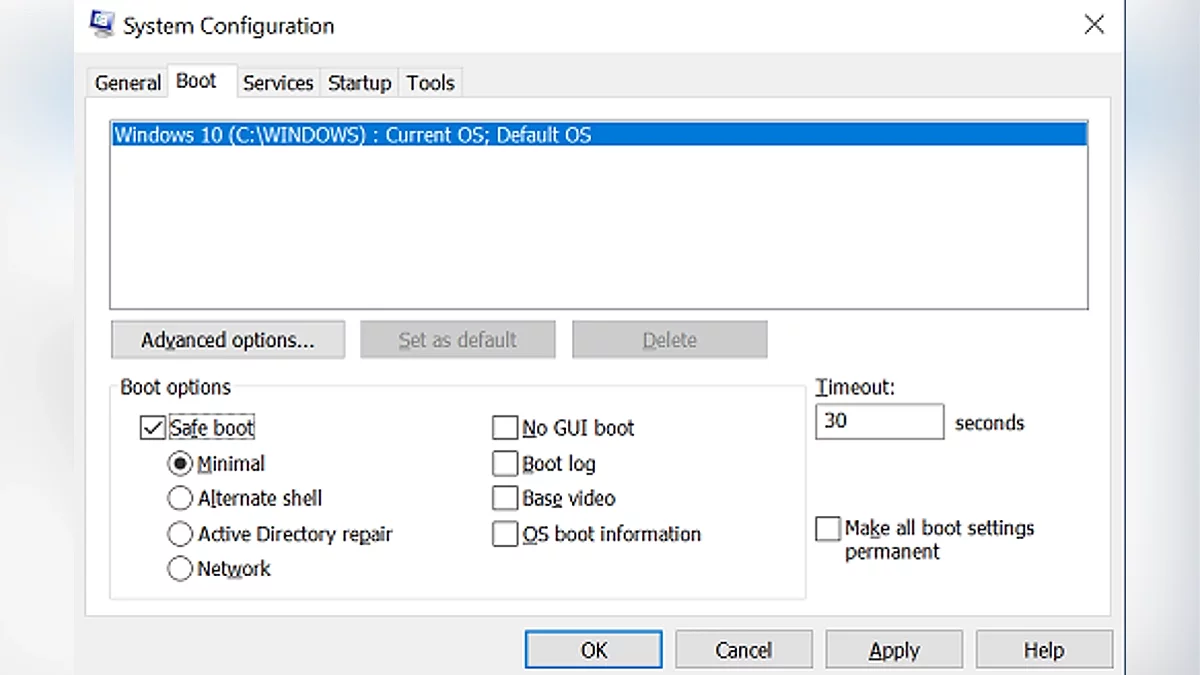
Hold down the Win+R keys while in Safe Mode, or select the Run option in the Start menu. In the opened window, type msconfig.
In the appearing System Configuration program, select the Boot tab. There, uncheck the Safe boot option, then confirm saving the settings by clicking the OK button and restarting the computer.
In Windows 10 and 11, there are quite a few ways to enable Safe Mode, which greatly simplifies the task of finding problems in the operating system. In addition to the methods described above, you can also enable Safe Mode similarly to disabling it in the System Configuration application. The only difference will be the need to check the necessary box instead of unchecking it.
- La nouvelle version du client Steam ne fonctionnera pas sur Windows 7 et 8
- Microsoft met en pause la mise à jour Windows 11 24H2 pour les PC avec des jeux Ubisoft
- Microsoft confirme que la mise à niveau vers Windows 11 restera gratuite

