How to Increase the Paging File Size in Windows 7, Windows 10, and Windows 11

Increasing the size of the paging file is one of the simplest ways to improve computer performance. This action is especially beneficial on weaker personal devices. In this guide, we will discuss how to increase the paging file size in the Windows 7 and Windows 10 operating systems.
What is the paging file for
The paging file is used to increase the size of RAM. In case of its shortage, the operating system first turns to the paging file on the hard disk to compensate for the missing space. This helps avoid the untimely filling of RAM and bypass all associated problems. For this purpose, a special paging file in the pagefile.sys format is created, in which all the data that did not fit is stored.
In most cases, this positively affects the system's performance and speeds up the operation of all programs on the computer. It is especially beneficial to increase the size of the paging file on personal computers with up to 4-8 GB of RAM. With 16 GB of RAM or more, performing the actions described below is not usually necessary.
How to increase the paging file size in Windows 7 and Windows 10
The instructions below list all the necessary steps for successfully increasing the paging file size in Windows. It is important to note that its size is set by default, and it is located on the same disk along with the data of this operating system. We do not recommend using the paging file in the Windows partition, so we advise moving it to another storage. To increase the paging file size, several steps need to be taken (the instructions for Windows 7 and Windows 10 differ only in the initial stage).
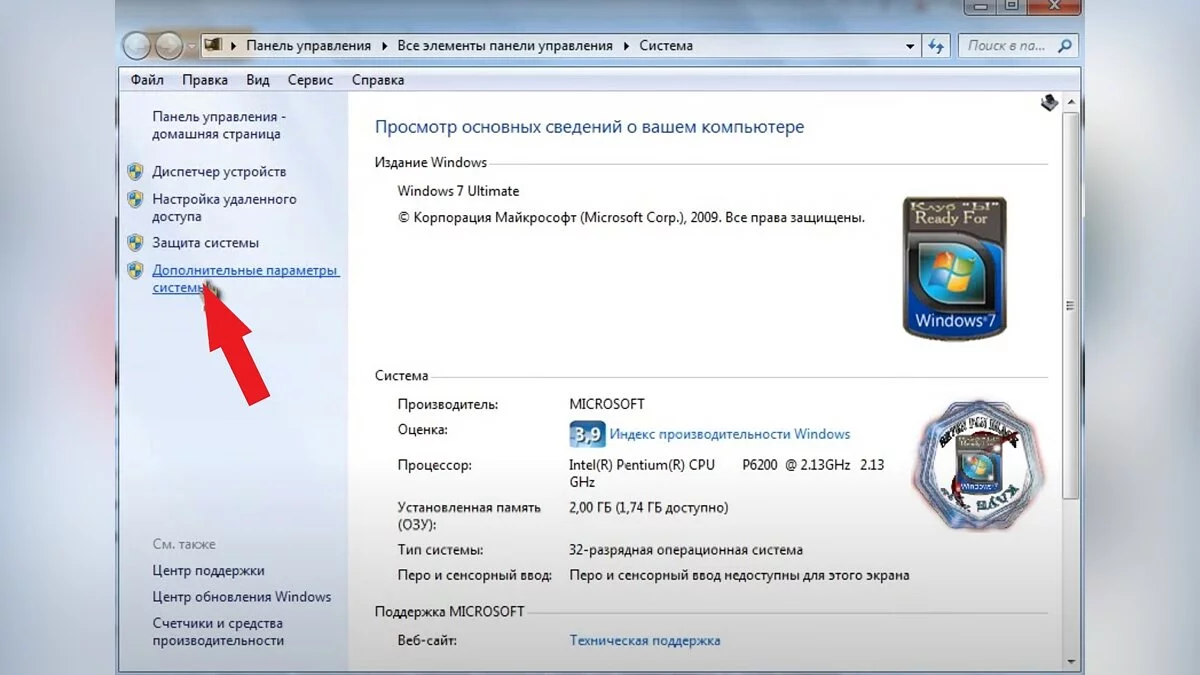
When using Windows 7, right-click on the «My Computer» icon and open «Properties». If the icon is not present on the desktop, you can open «Control Panel», go to the «System and Security» section, and use the «System» item.
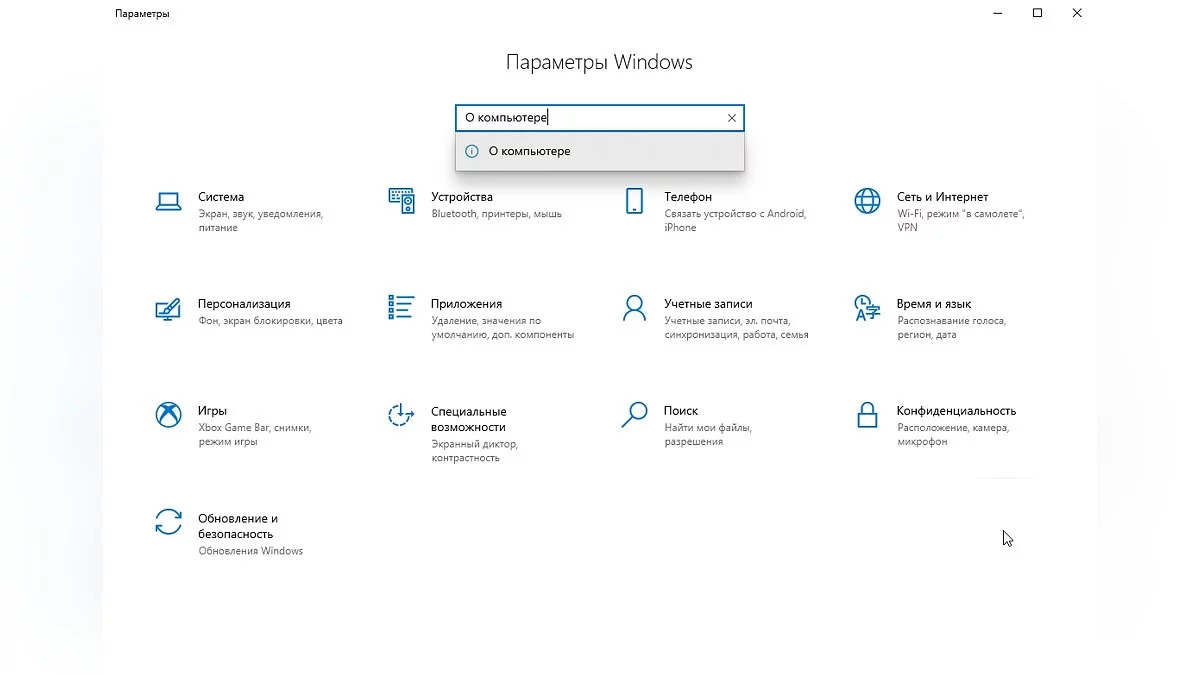
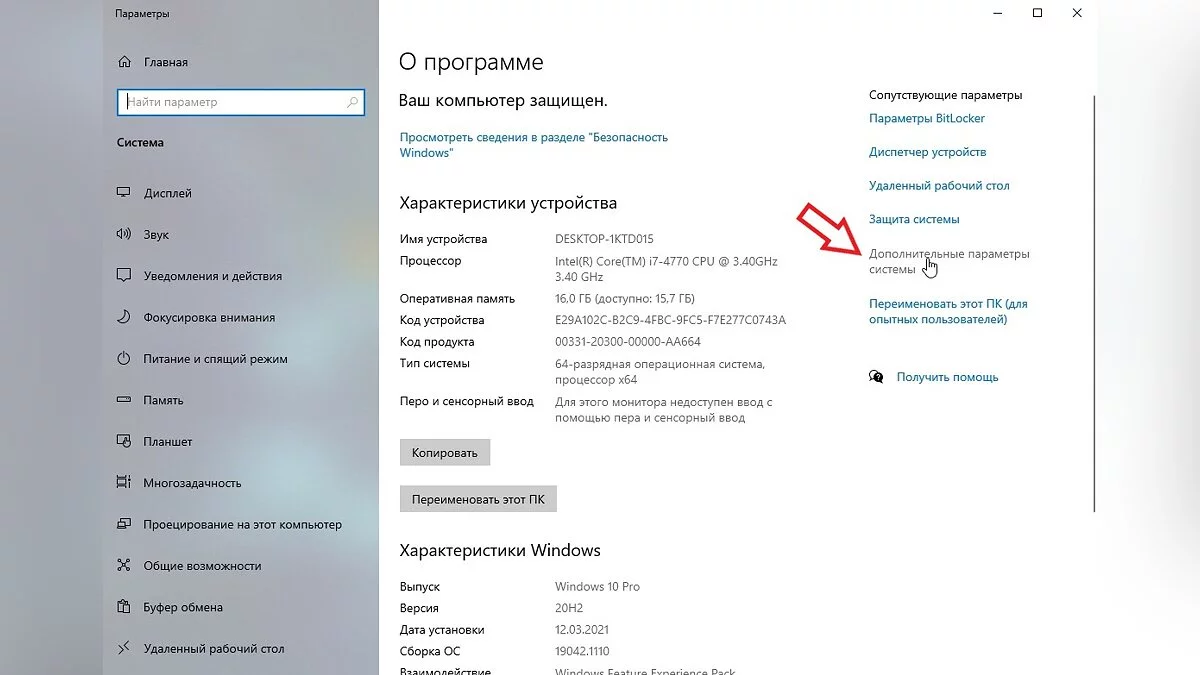
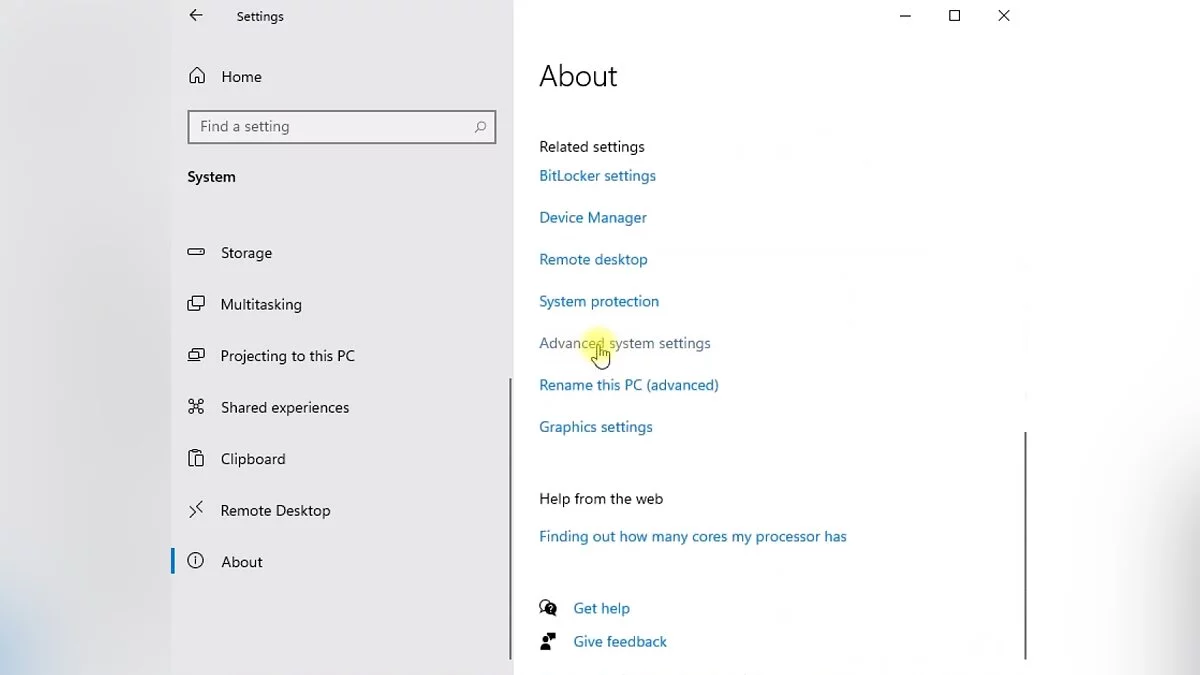
When using Windows 10, right-click on the «This PC» icon for Windows 10 and open «Properties». If the icon is not present on the desktop, to navigate to the desired window, you need to open «Settings», enter «About this PC» in the search without quotes, and click on the section that appears with the left mouse button.
Click on the «Advanced system settings» button.
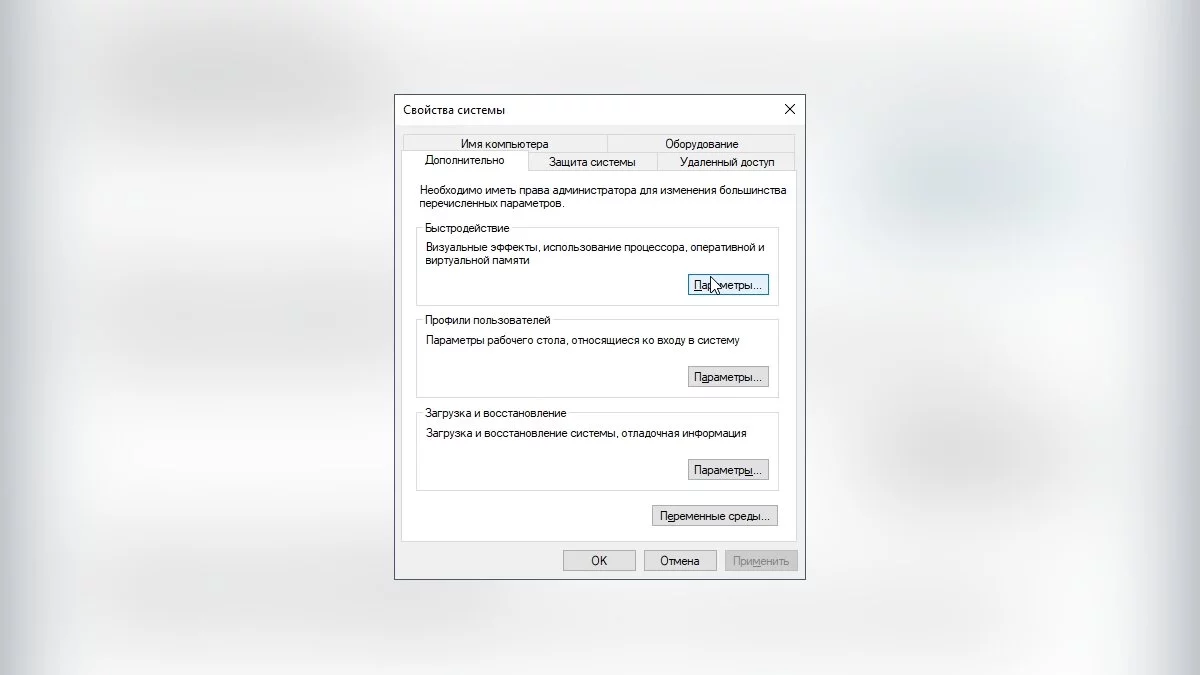
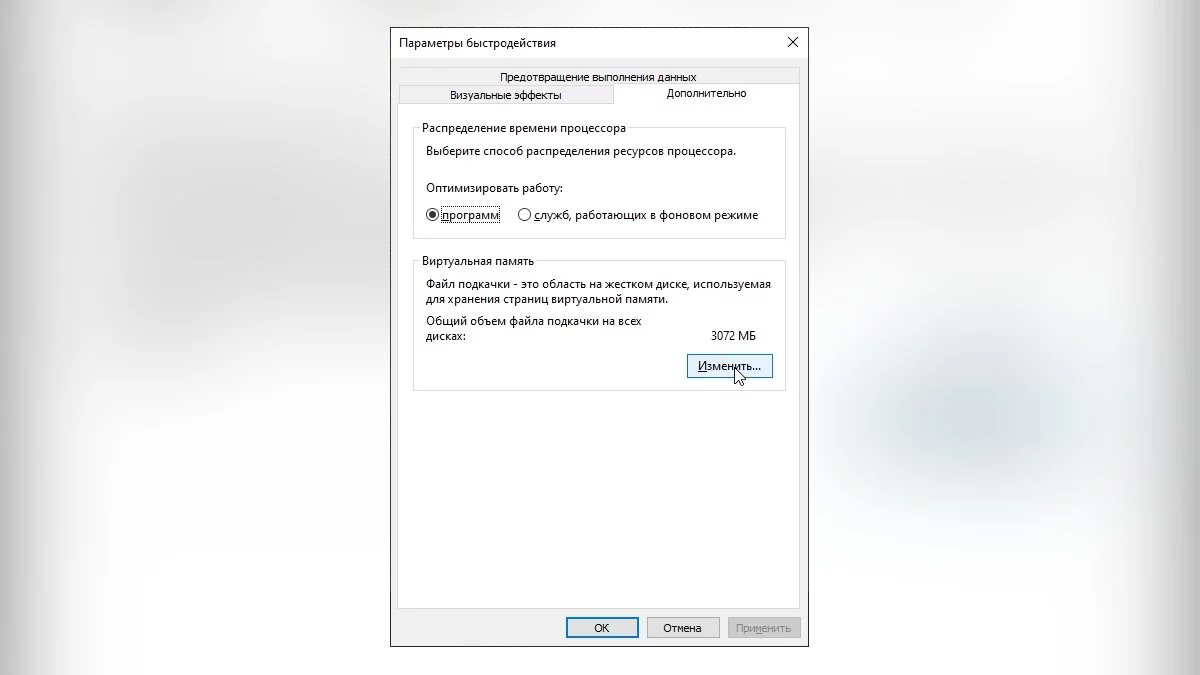
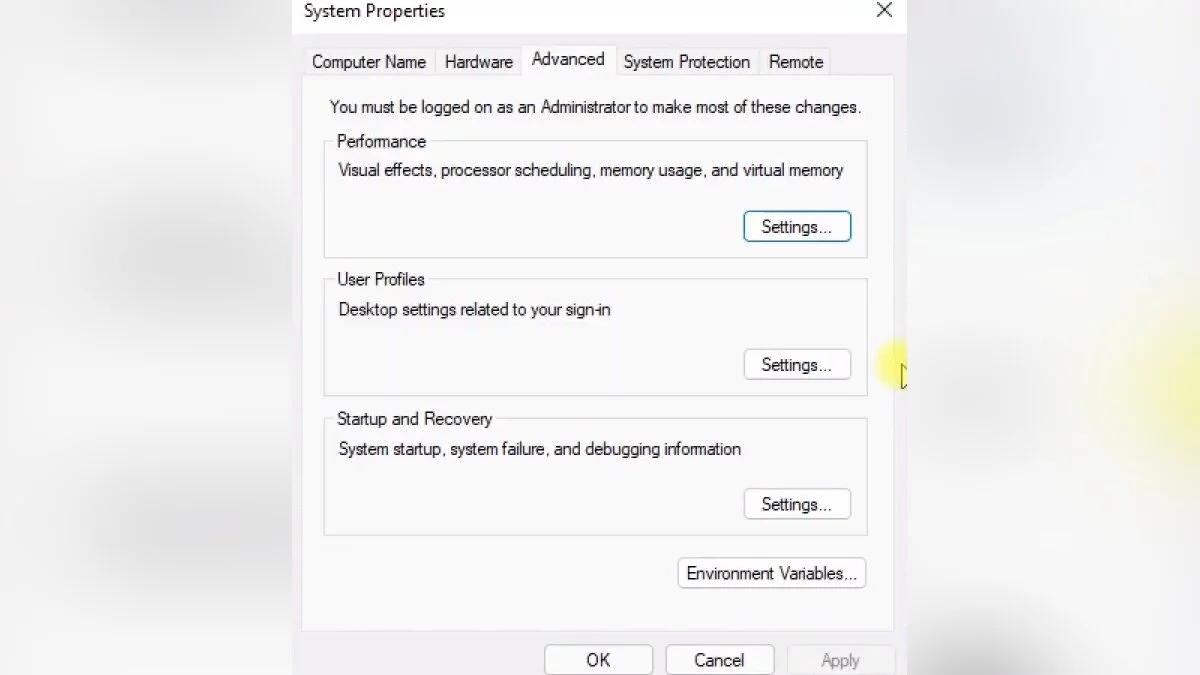
In the «Advanced» tab, find the «Performance» section and click the «Settings» button.
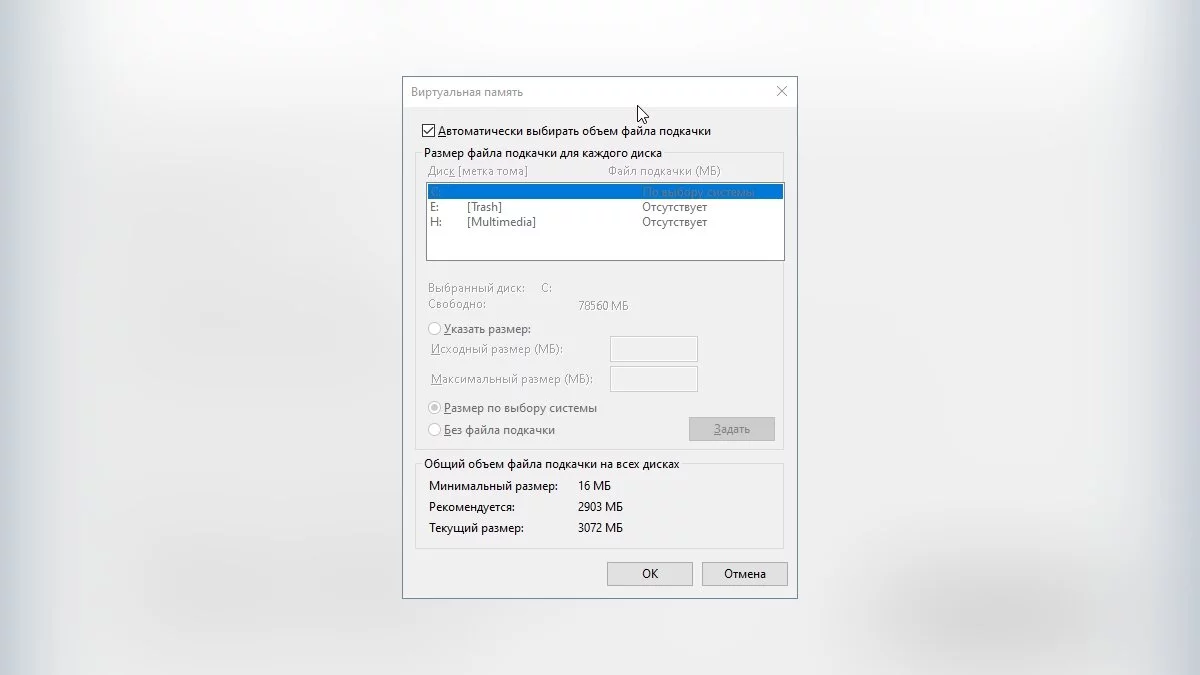
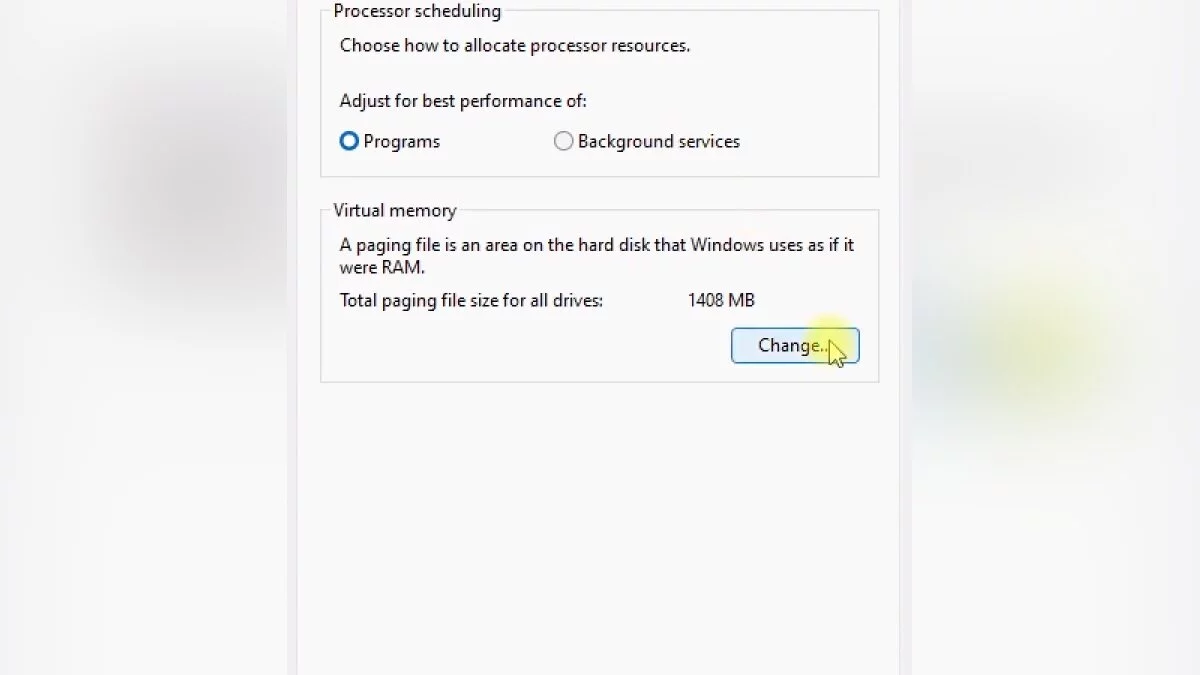
Open the «Advanced» tab and in the «Virtual memory» section, click «Change».
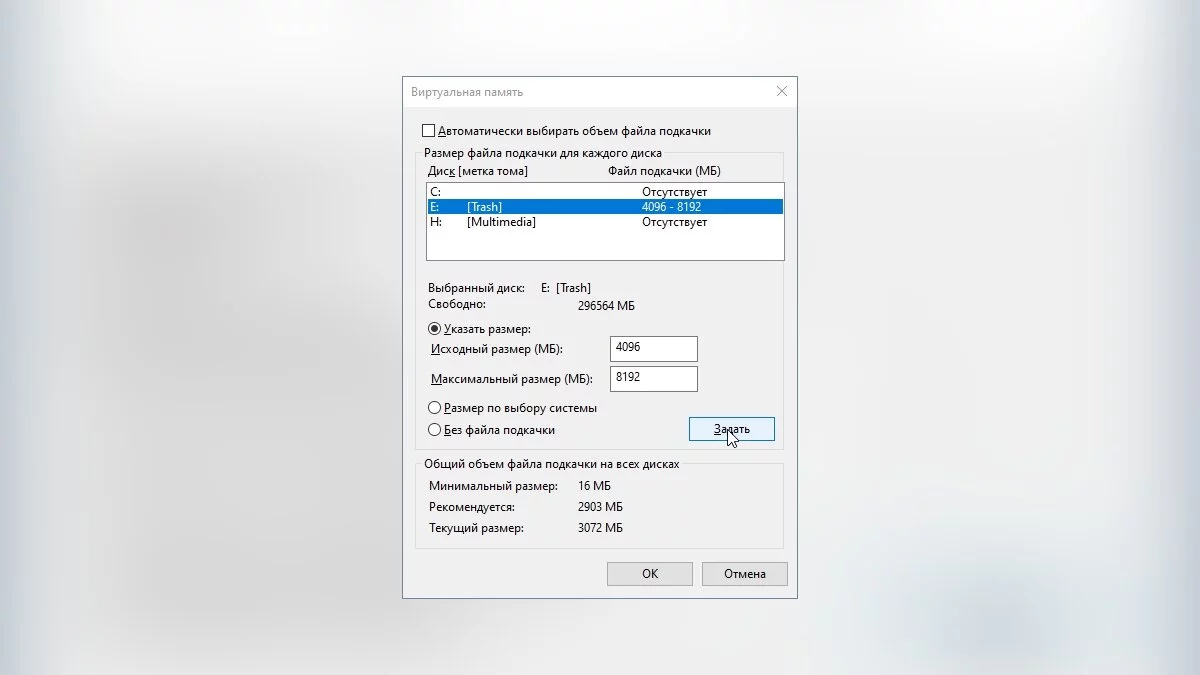
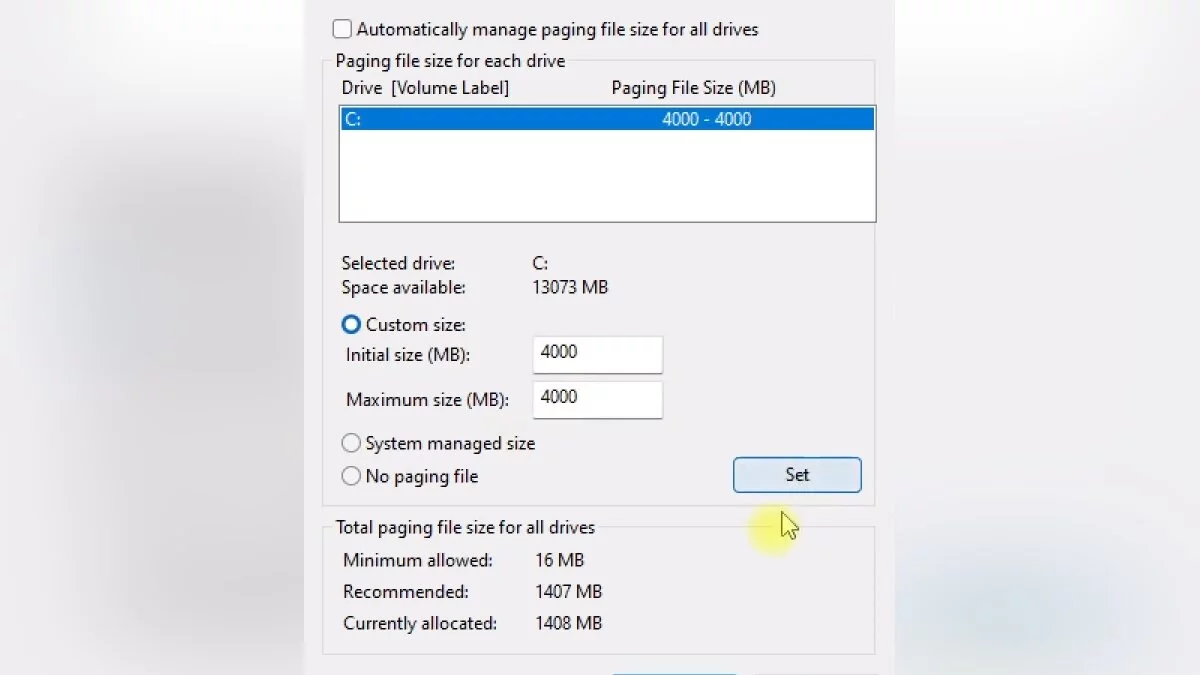
Uncheck the «Automatically manage paging file size for all drives» if it is checked.
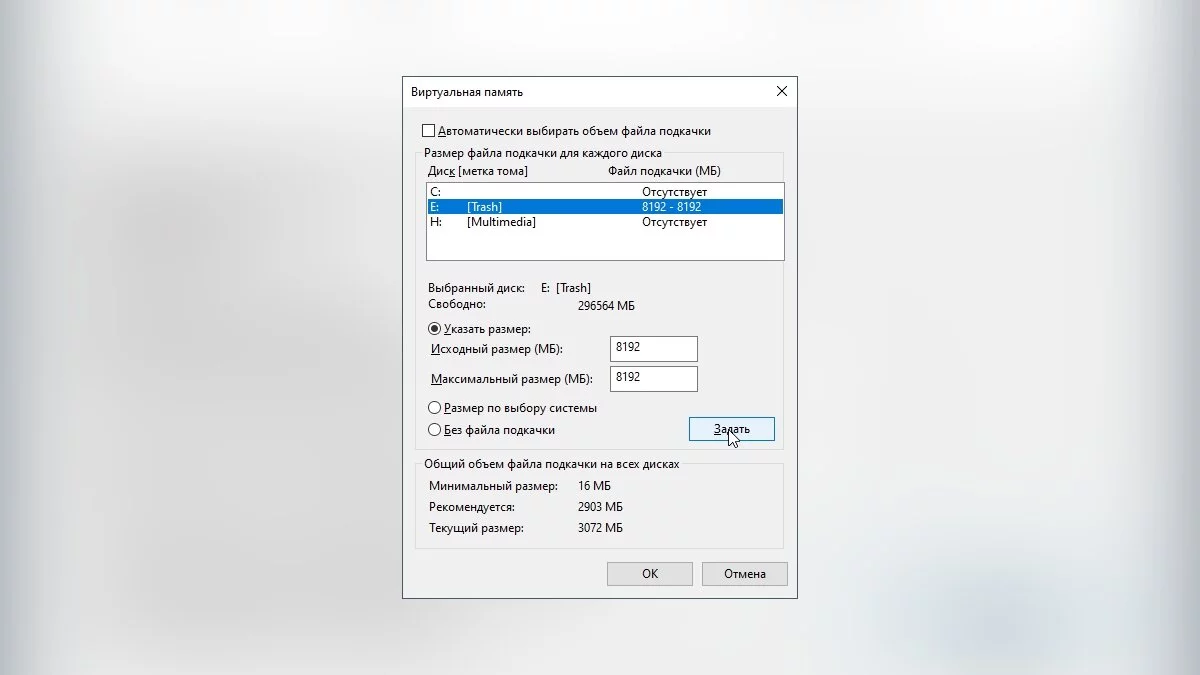
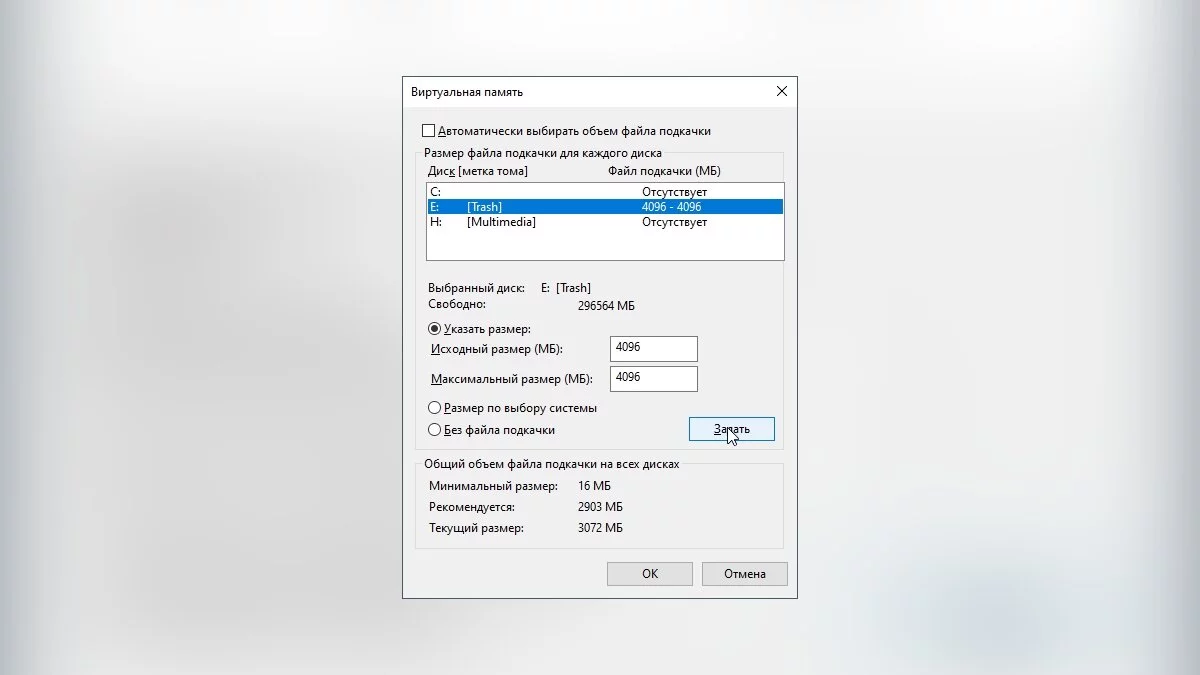
Select the desired hard drive from the list below for the paging file installation (it is advisable to use storage without operating system files) and activate the «Custom size» option. Enter the minimum value in the «Initial size (MB)» and the maximum in «Maximum size (MB)». Save the result using the «Set» button and click «OK» to exit the menu. Restart your computer to apply the changes.
For optimal device performance, the minimum size of the paging file should match the size of the RAM, while the maximum size is often set to twice as much. For example, if using 4 GB in the computer, set a minimum of 4 GB and a maximum of 8 GB, as shown in the screenshot above. With a larger amount of memory, it is recommended to let the system choose the size of the paging file.
It is also possible to set a static volume of the paging file. In this case, it cannot be fragmented, and therefore, under no circumstances will it reduce the speed of Windows operation.
How to enable the paging file cleaning feature
When the computer is operating, some data, if necessary, goes into the paging file. It is possible to avoid its full filling by timely cleaning. To do this, it is enough to set the function of cleaning the paging file before each shutdown of the computer. This requires a few simple steps (the instruction below is suitable for both Windows 7 and Windows 10). This method only works for users of professional versions of Windows and above, as in simpler variations of the operating system, for example, in Windows Home, local policies are not available.
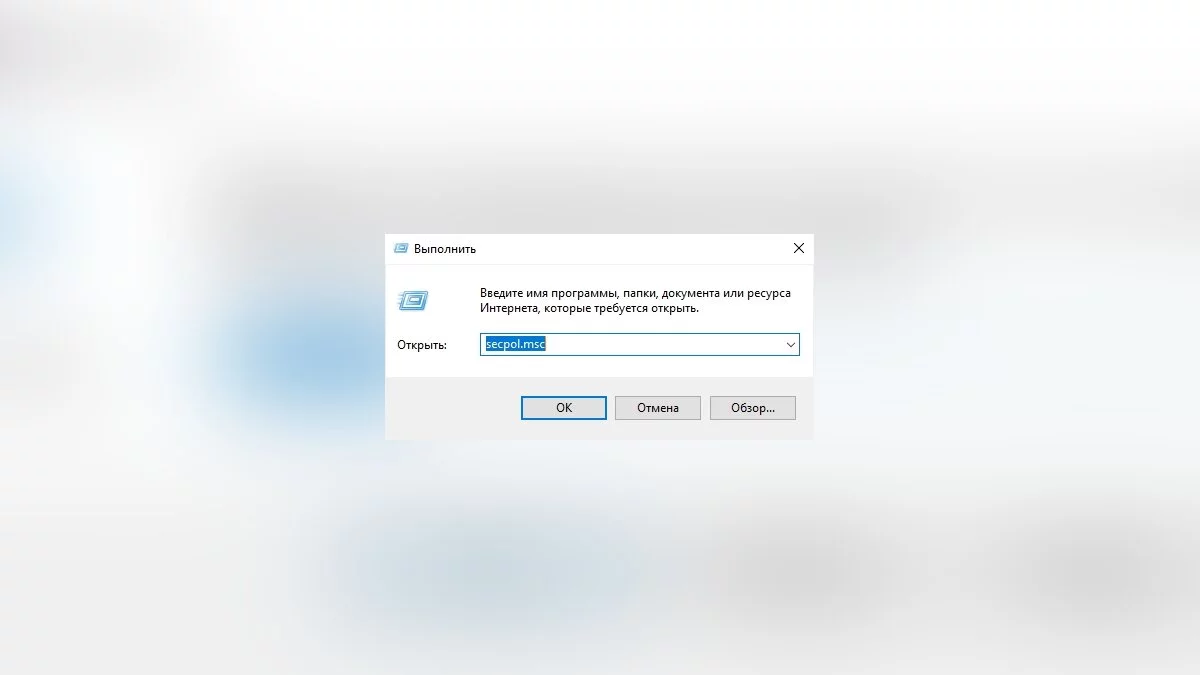
Press «Win+R» to call the «Run» window and enter «secpol.msc» without quotes. Press the «OK» button to open the «Local Security Policy» window.
Expand the «Local Policies» folder on the left and open «Security Options».
Find the policy «Shutdown: Clear virtual memory paging file» in the list and double-click it with the left mouse button.
Place a marker next to the «Enabled» option and save the changes using the »Apply» button.
Now, before every shutdown of the computer, the operating system will automatically clear the paging file.
How to Move the Paging File
The process of moving the paging file is similar to the actions mentioned above for increasing its size. Additionally, in Windows, it is possible to create auxiliary storage for RAM on several hard drives simultaneously. It's important to note that this will not enhance the computer's performance, hence using multiple paging files is not recommended. To move it, you need to follow a few simple steps (the instruction for Windows 7 and Windows 10 differs only at the initial stage).
When using Windows 7, right-click on the «My Computer» icon and open «Properties». If the icon is not available on the desktop, open «Control Panel», proceed to «System and Security» and use the «System» option.
When using Windows 10, right-click on the «This PC» icon for Windows 10 and open «Properties». If the icon is not available on the desktop, to navigate to the required window, open «Settings», type «About this PC» without quotes in the search, and click on the section that appears with the left mouse button.
Click on the «Advanced system settings» button.
In the «Advanced» tab, find the «Performance» section and click the «Settings» button.
Open the «Advanced» tab and in the «Virtual memory» section, click «Change».
Uncheck the «Automatically manage paging file size for all drives» if it is checked.
Select the currently used disk with the paging file, apply the «No paging file» option, and save the action using the «Set» button.
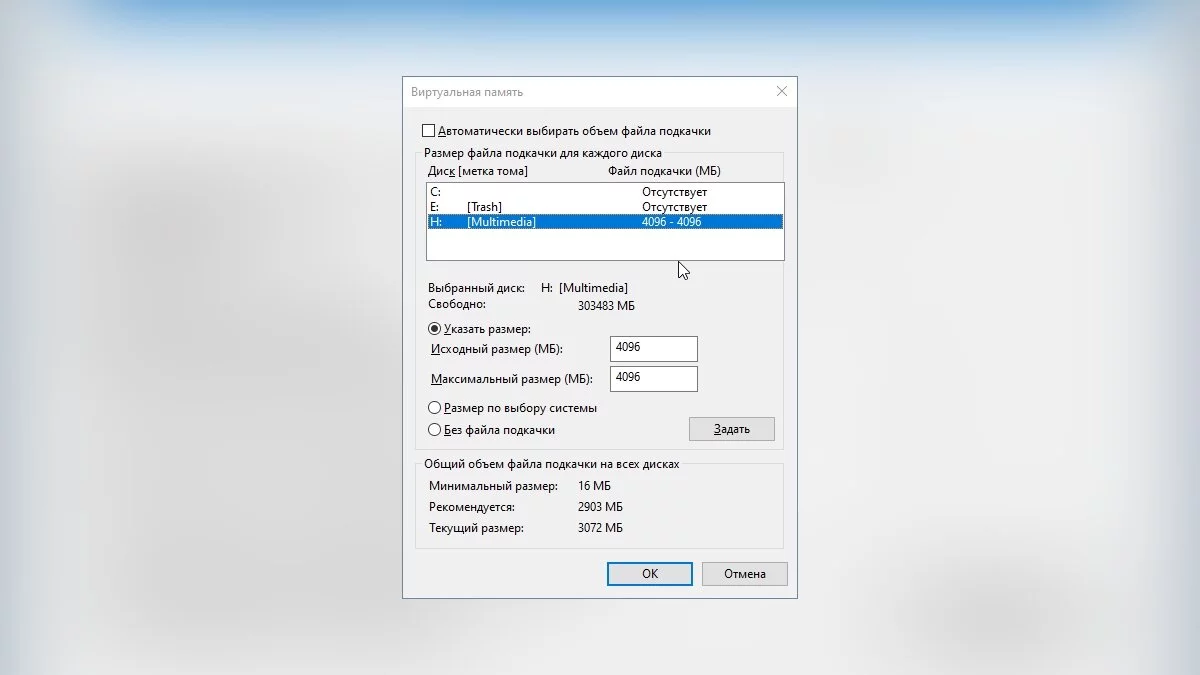
Select a different disk from the previous one and set all the necessary values, as per the instructions above.
Click the «Set» and «OK» buttons sequentially to save the changes.
How to Increase the Paging File in Windows 11
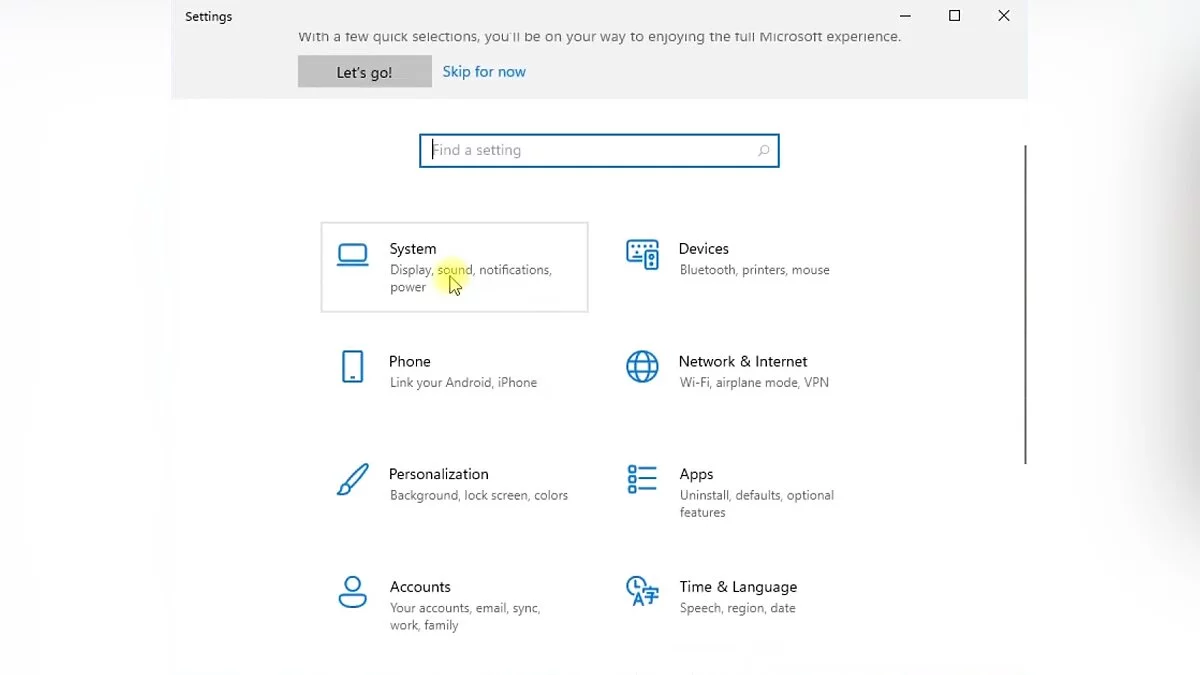
The process of increasing the paging file in Windows 11 is largely similar to that in previous operating systems. The instructions below detail all steps for increasing it. To start, open Windows «Settings» using the «Win+I» combination and go to the «System» section.
Scroll down to the very bottom of the menu on the left and click the «About» button. Scroll down the window that opens and use the «Advanced system settings» option to proceed further.
Go to the «Advanced» tab and in the «Performance» section, click on «Settings».
In the new window, also go to the «Advanced» section and use the «Change» button to enter the «Virtual Memory» window.
Uncheck the «Automatically manage paging file size for all drives» option and select «Custom size». Enter all data according to the principle outlined in the section «How to Increase the Paging File in Windows 7 and Windows 10».
If you have powerful equipment, manually setting the paging file size is not necessary, so it's sufficient to leave all settings on automatic mode.
- Wie man die CPU-Temperatur in Windows 10 und Windows 11 überprüft
- Was die Home- und Pro-Versionen von Windows 11 unterscheidet
- Wie man Windows 10 und Windows 11 für Gaming optimiert: Maximale Leistung, Spielmodus und andere Tipps


