How to Change Screen Timeout Before Lock in Windows 11

Windows operating systems are designed in a way that by default, when the computer is idle, they first turn off the screen and then put it in sleep mode. This is most often necessary for laptops, where a battery is used, but it is also applied to desktop PCs. In today's article, we will look at how you can change the screen timeout before it turns off in Windows 11 in different ways.
How to Change Screen Timeout in System Settings
The first option is the simplest — through the operating system settings.
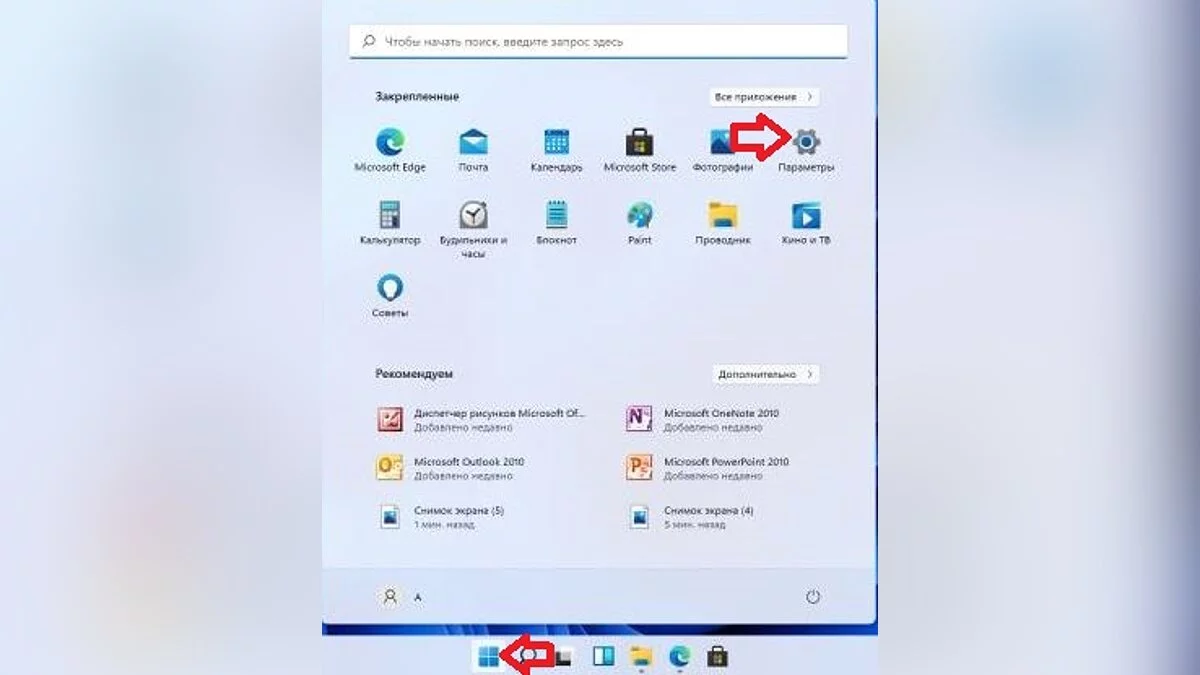
Open System Settings or right-click on the Start menu, then select Power Management.
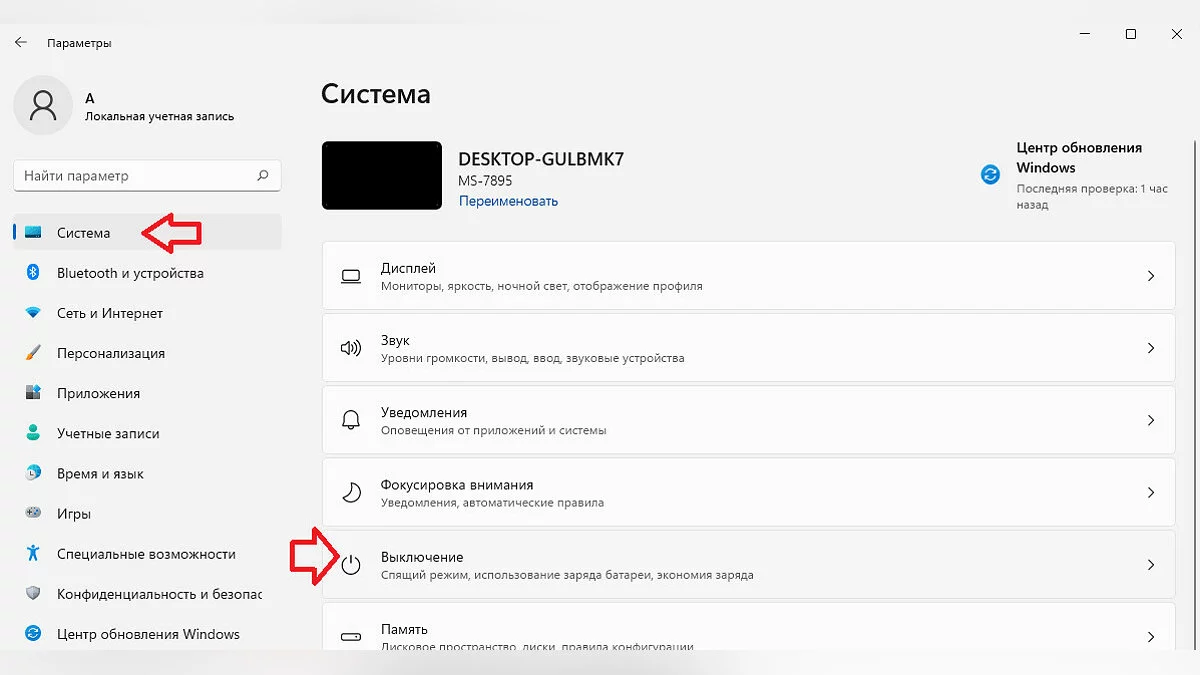
Go to the System => Shutdown section.
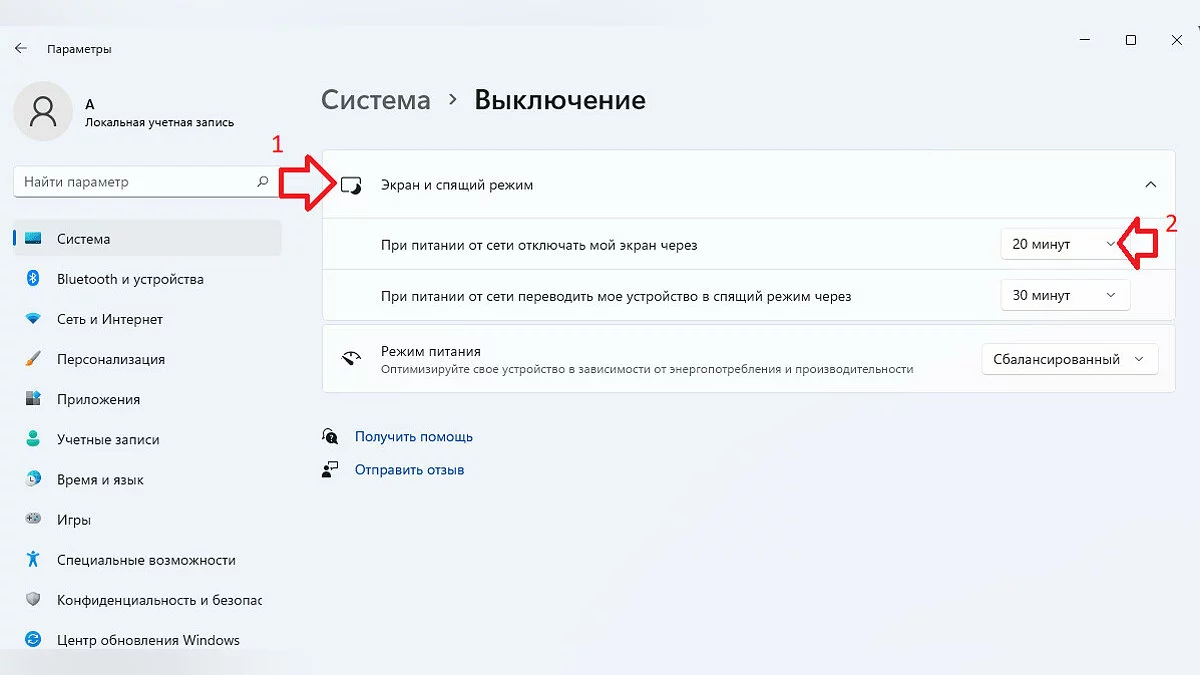
Select the Screen and sleep option, then choose the necessary value next to When plugged in, turn off my screen after and next to On battery power, turn off my screen after. No need to confirm or reboot the system. After this, you can close the settings window.
How to Change Screen Timeout in Computer Power Settings
As it turns out, you can also configure the screen active time in the PC power settings.
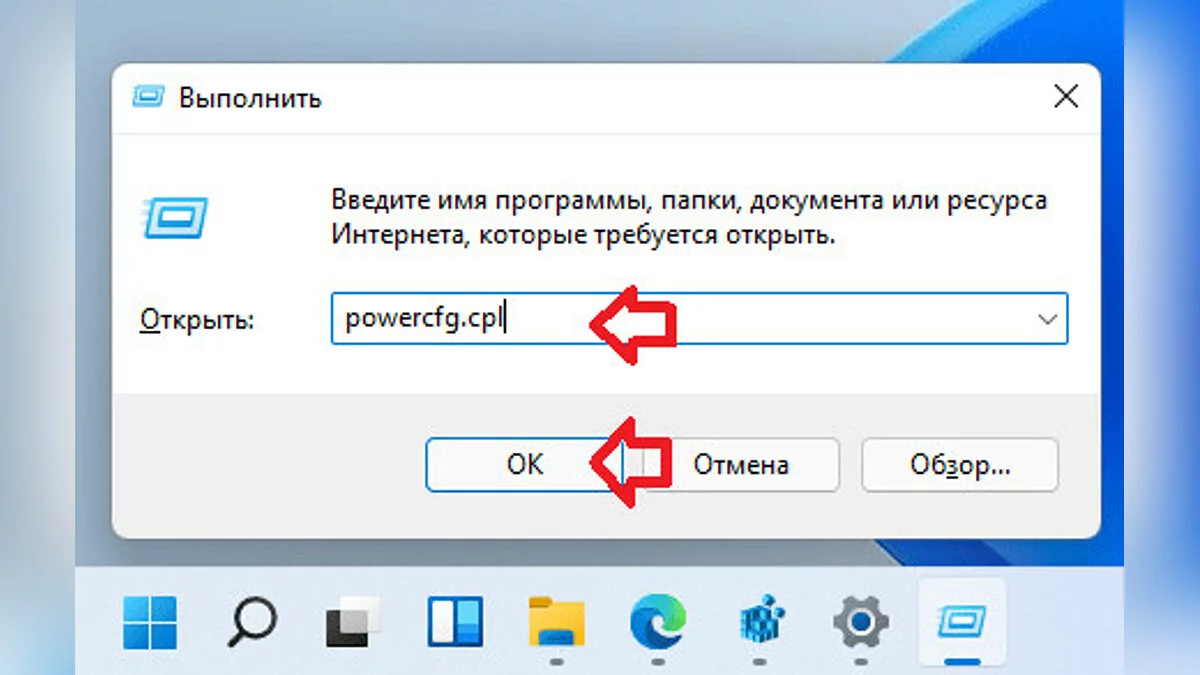
On the desktop, press Win+R and enter the command powercfg.cpl. The same can be entered in the search bar. Press Enter.
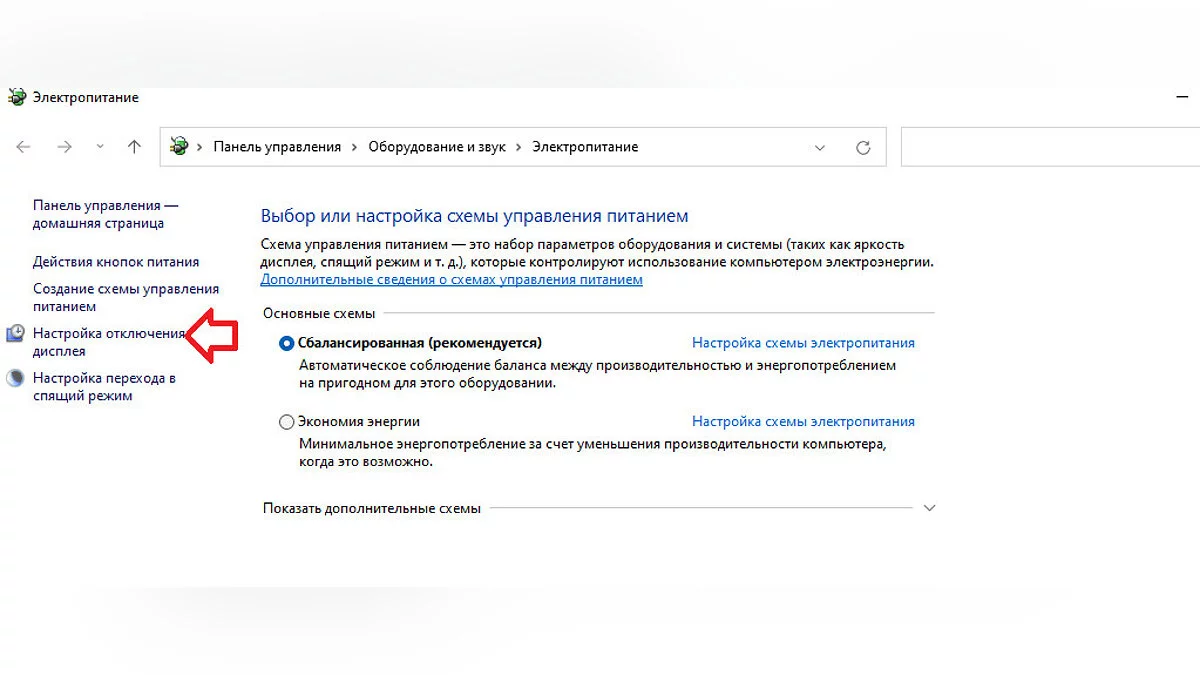
On the left, click Adjust display off settings, then next to Turn off the display choose the necessary value.
Click Save changes and close the settings window.
After this, the system will also change the screen timeout.
How to Change Screen Timeout Through Advanced Power Settings
Another method, which is somewhat similar to the previous one.
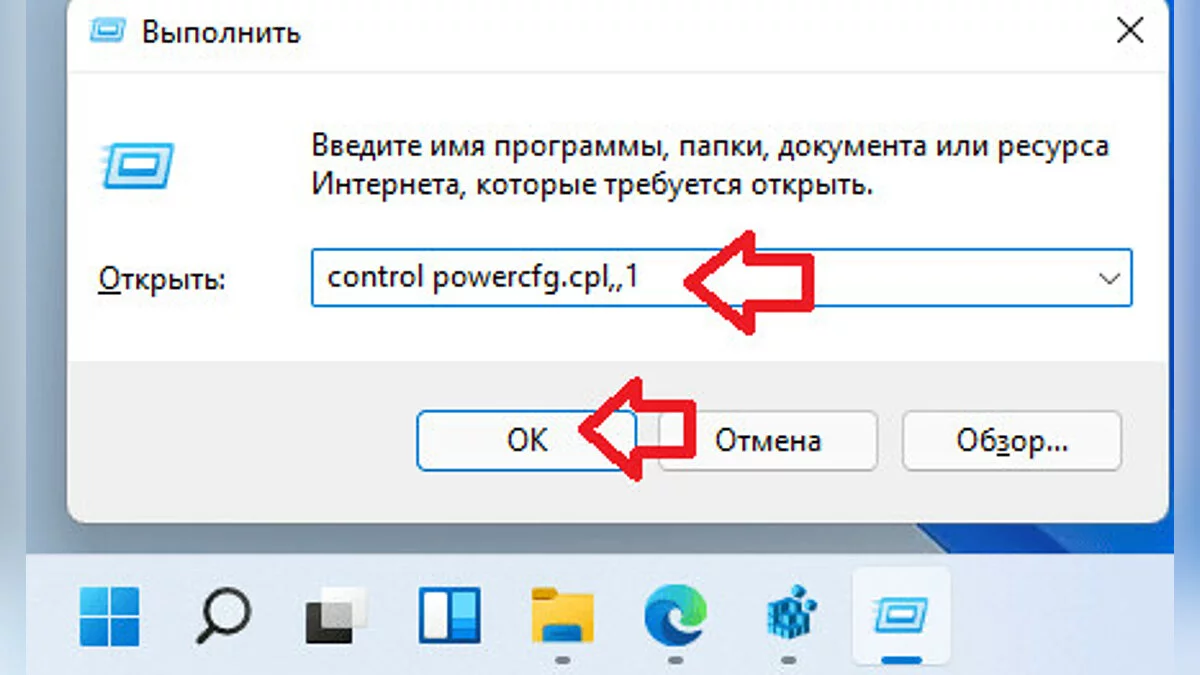
Right-click on Start and select Run, enter the command control powercfg.cpl,,1. Press Enter.
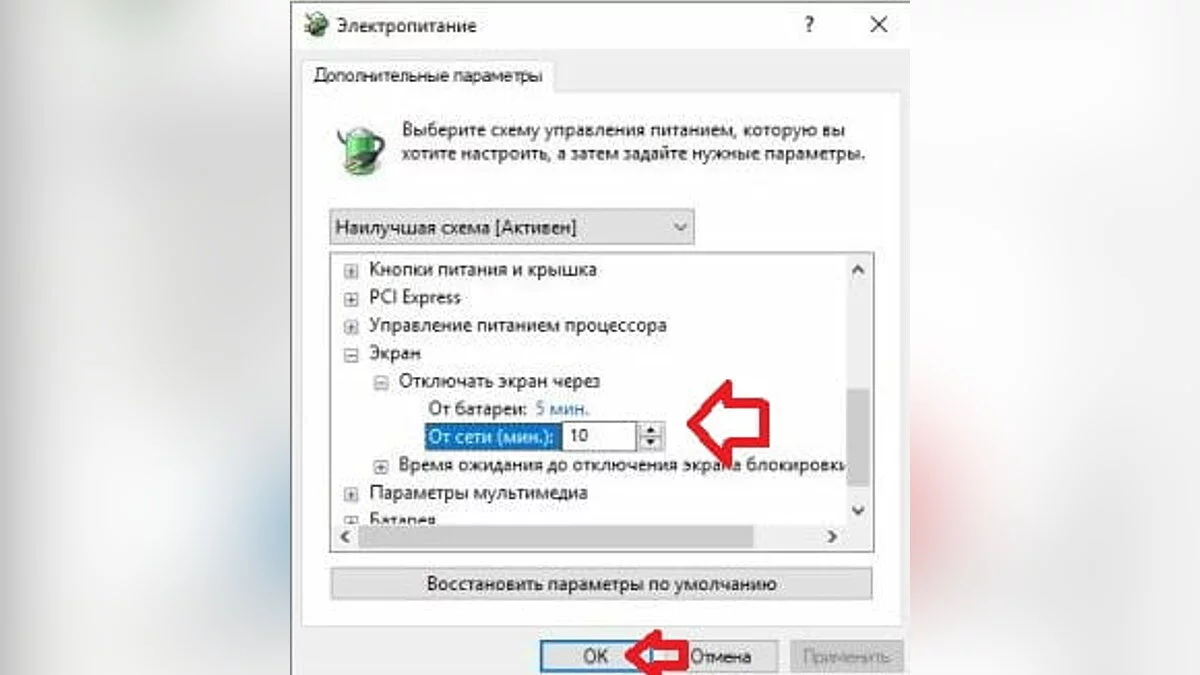
Go to the Screen => Turn off screen after section, set the desired value, and click OK.
This is a more detailed option, as it allows for more flexible system settings.
How to Change Screen Timeout Using Command Prompt
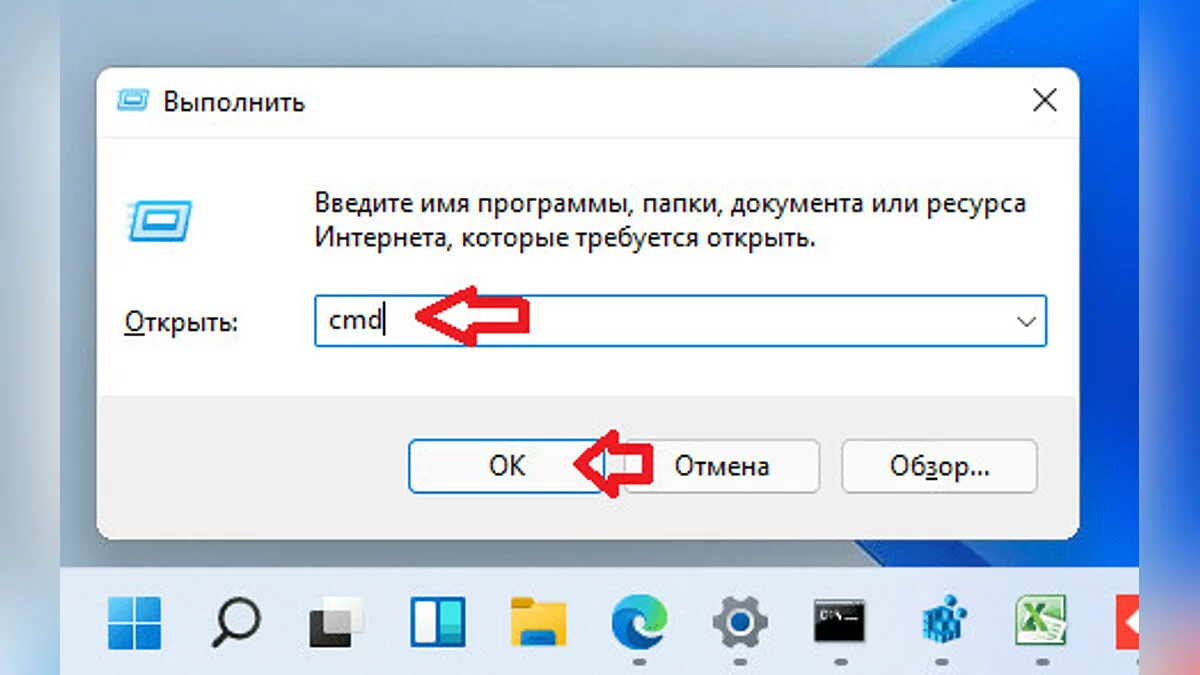
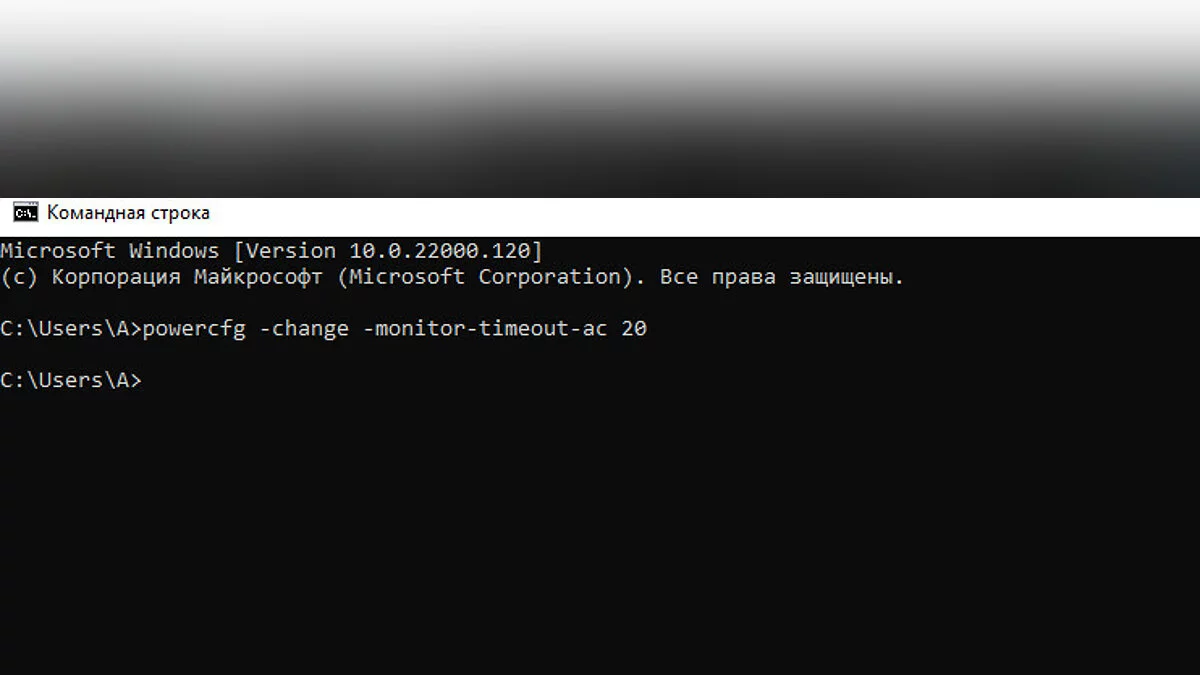
In the search bar or in the Run menu (Win+R), type cmd, and just in case, run it as administrator.
Enter the command to set the screen timeout while the computer is powered by the network — powercfg -change -monitor-timeout-ac 10. Instead of 10, you can enter a number that will represent minutes. Press Enter.
Similarly, enter powercfg -change -monitor-timeout-dc 10 and a number instead of 10. This command will change the screen timeout when running on battery power. Also press Enter.
As you can see, there's nothing complicated.
- Wie man Windows 10 und Windows 11 für Gaming optimiert: Maximale Leistung, Spielmodus und andere Tipps
- Was die Home- und Pro-Versionen von Windows 11 unterscheidet
- Wie man die CPU-Temperatur in Windows 10 und Windows 11 überprüft
-
How to Permanently Disable Updates in Windows 10, Windows 11, and Stop Background Application Downloads
-
Is Your Processor Running at 100%? Does a Game Load the Processor in Windows 10/11? — Troubleshooting
-
Steam Not Launching on Windows 10/11: What to Do and How to Fix?
-
How to Check Your PC's Specifications on Windows 10/11
-
How to Increase the Paging File Size in Windows 7, Windows 10, and Windows 11
