All Codes for Safes and Lockers in Alone in the Dark

In Alone in the Dark, players can find several locked safes and lockers, as well as seek combinations to open the passage to Jeremy's Memories using a special talisman. On the classic difficulty level, if all hints are turned off by default, it can sometimes be difficult to find a certain code. In this guide, we've provided all the passwords for lockers, safes, and the talisman.
Alone in the Dark Guides
- All Endings of Alone In The Dark (2024): How to Get Them
- All actors in Alone in the Dark (2024): who played Edward Carnby, Emily Hartwood, and others
- All Codes for Safes and Lockers in Alone in the Dark
- How to Find All The Collectibles (Lagniappes) in Alone in the Dark (2024)
- Alone in The Dark (2024) Walkthrough: All Puzzles and Collectibles
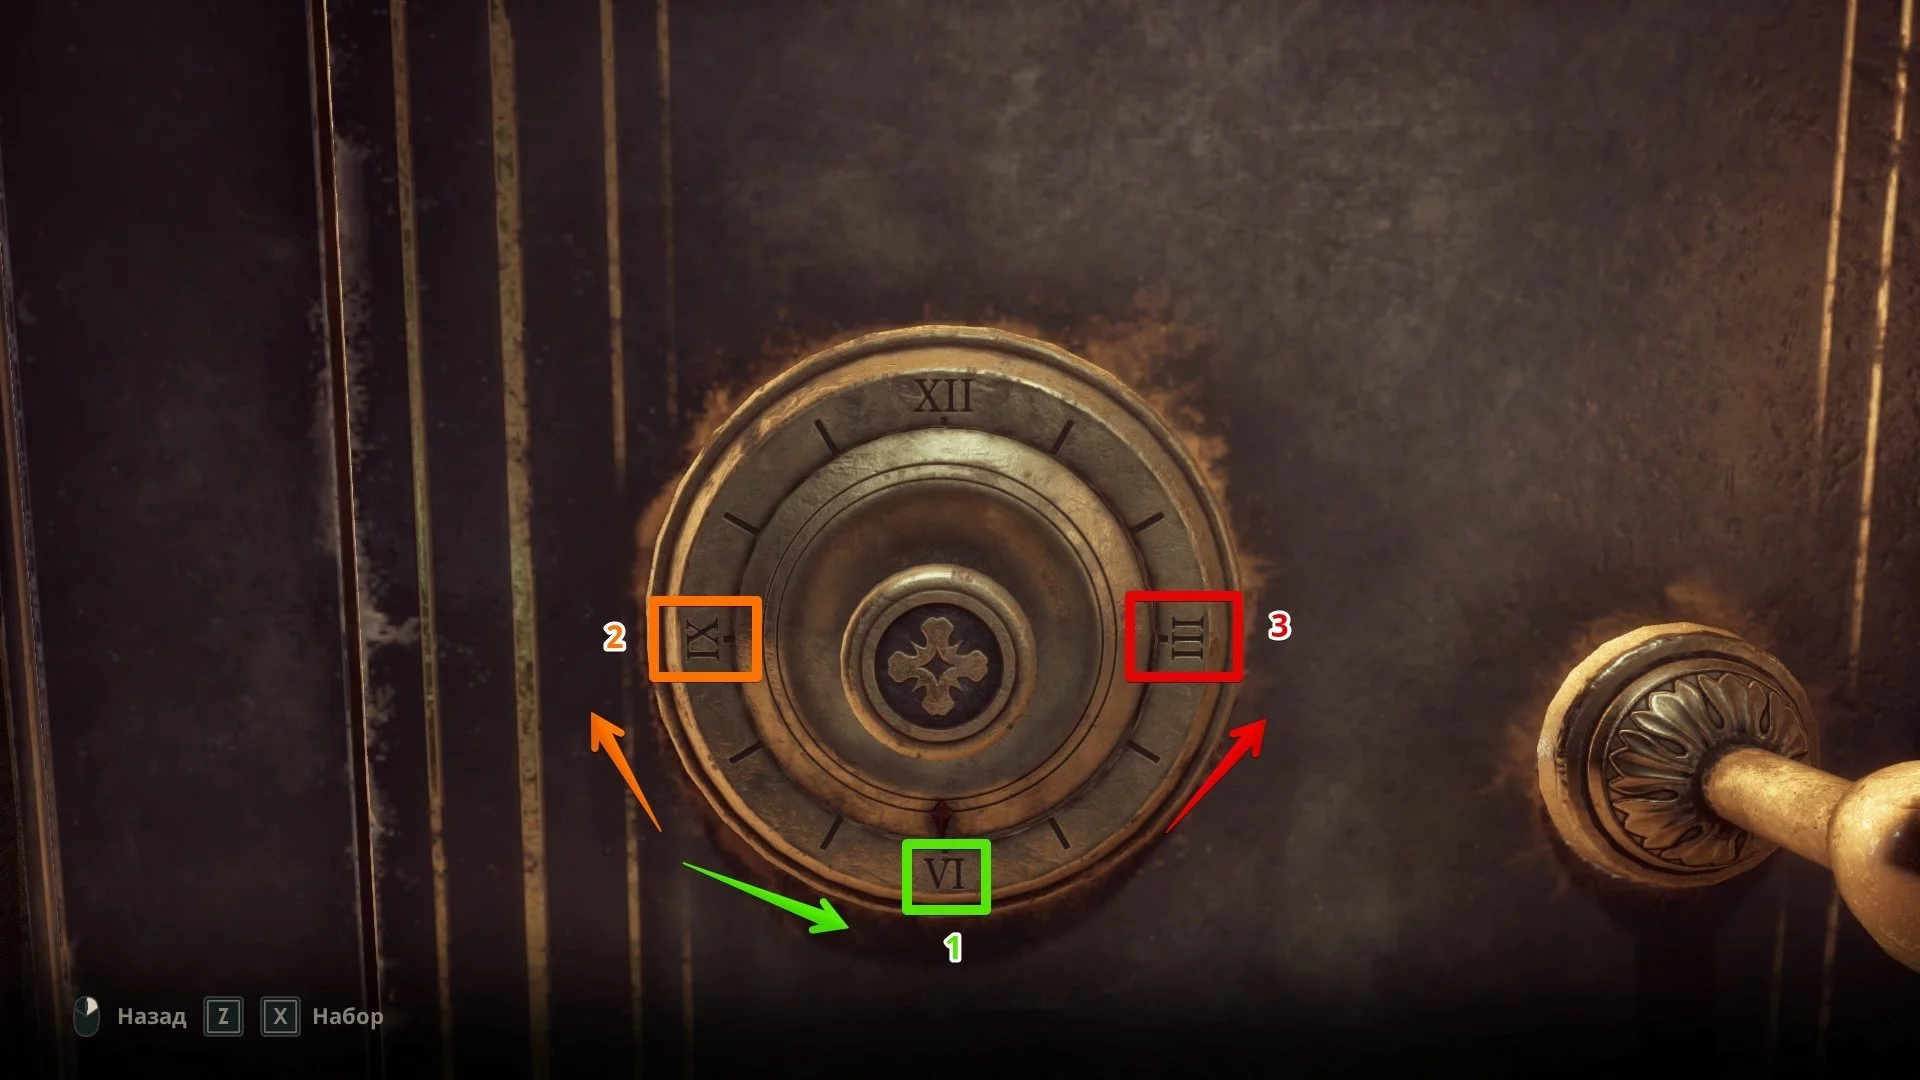
Code for the Safe in the Administrator's Room
As intended by the developers, during the first playthrough in the first chapter, you shouldn't know the combination to the safe in the administrator's room. However, if you use the code found in the story at the beginning of the game, you'll receive a secret gift Alone in the Dark. Use the following combination:
- 9 left;
- 1 right;
- 3 left.
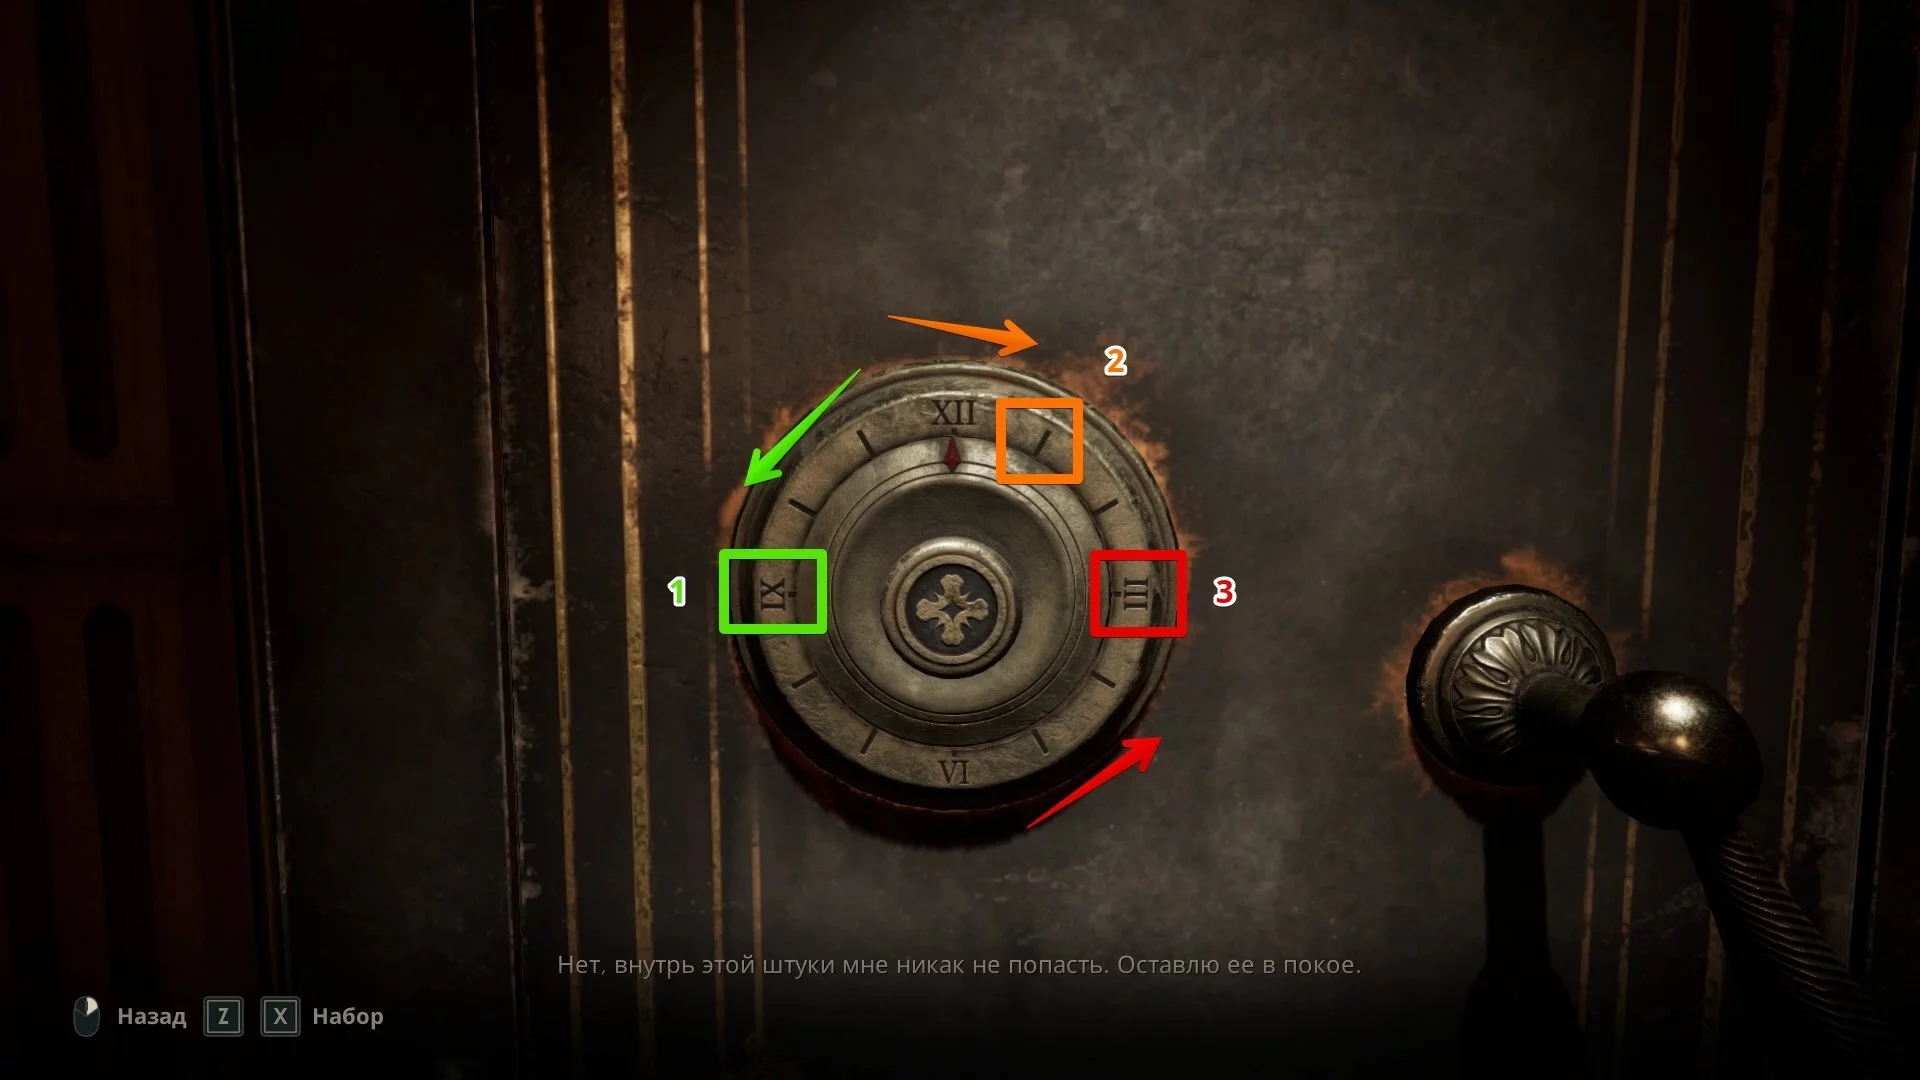
Note that this same code will need to be used in the fourth chapter to obtain the key to Dr. Gray's office. It will remain unchanged!
Code for the Locker in Room No. 6
In the second chapter, the main character will need to find two broken pieces of a plate for antique clocks. The first shard lies outside in a well, and the second is hidden on the second floor in room No. 6. To reach it, enter the combination:
- Pisces;
- Libra;
- Taurus.
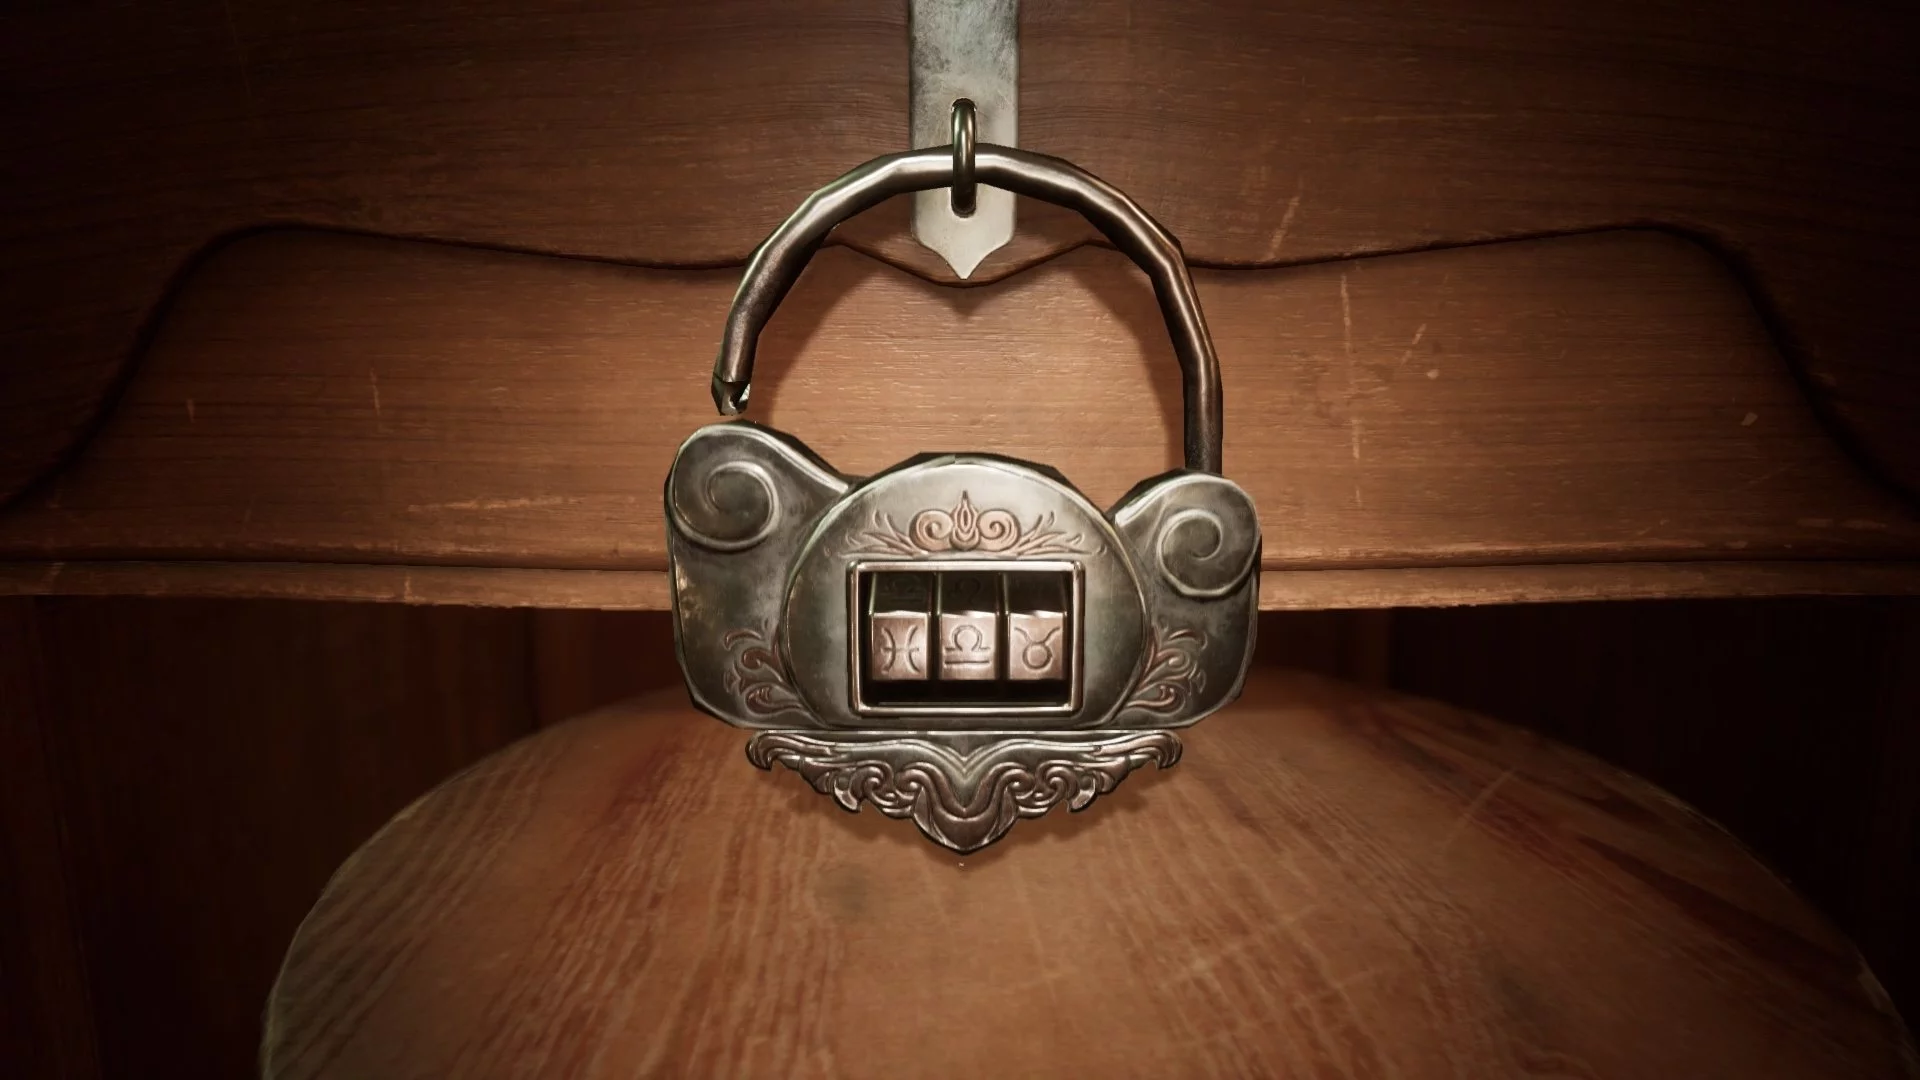
You can figure it out using Perozi's notes, whose journal lies behind the bed. If you turn the paintings on the wall to the left into the correct position and read the names on them, you can get the numbers with which these people are marked on the painting behind the bed.
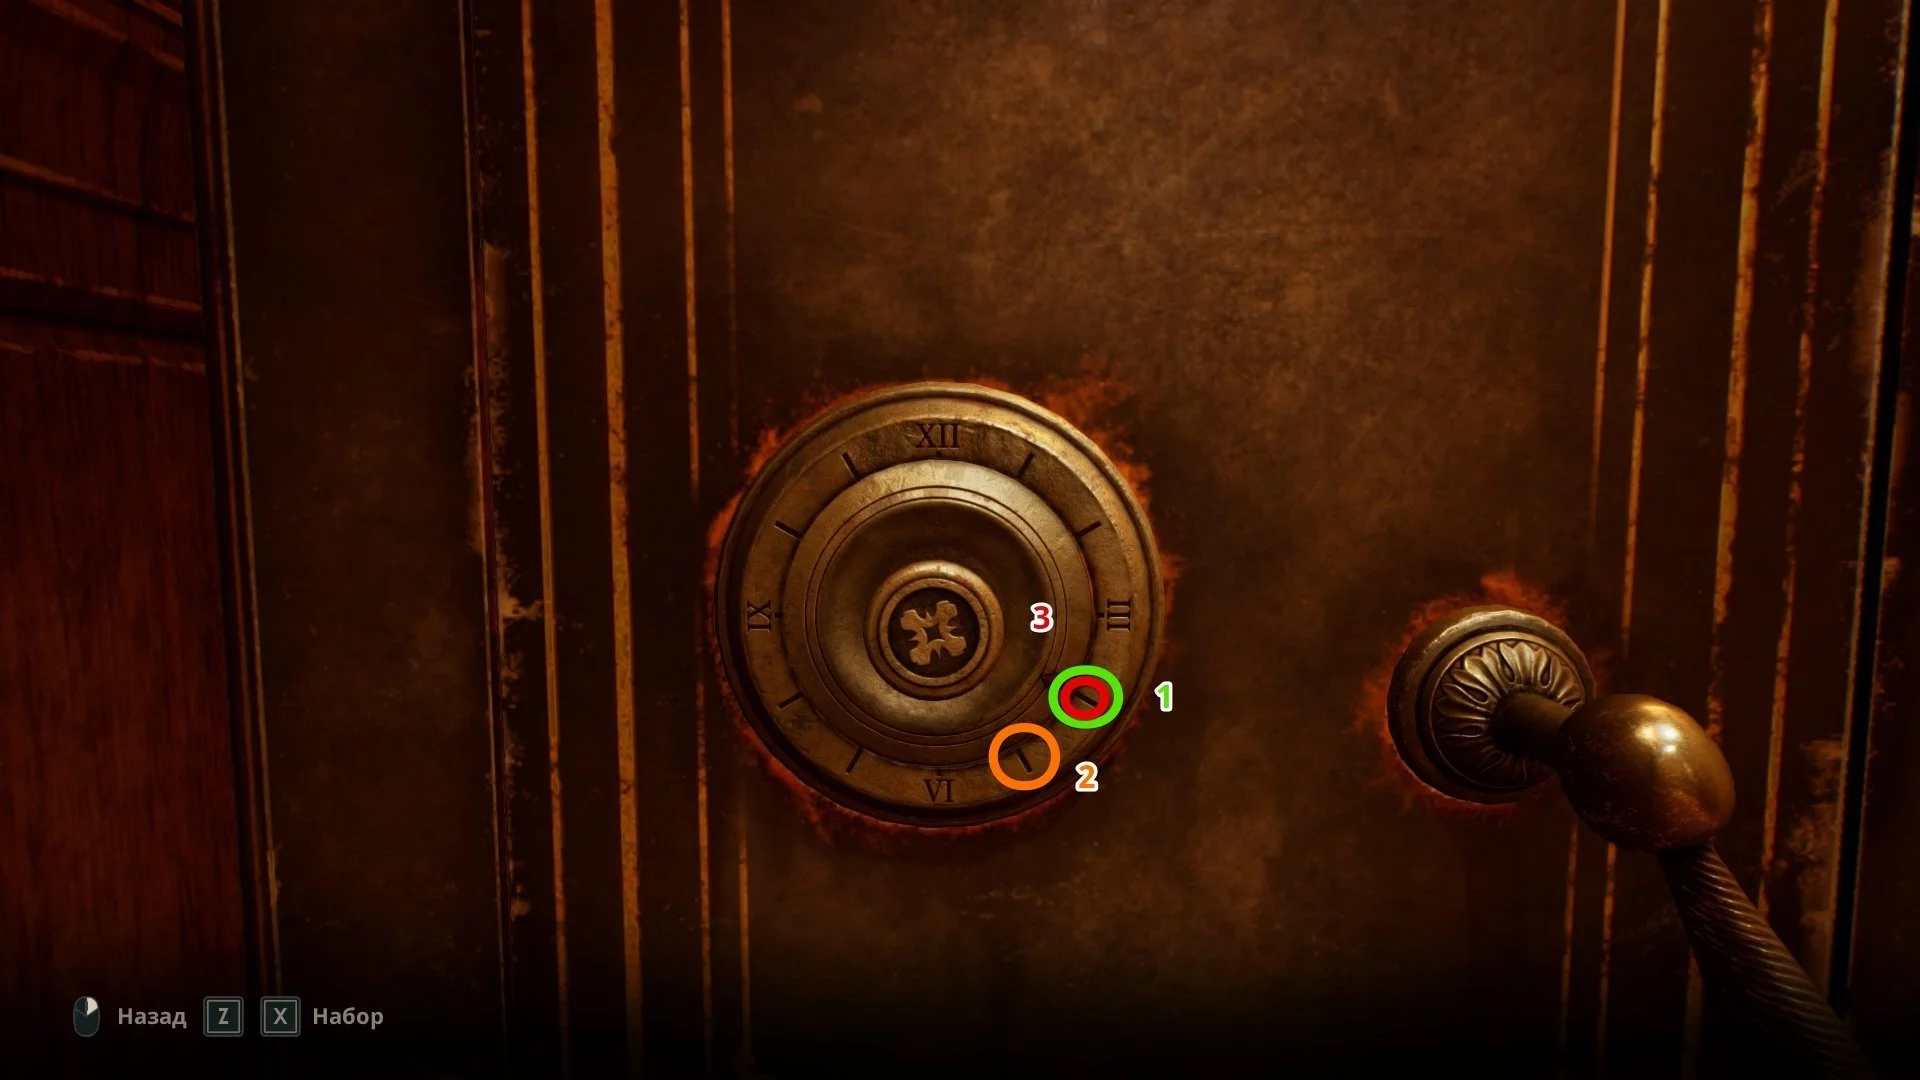
Code for the Safe in the Shipbuilding Company Building
The combination for the safe is written in the document «All His Things», which you will pick up in the shipbuilding firm's office on the second floor. Use this code:
- 4 left,
- 5 right,
- 4 left.
Code for the Locker in the Living Room
A little later in the story, the protagonist will need to find a few more lost plate shards, from which an image can be assembled. One such shard lies in the far room of the living room, on the second floor. If you have already obtained the key to this place, go there and use the following combination:
- Pisces;
- Gemini;
- Leo.
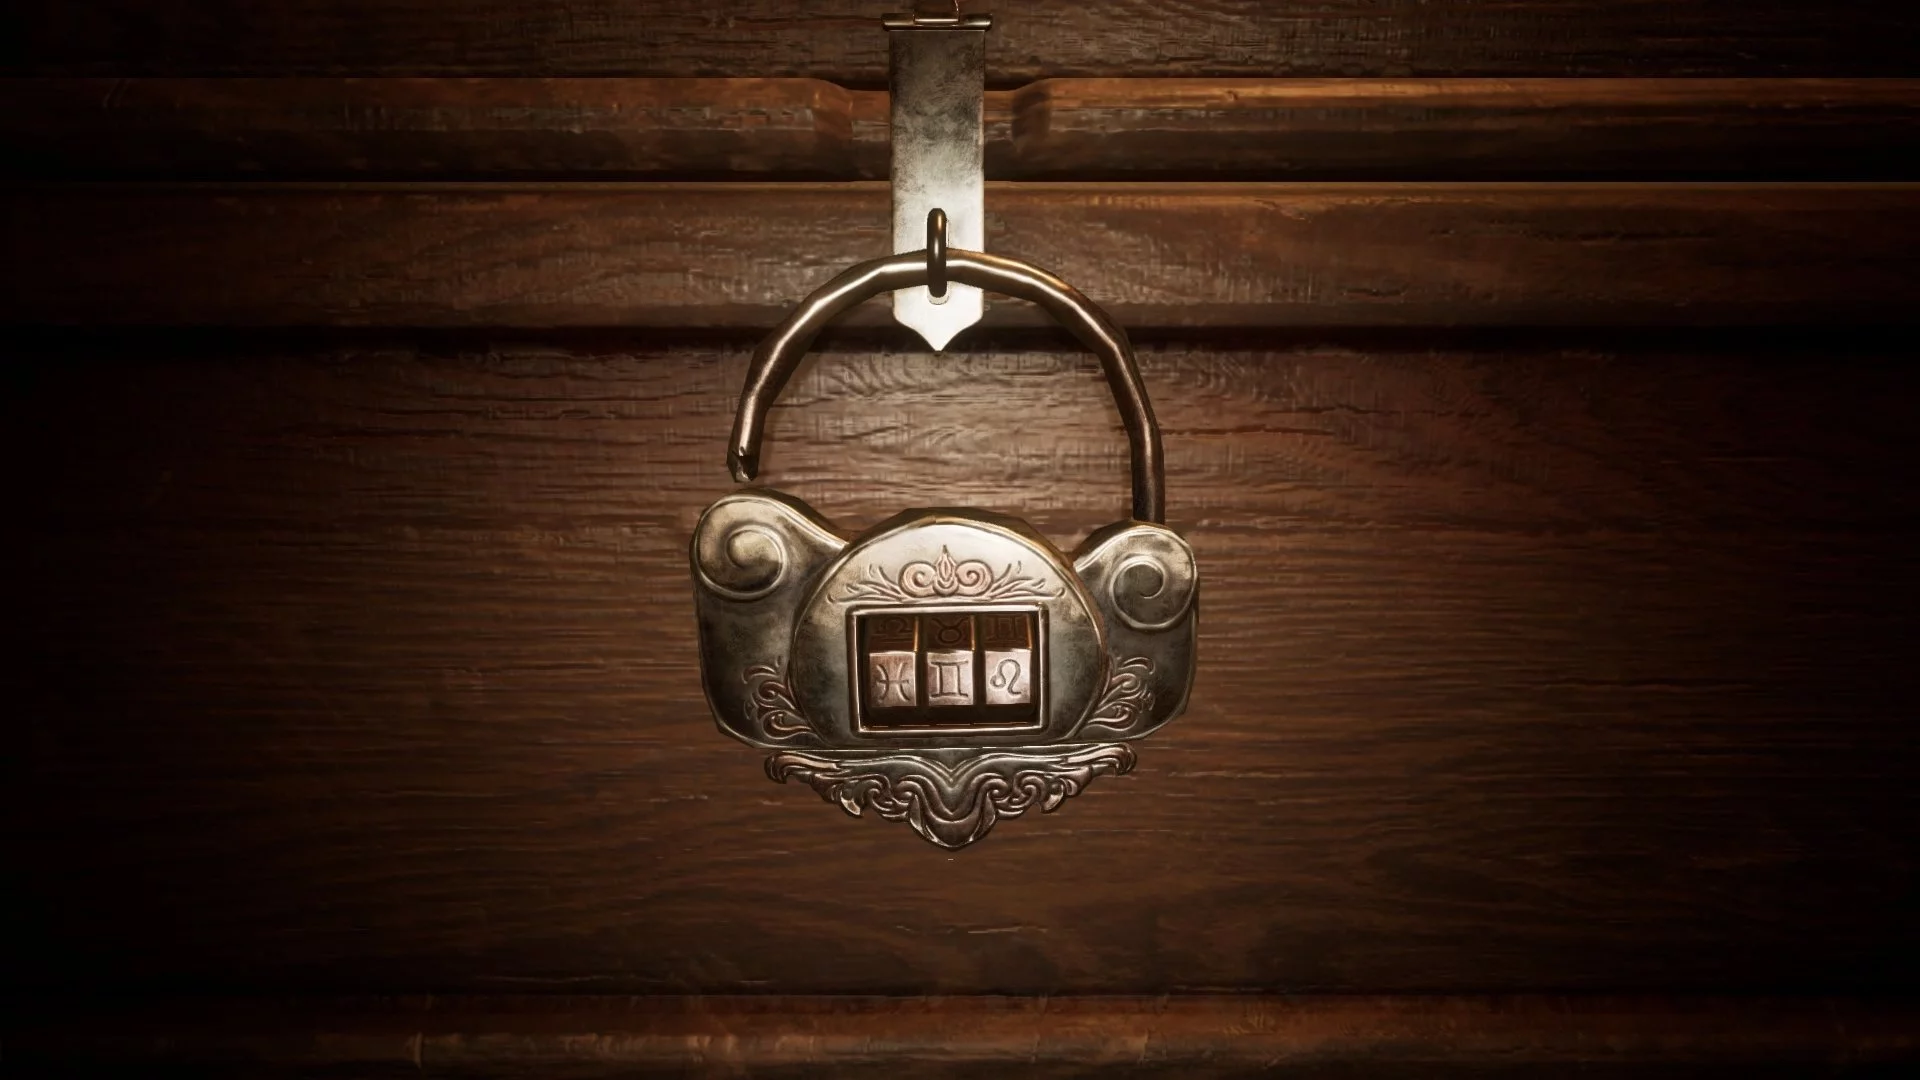
Note that according to the story, you will need to explore the main hall and pick up the key to the medicine box beforehand. With the above combination, this can be skipped, but if you do not visit the main hall, you will miss three presents.
Code for the Safe in Room No. 3
You will enter this room in the fourth chapter, closer to the end of the game. Notably, playing as different characters, the code will differ:
- In Edward's scenario: 6 left, 9 right, 3 left;
- In Emily's scenario: 9 left, 1 right, 8 left.
After this, the paths of the protagonists will also diverge. You can read more about this in the step-by-step guide to completing Alone in the Dark.
All Codes for the Talisman
In the game, you will often need to look for codes for the talisman to open the passage into the parallel world (Jeremy's Memories). Here they are in order:
- Code in the first chapter: 358
- Code in the second chapter: 643
- Code in the second chapter (from the boiler): 975
- Code in the third chapter (after the shipbuilding company): 258
- Code in the fourth chapter (in the attic): 641
- Code in the fourth chapter (in the doctor's room): 000
Other guides
- Alone in The Dark (2024) Walkthrough: All Puzzles and Collectibles
- All Endings of Alone In The Dark (2024): How to Get Them
- How to Find All The Collectibles (Lagniappes) in Alone in the Dark (2024)
- All actors in Alone in the Dark (2024): who played Edward Carnby, Emily Hartwood, and others
- Die Entwickler von Alone in The Dark wurden nach dem schlechten Start des Spiels entlassen.
- Alle Enden von Alone In The Dark (2024): Wie man sie bekommt
- Alle Schauspieler in Alone in the Dark (2024): wer spielte Edward Carnby, Emily Hartwood und andere