All Farms with Stashes and Treasures in Red Dead Redemption 2: Map and Walkthrough
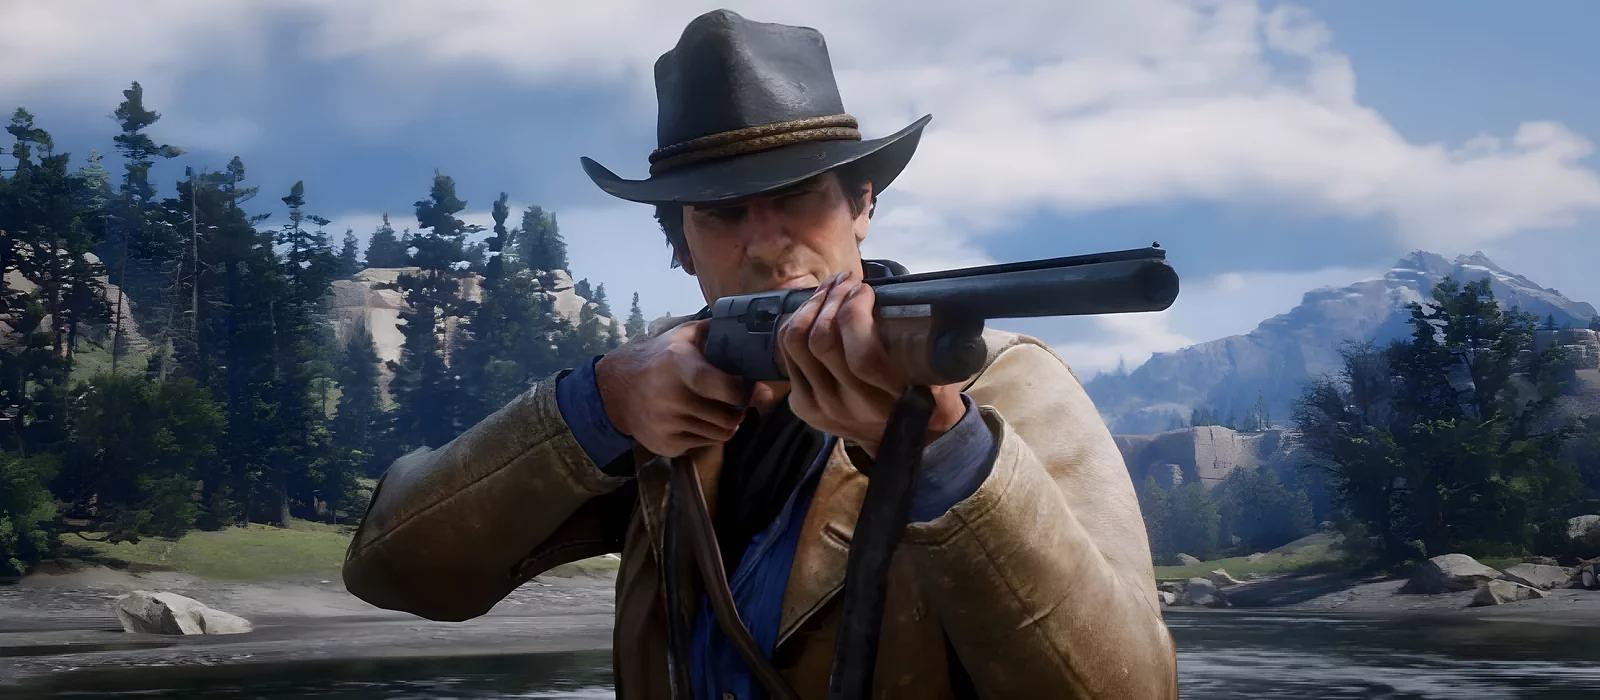
In Red Dead Redemption 2, you can find 7 farms with hidden treasures. To obtain the Breaking and Entering achievement, you need to find only 4 of them.
Red Dead Redemption 2 Guides
- Where to find all Gold Bars in Red Dead Redemption 2: treasure maps
- Where to find Otis Miller's Revolver (golden) in Red Dead Redemption 2: map
- All Farms with Stashes and Treasures in Red Dead Redemption 2: Map and Walkthrough
- All Weapons in Red Dead Redemption 2: Where to Find the Best Guns
- The Entire Map of Red Dead Redemption 2: Symbols, Locations, Settlements
- Hunting in Red Dead Redemption 2: Choosing Weapons and Finding Perfect Pelts
- How to Upgrade Your Camp in Red Dead Redemption 2: Boost Morale, Increase Satchel and Food Supplies
- Where to Find 30 Dinosaur Bones in Red Dead Redemption 2 — Guide and Map
- How to Get the Best Horse in Red Dead Redemption 2
- Walkthrough for All That Glitters is a Stranger in Red Dead Redemption 2 — Treasure Map and Guide
- How to Find the 9 Satellite Graves in Red Dead Redemption 2: Guide and Maps
- Legendary Animals in Red Dead Redemption 2: How and Where to Find Them
You can choose any four farms for the achievement. The last farm in Willard's Rest will be available only in Chapter 6. The rest can be robbed as early as Chapter 2. It is better to do this at the beginning of the game, as at a later stage some of the estate residents may no longer be there. Some can be accidentally killed during the playthrough. Fully inspect the farms, not limiting yourself to just the stashes.
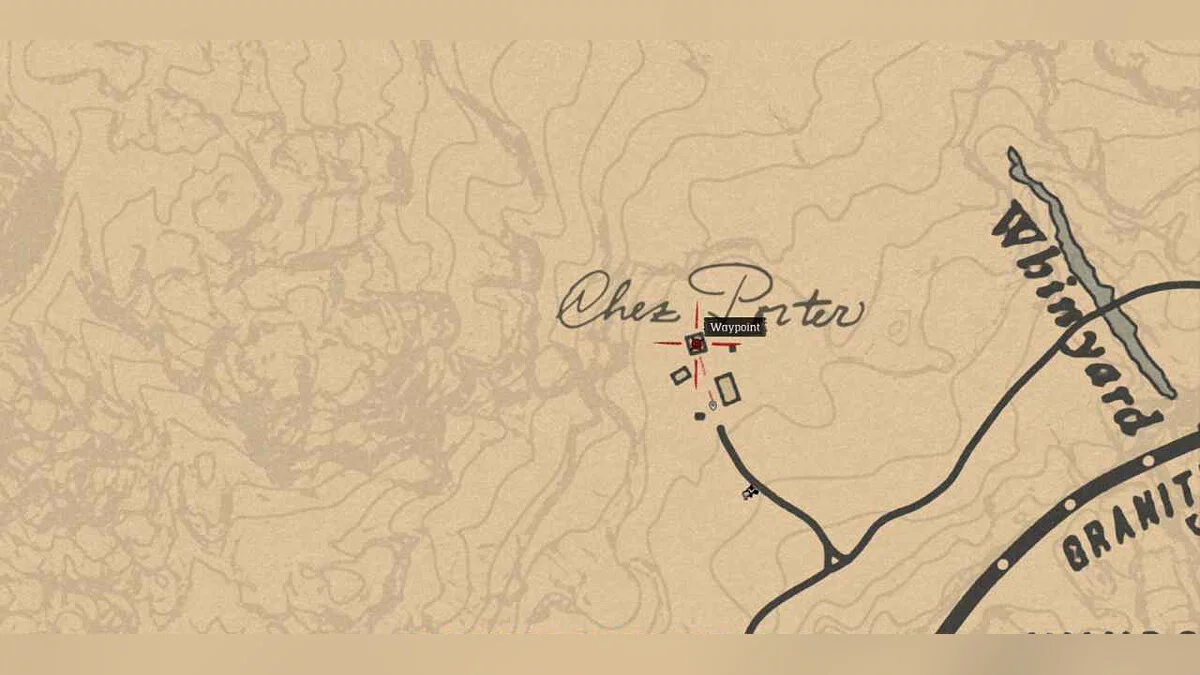
Chez Porter
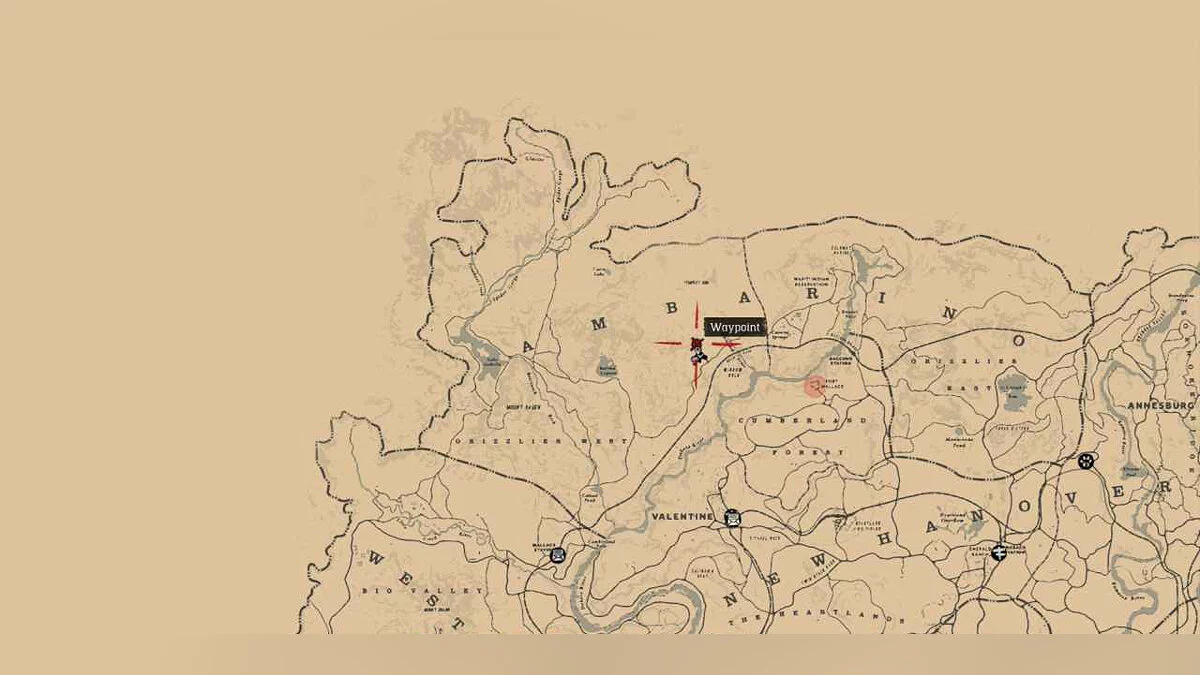
The secret stash is located on the upper floor of the barn. You will go to rob this place with Javier when you get his Home Robbery mission in Chapter 2 or Chapter 3. Javier can be found in your gang's camp. You can go to the estate without him, but it is unknown if it will count towards the achievement. You can climb up the barn ladder to find a box next to the haystacks. The box contains $100 and a bag of jewelry. Don't forget to inspect everything else in the houses.
Aberdeen Pig Farm
A guy will be sitting on the porch of the farm to greet you. Talk to him and follow him into his house. Then rob the place. Be sure to go back outside and enter the door on the south side of the house. There will be a room with a stash. This door will be locked until you follow the guy into his house. It is a small cabinet with $40 inside.
Lonnie's Shack
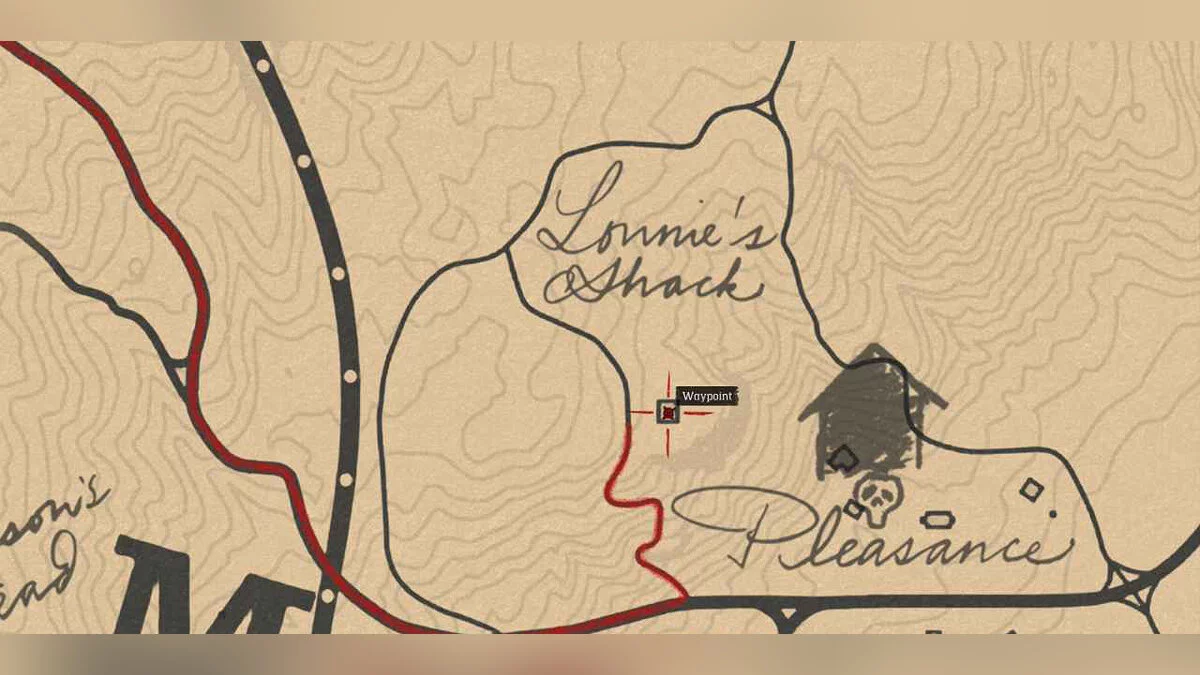
Inside the farm, there will be 4 guys. Kill 3 of them, but leave 1 alive! It is better to use manual save. Point your gun at the last surviving guy and threaten him. He will tell you the location of the stash. This stash can vary, depending on who is left alive. It can be under a pillow on one of the beds or in a grain sack in the kitchen. But if you do not interrogate the last living guy, you will not be able to take the stash.
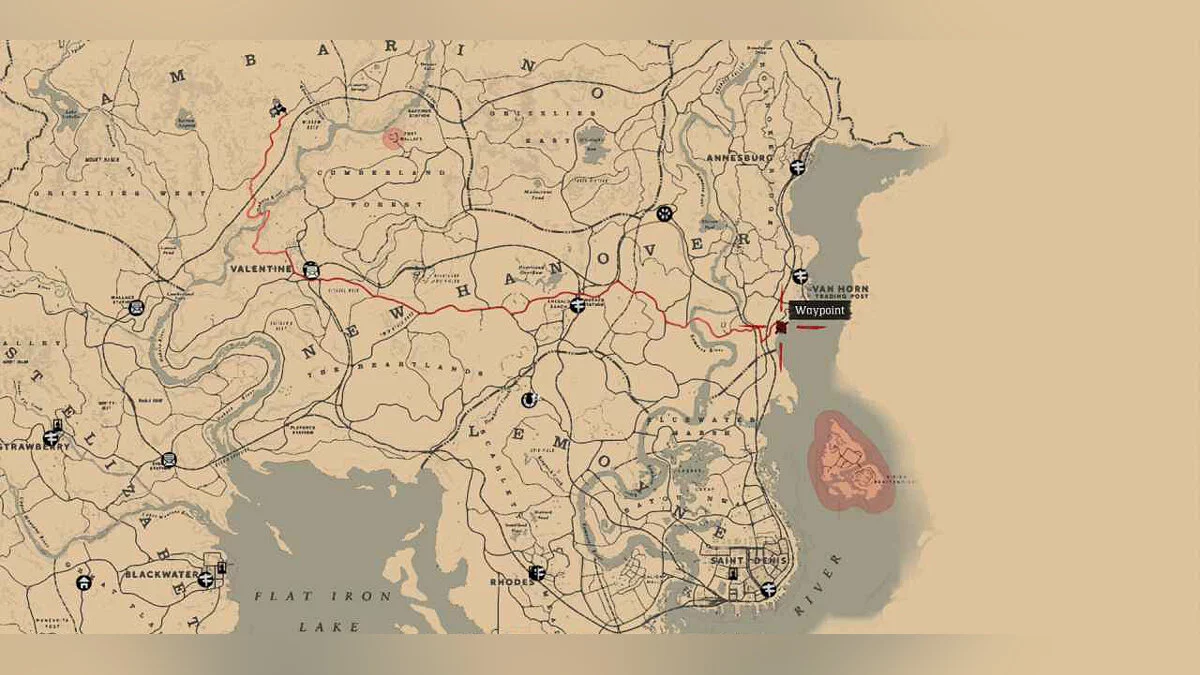
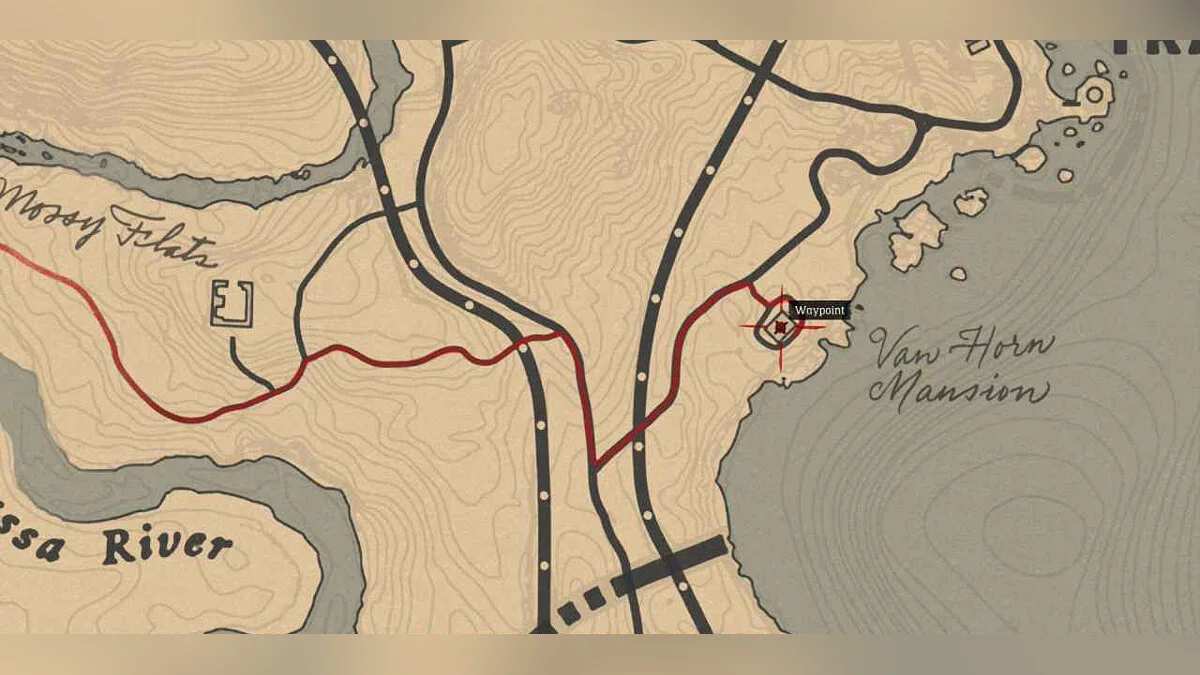
Van Horn Mansion
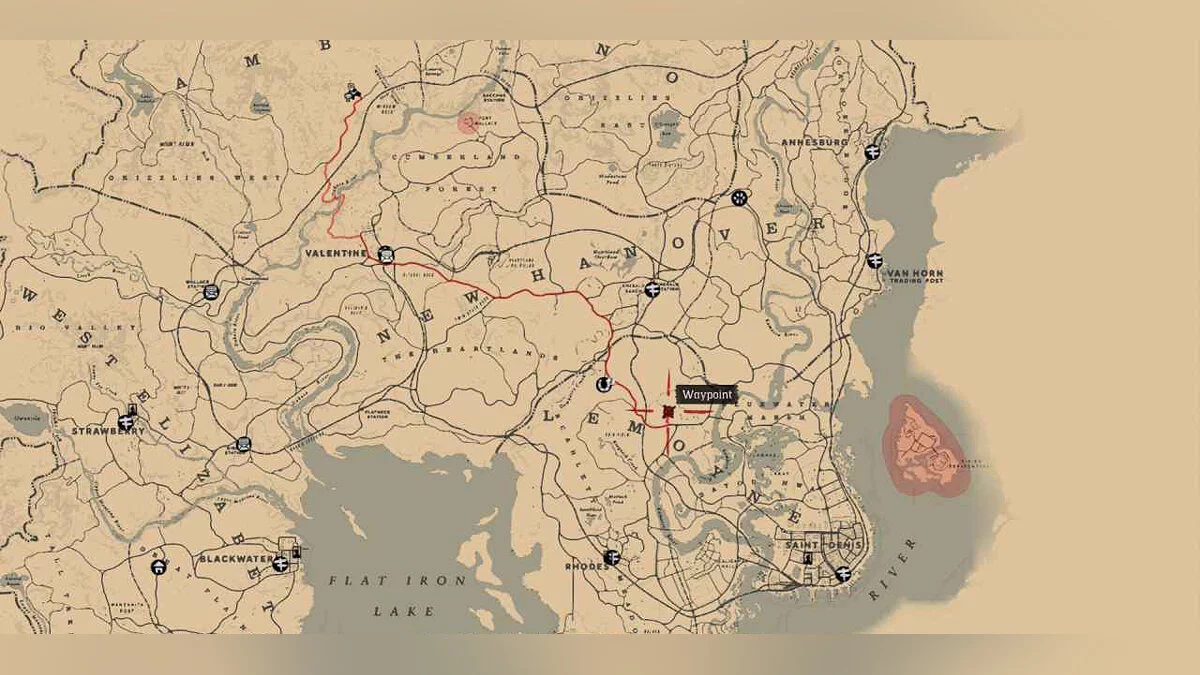
The farm is located south of the Van Horn Trading Outpost. You can find two residents there. They appear once a week at random times (they can also appear at night). You can set up a camp nearby and wait. At night, they may sleep on the ground floor, and during the day, they may just sit or walk around. Steal the money from their table downstairs and inspect the entire house.
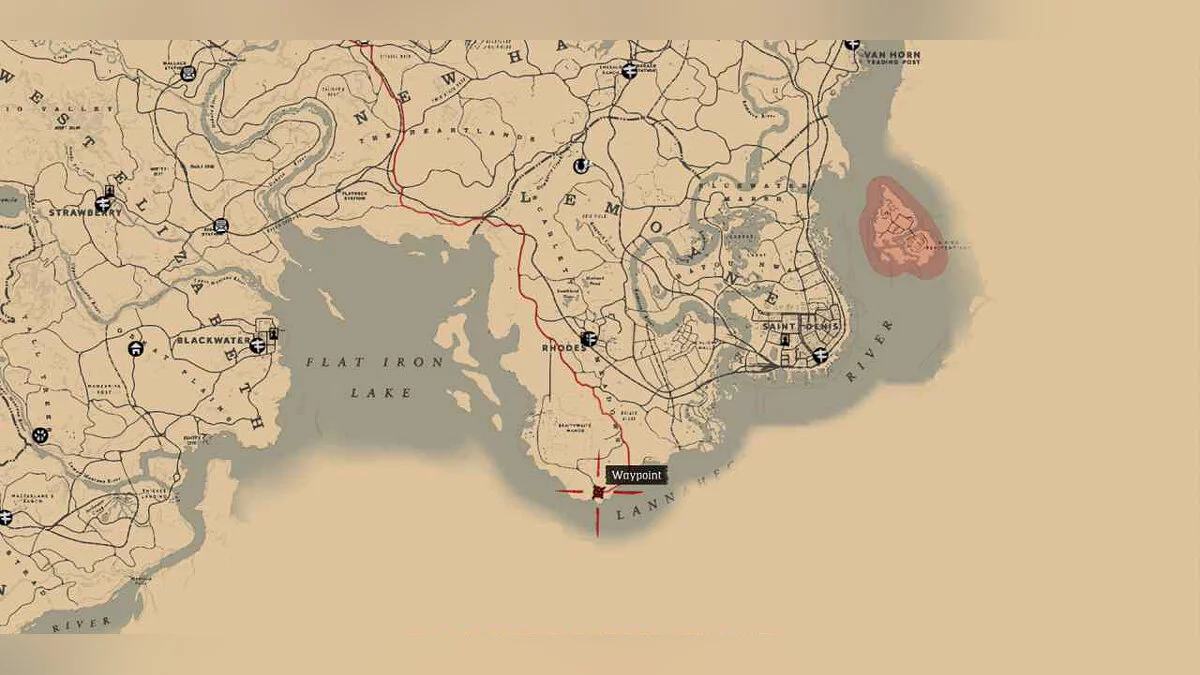
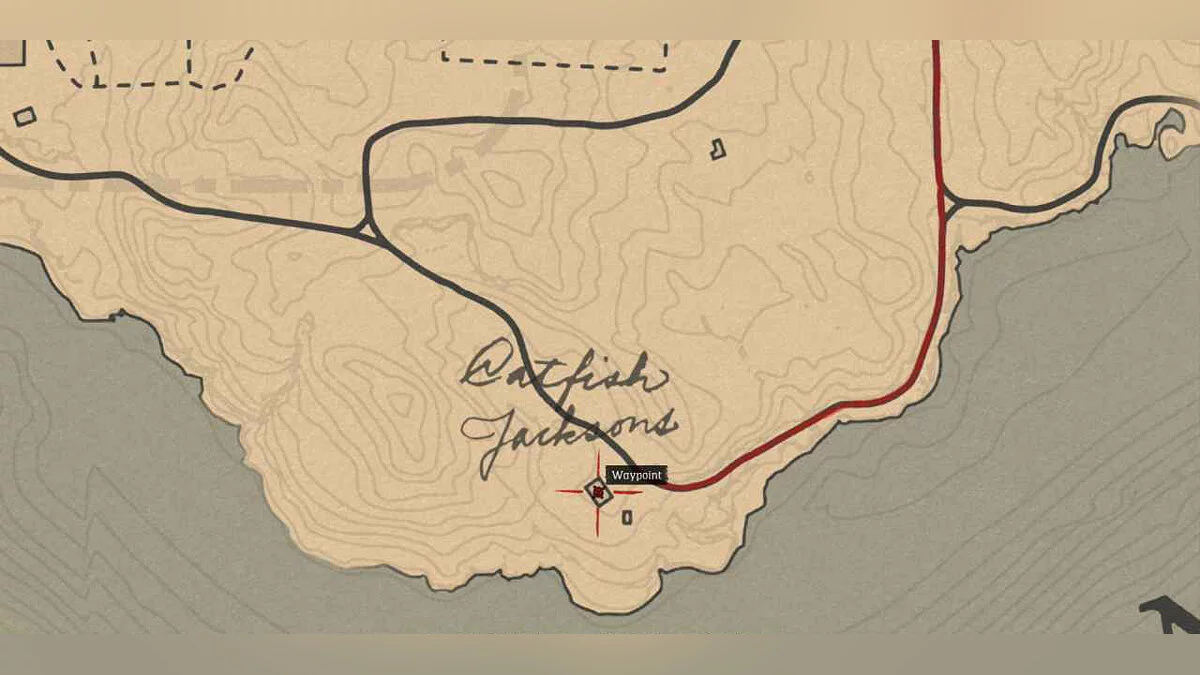
Catfish Jacksons
Enter the Jacksons House. You can find a father and son or just the son there. You can find a shotgun in the living room and threaten the son to tell you the location of the stash. It can be inside the chimney in the living room or outside the house, on the side, to the right of the entrance. There is a small hole with a box inside on the inner side of the house. Interact with the box. But don't forget to steal all the valuables in the house, especially the cigarette cards in the son's room chest and the shotgun from the living room. It seems that this stash counts as soon as you interrogate the son.
Watson's Cabin
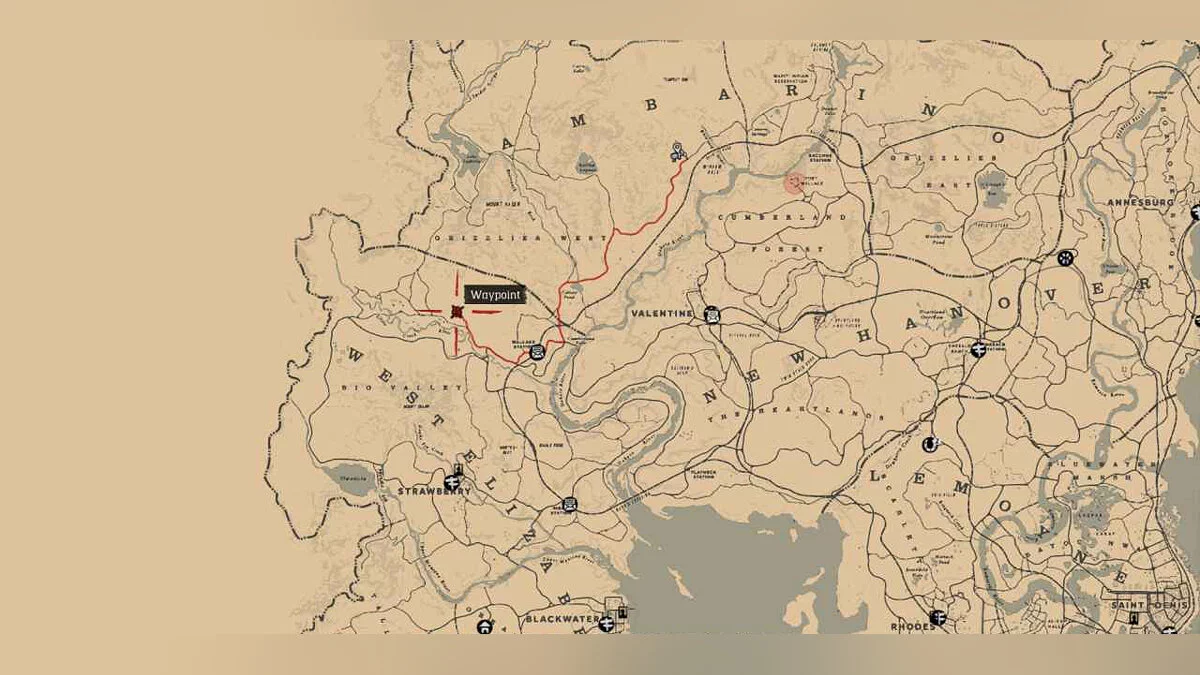
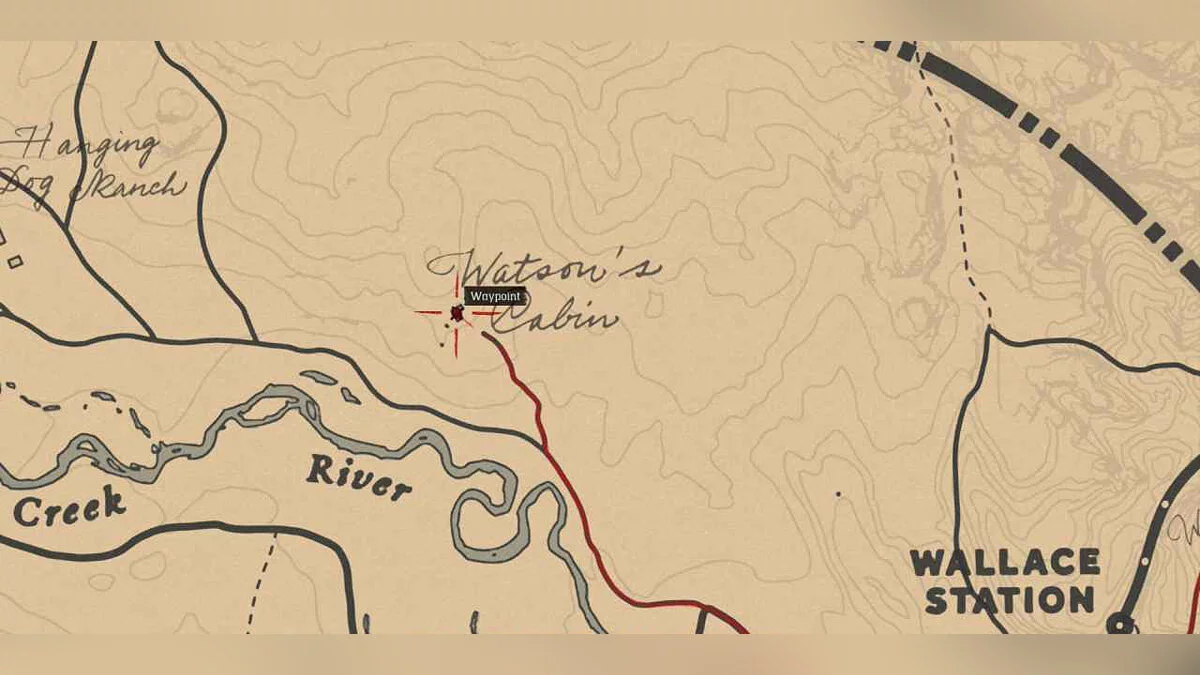
In Watson's Cabin, you will find an old lady. Enter the house and find the stairs to go down to the basement. Steal the rifle and leave. One shotgun is enough to get the trophy. If you want to get more money (optional), set up a camp and rest twice in a row to return the next day. Four sons of the old lady will appear on the farm. Kill them and take the box from the kitchen table that wasn't there before. It contains $73.
Willard's Rest (Rocky Seven)
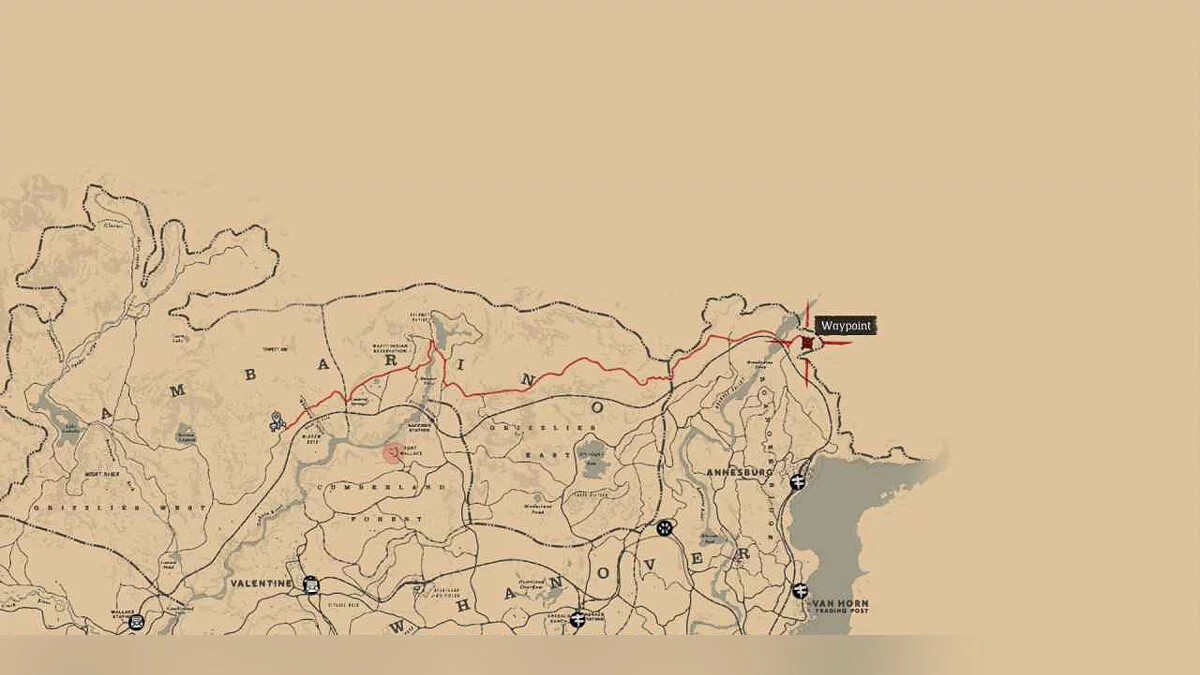
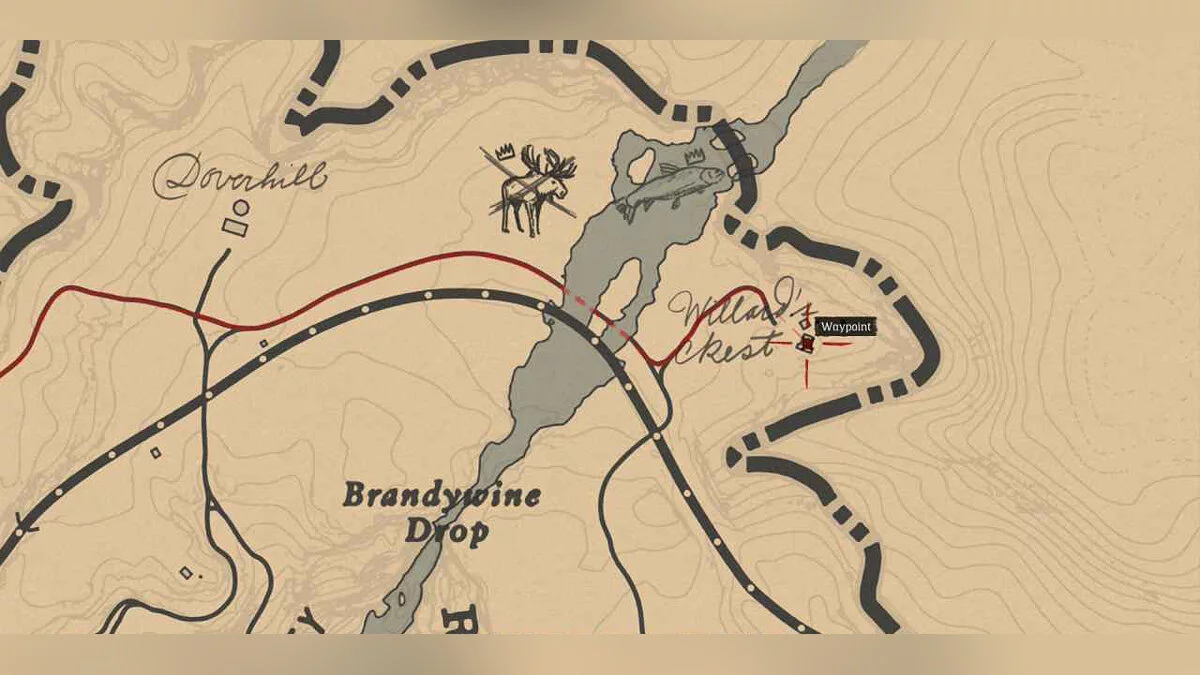
This farm will be available only after completing the first mission in Chapter 6. Go there and talk to the resident, teach her to hunt. Return after 2 days (you can set up a camp nearby and rest). After a small task, follow her inside the house to have dinner, and then rob her cabinet next to the bed. Don't forget to inspect the entire house as well.
Other guides
- The Entire Map of Red Dead Redemption 2: Symbols, Locations, Settlements
- Where to find all Gold Bars in Red Dead Redemption 2: treasure maps
- All Weapons in Red Dead Redemption 2: Where to Find the Best Guns
- Where to Find 30 Dinosaur Bones in Red Dead Redemption 2 — Guide and Map
- Hunting in Red Dead Redemption 2: Choosing Weapons and Finding Perfect Pelts
- Walkthrough for All That Glitters is a Stranger in Red Dead Redemption 2 — Treasure Map and Guide
- How to Get the Best Horse in Red Dead Redemption 2
- Where to find Otis Miller's Revolver (golden) in Red Dead Redemption 2: map
- How to Upgrade Your Camp in Red Dead Redemption 2: Boost Morale, Increase Satchel and Food Supplies
- Everything You Need to Know About GTA 6: PC Release, Characters, Map, and Cheats
-
How to Get the Best Horse in Red Dead Redemption 2
-
How to Upgrade Your Camp in Red Dead Redemption 2: Boost Morale, Increase Satchel and Food Supplies
-
The Entire Map of Red Dead Redemption 2: Symbols, Locations, Settlements
-
Walkthrough for All That Glitters is a Stranger in Red Dead Redemption 2 — Treasure Map and Guide
-
Where to Find 30 Dinosaur Bones in Red Dead Redemption 2 — Guide and Map
-
Hunting in Red Dead Redemption 2: Choosing Weapons and Finding Perfect Pelts
-
Legendary Animals in Red Dead Redemption 2: How and Where to Find Them
-
How to Find the 9 Satellite Graves in Red Dead Redemption 2: Guide and Maps
