How to Find Experts and Gain New Abilities in Star Wars Outlaws

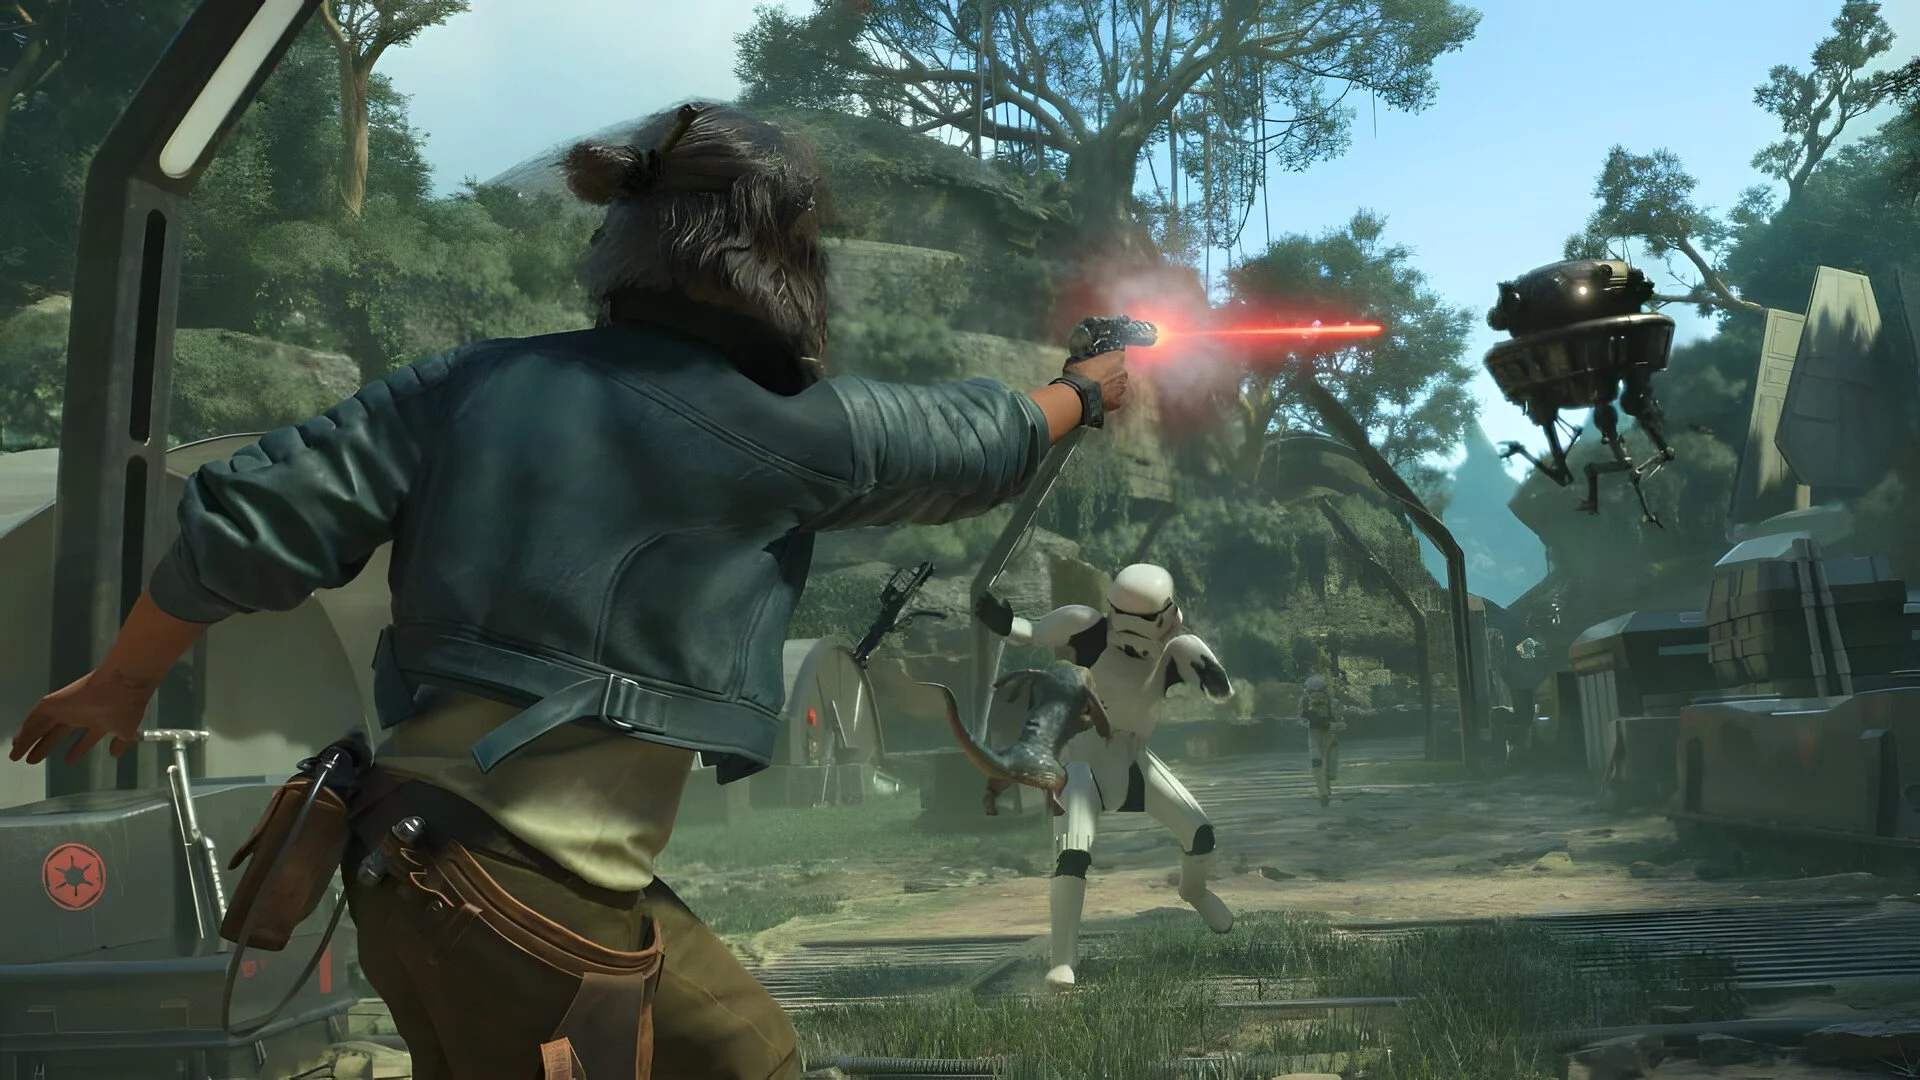
The world of Star Wars Outlaws has a vast number of activities that help in character development. Experts can teach you a variety of abilities. Each of them provides six abilities, but finding them can be challenging. In this guide, we will tell you how to find experts and what abilities they possess.
How to Find Experts in Star Wars Outlaws
In most cases, you will receive a lead on the nearest expert, who will be marked in your journal as Expert Information under the Outlaws tag. These leads can appear naturally, or you may receive a brief notification from ND-5 after completing a story mission. If the leads do not appear, try leaving the planet and returning.
The first lead will introduce you to an expert, and each of them will have a task for you. Completing it will unlock the initial ability and show the requirements for the others. Meetings with experts are a kind of skill progression system in Star Wars Outlaws.
Requirements may include performing certain actions in combat or gathering materials in the open world, but the skill menu can provide hints and track progress, making these tasks easier to complete.
It is important to note that progress on an ability will only start after you learn the requirements. For example, if Ayla's ability requires you to hack three locks, the locks you hacked before meeting her will not count. Once all conditions for the ability are met, it can be unlocked directly from the menu without returning to the expert.
Bartender Bram's Abilities
Bram is unlocked automatically at the beginning of the game, and you receive two free abilities. However, you will have to work for the remaining four.
Bram's abilities are basic, mainly focusing on improving combat skills and puzzle-solving mechanics.
- Cantina Brawling: Allows you to use melee attacks against enemies. Unlocked by default;
- Lockpicking: Allows you to use Data Spike to pick locks on doors and containers. Unlocked by default;
- Fast Talk: Allows you to distract an enemy for a few seconds after being detected. Unlocks after stealthily eliminating three enemies and defeating five enemies in melee combat;
- Keep Talking: Allows you to distract multiple enemies after being detected. Requires unlocking Fast Talk and defeating six enemies distracted by this ability;
- Armored Undershirt: Health increases by one additional bar. Requires collecting eight Courseweave and one Ironweave;
- I Know Someone: Allows you to receive personal trade requests from specific merchants. Requires spending 1,000 credits and meeting six different merchants.
Quest and Abilities of Mechanic Selo
Selo is likely to be the first expert you unlock if you follow Danko's advice and look for leads on expert information. After completing the main quest New Tricks, Danko will give you a hint about a top-notch mechanic on Toshara. Head to Jaunta's Hope and get the information about the mechanic expert from the bartender at Daruda Diner. After that, go to Kadua and the cliff near Jaunta's Hope, where you will meet Selo. She will have a task for you.
Details of Selo's Quest
Selo wants you to get her a speeder part located at a nearby Imperial base. Follow the marker to the base, use Selo's silencers, and go inside. You will have to go through several platforming challenges, including giant fans and moving walls, but since there is only one path, you won't get lost. Return to Selo with the part to unlock her first ability.
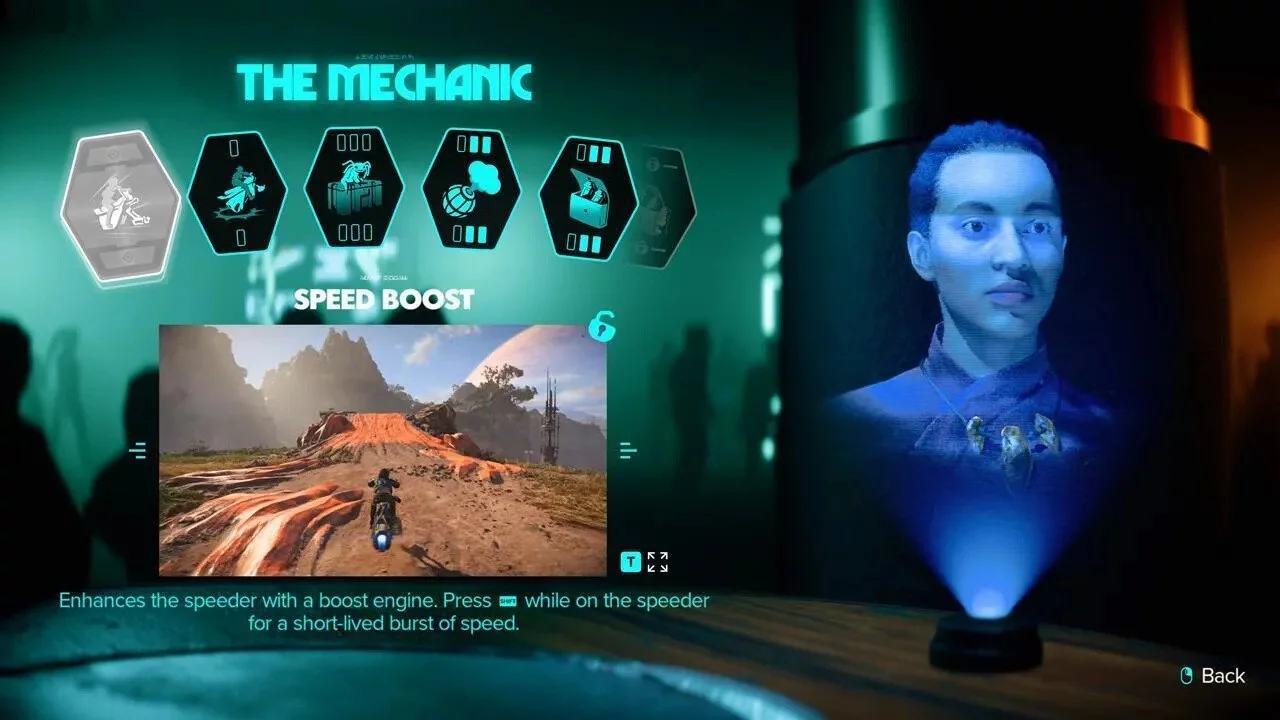
Selo's Abilities and Unlock Conditions
Selo's skills include abilities related to speeders, as well as some very useful tricks for rogues, including one of the best abilities in the game — the Smoke Bomb.
Here is a list of Selo's abilities and the conditions for unlocking them:
- Speed Boost: Allows you to use a speed boost on the speeder. Unlocked by default;
- Speeder Jump: Allows you to perform jumps using the speeder. Unlocks after performing a 60-meter jump without collision;
- Treasure Hunter: Nix can highlight nearby containers. Open 10 different containers, command Nix to fetch an item, and find four ways to make Nix happy;
- Smoke Bomb: Allows you to use smoke bombs that confuse enemies and block their lines of sight. Requires collecting three MG2 power exceeders, seven polycarbonates, and one processor for smoke bombs;
- Scoundrel's Pouch: Allows you to carry one additional bacta vial and one grenade. Requires collecting eight Courseweave, four Robuma leather, and one piece of durafiber cloth;
- Outlaw's Pouch: Allows you to carry one additional bacta vial and one grenade. Requires unlocking Scoundrel's Pouch, then collecting 18 Courseweave, 10 polycarbonates, and one elastic durafiber.
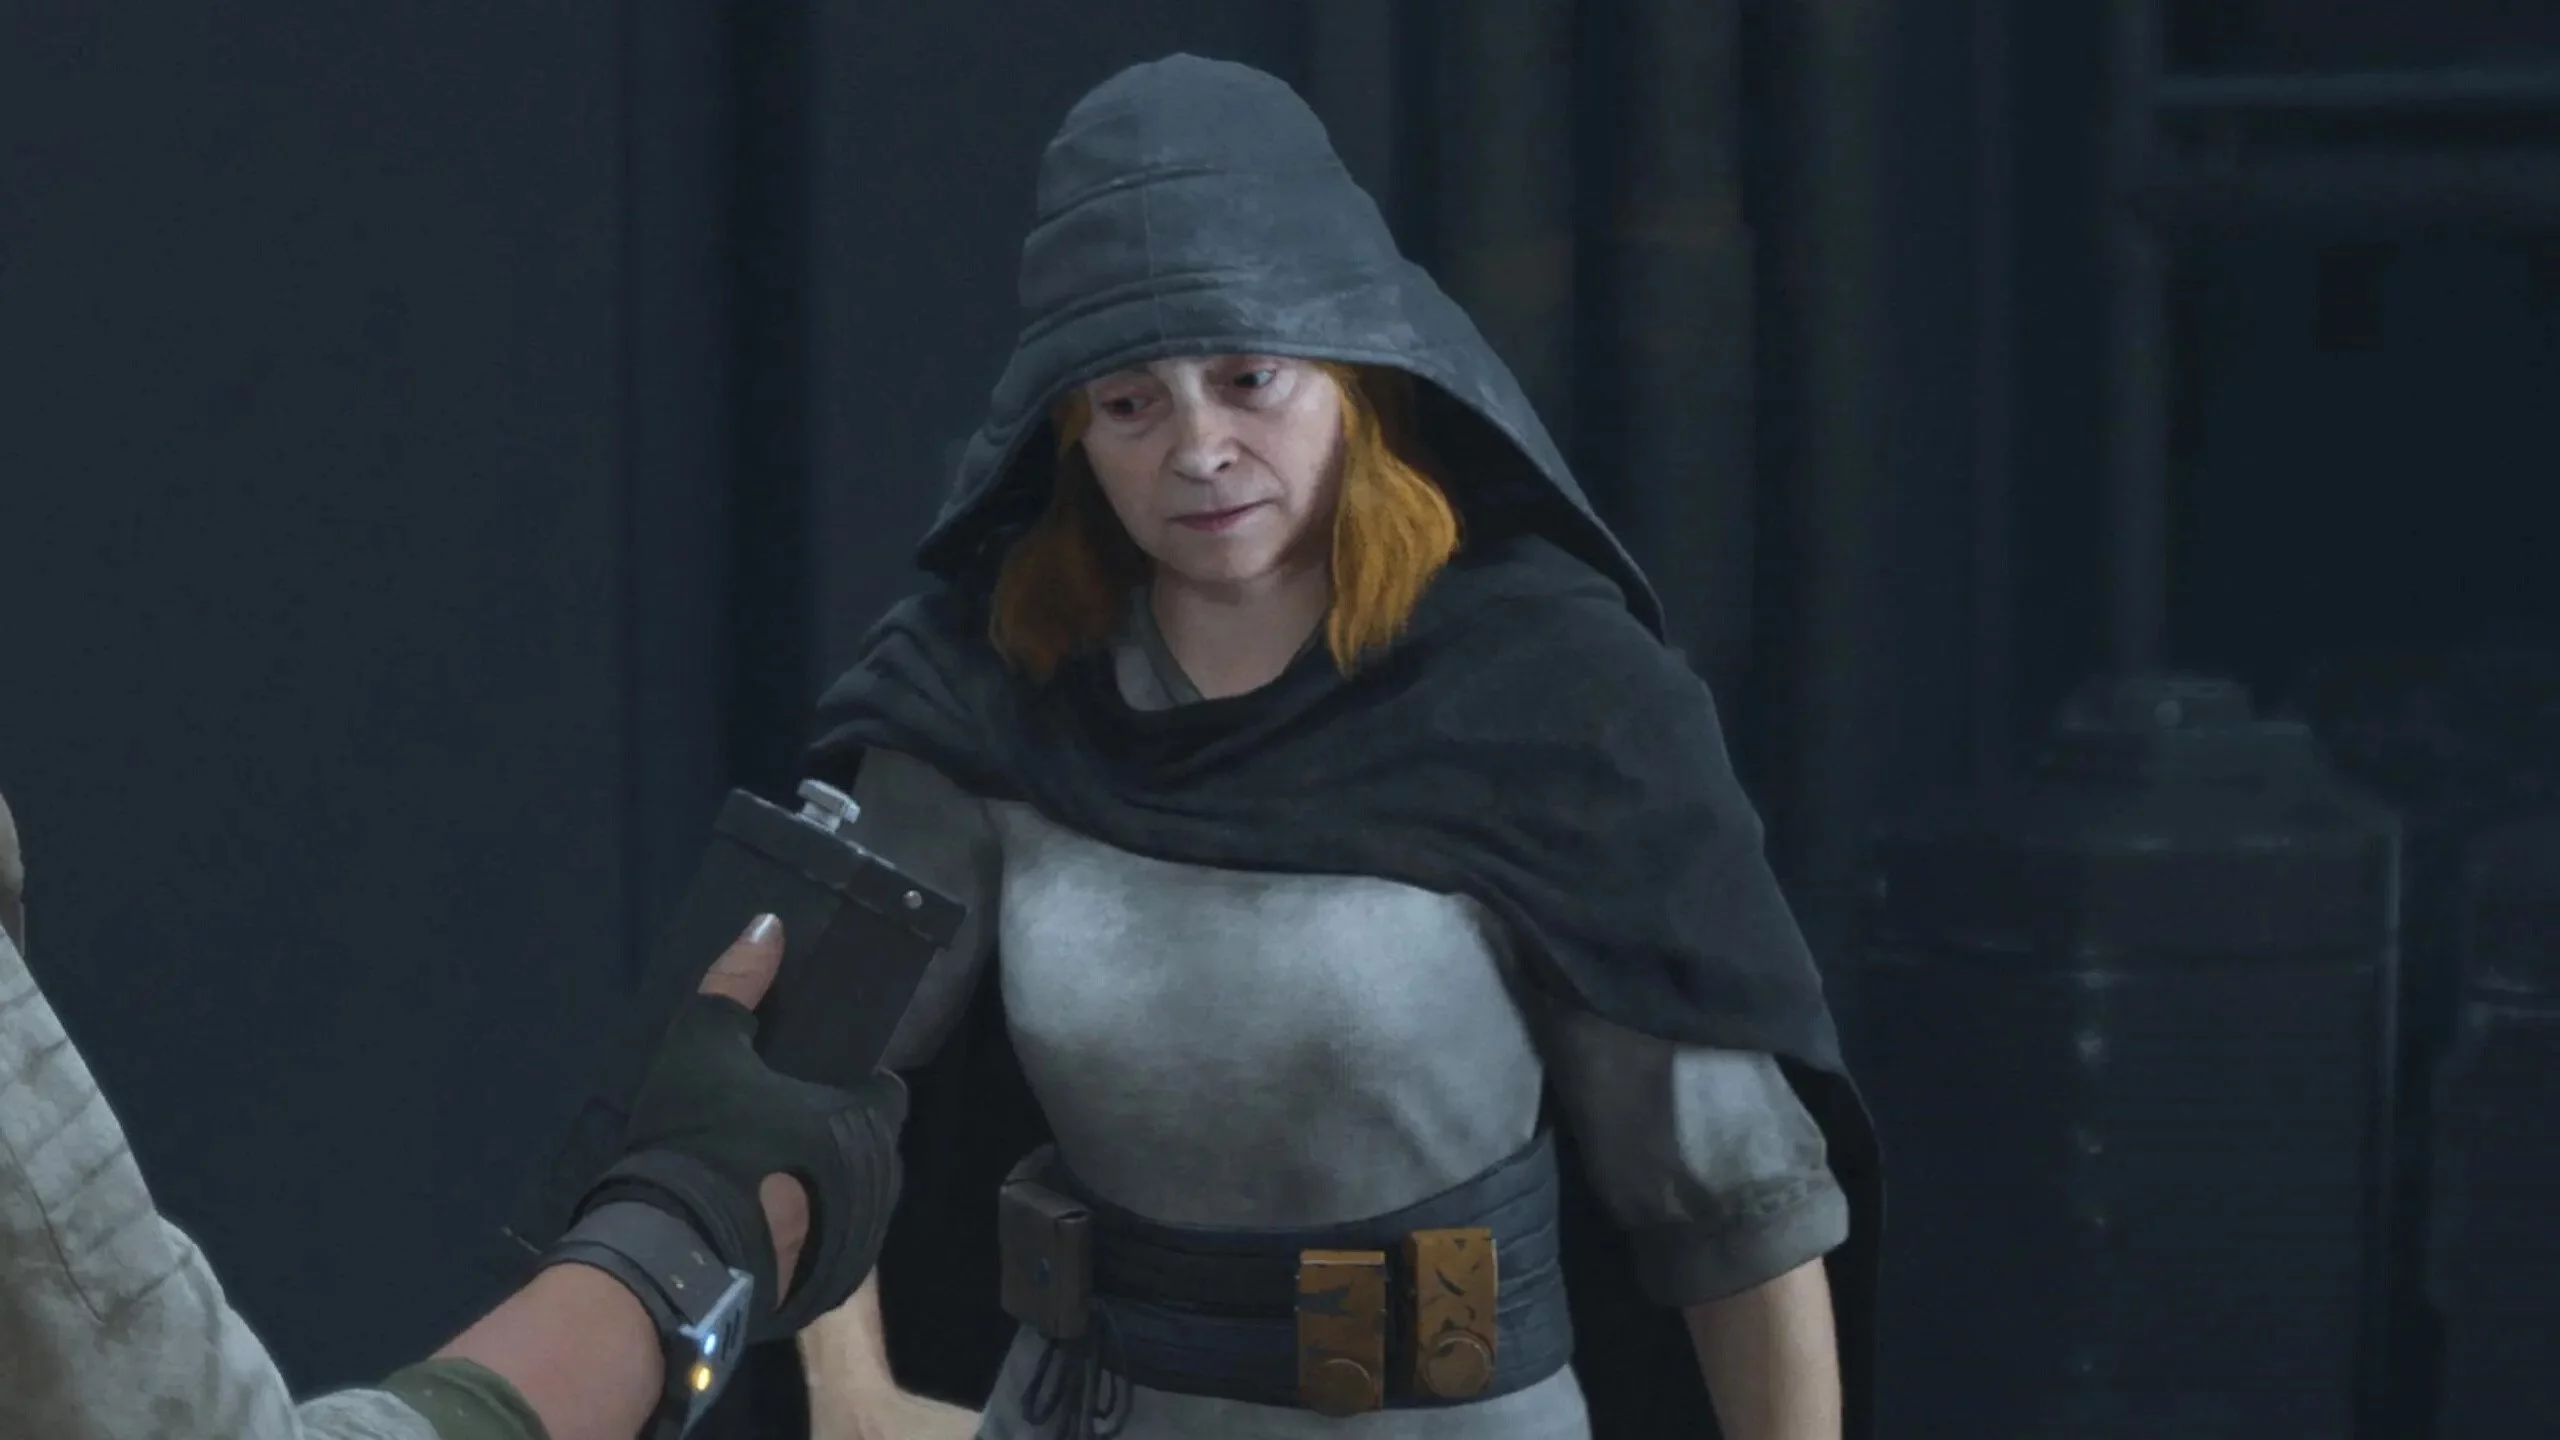
Quest and Abilities of Ayla Reshiker
Ayla is found on Toshara, and her quest chain unlocks along with Selo after completing the mission New Tricks. Information about the Hacker Expert sends you back to the tavern-gambling hall on Mirogan, where you learn that the next step is at the landing pad Crimson Dawn. If you have an excellent reputation with the syndicate, you can go directly there. If the reputation is good, you can approach the landing pad, sneak to the right, and climb the side wall to meet your contact.
If the reputation is bad or worse, you'll have to sneak into the area through the market and quietly reach the landing pad.
Details of Ayla's Quest
Ayla found herself in a difficult situation, and only you can help — if you want her assistance. Follow the quest marker to the Imperial base where Ayla is stuck and sneak your way to her. A large number of armed opponents will be a big problem if you want to fight your way through. A cautious approach will be much easier. Ayla tasks you with hacking the base's turrets and extracting the data, after which you will need to leave.
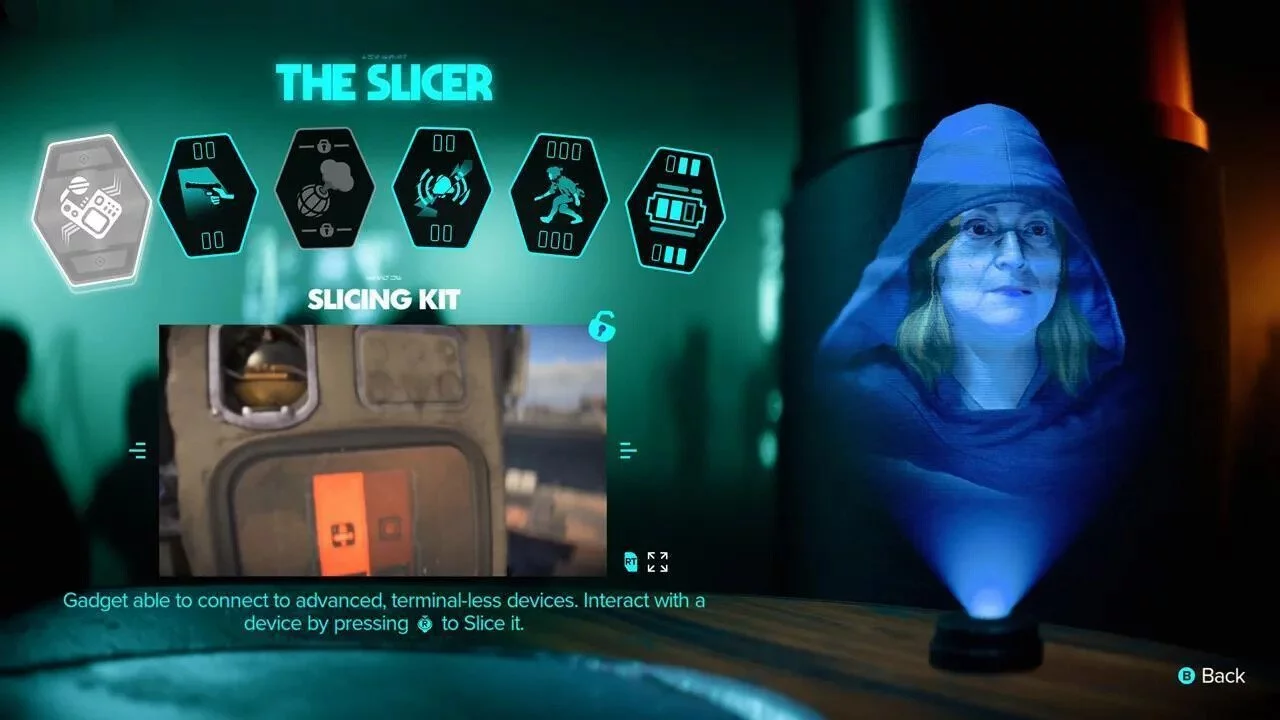
Ayla's Abilities and Unlock Conditions
Ayla's skills, oddly enough, are not much related to hacking, but they are still useful.
- Slicing Kit: Allows you to hack terminals. Unlocked by default;
- Sneak Shot: Increased blaster damage when shooting unnoticed enemies. Complete one infiltration contract and defeat five enemies distracted by Nix using the blaster;
- Concussive Smoke: Your smoke bombs stun enemies. Requires unlocking Smoke Bomb (from Selo), then finding one ion capacitor charge, 10 durasteel, and four battery accelerators;
- Sneaky Trap: Nix can turn alarm panels into traps that kill enemies who use them. Command Nix to perform seven different actions and hack three computers in three attempts or less;
- Lightfooted: You are harder to notice when walking or running. Perform a stealth elimination of an Imperial officer, hack at least three locks, and complete one smuggling contract;
- Slice Kit Upgrade: You get additional hacking energy, allowing you to activate Joker devices. Collect one hacker chip, one direct energy circuit, and eight chalcopyrites.
Quest and Abilities of Lando the High Roller
You can unlock Lando fairly quickly after leaving Toshara for the first time. Head to Akiva and visit the cantina in Alcazar on the south side of Mirra. The bartender will tell you about the expert in Sabacc, unlocking the information Taking Your Shot. Follow it to a shady establishment on Satraps Promenade, go downstairs, and talk to the guard. Bribe or intimidate him to get through.
Details of Lando's Quest
Lando will be happy to help if you do him a favor first. Head to Kijimi, enter the Crimson Dawn area, and find their Sabacc stash — this will be easier if you have a good relationship with Crimson Dawn. Challenge at the table using their special chips, win, and take Lando's chip. Return to Akiva's orbit — you'll need to leave the planet for the next stage of the quest to activate — and defeat the TIE Fighters that will attack you. Now head to the quest marker in the jungles of Akiva and help Lando's rebels fend off several waves of stormtroopers. After this, you will unlock the expert's skills.

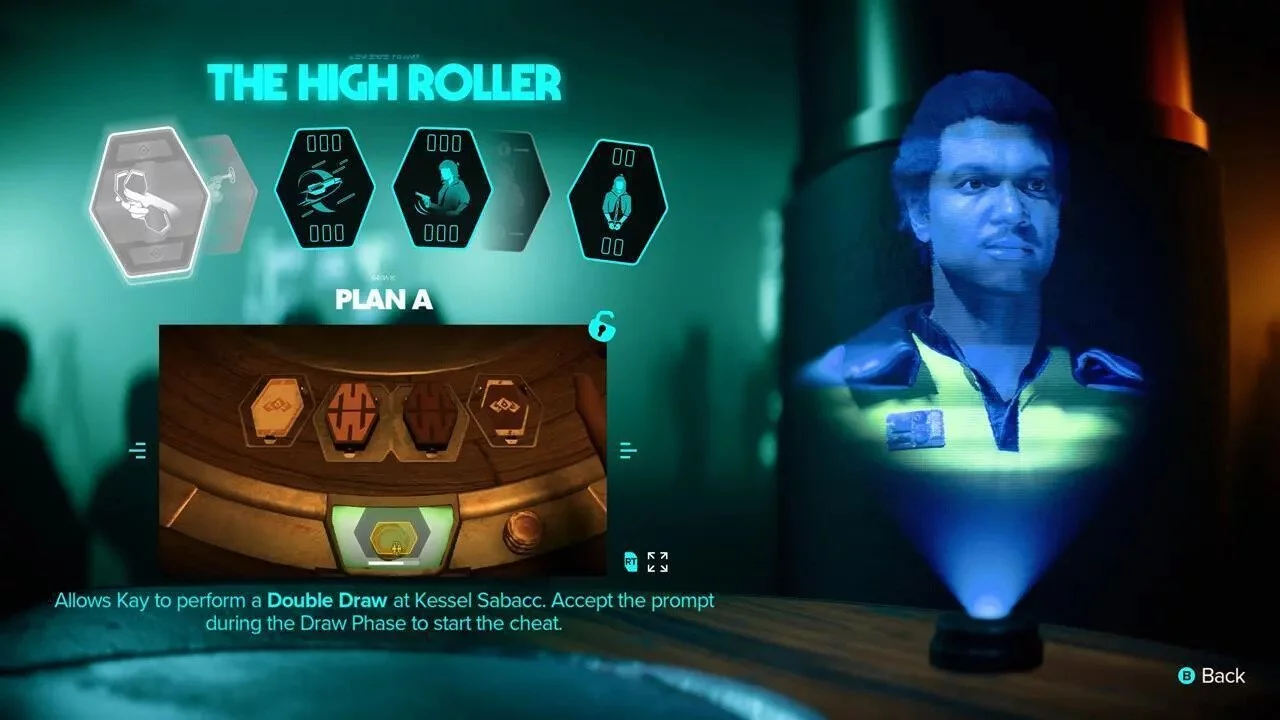
Lando's Abilities and Unlock Conditions
Lando's skills provide useful upgrades both in and out of combat. Here's a list of Lando's abilities and their unlock conditions:
- Plan A: Allows you to draw two cards instead of one in Sabacc. Unlocked by default;
- Plan B: Allows you to use the heavy configuration of the plasma blaster. Unlocked by default;
- Roll Maneuver: Allows you to perform side maneuvers on the Trailblazer. Defeat 10 enemies in space, find 10 containers in space, and dodge five incoming missiles;
- Shoot First: Your first blaster shot at the start of combat deals additional damage. Play Sabacc three times (and win), defeat two high-profile Sabacc players, and eliminate 10 enemies by shooting from the hip;
- Ask Later: For a few seconds after you draw your blaster and shoot from the hip, your shots accumulate a small amount of adrenaline. Details coming soon;
- Just Improvise: After using Fast Talk or making an arrest, enough adrenaline accumulates to perform an Adrenaline Rush attack. Maintain a good or excellent reputation with three syndicates simultaneously and steal from two syndicate vaults.
Quint the Gunslinger's Quest and Abilities
Quint is located on Tatooine, but reaching her is not so simple. Information about the expert The Gunslinger unlocks after you talk to the bartender in the cantina at Mos Eisley. However, if you are following the main storyline that leads you to Mos Eisley, you won't be able to explore the cantina or interact with anyone inside until you complete a long quest.
In any case, follow the information to the Hutt outpost located west of Wayfar. You need to find a datapad inside a small building outside the outpost itself. If your reputation with the Hutt is poor and you get caught, about two dozen enemies will rush at you. If your reputation is good or better, you can simply enter the building and take the datapad. It will lead you back to Quint in Wayfar, after which her quest will begin.

Details of Quint's Quest
Quint's quest is short and straightforward. Her former Hutt friends are out for revenge, and you and Quint will need to secure the town. You'll have to fight off three waves of Hutt fighters and then their leader. You can quickly deal with them using Adrenaline Rush attacks and the Power Blaster module from Kai.
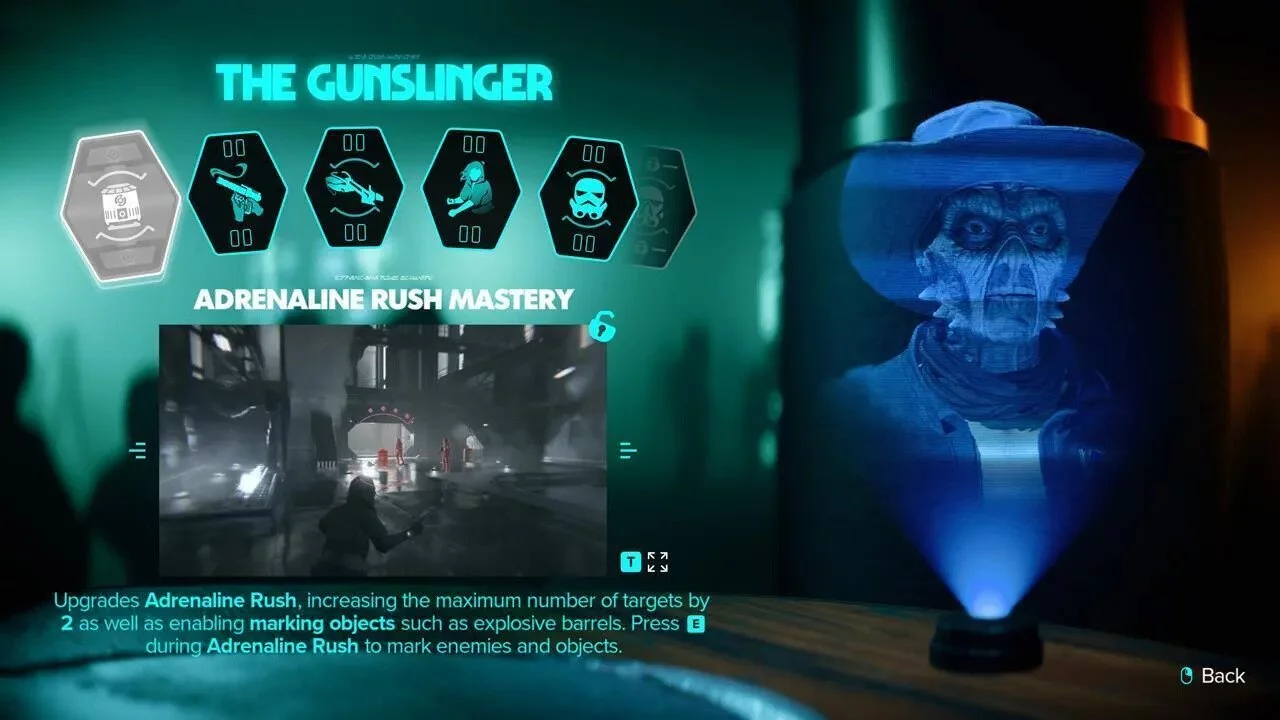
Quint's Abilities and Unlock Conditions
Quint's skills focus on blaster shooting agility, which matches her reputation as a sharpshooter. While they are not mandatory, they certainly make crowd control easier.
Here's a list of Quint's abilities and their unlock conditions:
- Adrenaline Rush Mastery: Allows you to target two additional enemies with the Adrenaline Rush ability. Unlocked by default;
- Powered Recharge: You gain a bit of adrenaline when performing Perfect Cooling on an overheated blaster (if you have this blaster upgrade). Pick three locks without errors and defeat 12 enemies using your blaster's power module;
- Speeder Shot: Automatically targets enemies sitting on speeders with Adrenaline Rush when you're piloting a speeder. Win three speeder races and make five headshots on enemies on speeders;
- Resilient: Your health increases by one additional bar. Defeat 10 Imperial soldiers while under a level three or higher wanted status (all 10 kills must occur before you lower or remove your wanted status);
- The More: Allows you to target one additional enemy with Adrenaline Rush. Defeat four enemies with one Adrenaline Rush three times;
- The Merrier: Allows you to shoot elite enemies twice with Adrenaline Rush, ensuring a kill. Unlock The More, then defeat three Deathtroopers at once and eliminate six enemies with one Adrenaline Rush attack.
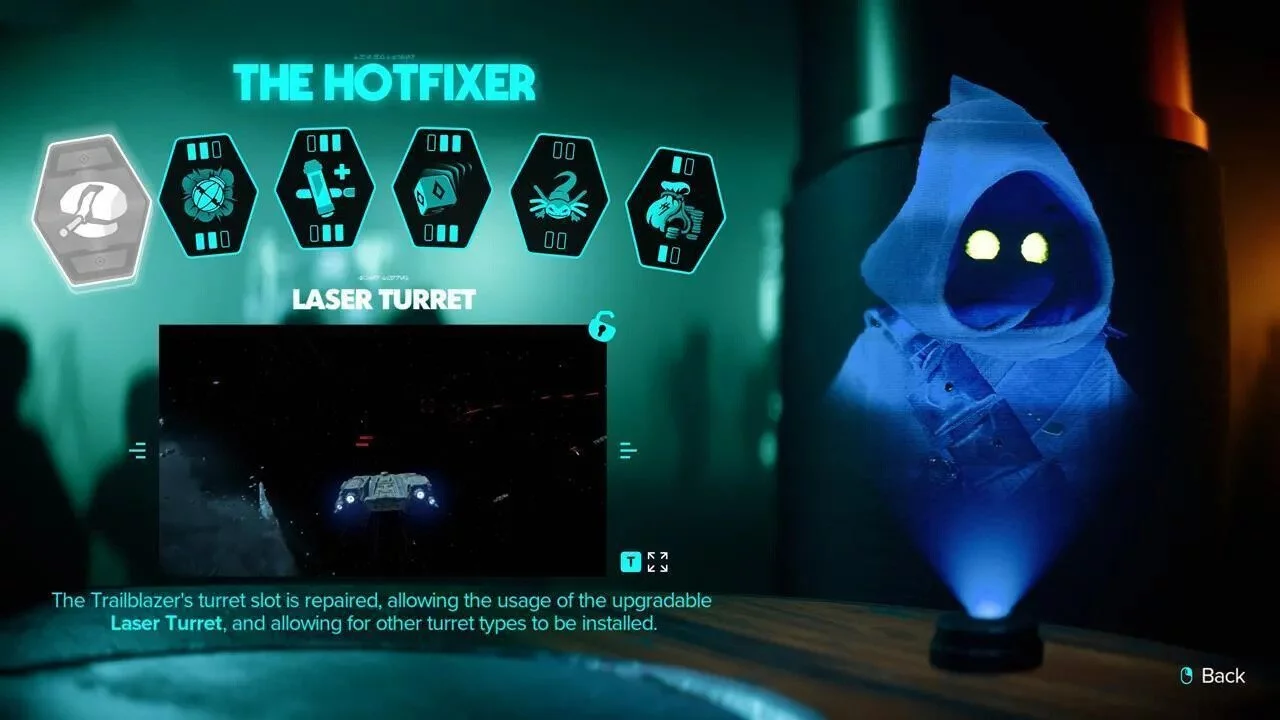
Tika the Repairman's Quest and Abilities
Tika, a Jawa shipwright, lives on Tatooine, and her initial quest chain Buying a Turret becomes available after meeting Hoss in the Mos Eisley cantina. However, you can only follow her after completing the main quest.
Once you can freely explore Tatooine again, follow the information to Bestine by talking to the person repairing their speeder at the town's junkyard. Find the information in the Southern Jundland Wastes, avoiding Imperials along the way, and eventually, you'll find Tika at her Sandcrawler.
Details of Tika's Quest
Tika has an unpleasant request, during which you'll need to defeat several bandits, enter a cave, and retrieve an item. Upon exiting the cave, new bandits will appear, so your next task will be to catch the thief. Find his hideout, defeat him and all the enemies that attack you, retrieve the item, and return it to Tika. This battle will go faster if you have Quint's basic skill. If not, use any heavy weapon you find to deal with the enemies more quickly.
Tika's Abilities and Unlock Conditions
Tika's skills are diverse and include one key ability for playing Sabacc and one that reduces prices at merchants.
Here's a list of Tika's abilities and their unlock conditions:
- Laser Turret: Allows you to upgrade or replace the Trailblazer laser turret. Unlocked by default;
- Improved Grenade: Your grenades deal 50 percent more damage and have a 50 percent larger blast radius. Collect 20 durasteel, 1 compact detonite, and 6 battery accelerators;
- Enhanced Bacta Injector: Instantly restores more health with Bacta vials. Collect 6 gelicyl gears, 1 ejector injector, and 15 clear steel;
- Magnetic Dice: Allows you to manipulate the dice roll when playing the Imposter card during a game of Sabacc. Collect 6 direct energy coils, 1 LC3-skeeter, and 15 silver iron;
- Cheeky Explosion: Nyx can make an enemy's grenade explode. Feed Nyx three different dishes and have him steal three times;
- M'Gasha: Merchants sell items 10 percent cheaper and pay 10 percent more for valuable items. Find five Jawa merchants and achieve favorite customer status with three merchants.
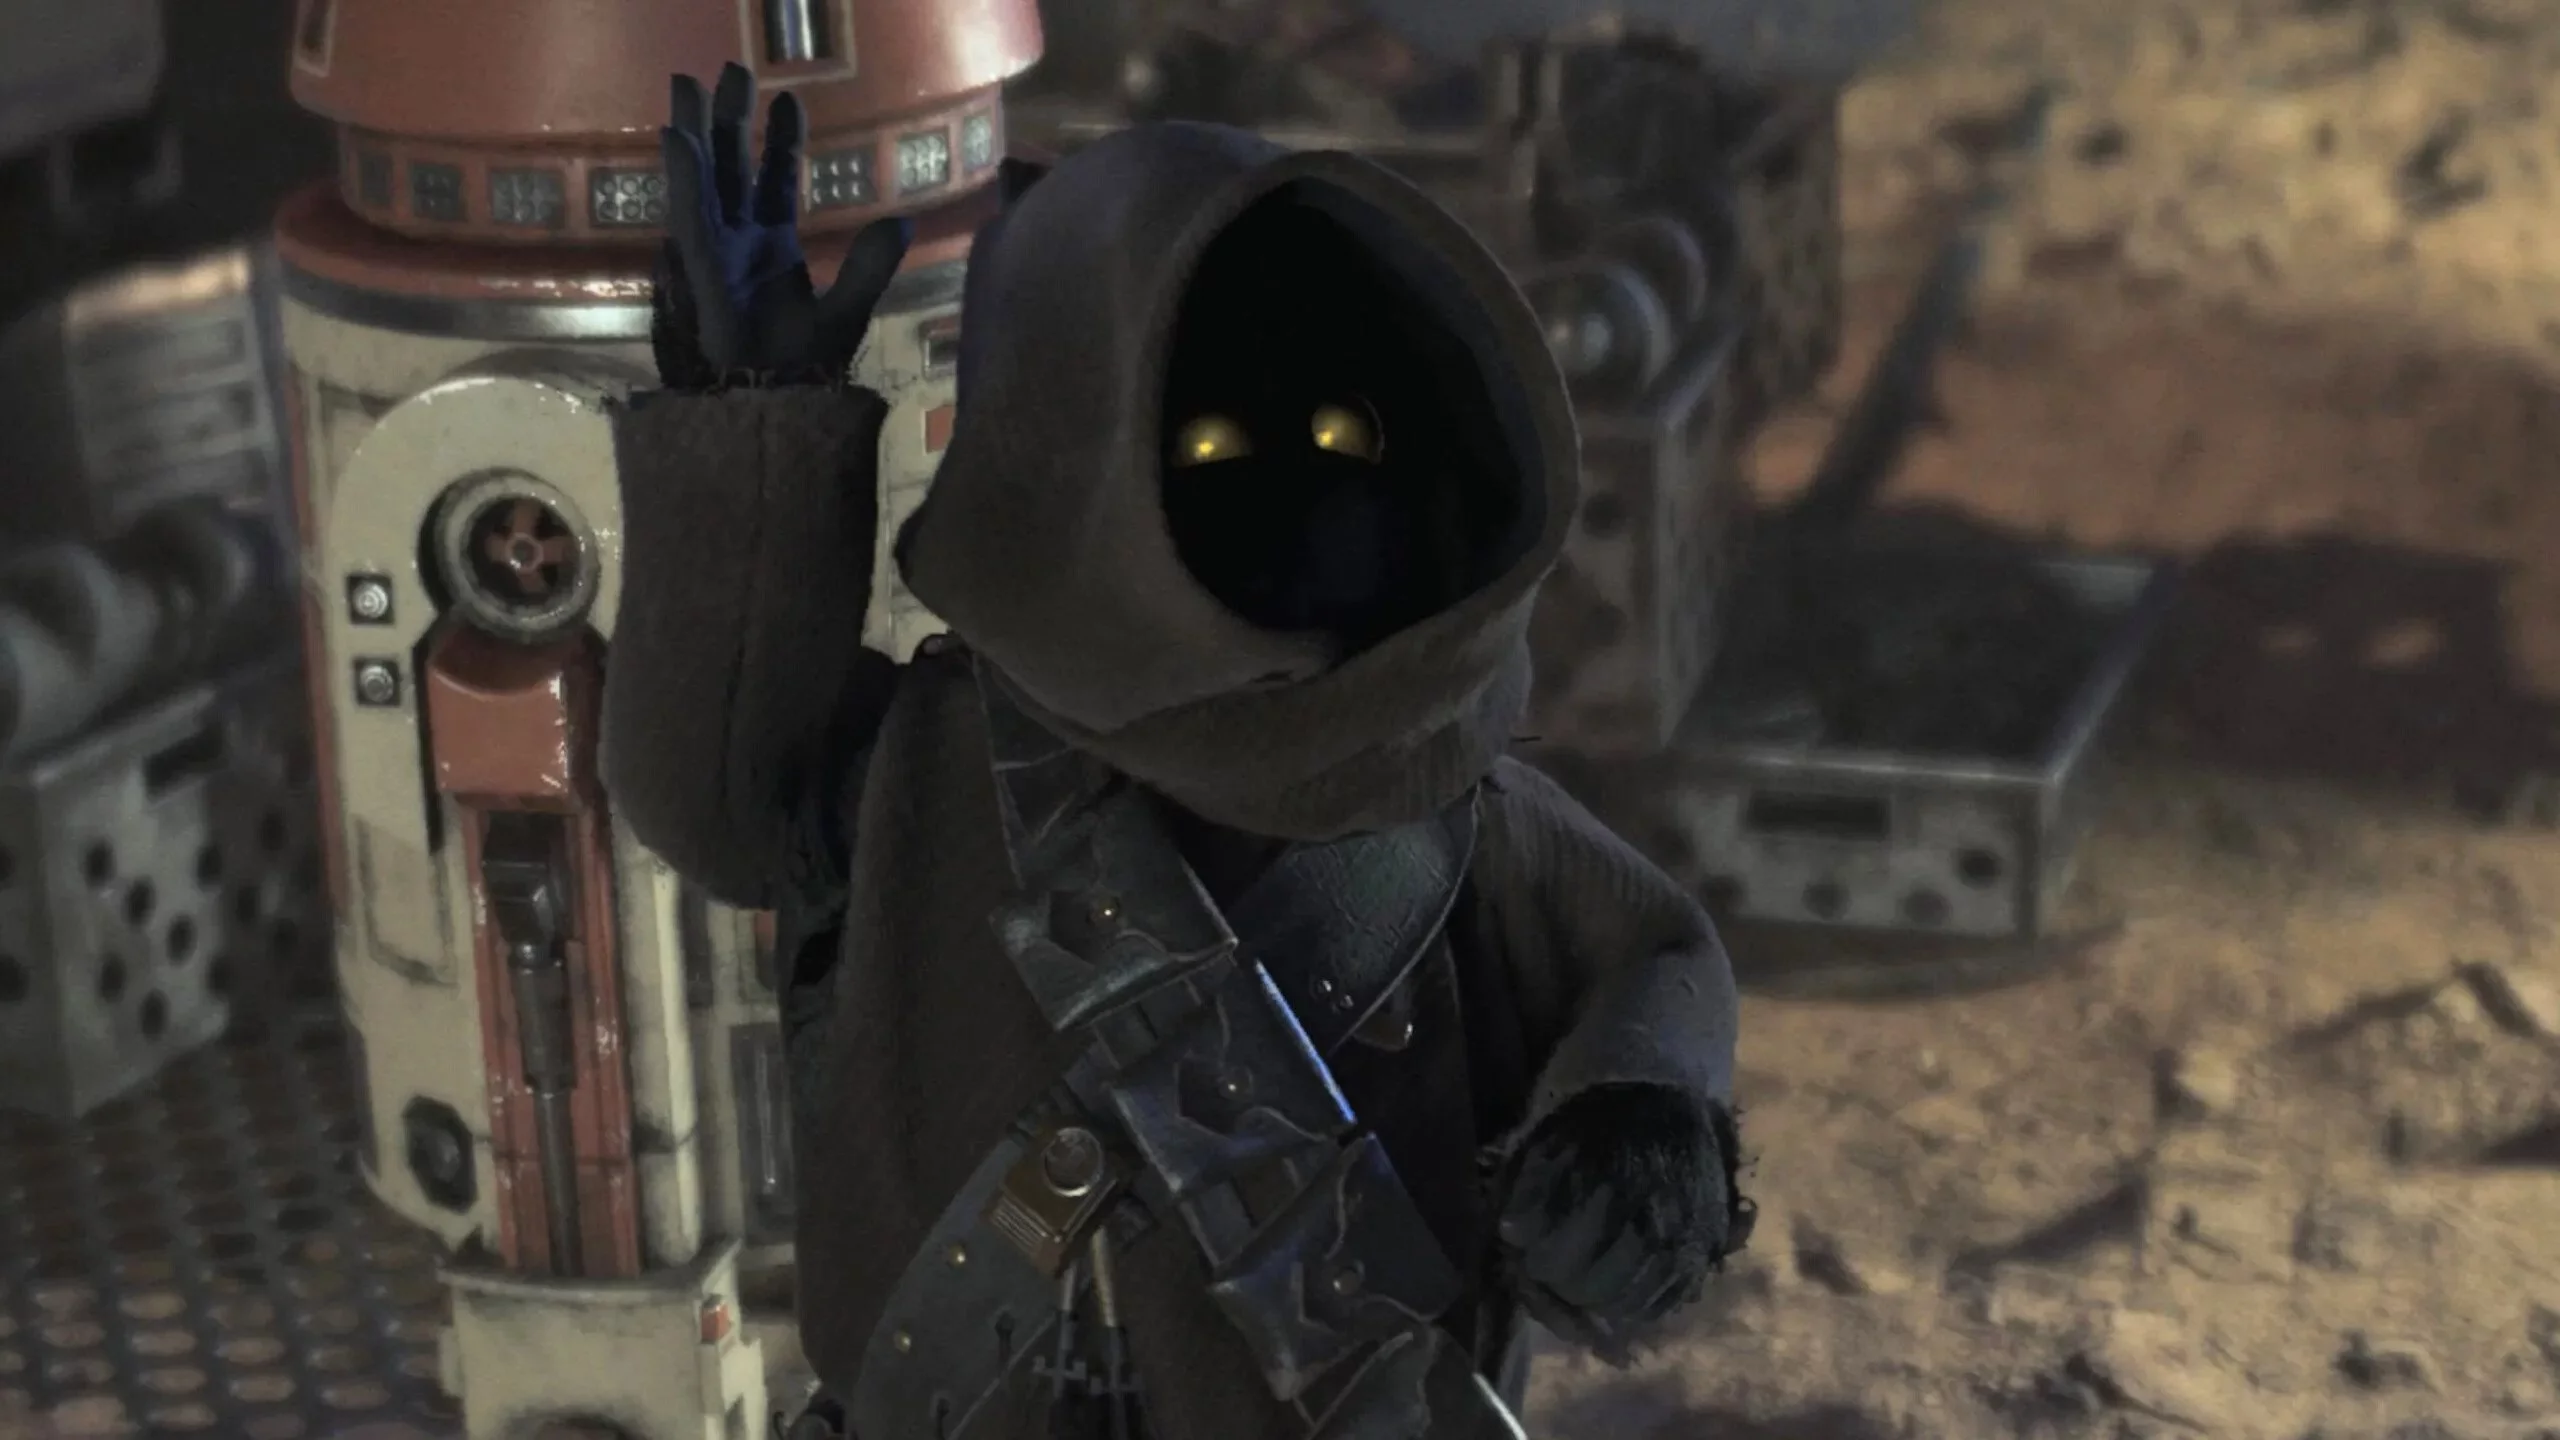
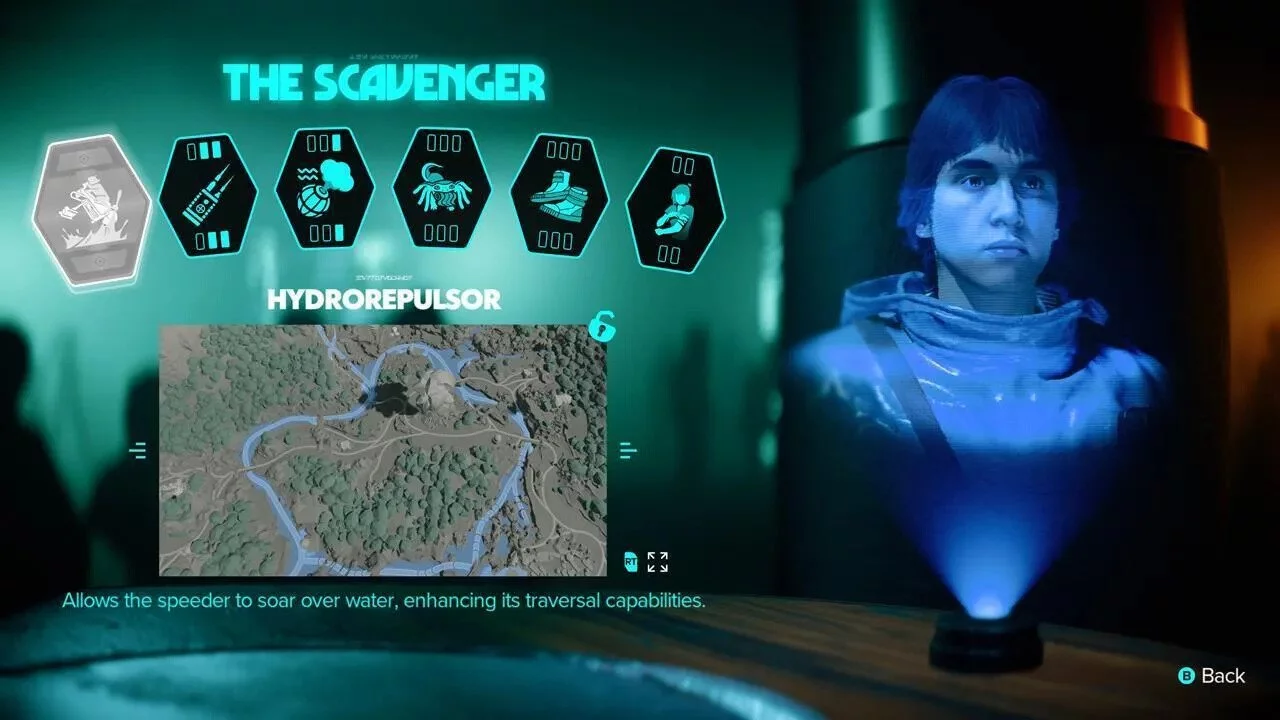
Quest and Abilities of Timin the Scavenger
Timin is tied to the main story on Akiva, and you can find him only after contacting Gedik and exiting the Imperial complex. Information about The Scavenger should appear after leaving the area, but if it doesn't, fast traveling back to the city of Myrra might solve the issue. This information will direct you to the village of Sashin, now easier to reach thanks to a new fast travel point, and point to Timin's aunt.
Timin went scavenging some time ago but hasn't returned, so you'll need to find him. Follow the information to a remote estate where you'll face Hutt mercenaries who have captured Timin. If you start the fight openly instead of using a stealth attack, you'll lose some reputation with the Hutts. Talk to Timin after the skirmish to start his quest.
Details of Timin's Quest
Timin wants you to retrieve some durasteel rods so he can properly install the hydropulsator on your speeder. The Pykes took them to an island outpost, and the hydropulsator still has enough power for you to get there and find them. You might want to unlock Selo's speeder jump before this, as it will make navigating the islands easier. The Pykes will leave after you find the stash and move the rods to another post. Follow the information there, then defeat the Pyke mercenaries guarding the goods. Despite the open fight with them, it seems this task won't lower your reputation with the Pykes. Return to Timin to complete the job.

Timin's Abilities and Unlock Conditions
Timin's default ability allows you to move on water, and he also provides you with an Electro-Shock Prod, which allows you to quickly take down elite enemies.
Here's a list of Timin's abilities and their unlock conditions:
- Hydrorepulsor: Allows you to ride a speeder over deep waters. Unlocked by default;
- Electro-Shock Prod: Allows you to perform stealth takedowns on elite enemies. Collect five ion cells, 15 chalcopyrite, and one NL-02 charging emitter;
- Ion Smoke Bomb: Your smoke bomb deals damage to droids and disrupts electronic equipment. Unlock the Smoke Bomb (from Selo), then collect 10 ray-accelerators, 25 durasteel, and 1 flux-compressor;
- Assisted Scavenging: Nyx can find additional loot when opening containers. Complete five merchant requests, find four smuggler caches, and collect 2,500 credits;
- Scavenger's Footwear: You move faster while crouching. Collect 15 jarwal fabrics, 30 courswave, and 1 susurra fabric;
- Survivor: Your health increases by one additional bar. Defeat three Death Troopers in one battle and find a stranded merchant on Akiva.
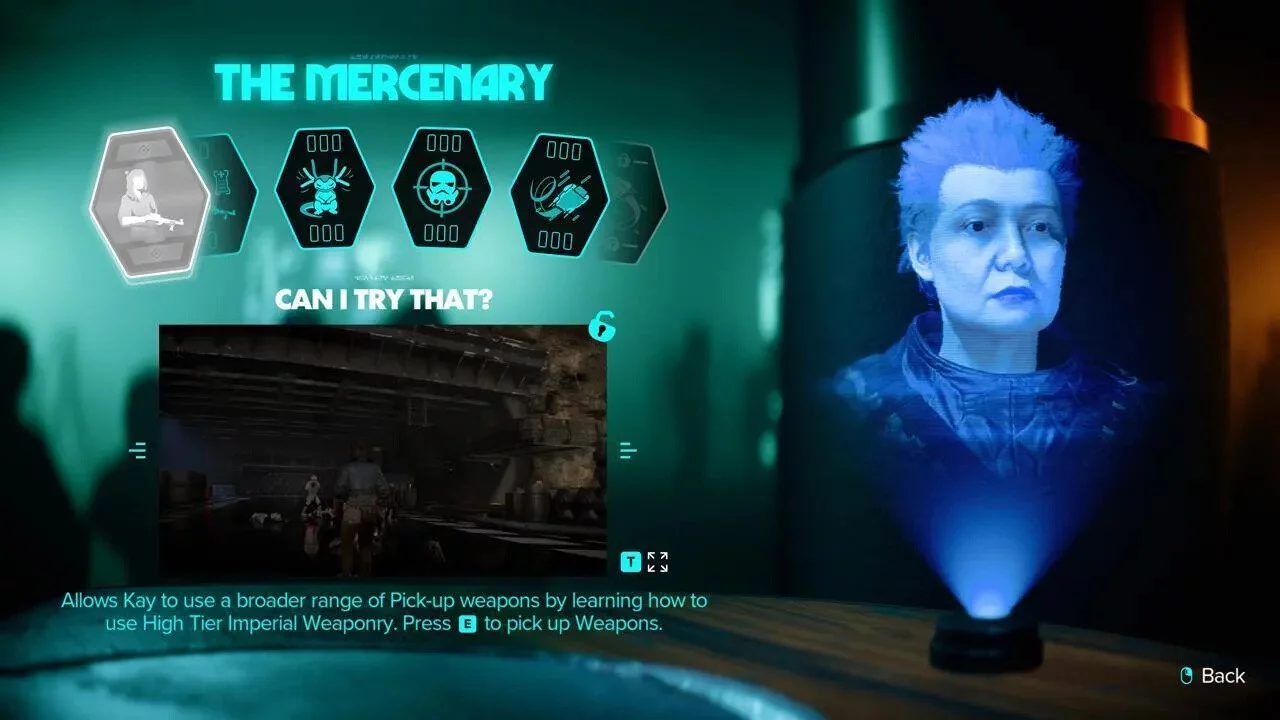
Quest and Abilities of Rooster the Mercenary
Information about Rooster appears on the map as soon as you arrive at Kijimi. Head to the Domak Refectory in the northwest part of the city and talk to the bartender. If this is your first visit, the bartender might tell you about Gedik as part of the main mission; you may need to leave and return to be able to talk to him again. The bartender will direct you to Rooster, who is sitting at a table in the corner, and mention a transmitter and some lost weapons floating in the Kijimi asteroid belt.
Details of Rooster's Quest
Return to the Trailblazer and enter the orbit of Kijimi, the marker on the map will direct you to the western part of Kijimi space, where you will need to search for a container in a vast open area. The container's location is completely random. Once you get close, a marker will appear on the map, indicating the correct direction.
Follow Rooster to the Northern Wastes of Jundland on Tatooine, which can be reached faster and safer if you have already unlocked the fast travel point at Tika's Sandcrawler. Find Rooster, fend off waves of stormtroopers, and talk to Rooster again. If she remains in combat mode after the first time, leave the quest area. Resetting the area after 10 seconds should convince Rooster that the danger has passed.
Rooster's Abilities List and Unlock Requirements
Rooster has a diverse set of skills, including an increased detection radius for Nyx and several abilities for the Trailblazer.
- Can I Try That?: You can use advanced Imperial weapon pickups, such as the minigun from Rooster's quest. Unlocked by default;
- I Like This Thing: All weapon pickups have 25% more ammo. Defeat five enemies using different types of weapons, excluding your blaster;
- Feelers Out: Doubles Nyx's detection and movement radius. Complete a thief contract without being noticed; have Nyx fetch a Bacta medkit, grenade, and weapon; and make Nyx jealous by petting animals that are not Nyx;
- Sharpshooting: You get a significant adrenaline bonus after a precise headshot. Defeat eight enemies with a sniper rifle, complete a guard contract, and make 15 headshots;
- Loop Maneuver: You can perform a 180-degree turn on the Trailblazer. Defeat six TIE Interceptors and 12 enemy ships of any faction, and complete a space smuggler contract;
- Top Roll Maneuver: You can perform a 360-degree turn, allowing the Trailblazer to get behind the current pursuer. Details will be added soon.
MT-7 Veteran Quest and Abilities
Finding MT-7 can be done by tracking encrypted transmissions in space, which are found in silver or yellow containers floating in the void. There are plenty of containers to open and space to explore, but the transmission data does not provide quest markers.
Veteran intel and the quest were unlocked after finding three transmissions and completing the first part of the Droidsmith quest on Akiva. The locations of the transmissions and the required number may be random.
Regardless, ND-5 activates when you find enough transmissions and directs you to a hidden landing pad on Akiva. The pad is not accessible on foot or by speeder at this point, but you can open the surface map and quickly reach it by ship. Talk to MT-7 to start the quest.
MT-7 Quest Details
Kay and ND-5 decide to help MT-7 complete their final mission, which will take you through the jungle and back into orbit. Climb the rock wall on the second level to access a locked room and use Kay's ion cannon to restore power. Follow the quest marker to Sashin and then north through the jungle until you find another datapad that directs you back into space. Jump into the Trailblazer, find the separatist satellite, and destroy five jammers blocking it. If you have trouble finding all the jammers, look for gaps in the debris that the Trailblazer can fly through. You will likely face two waves of pirate ships, so it's recommended to install Tika's turret. Return to MT-7 to complete the quest and unlock their skills.
MT-7 Abilities and Unlock Conditions
While MT-7 may specialize in combat, their skills are more related to survival — such as increasing health and reducing cooldown times.
- Decryption Module: You can decrypt and listen to separatist transmissions and datadisks. Unlocked by default;
- Improvise: Your health increases by one additional bar. Find three shelters and defeat five enemies using environmental hazards (e.g., explosions);
- Adapt: You instantly recover one additional health when using a bacta flask. Unlock Improvise, then collect one J8 terrain sensor, nine transparisteels, and three ion elements;
- Overcome: You recover health faster after taking damage from an explosion. Unlock Adapt, then complete a level 6 event by defeating a squad of Death Troopers in their camp, and destroy three enemies with one explosion;
- Nix Commando: After Nix attacks an enemy, he can attack another nearby enemy at his discretion. Make Nix happy six times and defeat 10 enemies while Nix distracts them;
- Slice Kit Upgrade: You get an additional charge for your slicing kit. Collect one AF-2 key, 30 chalcopyrites, and 15 4XB calculation blocks.
Other guides
- Best Upgrades in Star Wars Outlaws — For Ship, Blaster, and Speeder
- Guide to Stealth in Star Wars Outlaws: How to Simplify Stealth
- Leitfaden für Stealth in Star Wars Outlaws: Wie man Stealth vereinfacht
- Star Wars: The Acolyte nach der ersten Staffel abgesetzt
- Die Schöpfer von Star Wars Outlaws zeigten Spielwelten und Grafiken der PC-Version