How to Remove Windows 10/11 Updates

Sometimes, after installing a new operating system update, bugs and errors may occur that can seriously affect device performance. If the problem arises with the new version, you can remove it and revert to a more stable version. In this guide, we will explain how to remove the latest Windows 10 and 11 updates in various ways.
How to Remove Updates via Windows Settings
The simplest way is to use Windows settings. Currently, update removal is available in all versions of the operating systems.
For Windows 10
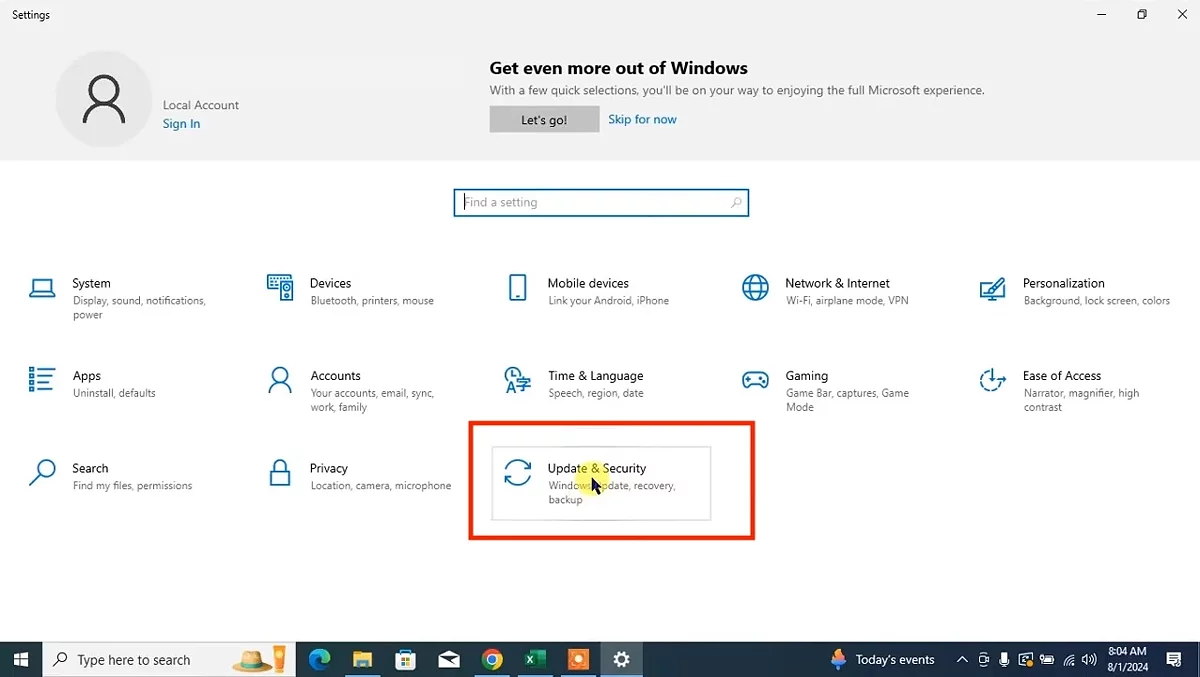
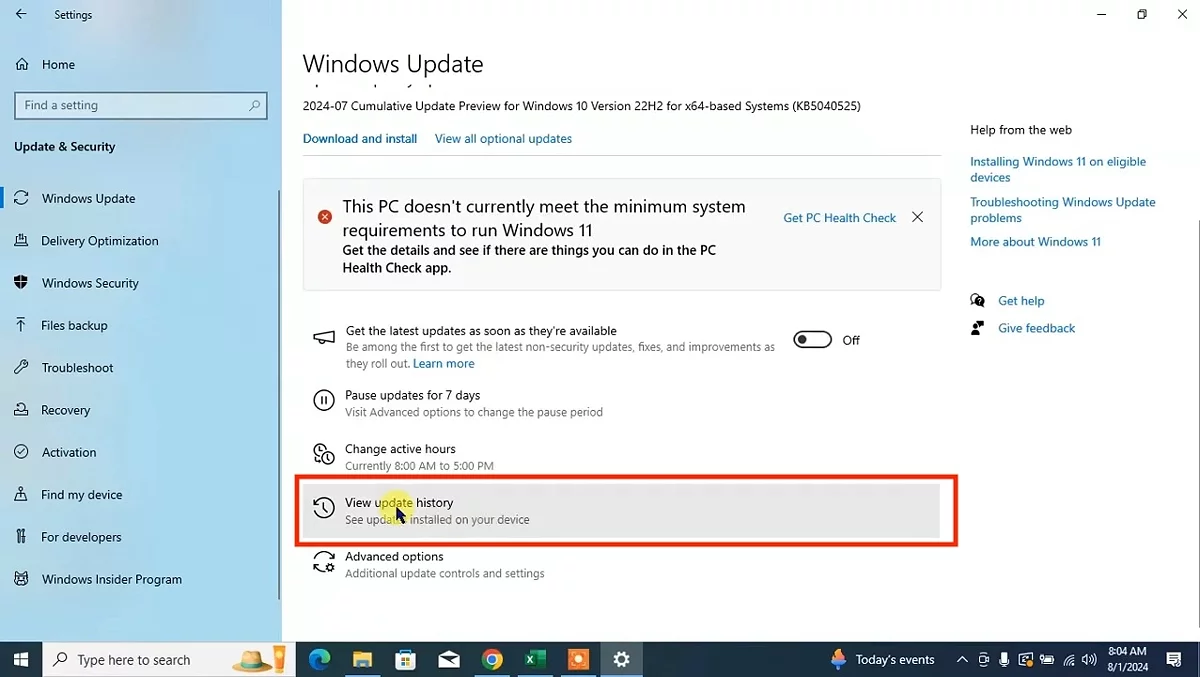
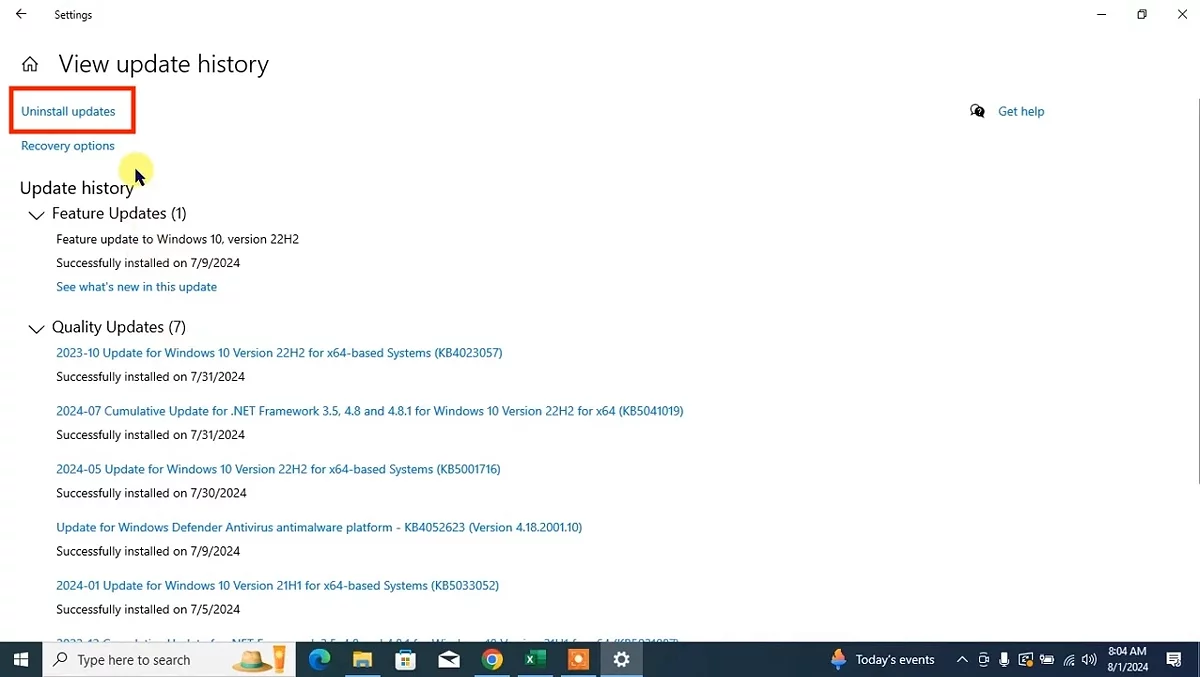
In Windows 10, open Settings and go to the "Update & Security" tab. Then select the "Windows Update" section, which is the first in the list on the left. Next, open the "Update history" by clicking on the corresponding label. It may be located either under the button for checking a new version or at the bottom of the page. In the opened tab, select the topmost option.
For Windows 11
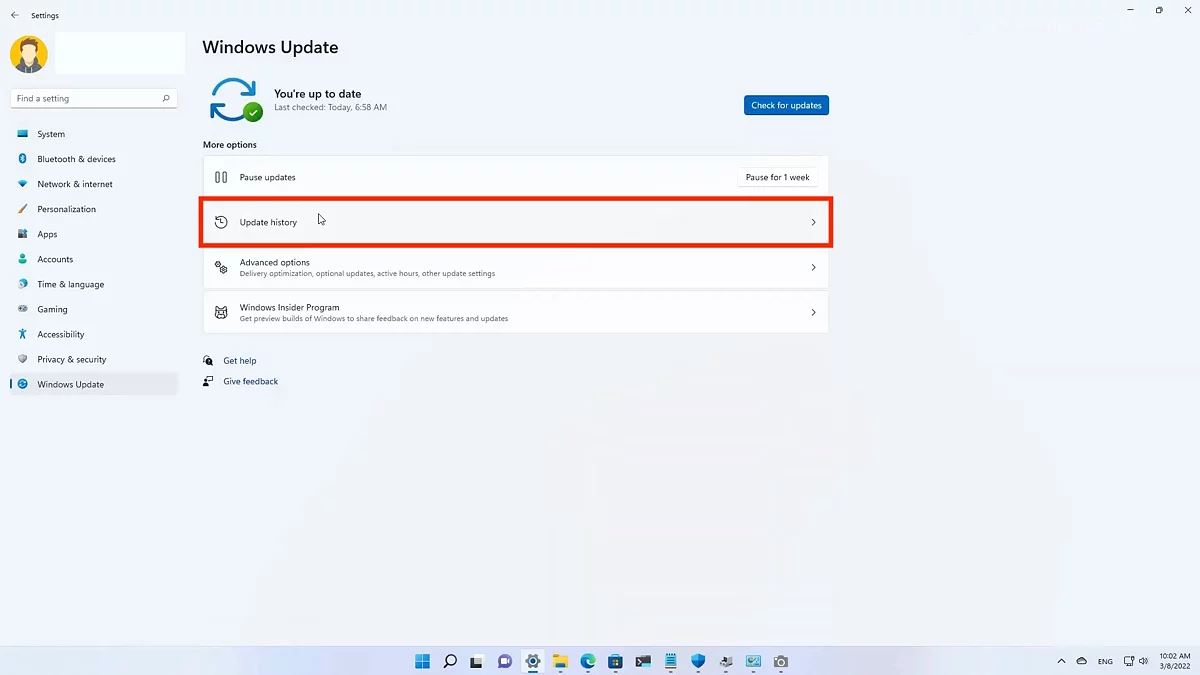
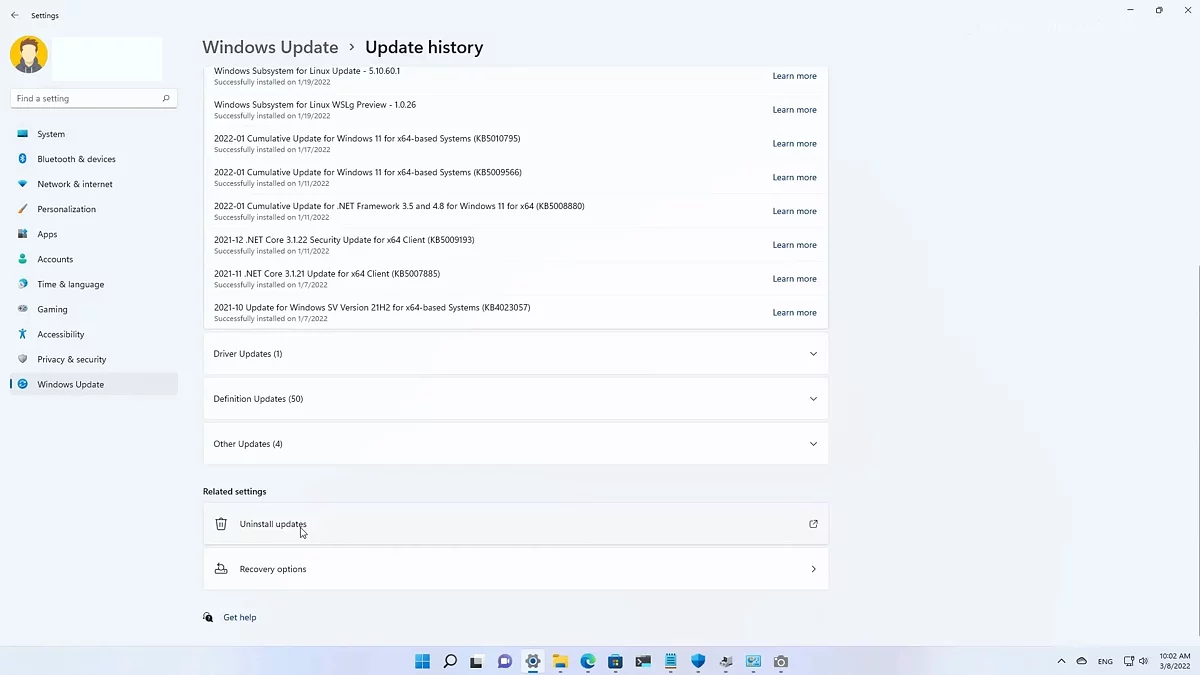
If you are using Windows 11, the procedure is slightly simpler. You need to open the "Windows Update" menu and scroll down to the corresponding section.
Select "Uninstall updates". The opened menu will list various versions. Highlight the one you need in the list and initiate the removal process.
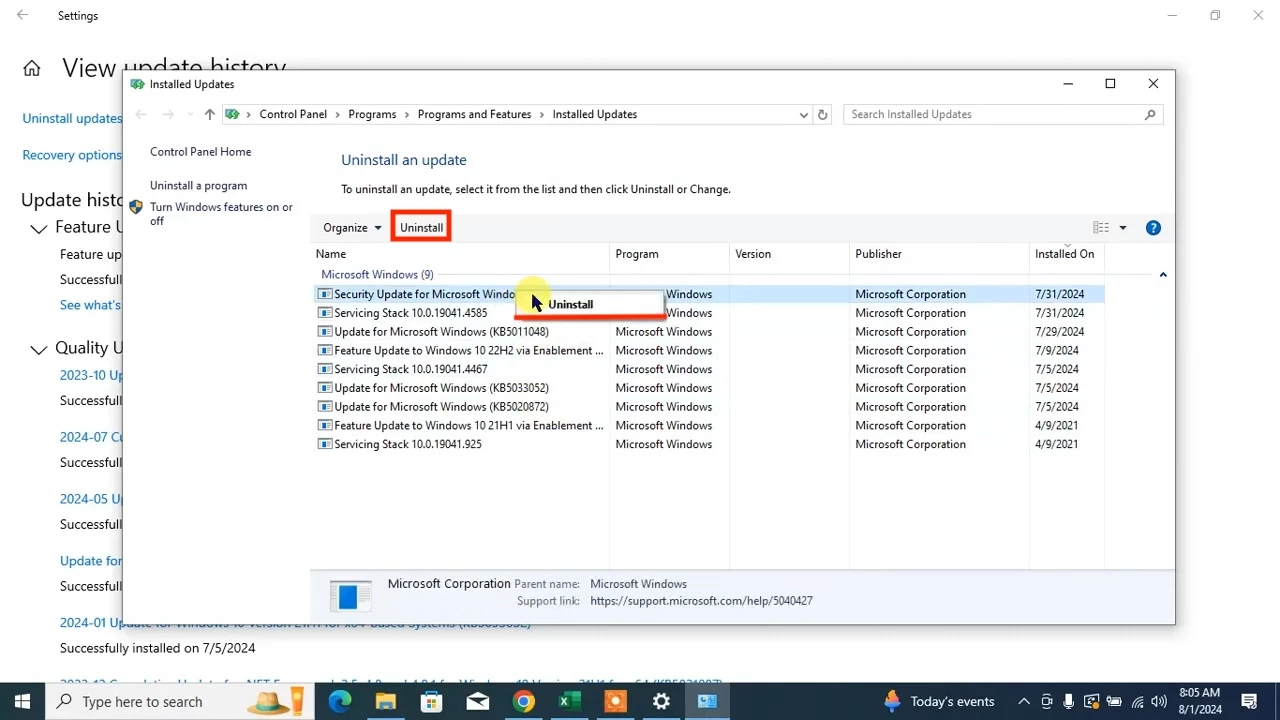
Through Control Panel
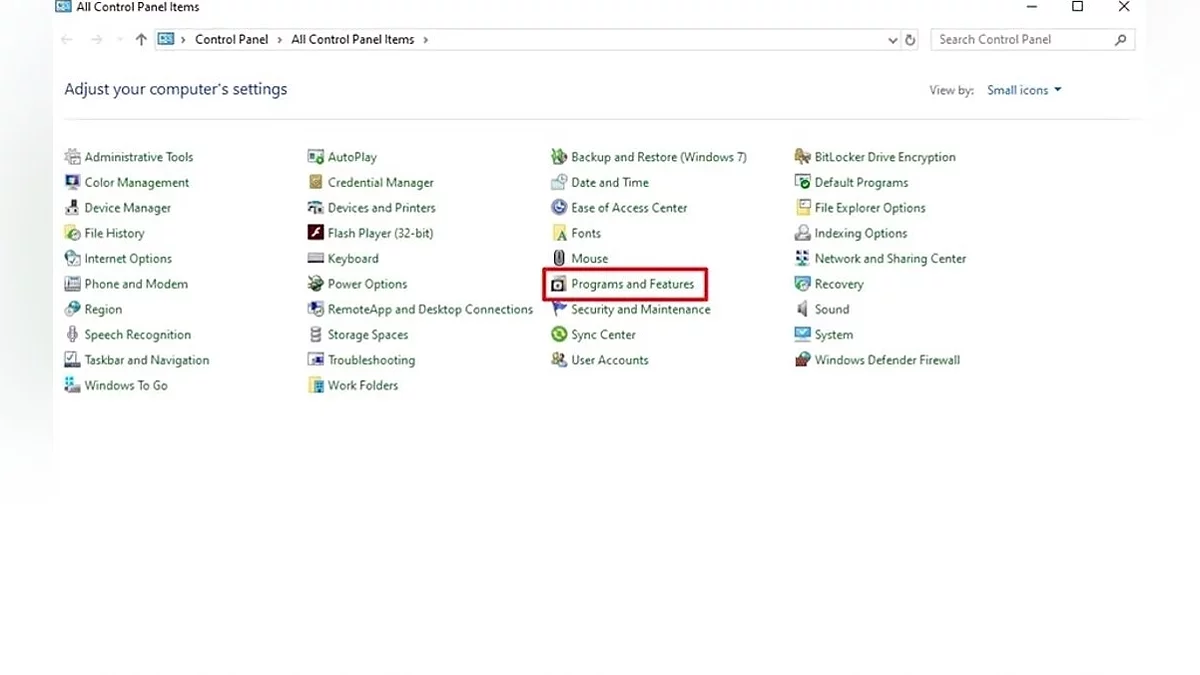
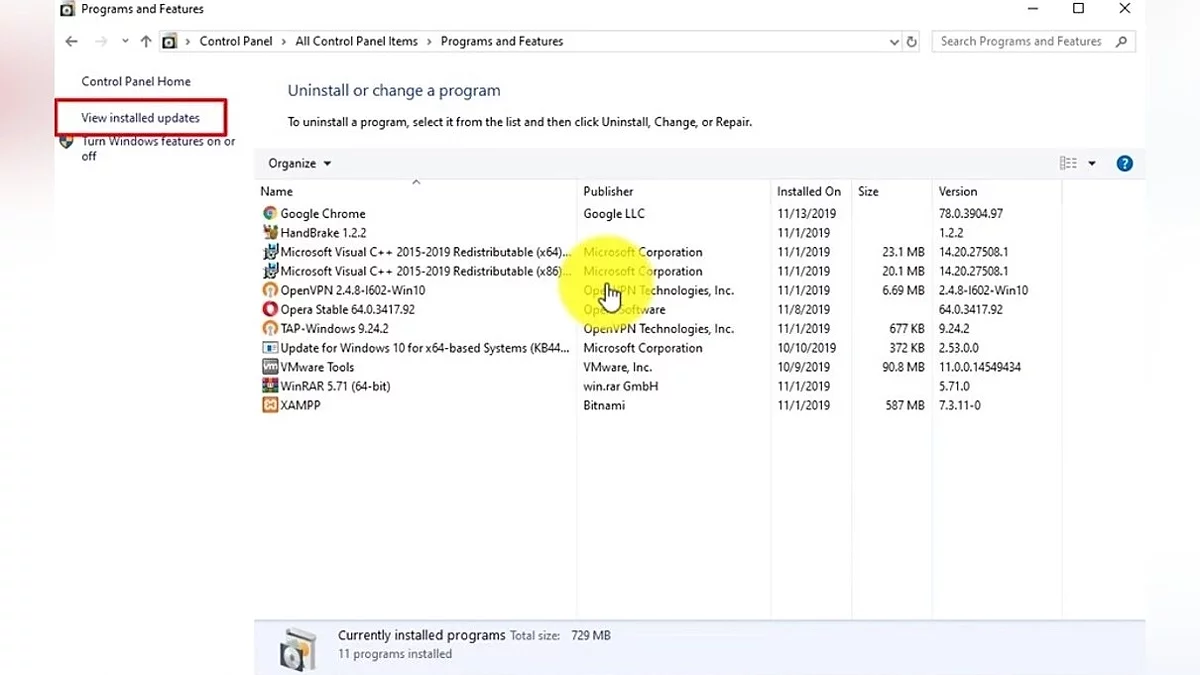
This method almost completely repeats the actions of the previous one, but through the "Control Panel" application. Open the "Programs and Features" section, where viewing installed versions is available in the left menu.
Using Command Prompt (wusa)
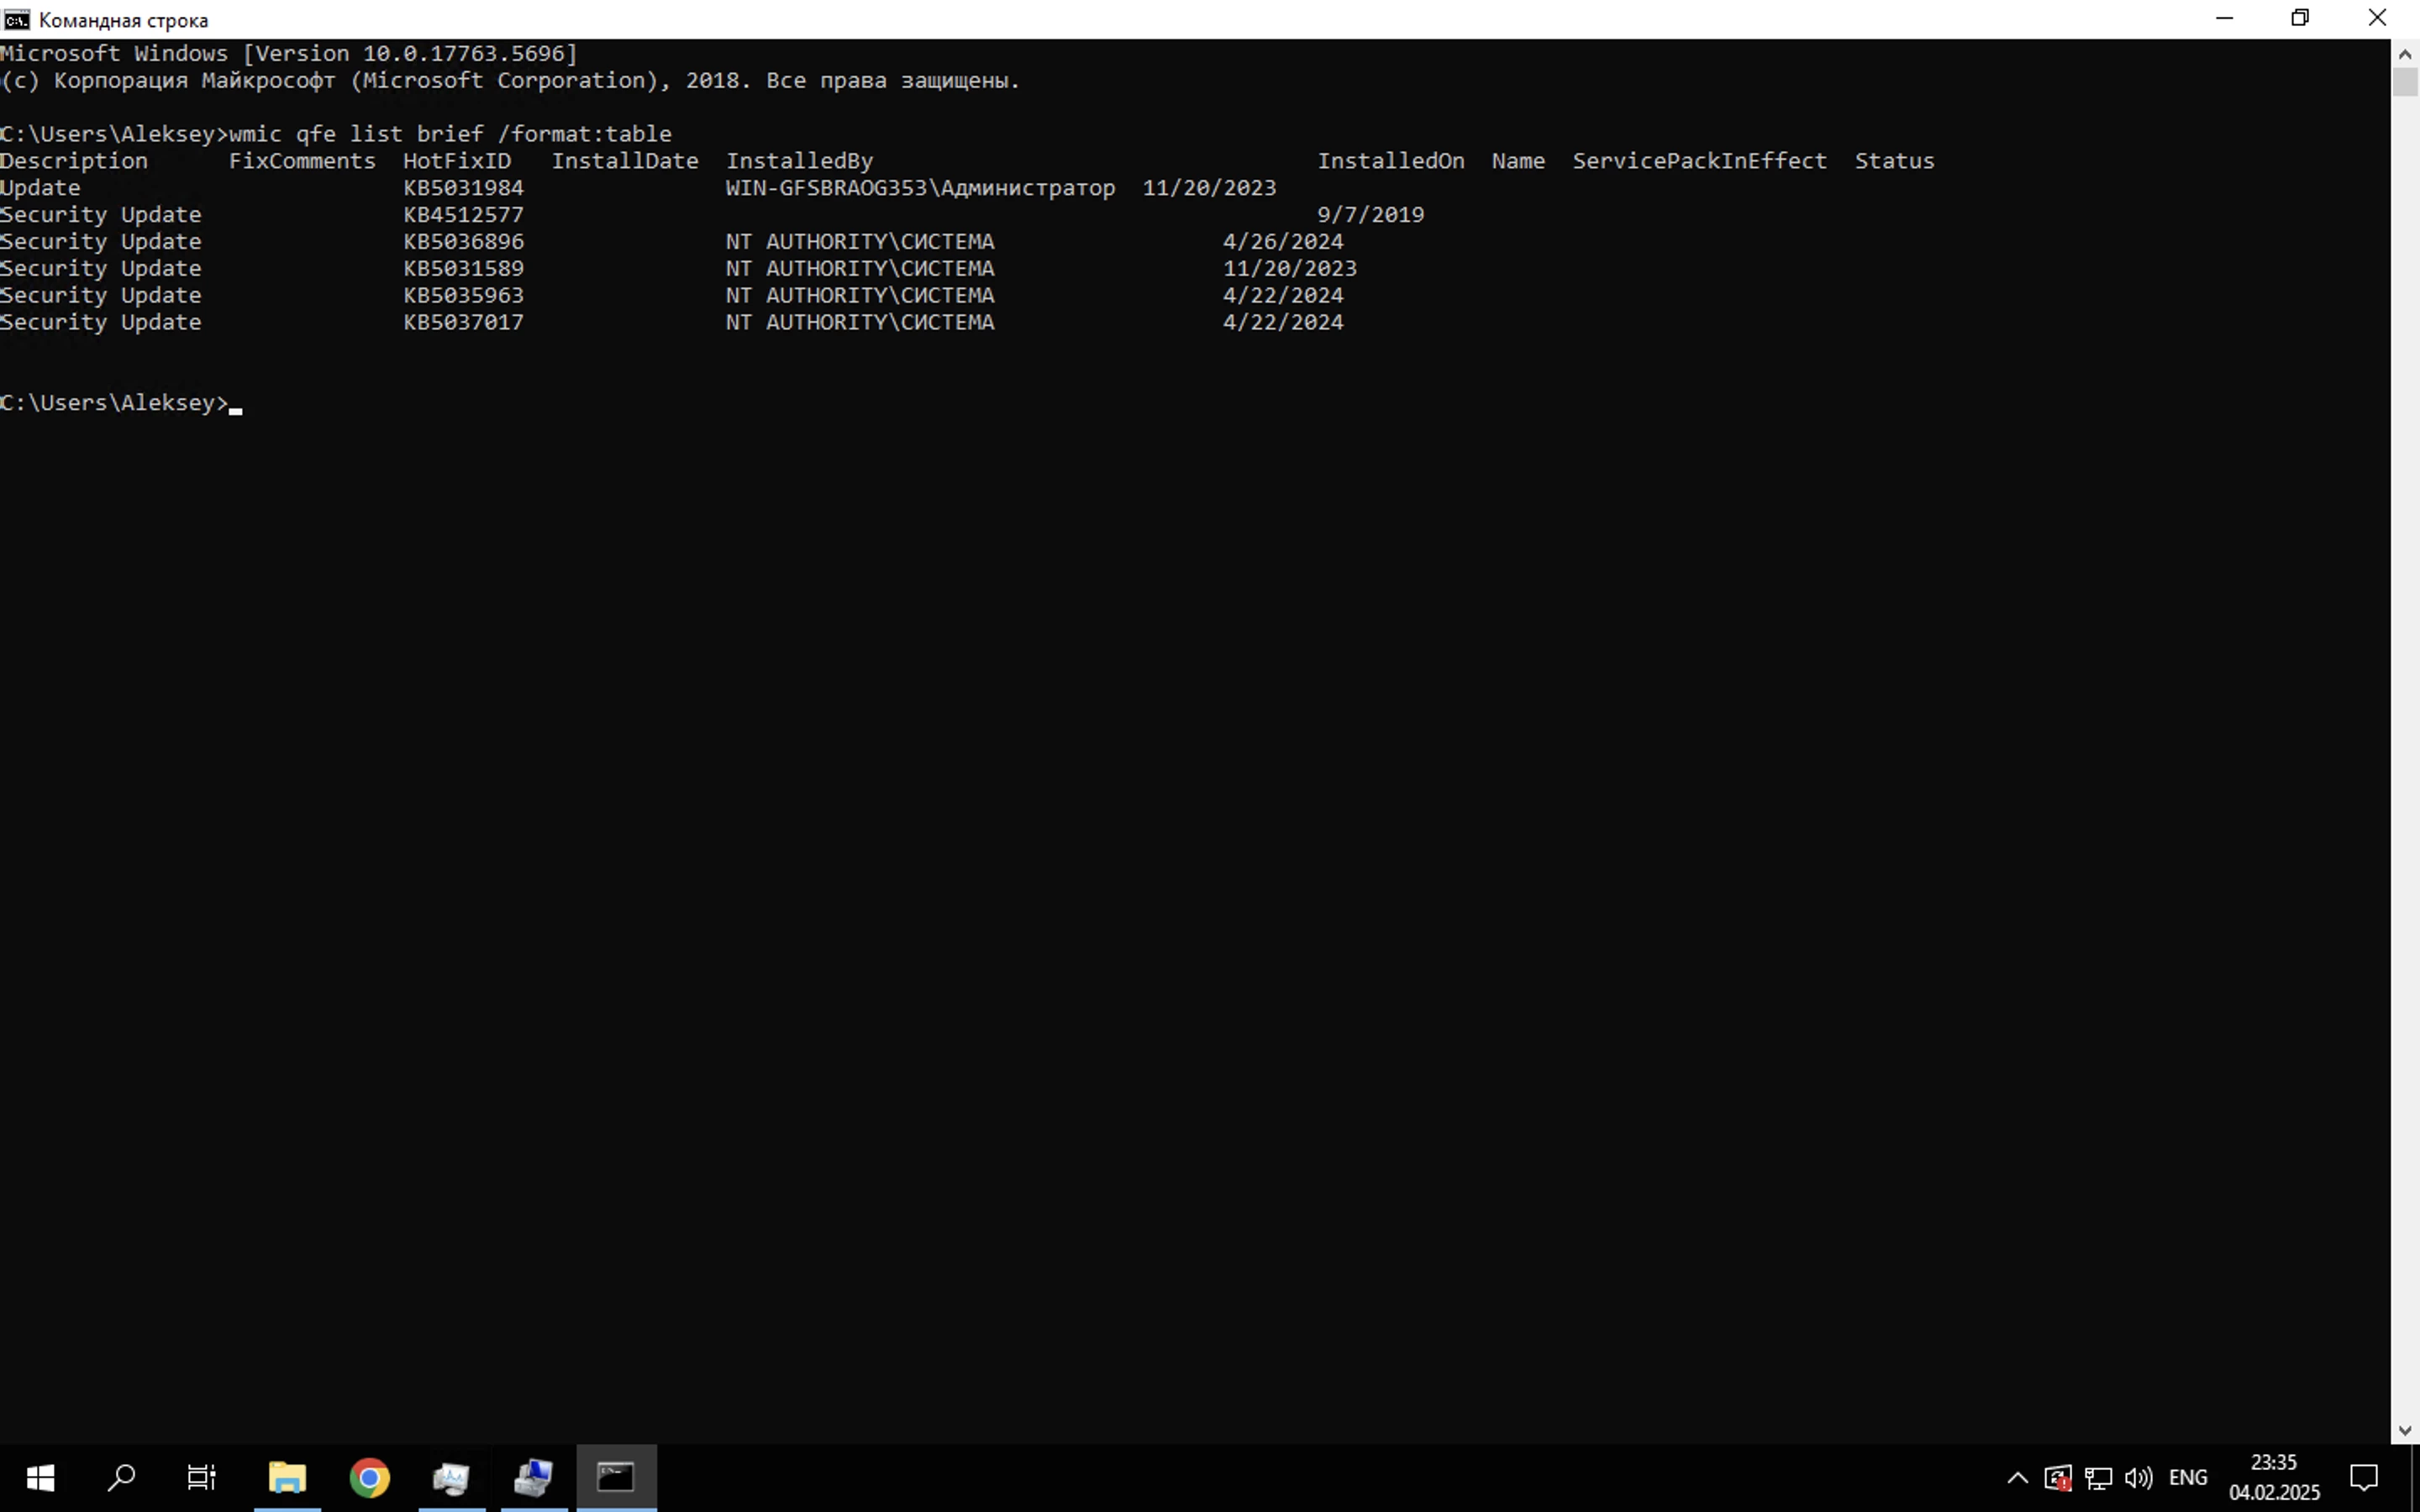
Run Command Prompt as an administrator and enter the command wmic qfe list brief /format:table. This will allow you to see a list of all loaded operating system updates with their serial numbers. To remove a specific update, use the command wusa /uninstall /kb:, adding the numerical part of the serial number after the colon. Confirm your actions in the system messages, and the computer will start the removal process. If you want to avoid displaying system information, add the parameter /quiet at the end of the command after the numerical value, for example: wusa /uninstall /kb:38392744 /quiet.
Using Command Prompt (dism)
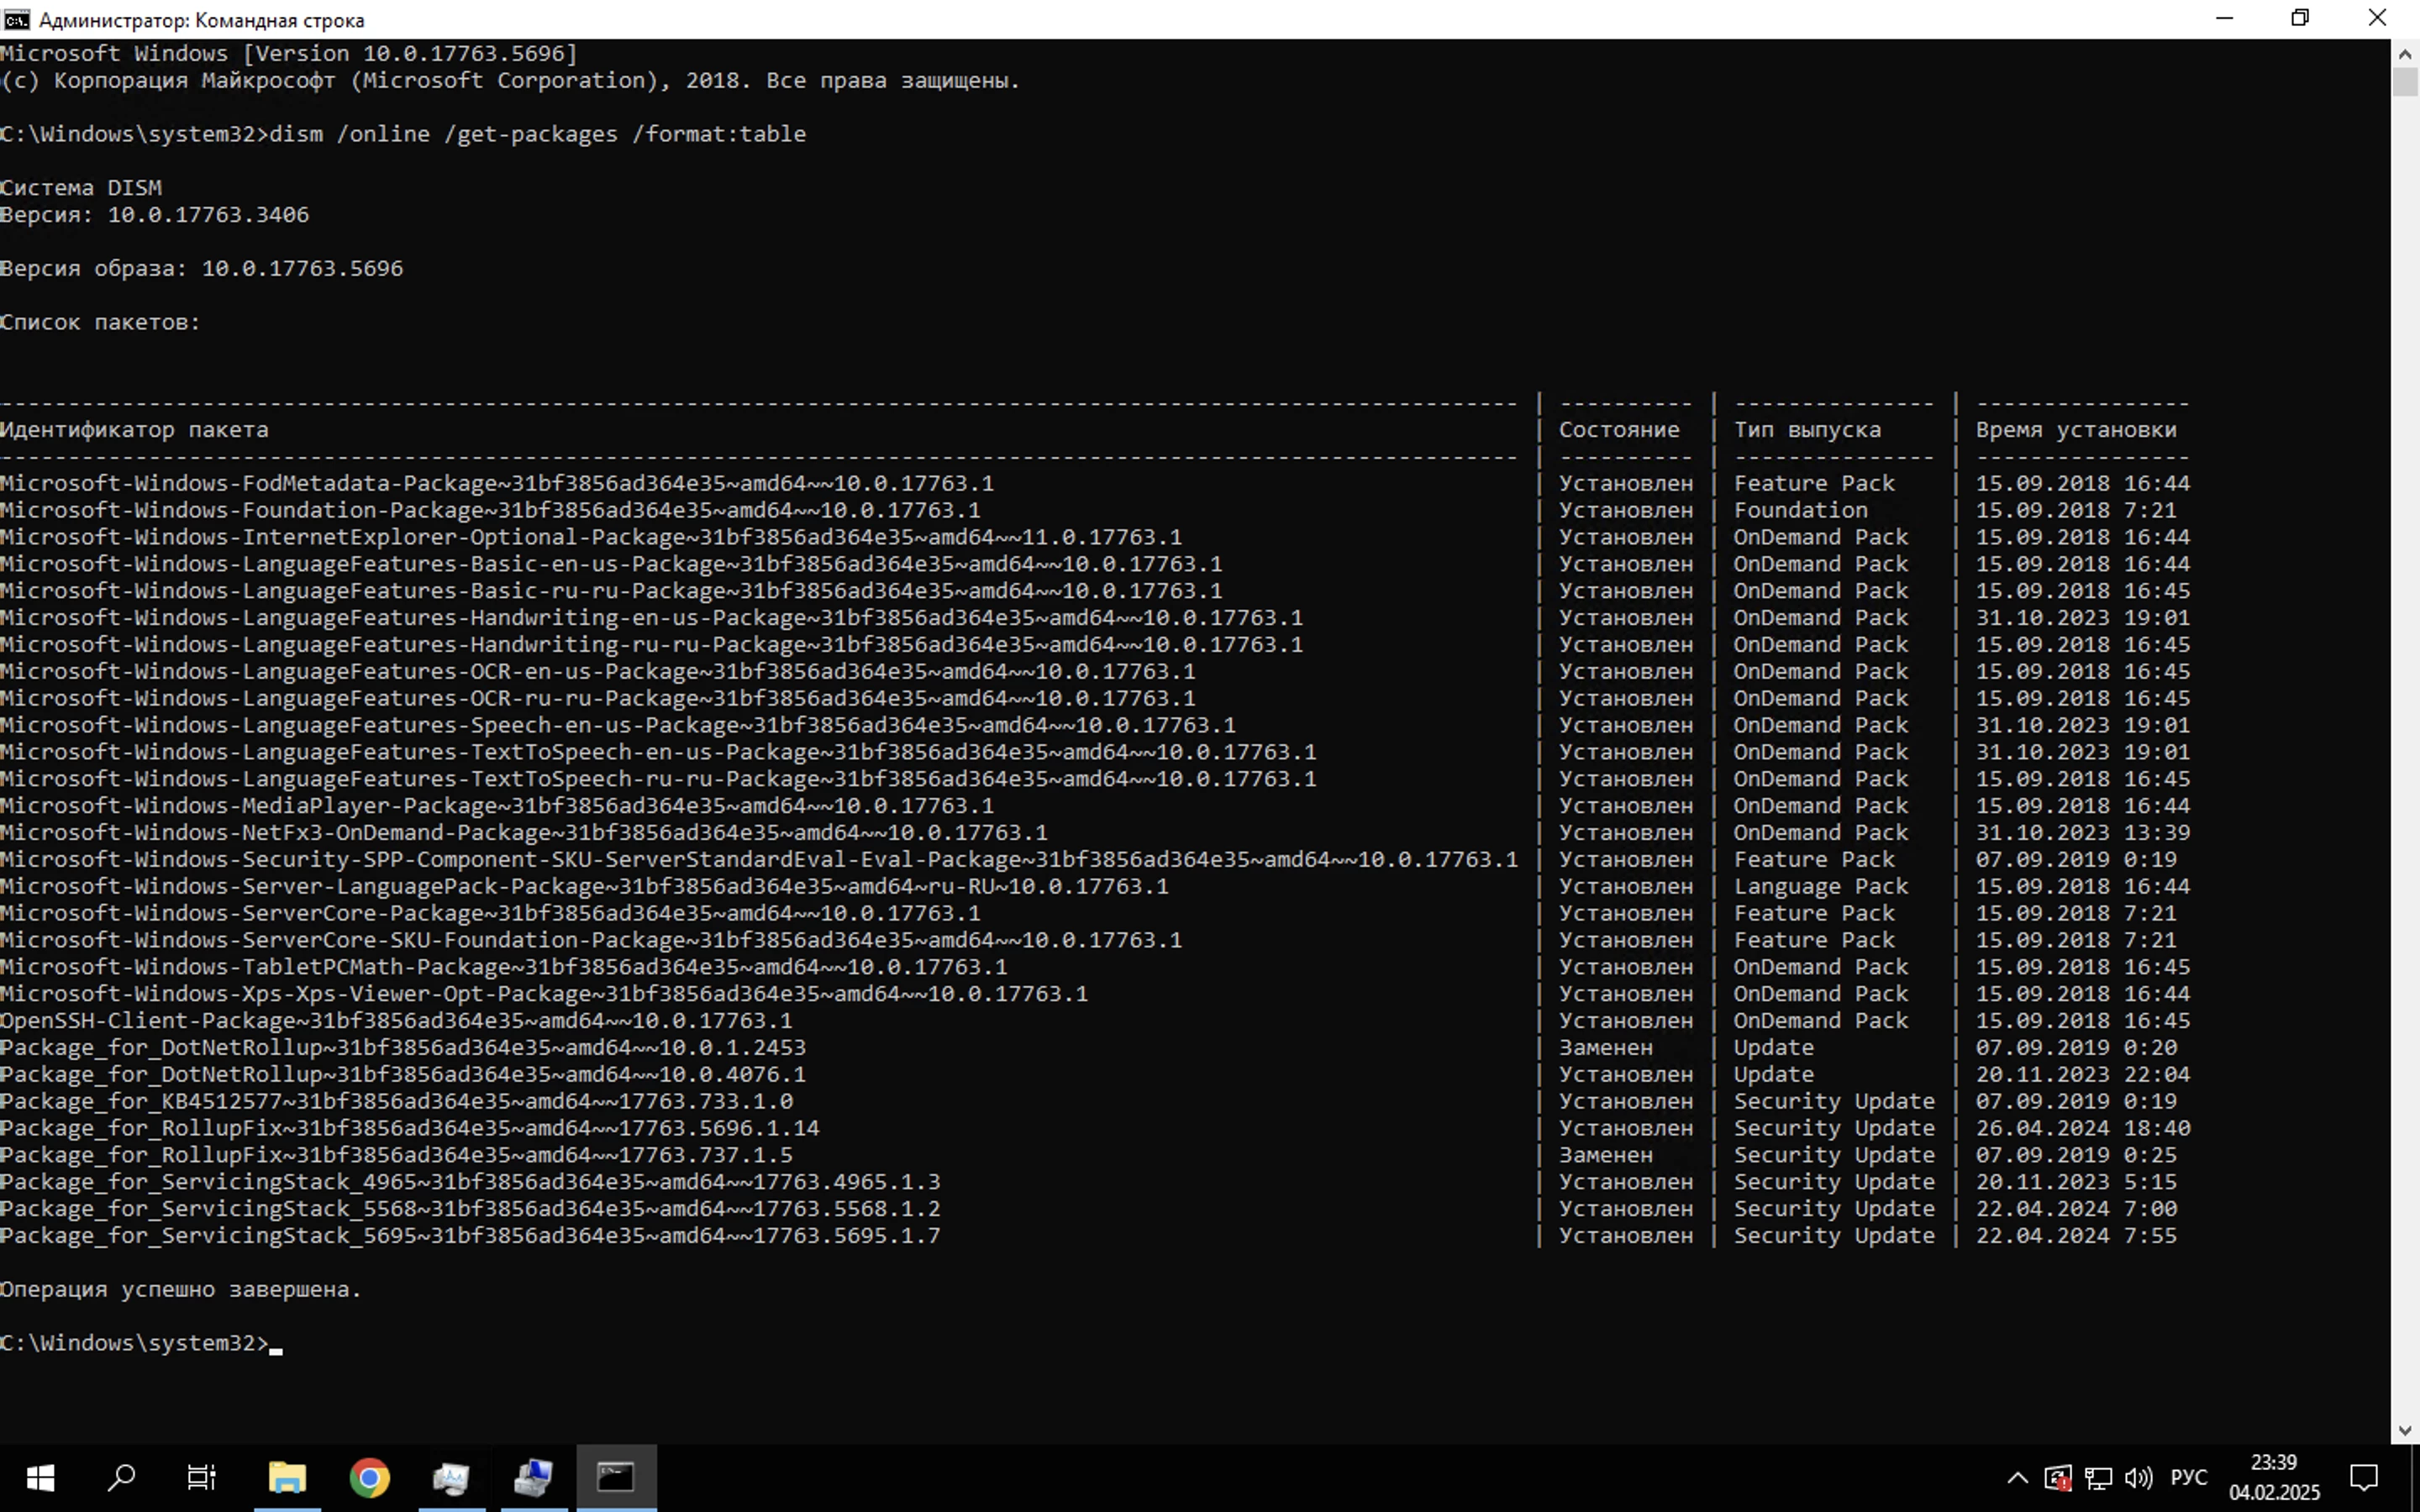
This method is almost identical but can also be used in the system recovery environment:
- dism /online /get-packages /format:table — displays a list of loaded updates;
- dism /online /remove-package /packagename: — after the last colon, specify the full name of the version you want to remove.
Using a Batch File (batch file)
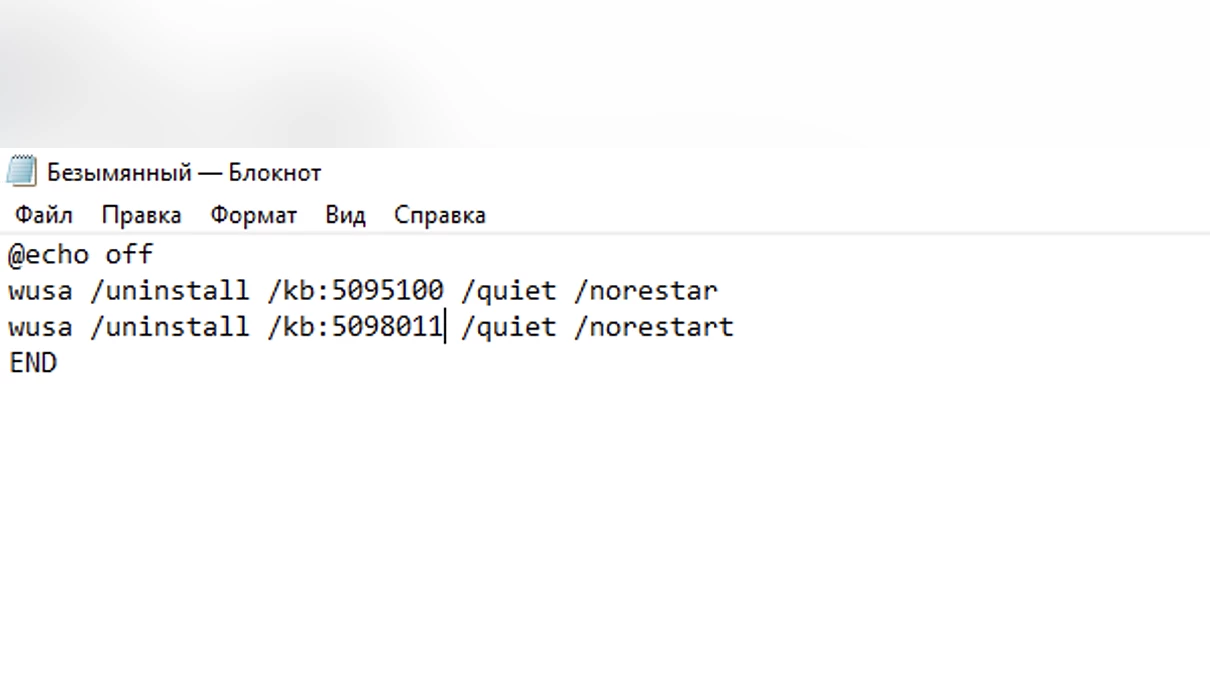
Create a text file with commands to execute in Command Prompt to remove multiple updates at once. Open a new file in Notepad and follow these steps:
- At the beginning of the file, write @echo off and move to the next line;
- Specify each update to be removed on a separate line. This is done almost the same way as in one of the previous methods: wusa /uninstall /kb:(update number);
- At the end, after moving to a new line, enter END.
Save the file by adding the extension .bat to its name. Run it, and everything will be ready.
Hiding Removed Updates
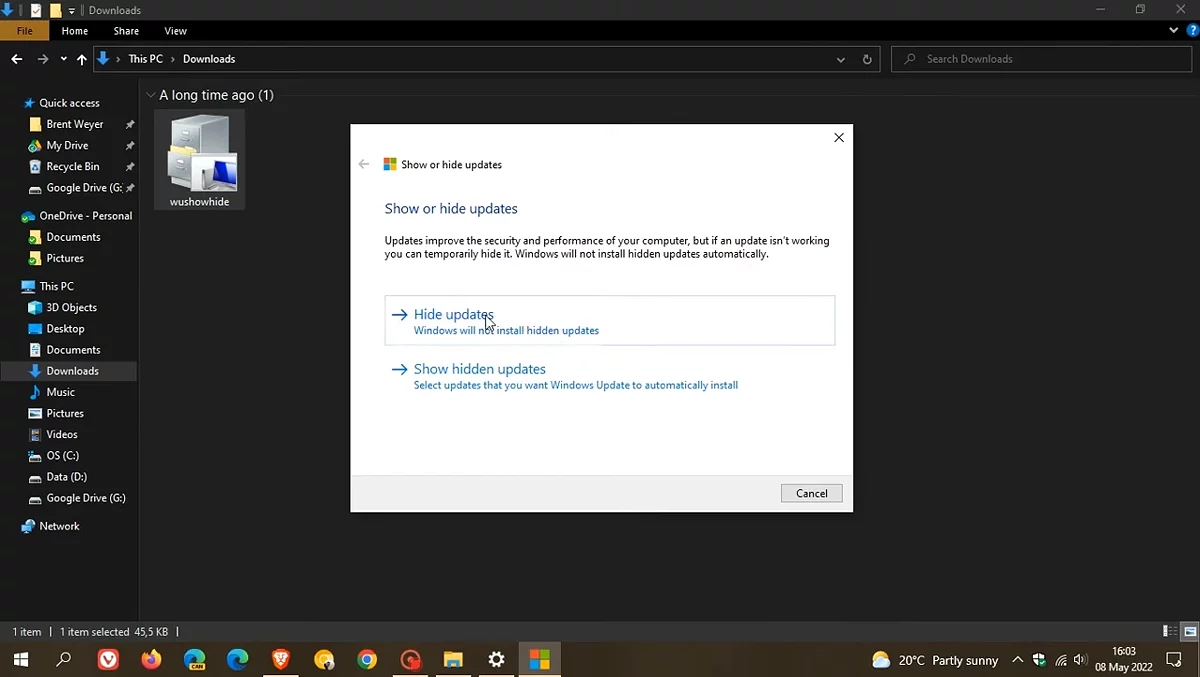
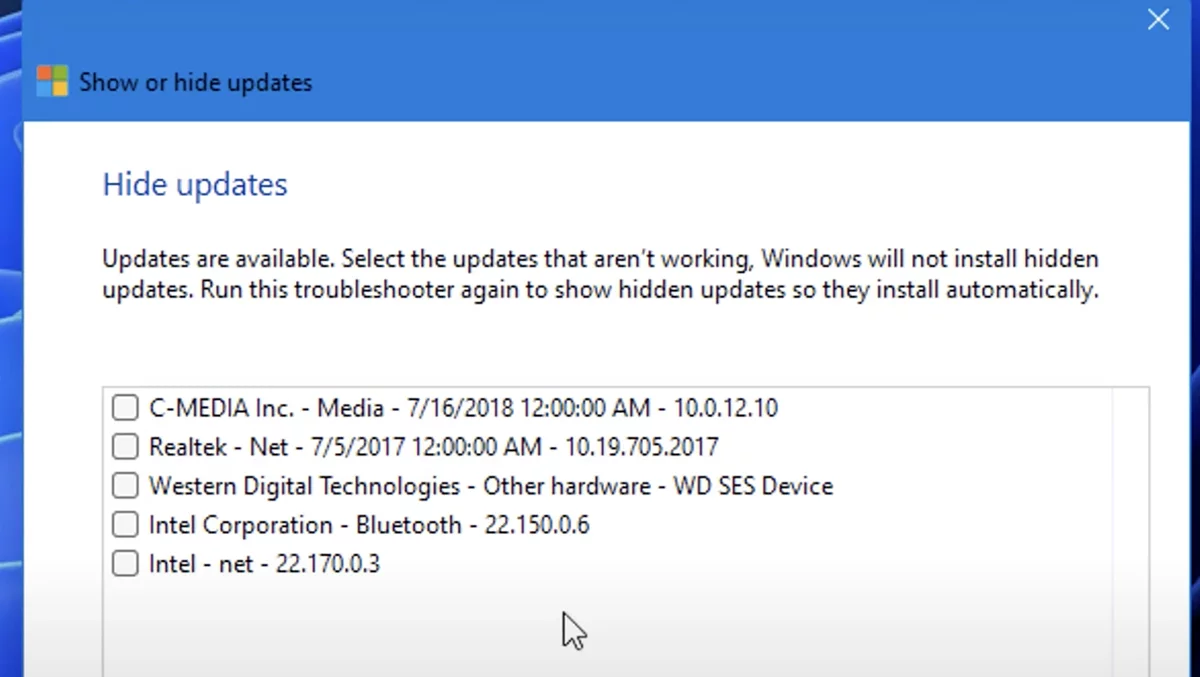
To prevent the computer from re-downloading the removed version, it needs to be hidden. To do this, download a special utility from the official website and open the application. Then click "Next" and select the top option that provides the necessary functionality. Check the updates that should not be downloaded in the future. Confirm your choice and wait for the hiding process to complete.
- Windows 11 et 10 reçoivent des mises à jour majeures
- L'archiviste légendaire WinRAR se met à jour vers 7.10 avec des améliorations de performance et d'interface utilisateur.
- Microsoft épargnera aux utilisateurs de Windows 11 les tracas de la migration des données