Enable Secure Boot on Windows 11: Easy Steps

Although Windows 11 is not as flexible as Linux and does not offer an extensive set of customizable options, some systems still require additional configuration before the full launch of the device. One such setting is enabling Secure Boot. Even if you haven't done this in advance, don't miss the opportunity to enable this utility at the first chance.
What is Secure Boot?
Secure Boot is a technology integrated into BIOS or UEFI that verifies the authenticity of various system components to prevent the execution of malicious code.
The process of analyzing software and core applications occurs during the computer's boot. If the checks are successful, the system starts, and the necessary data is sent to a special internal storage. In case of any malfunctions, you will receive a corresponding notification.
Component testing is based on the following criteria: control of access management parameter changes, verification of electronic certificates and integrity, as well as obtaining information on available improvements and fixes.
If you need to modify the operating system, you can disable Secure Boot. Let's figure out how to check if this technology is enabled.
How to Check if Secure Boot is Enabled?
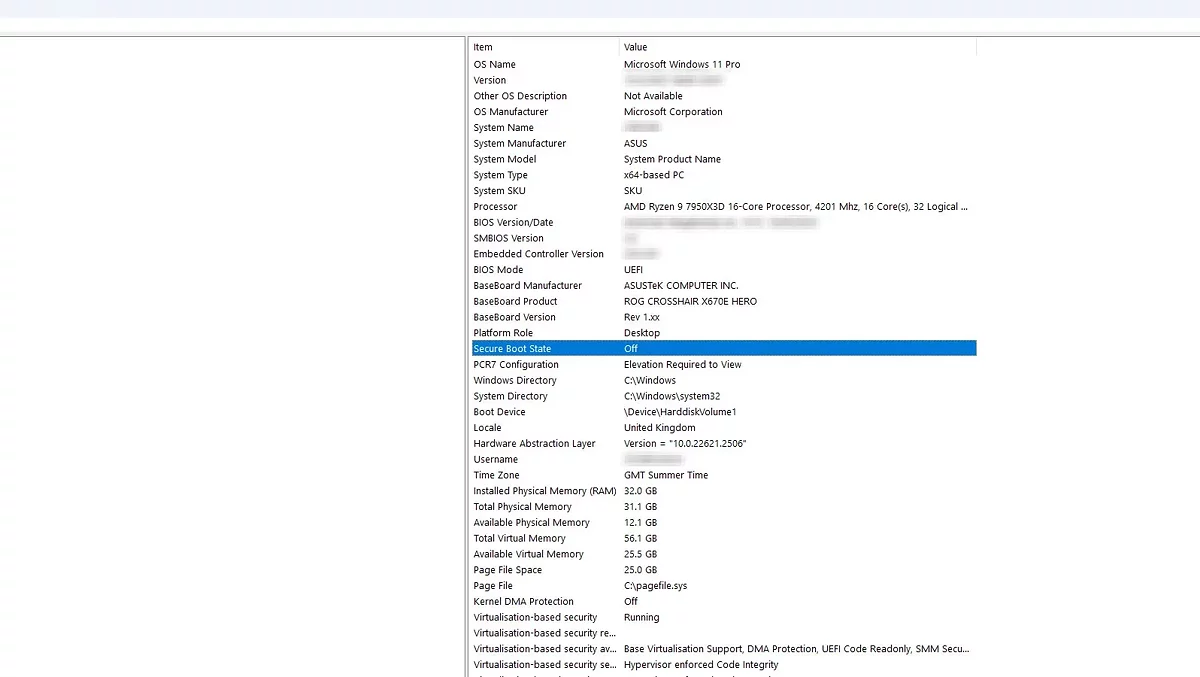
Right-click on the icon in the lower-left corner of the screen associated with the Start section. In the opened menu, select the Run option. Then enter msinfo32 and in the System Information section, scroll down until you find the Secure Boot State parameter. Pay attention to its value.
Unfortunately, you cannot enable Secure Boot in this utility. To do this, you first need to launch BIOS and UEFI. We will show you how this can be done.
Launching BIOS or UEFI
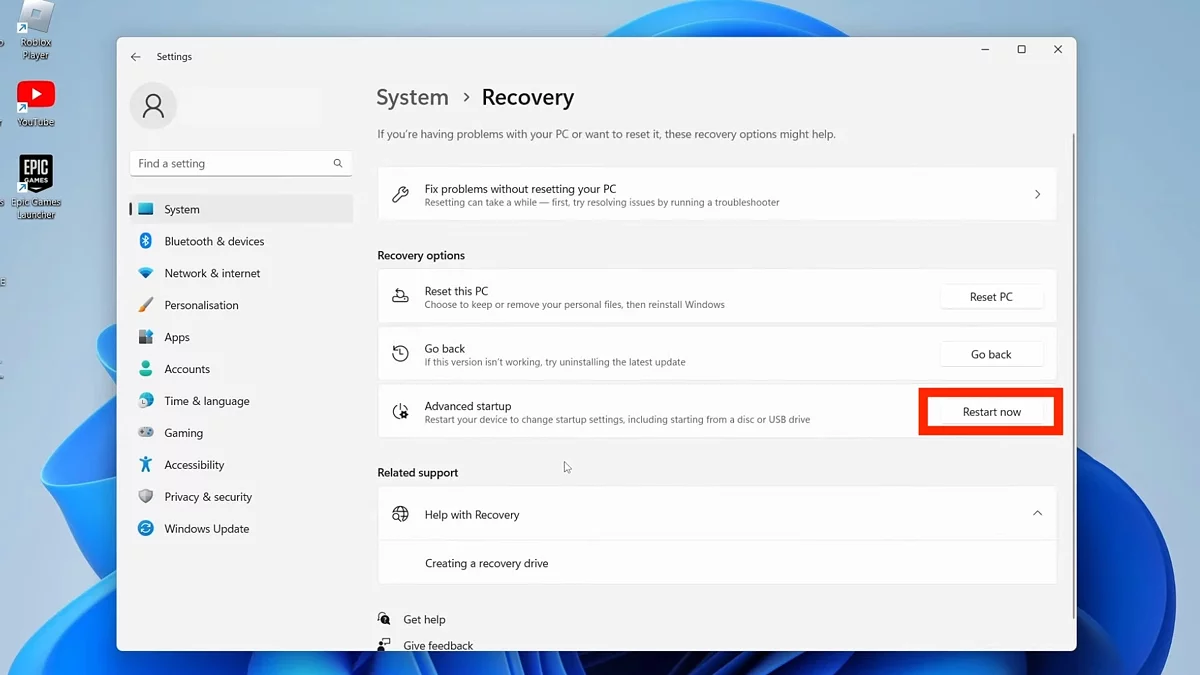
Use the settings where you go to the System section and open the subsection called Recovery. There, select the option to reboot the PC for more detailed device management.
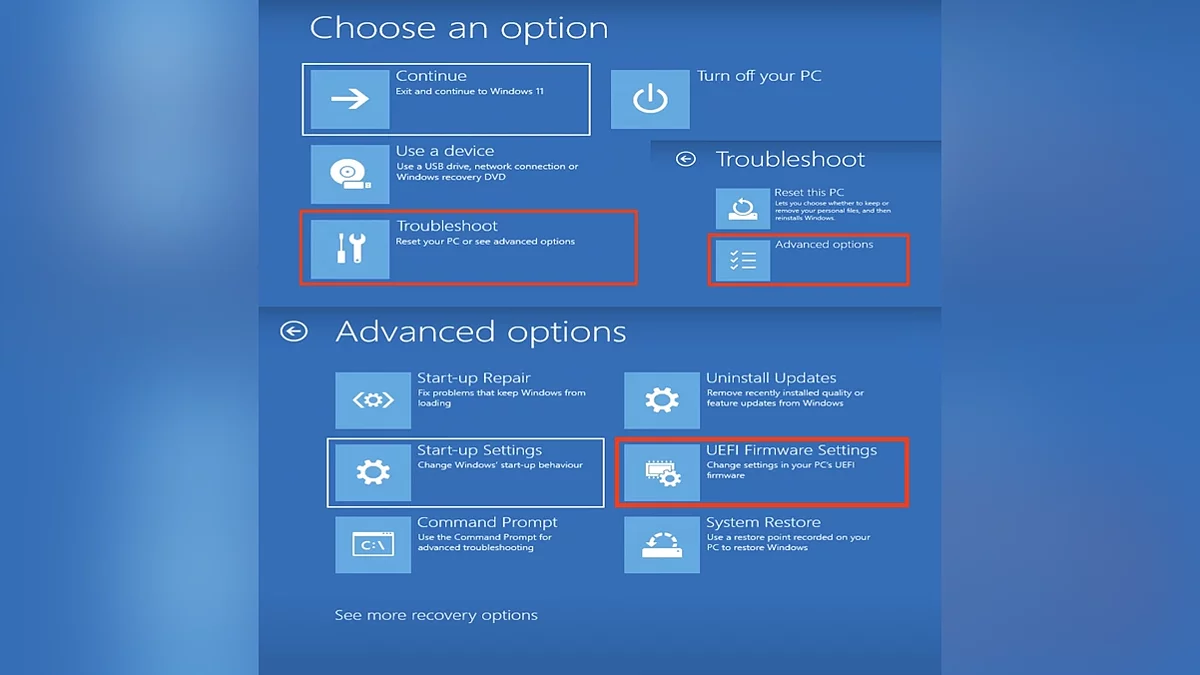
Once you see the blue screen, among the choices, click on Troubleshoot, then go to Advanced options. Indicate that you would like to use the BIOS or UEFI firmware settings. The computer will restart, after which it will open the necessary utility.
Additionally, you can open this menu in the context of a regular startup: you will need to hold down the Shift key all the time. On some models, serial manufacturers make direct BIOS or UEFI access available. To do this, simply briefly hold down the assigned button at the start. It is usually assigned to F2 or F12.
Enabling the Secure Boot Option
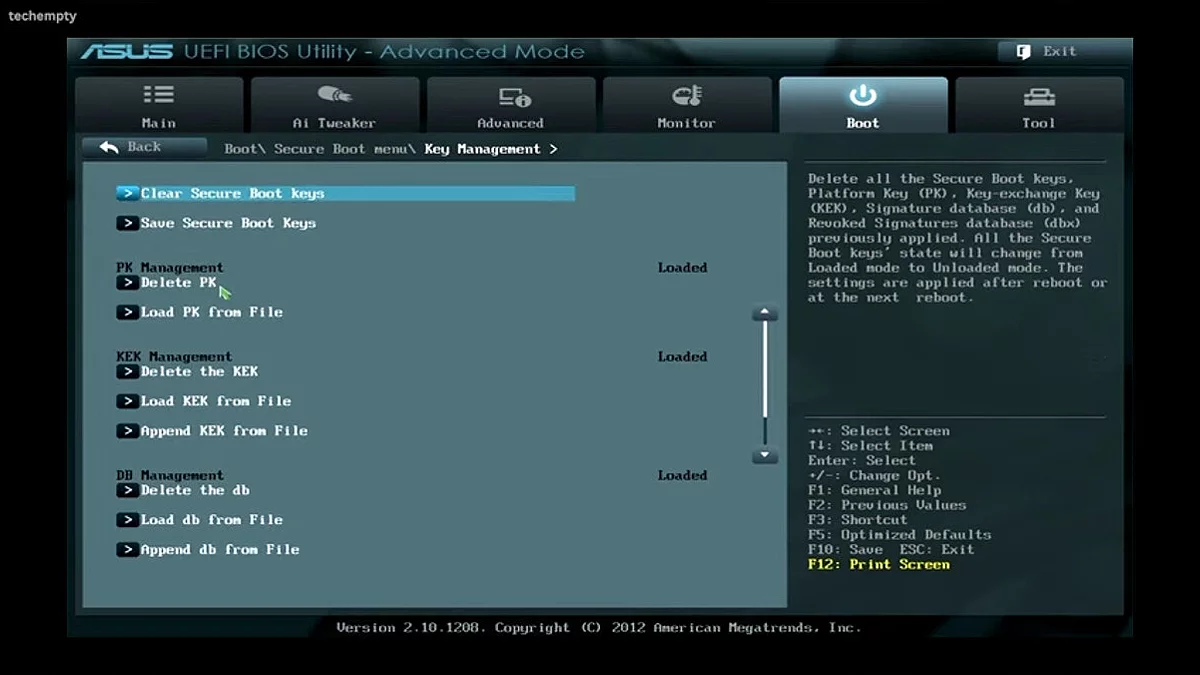
Make sure that BIOS or UEFI is loaded in the advanced version if your device supports a simplified variant — this will be indicated next to the firmware set name.
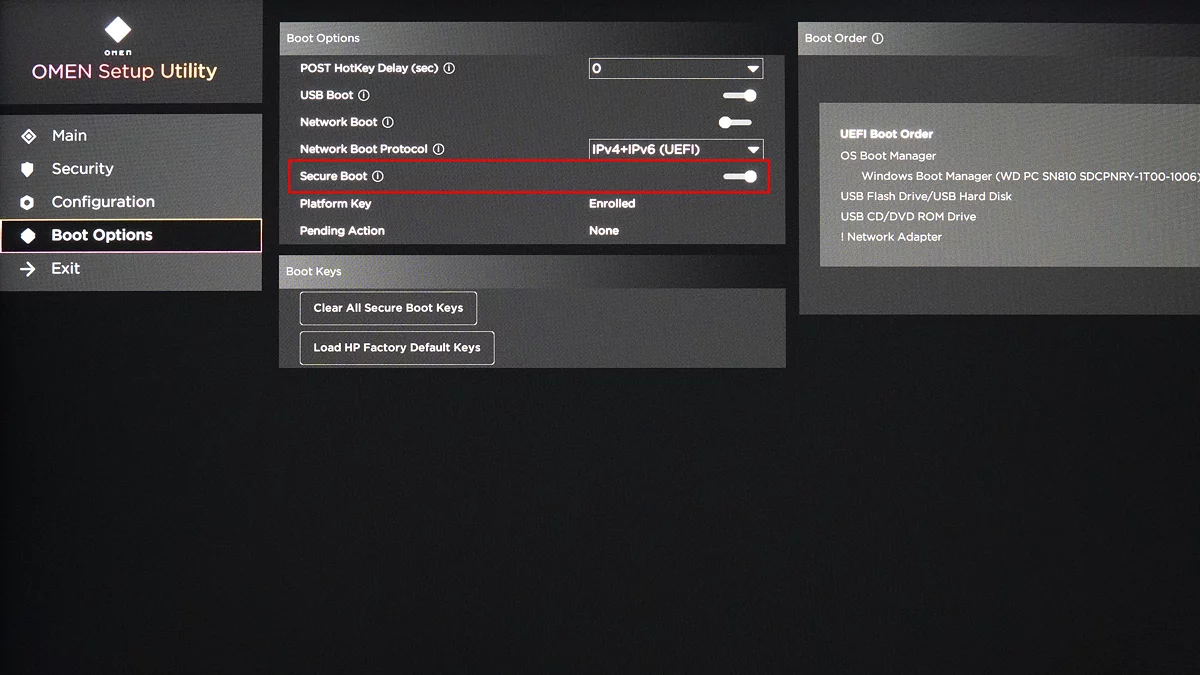
Then you need to open the Security or Boot tab, depending on your device's specifications. Next, find the Secure Boot setting and activate the switch or select the desired option from the list. Your choice will be applied during subsequent computer startups.
- Microsoft confirme que la mise à niveau vers Windows 11 restera gratuite
- Microsoft commence la mise à jour automatique des PC vers Windows 11 24H2
- Un chargeur original au design enroulable a été révélé
