All Chests and Puzzles in Honkai: Star Rail's Eternal Sacred City of Ohema
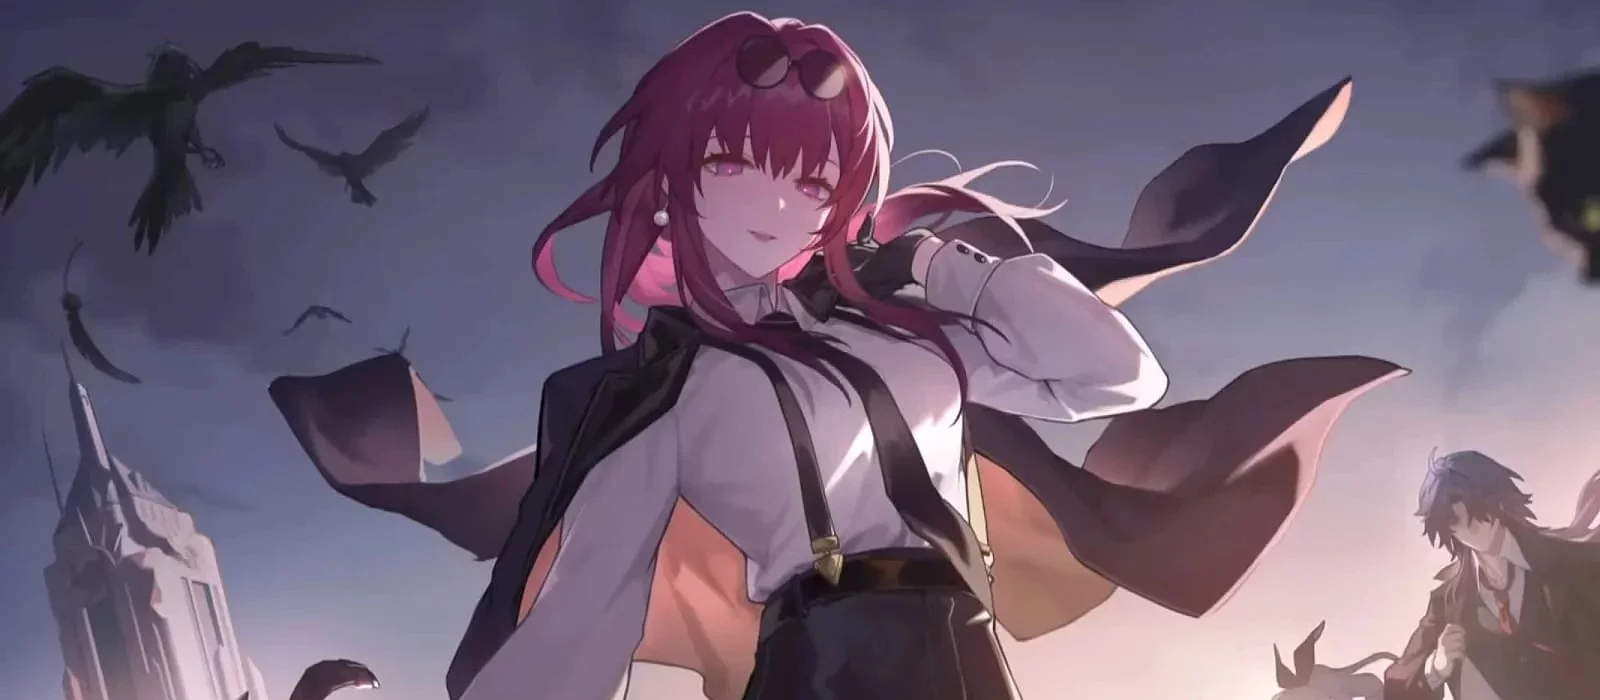
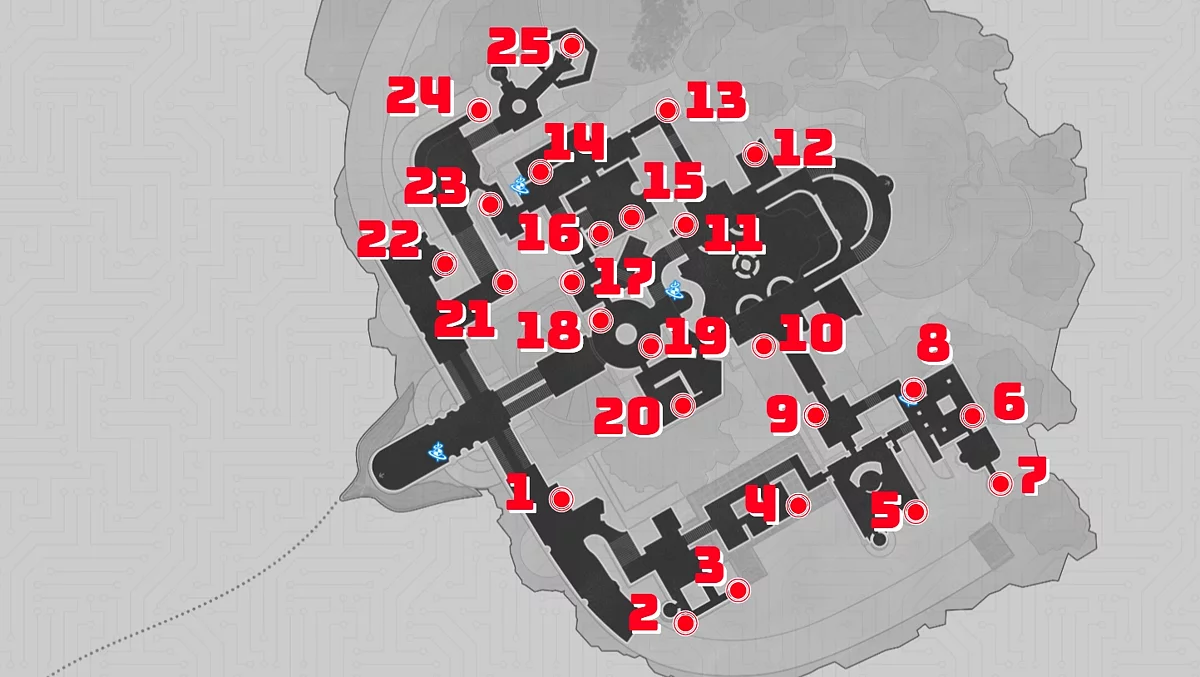
With the release of the new planet Amphoreus in Honkai: Star Rail, many unique locations filled with various puzzles, treasure chests, and mysteries have appeared. One of the largest areas is the city of Ohema — one of the few surviving polis of Amphoreus. In this guide, we will tell you how to find all the chests in Ohema and where they are located.
All chests on the first floor of the upper part of Ohema
One of the main polis of Amphoreus, Ohema, is divided into two large parts, which can be navigated using teleport wings. Before collecting the chests, it is recommended to complete as many quests of the new Conquest Mission as possible to unlock all areas of the city. You can also add characters to your team that make it easier to find treasure chests, such as Topaz or the Great Hertha.
Next, we'll tell you where to find all the chests on the first floor of the upper (northeastern) part of the location.
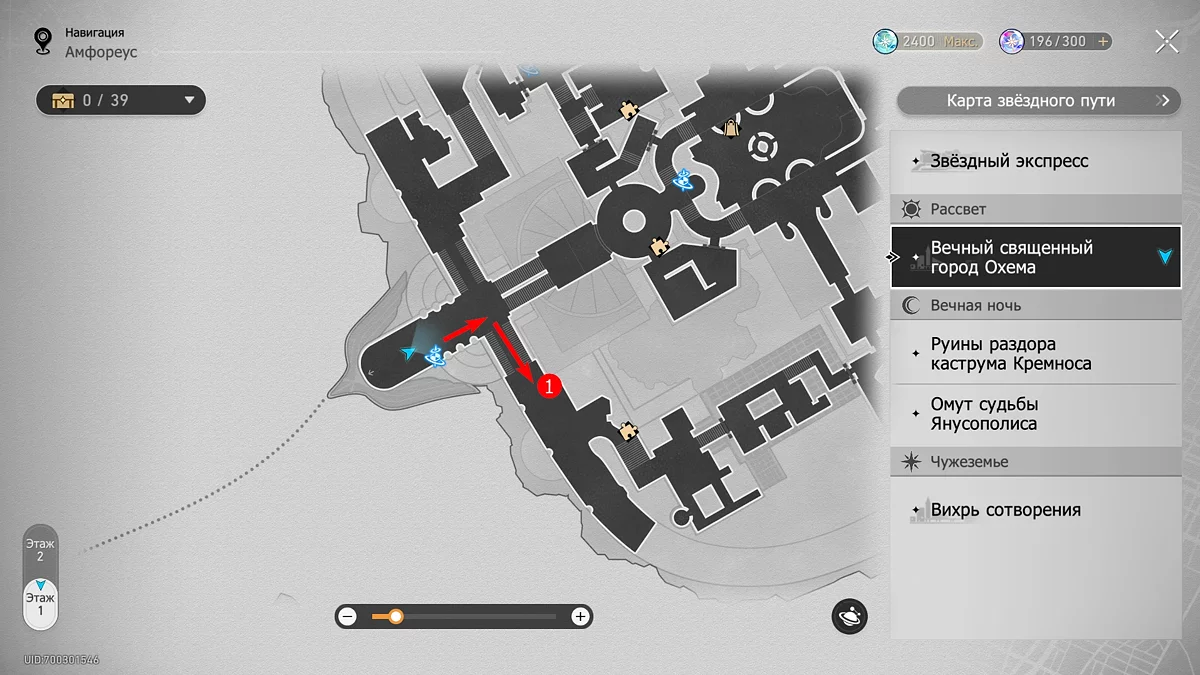
Chest #1
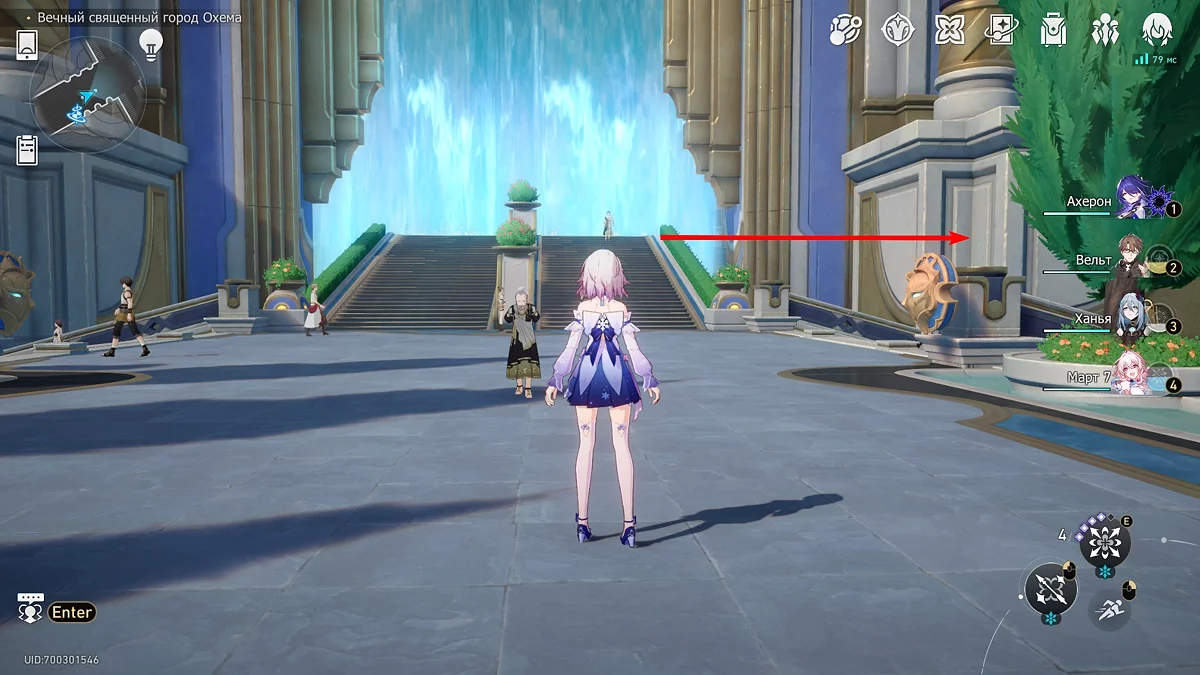
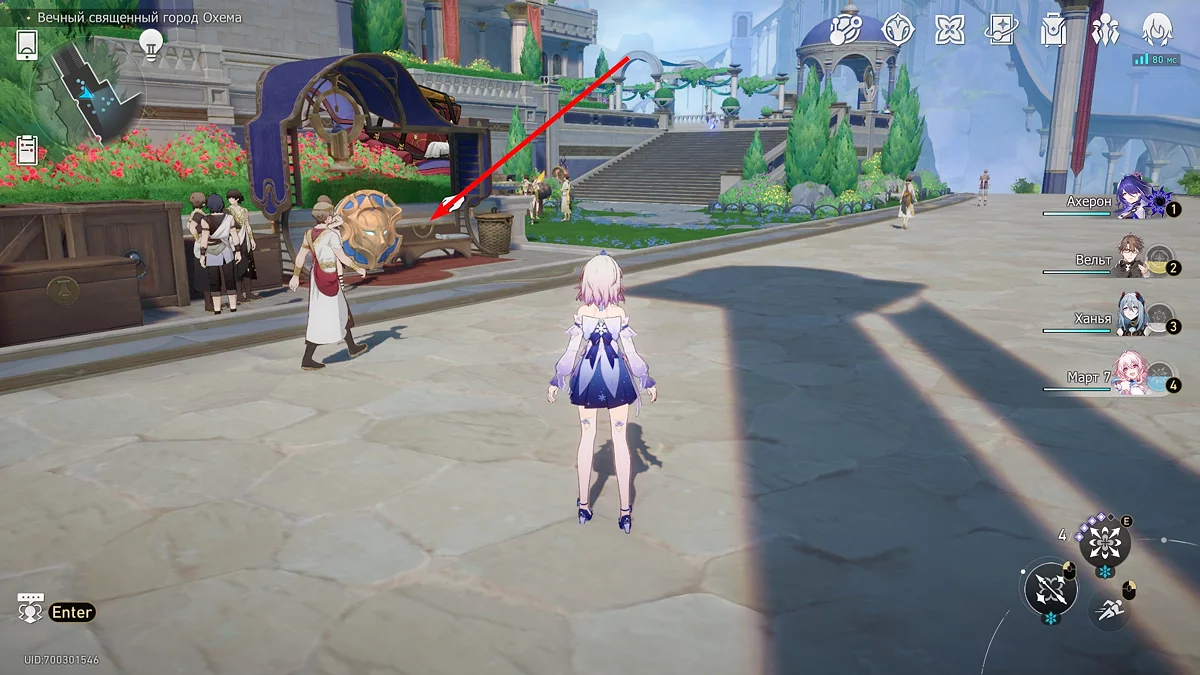
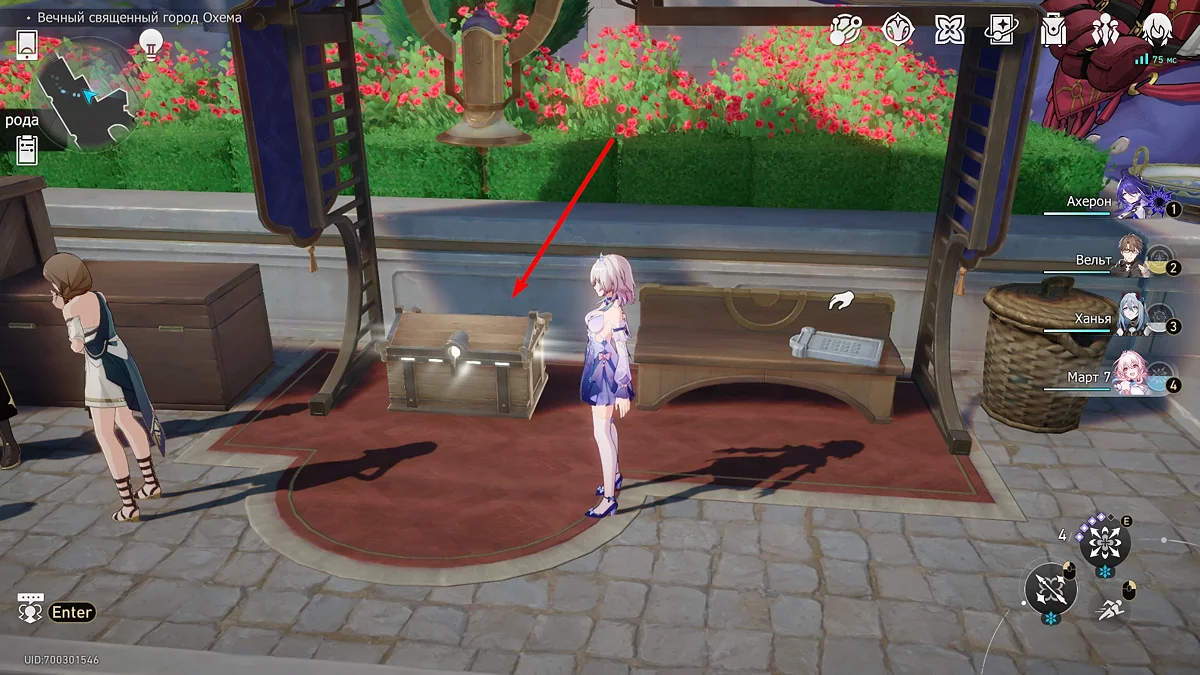
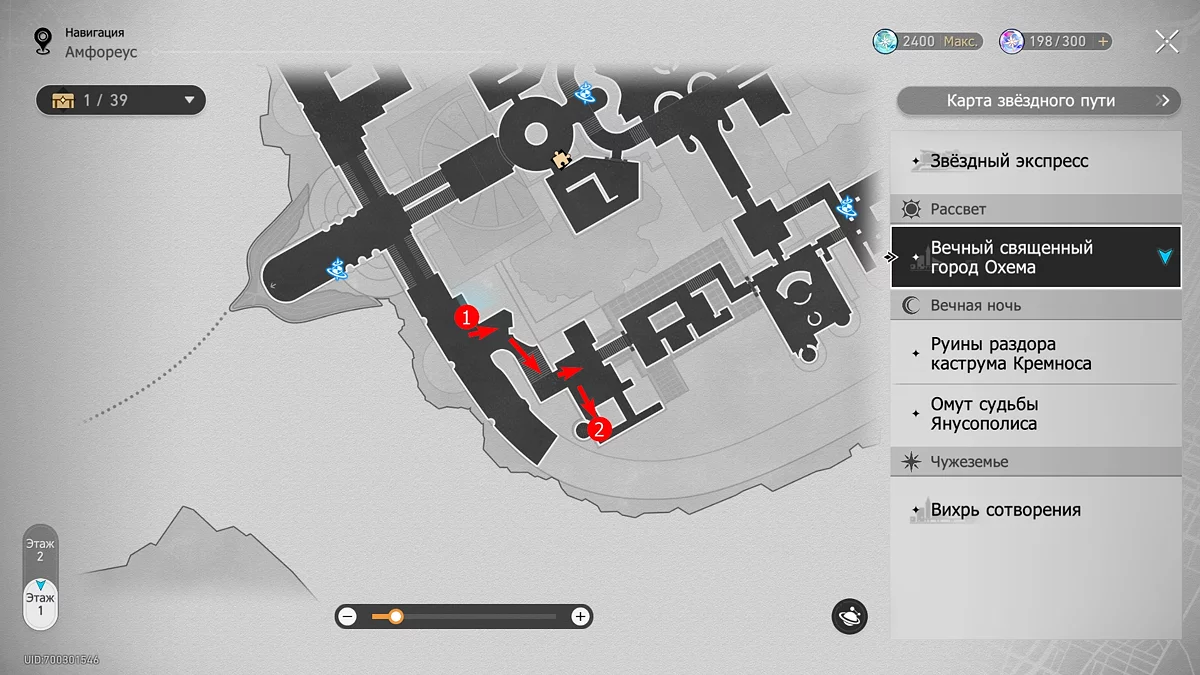
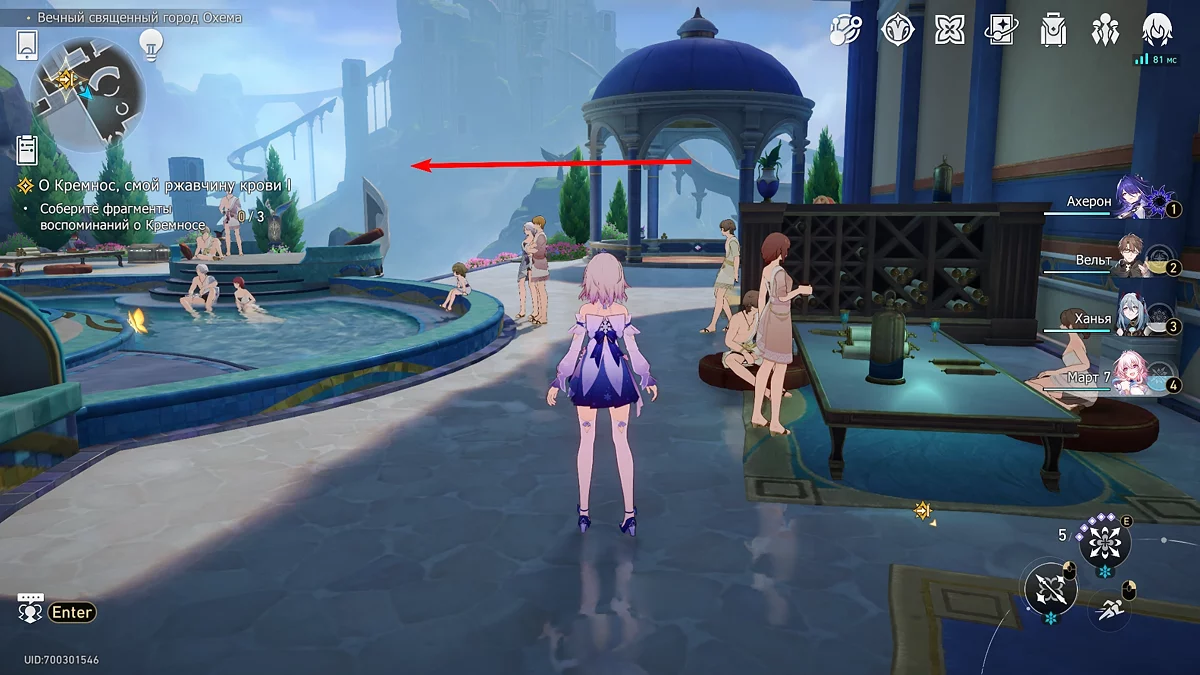
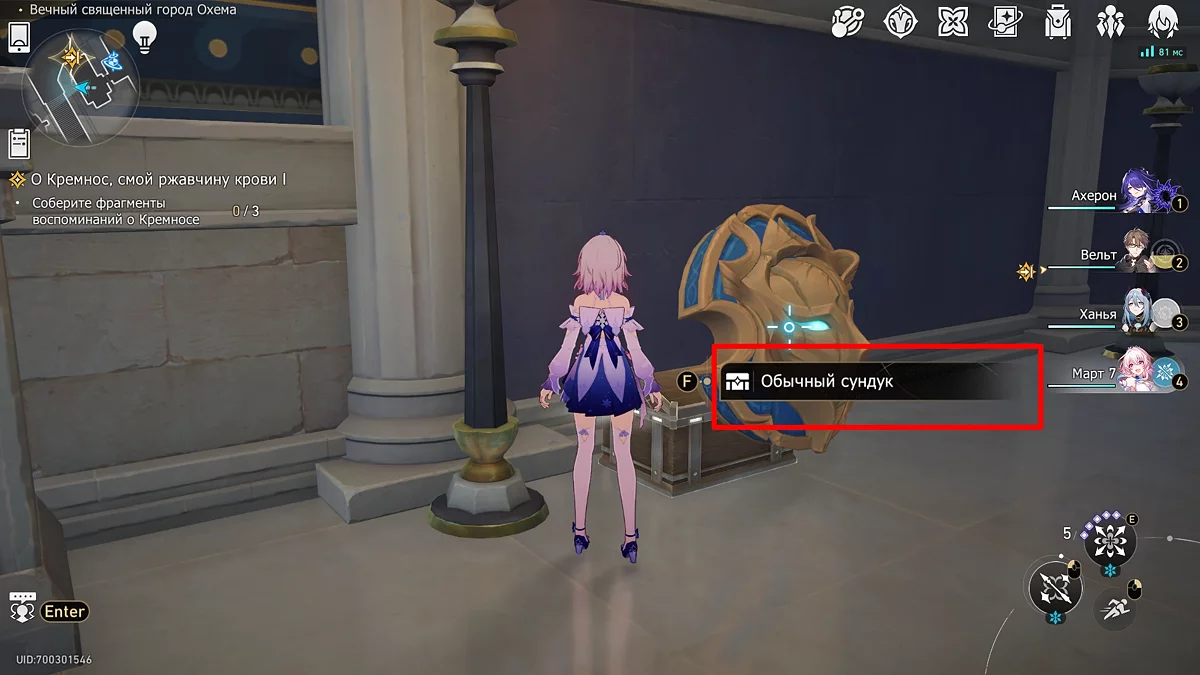
Use the spatial anchor at the Marble Palace and at the turn before the waterfall, go right. Go down the stairs and on the left, near the resting area, you will see a shield. Break it with any character's attack and take the chest behind it.
Chest #2
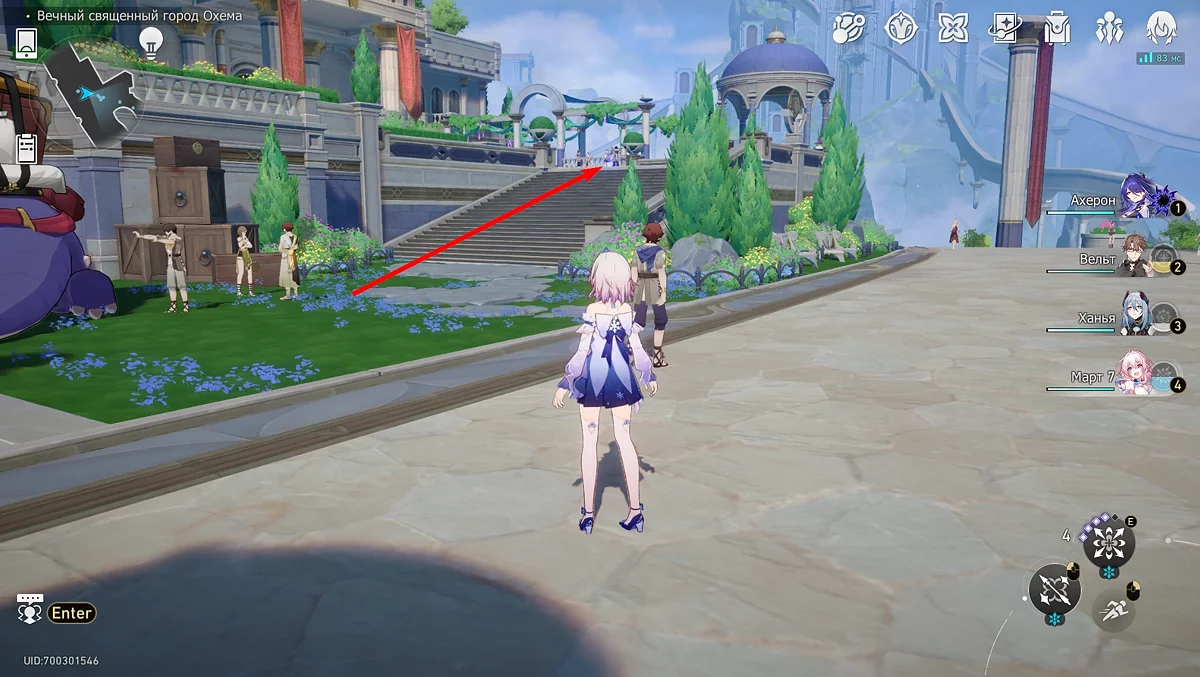
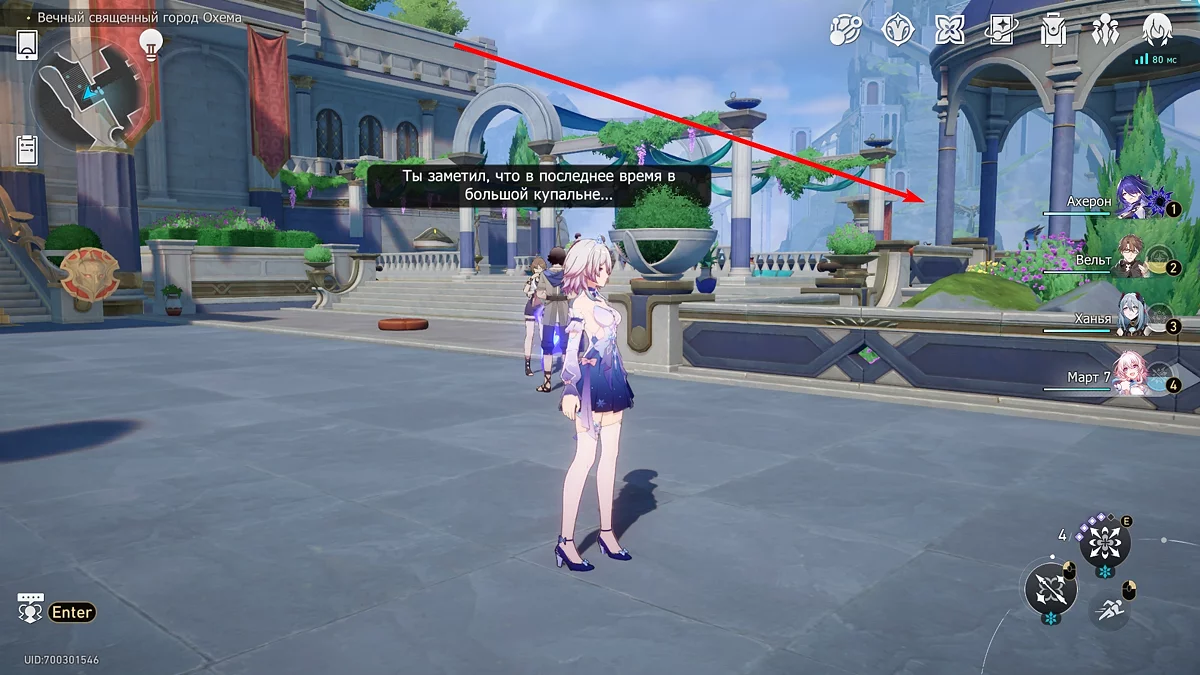
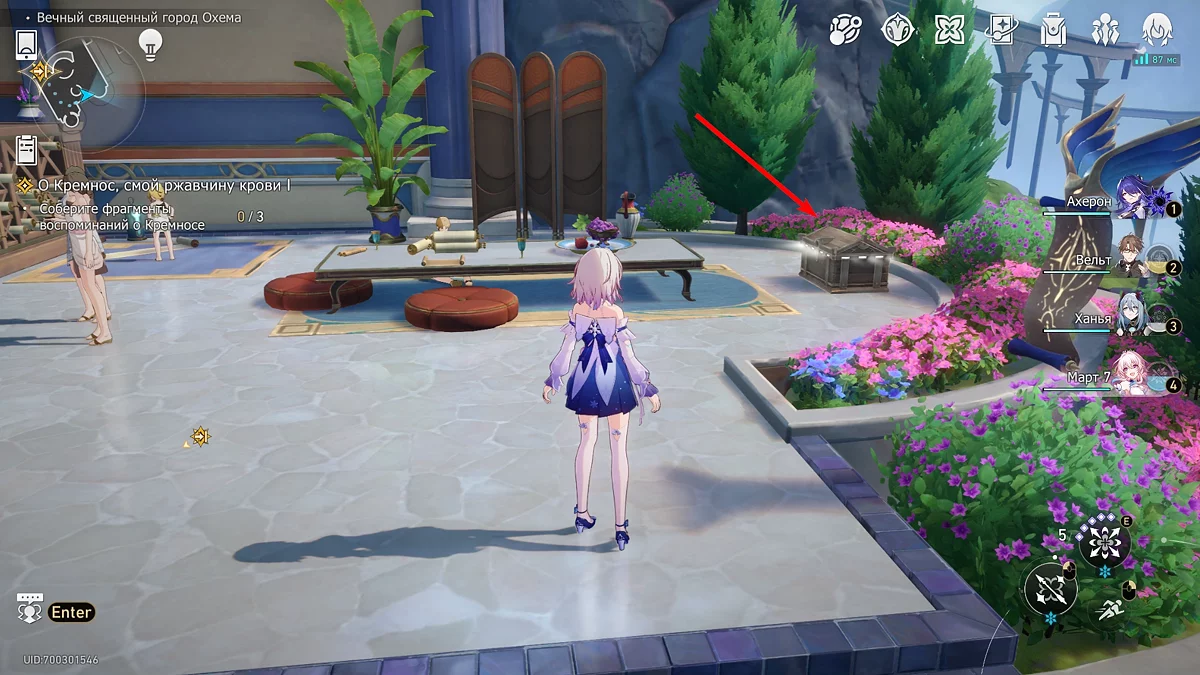
Turn left from the first chest and go up the stairs, then proceed to the round-shaped gazebo. There you will find the second chest.
Chest #3
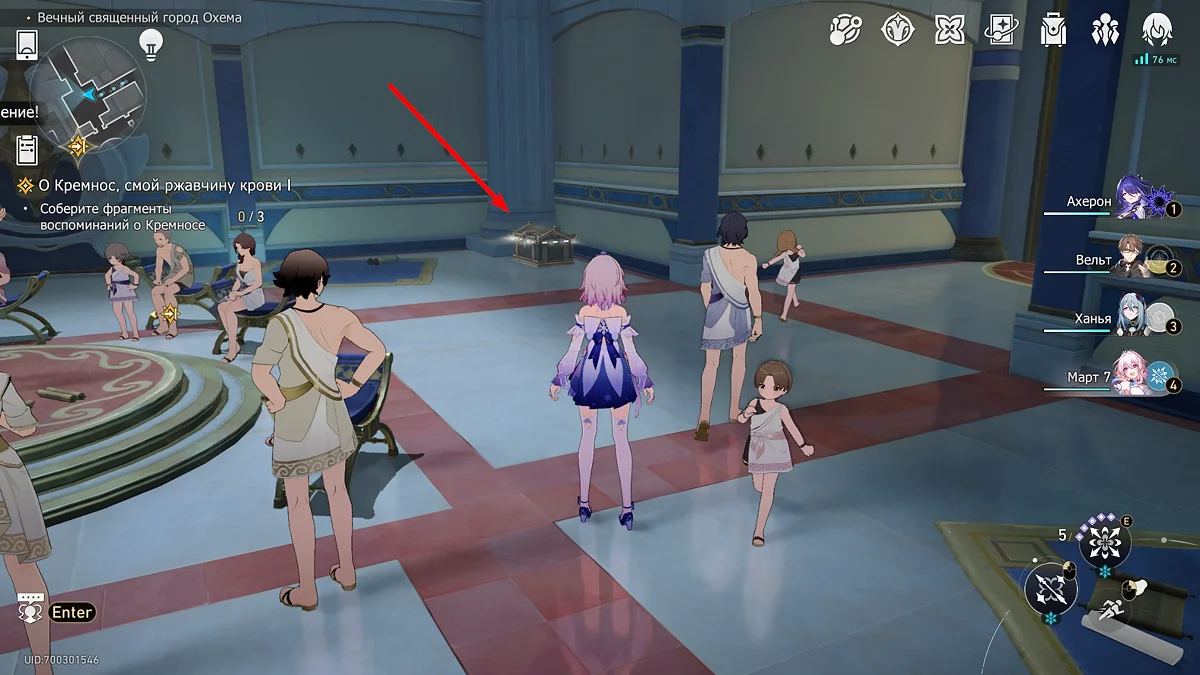
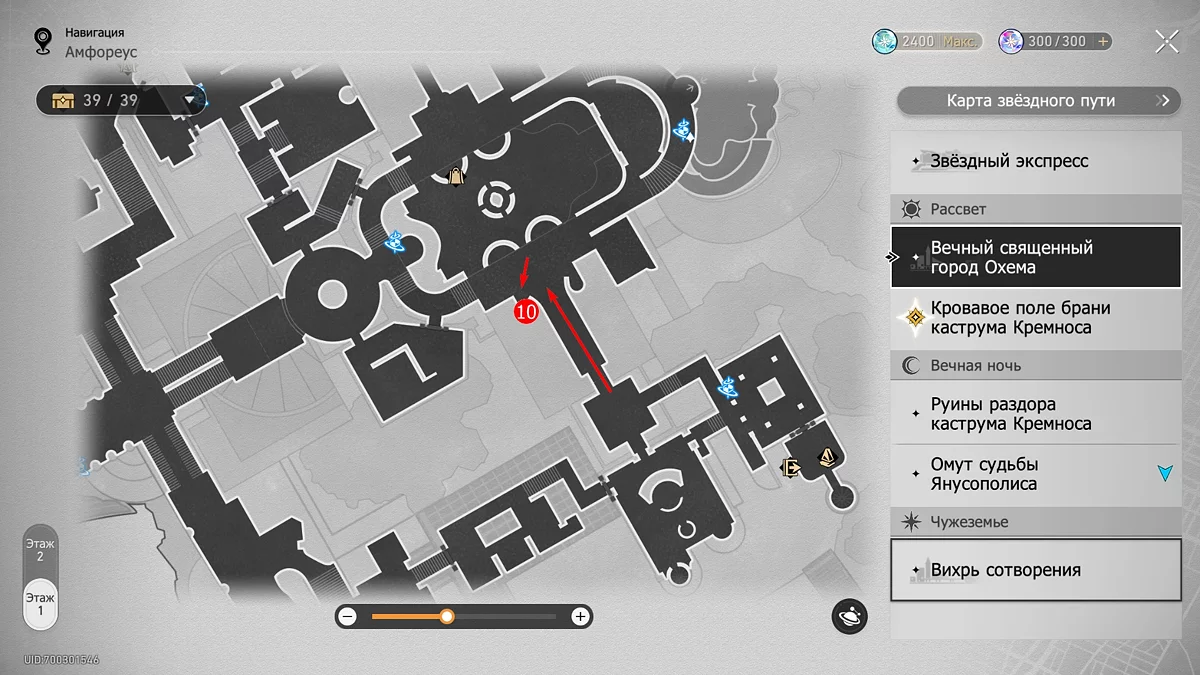
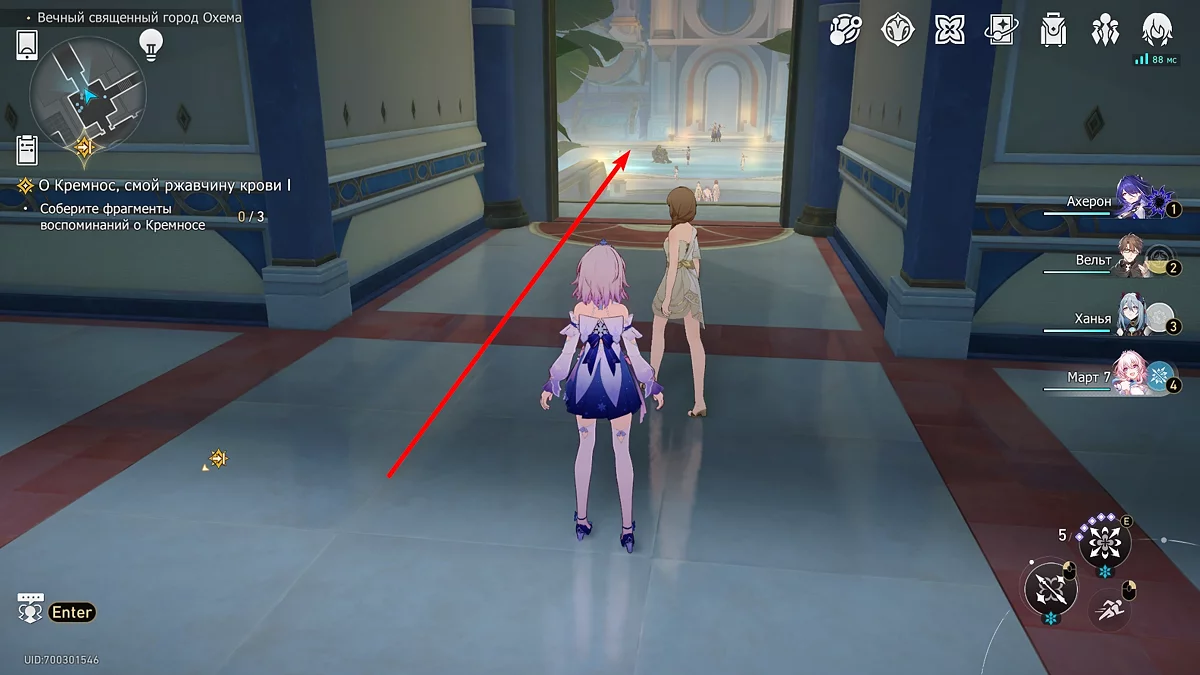
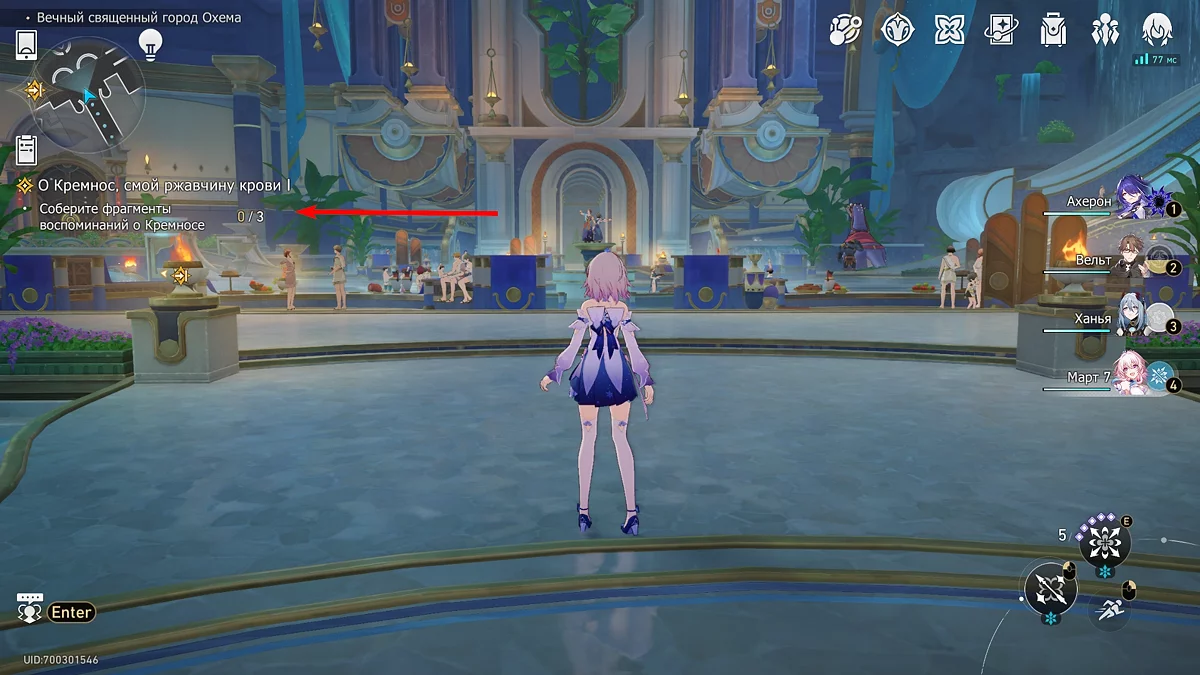
From the previous treasure chest, go to the wall opposite, where children are sitting. Near them, there will be another ordinary chest.
Chest #4
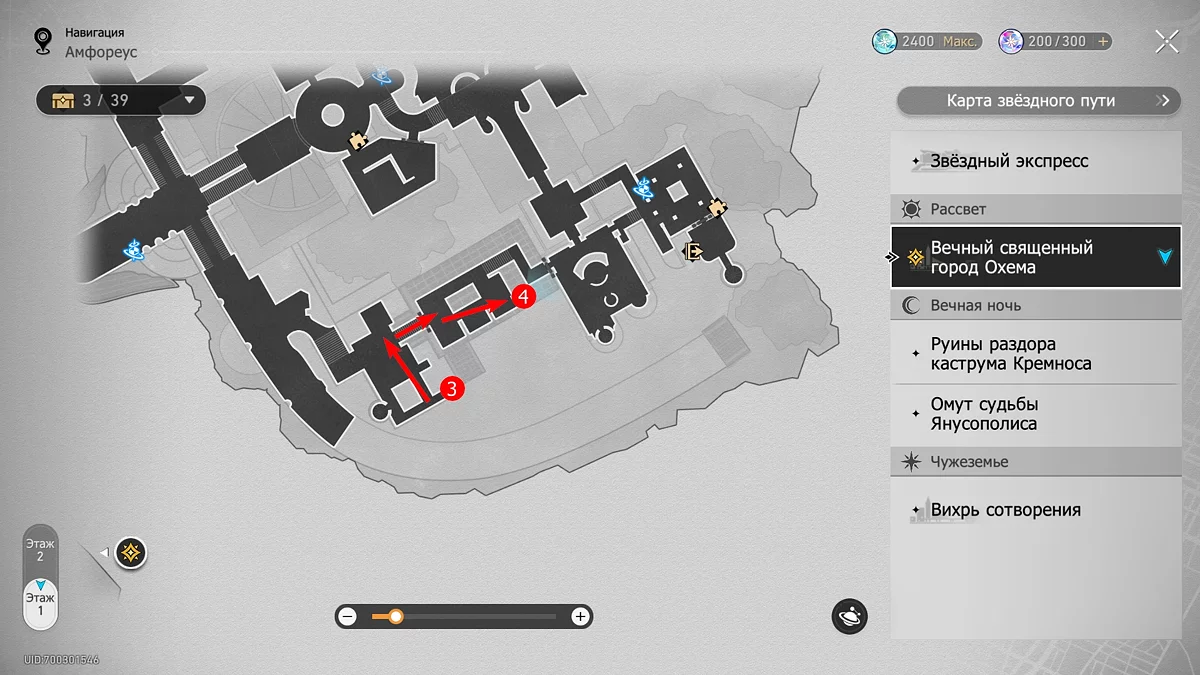
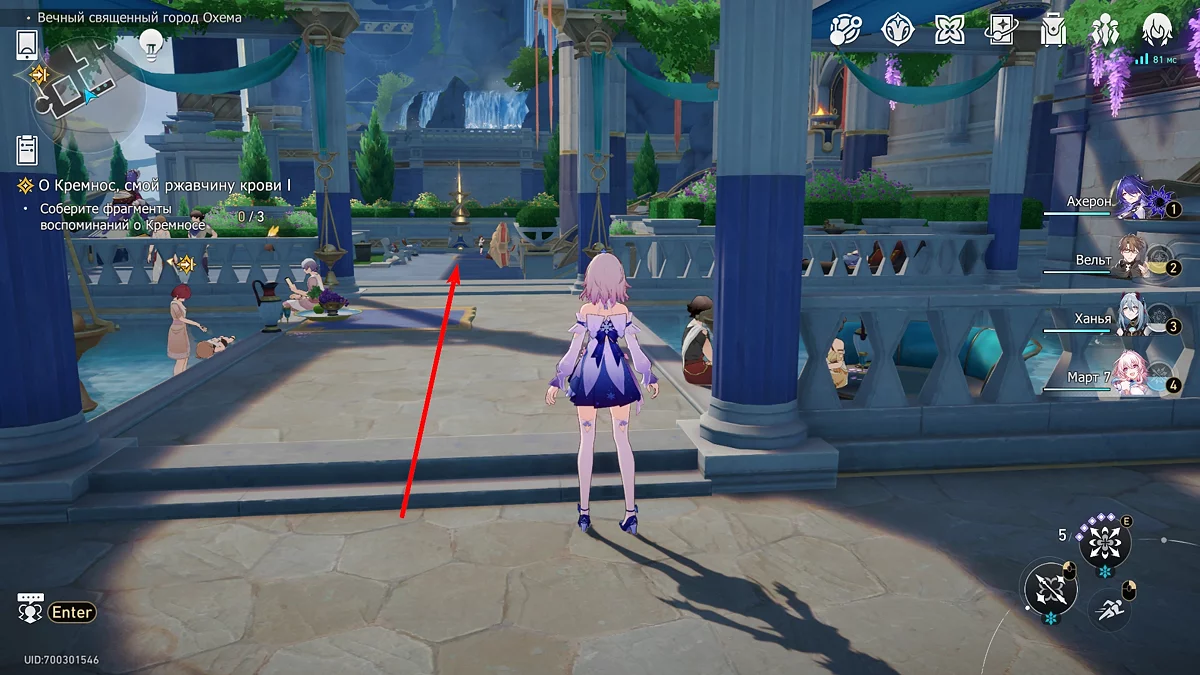
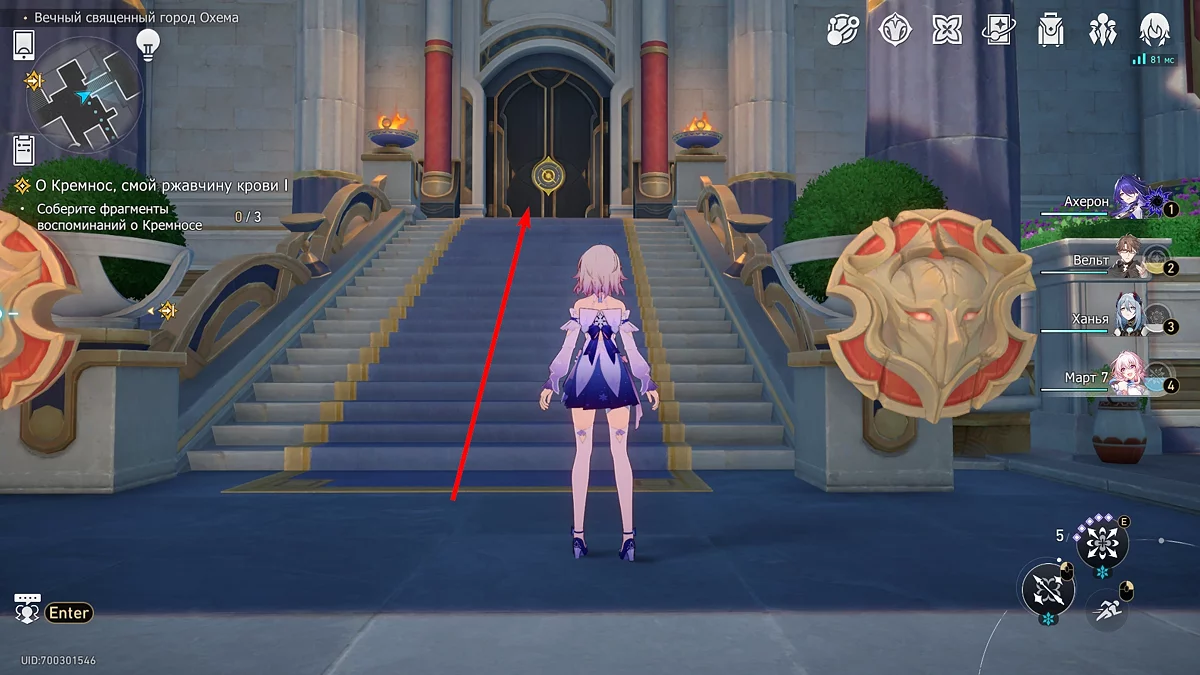
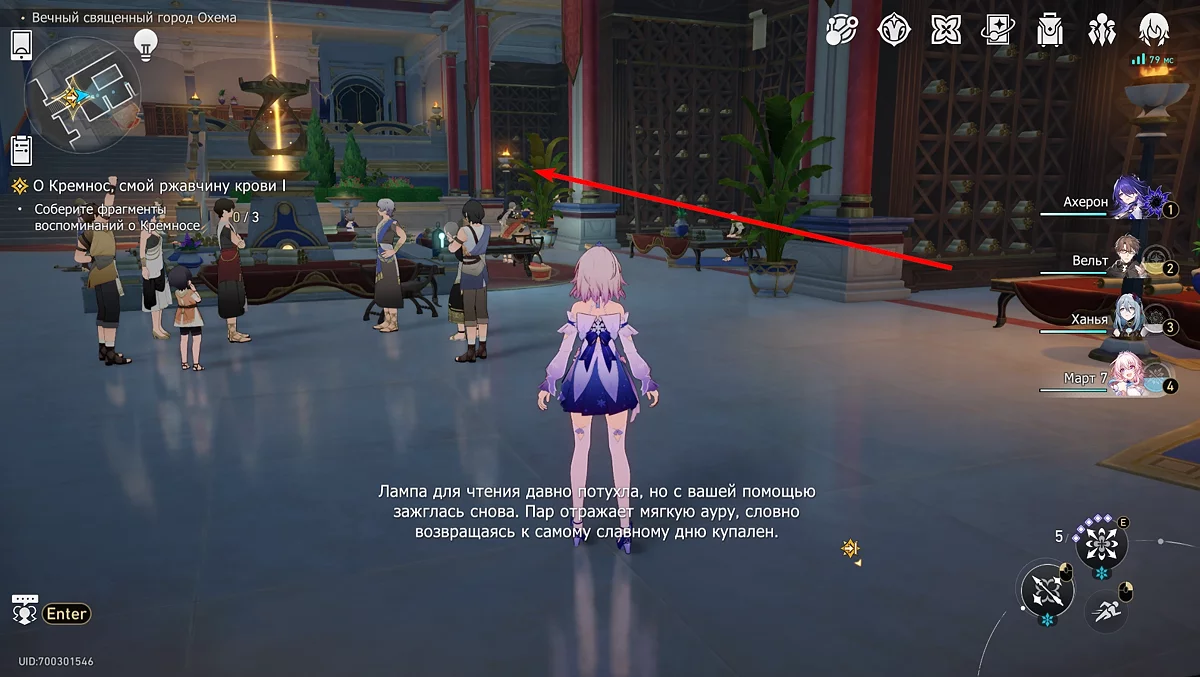
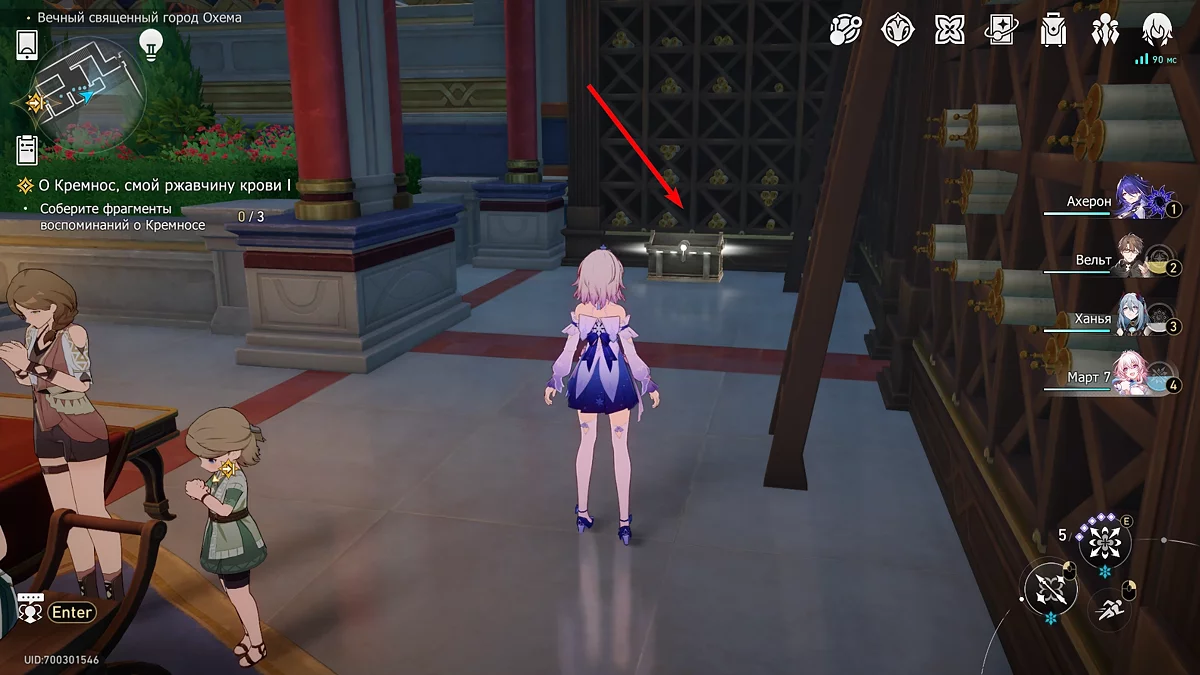
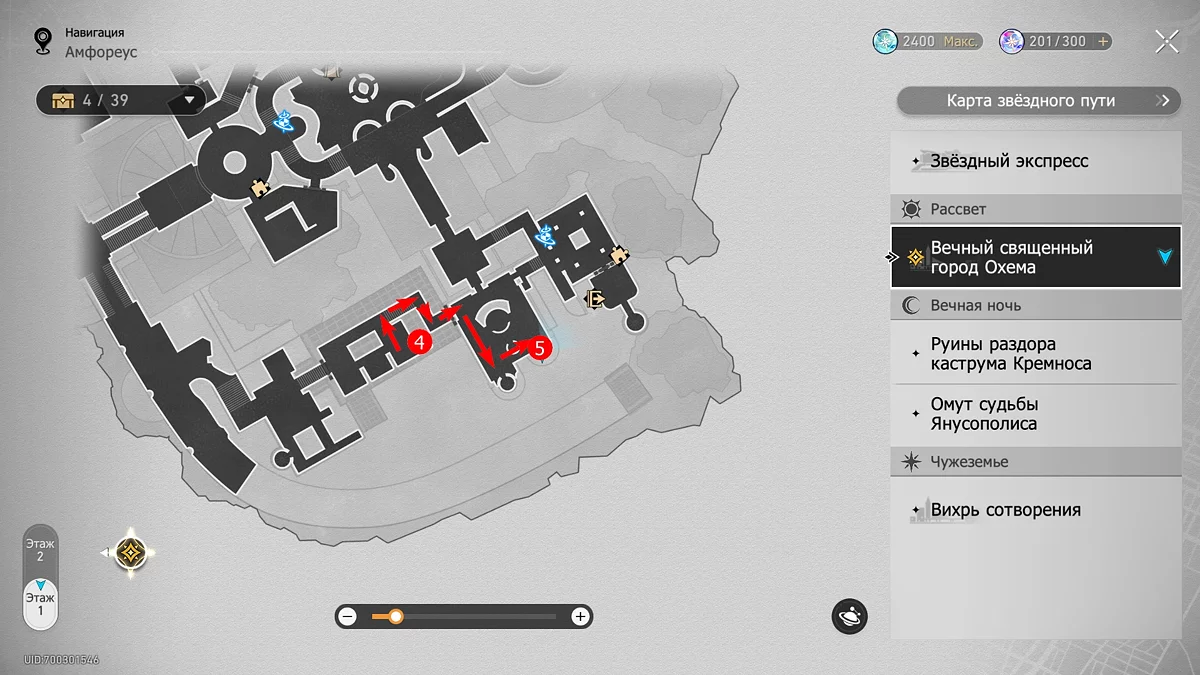
Walk between the baths and turn right. Go up the stairs and enter the door. You will find yourself in the library. To find the chest, stay to the right, near the bookshelves. At the last shelf, you will see the fourth ordinary chest.
Chest #5
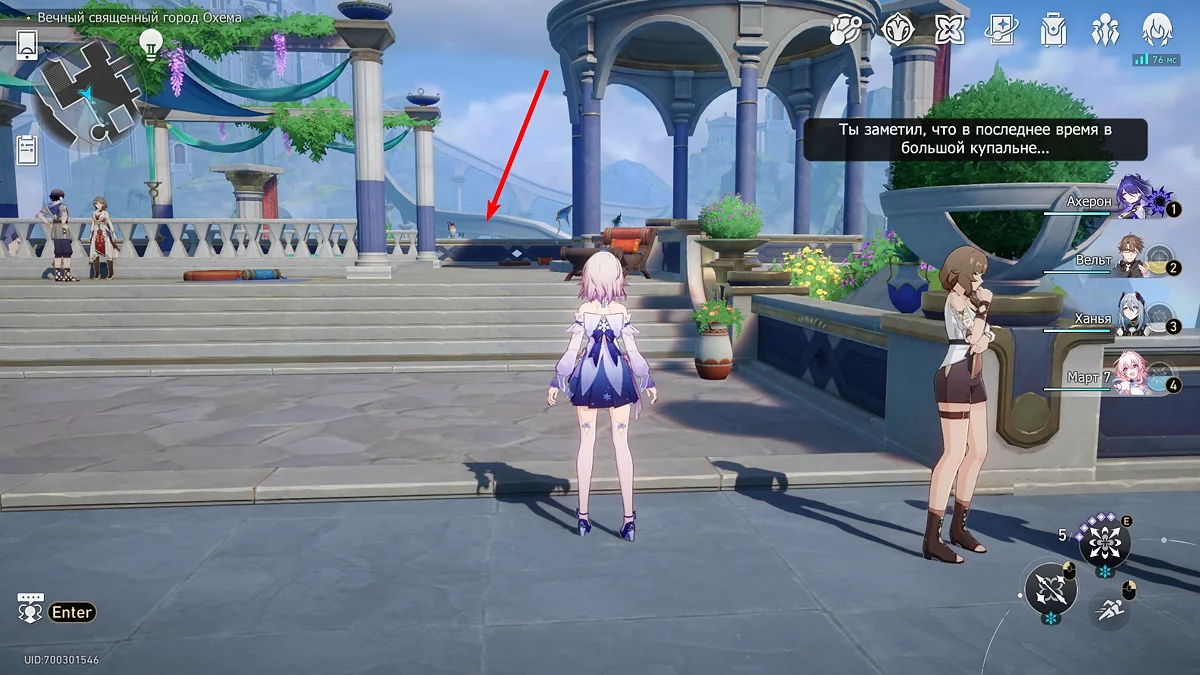
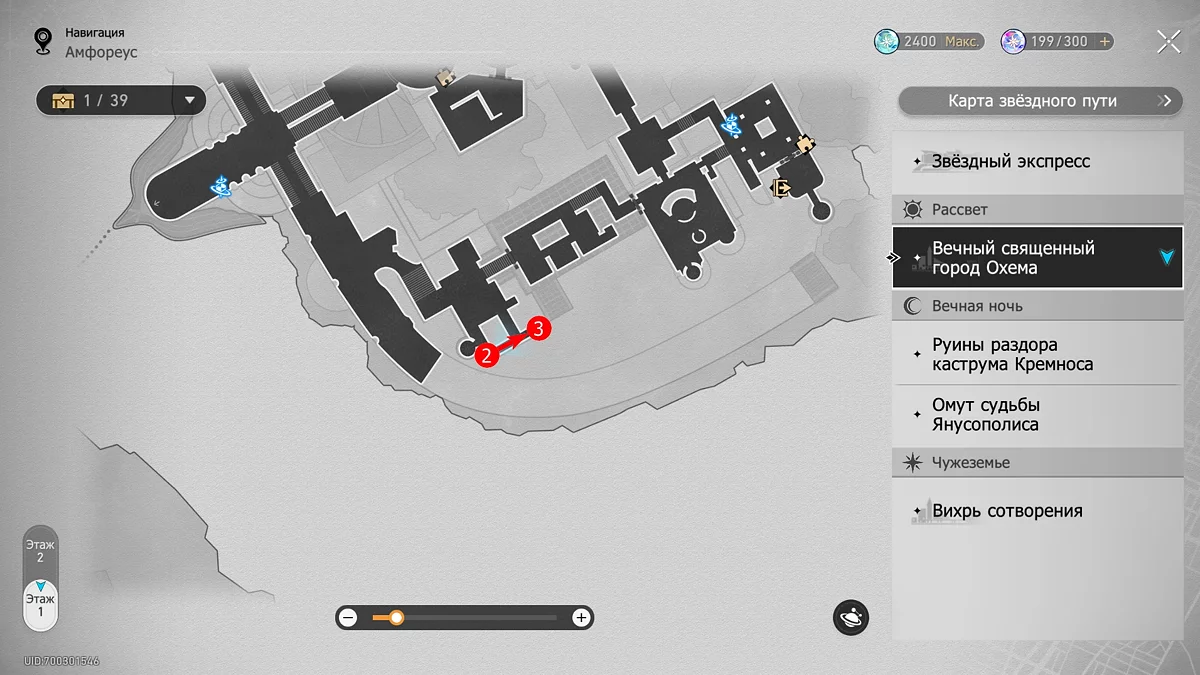
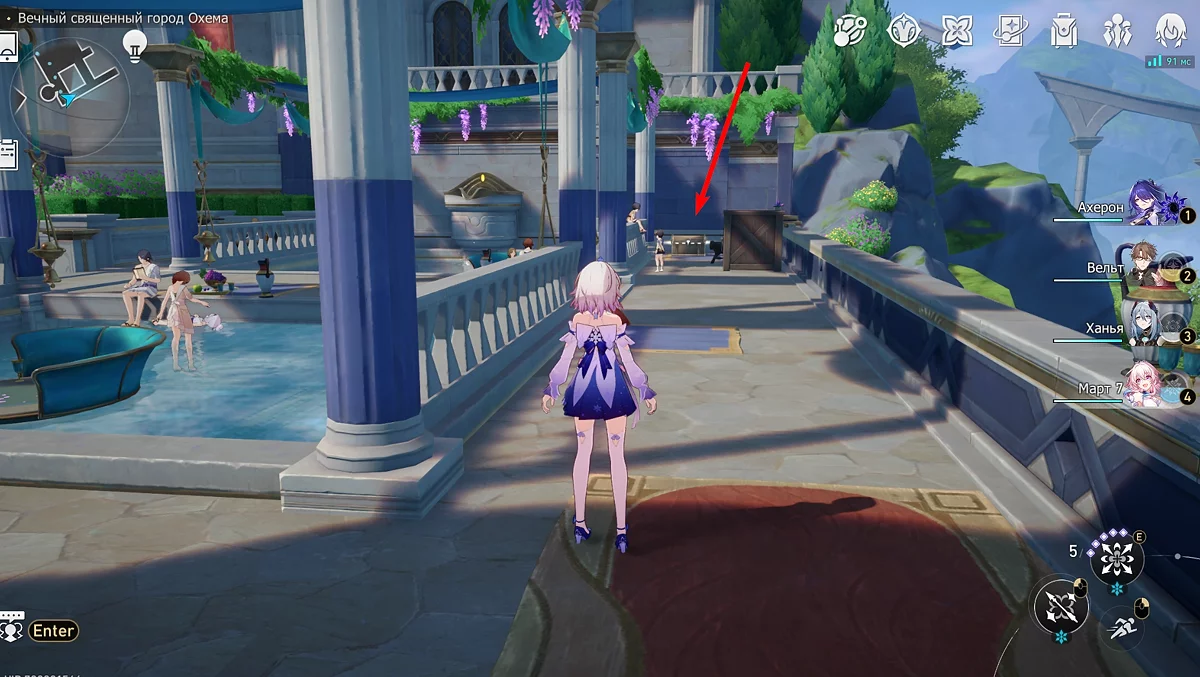
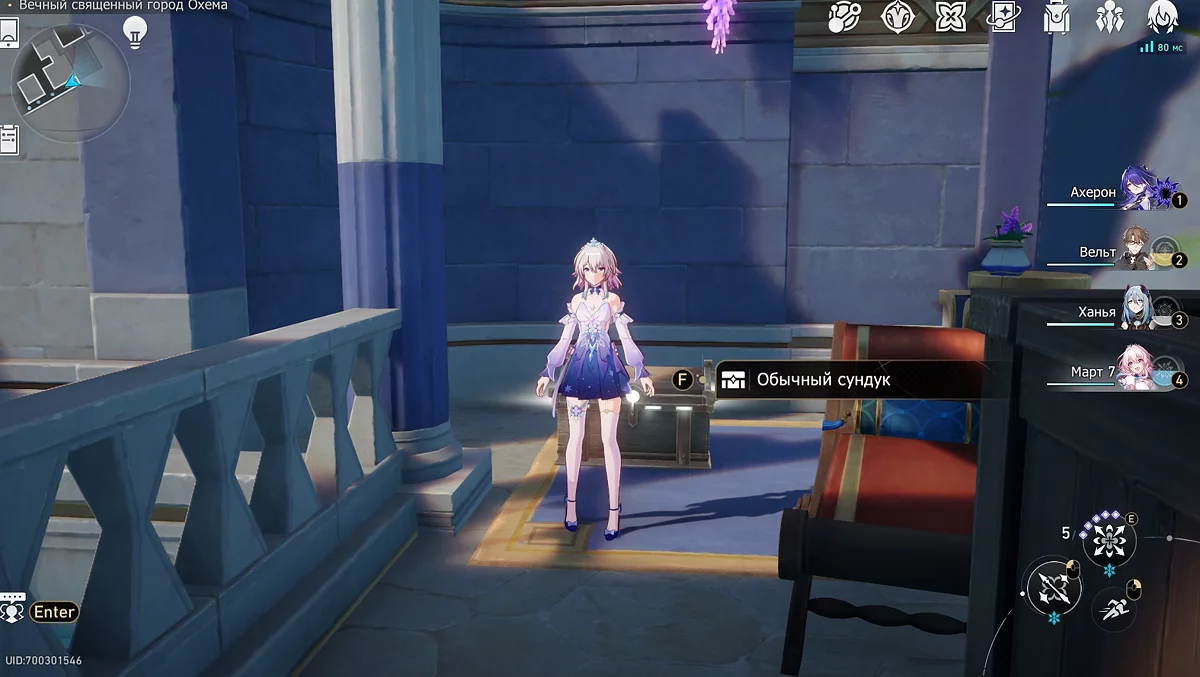
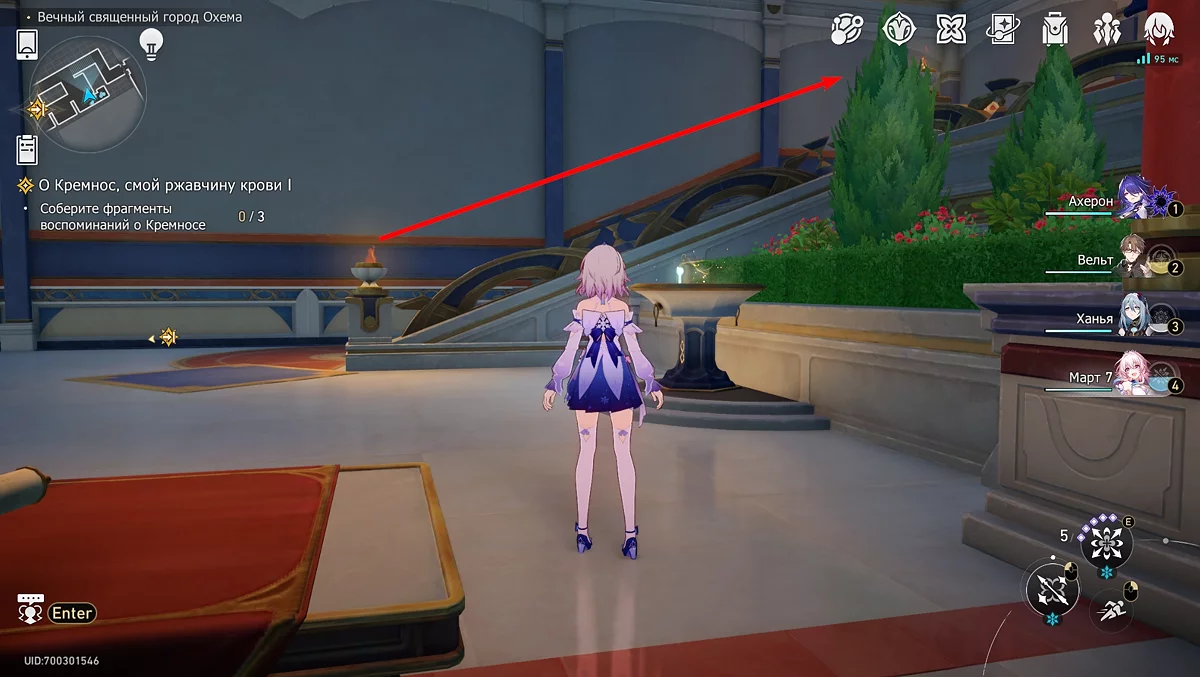
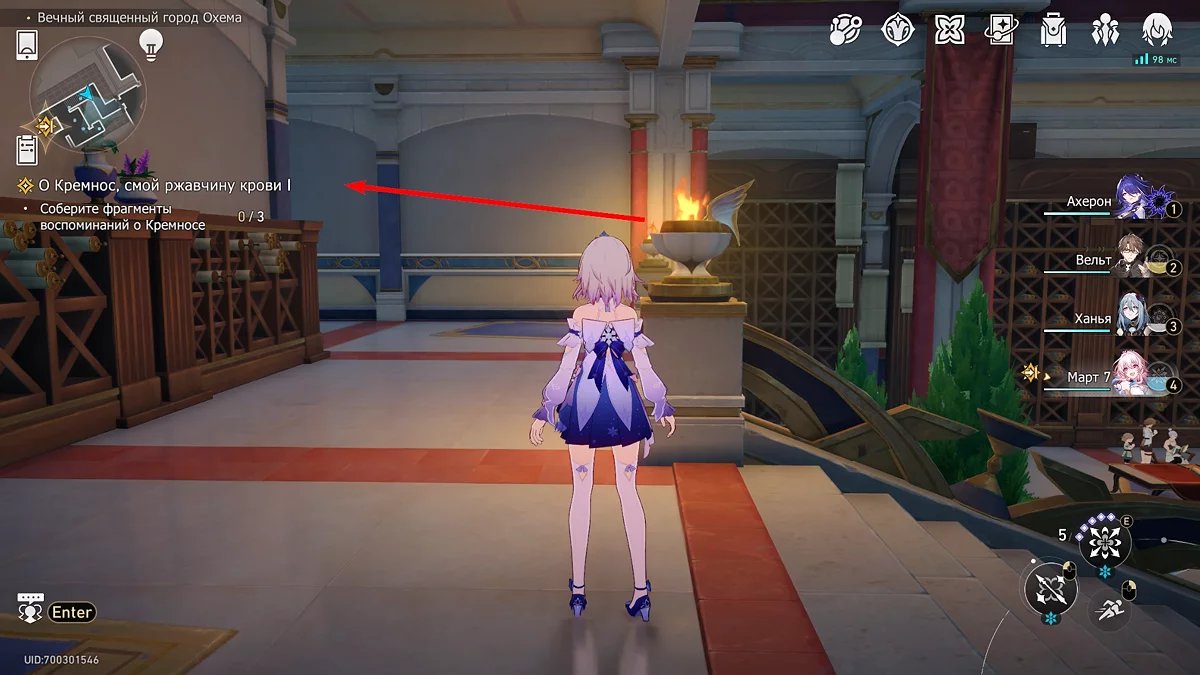
Go up the stairs opposite the previous treasure chest and enter the door. Once outside, head towards the round gazebo. Opposite it, near the table with screens, you will find the chest.
Chest #6
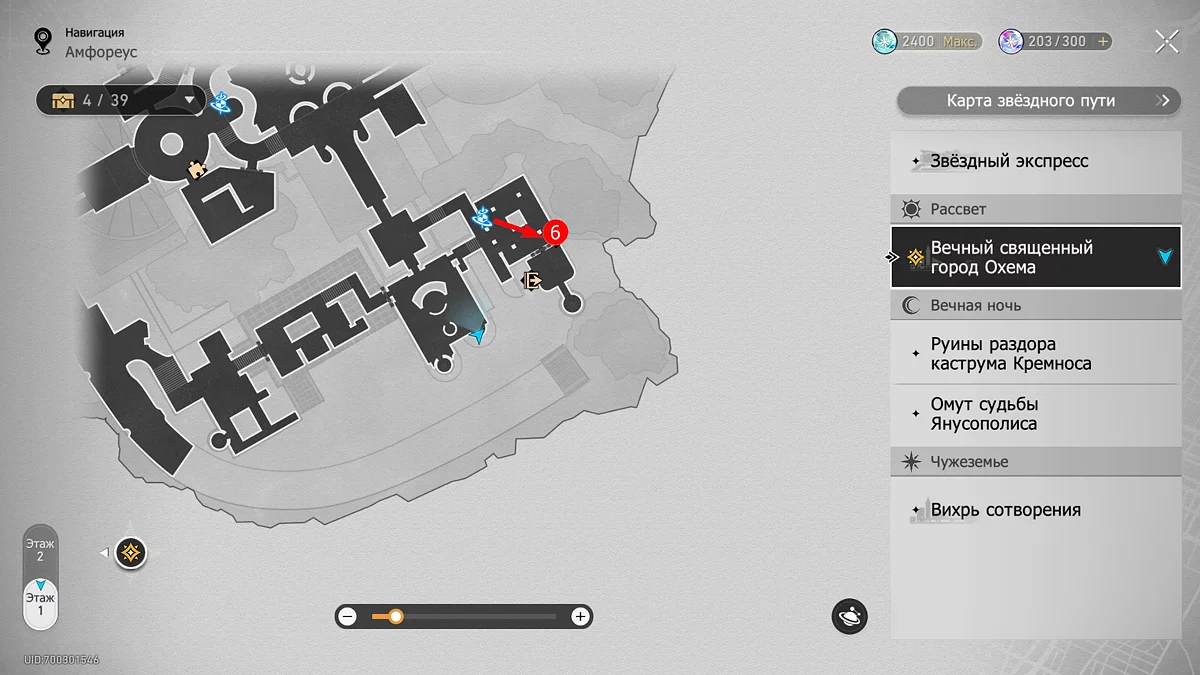
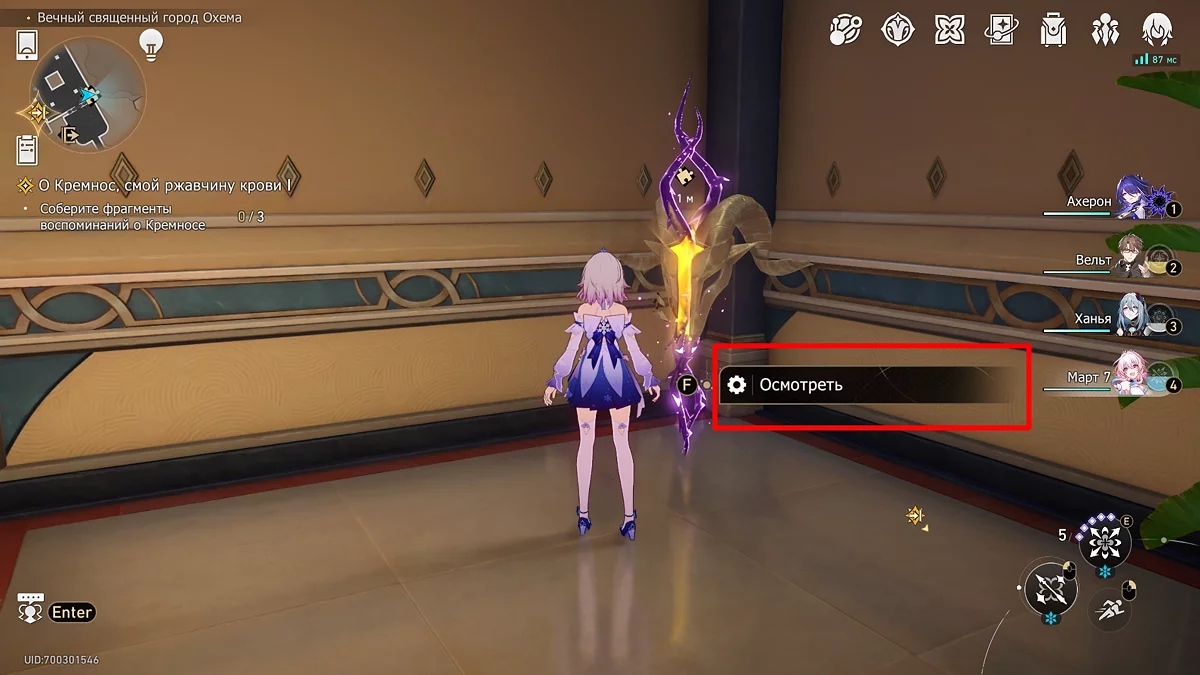
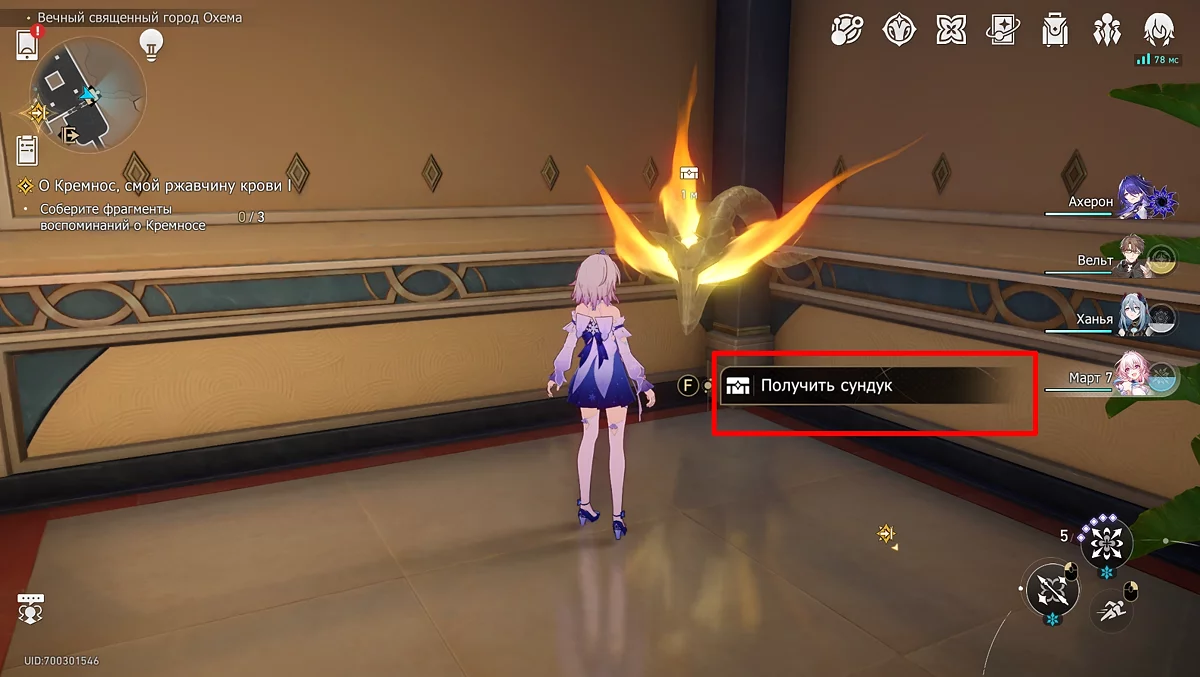
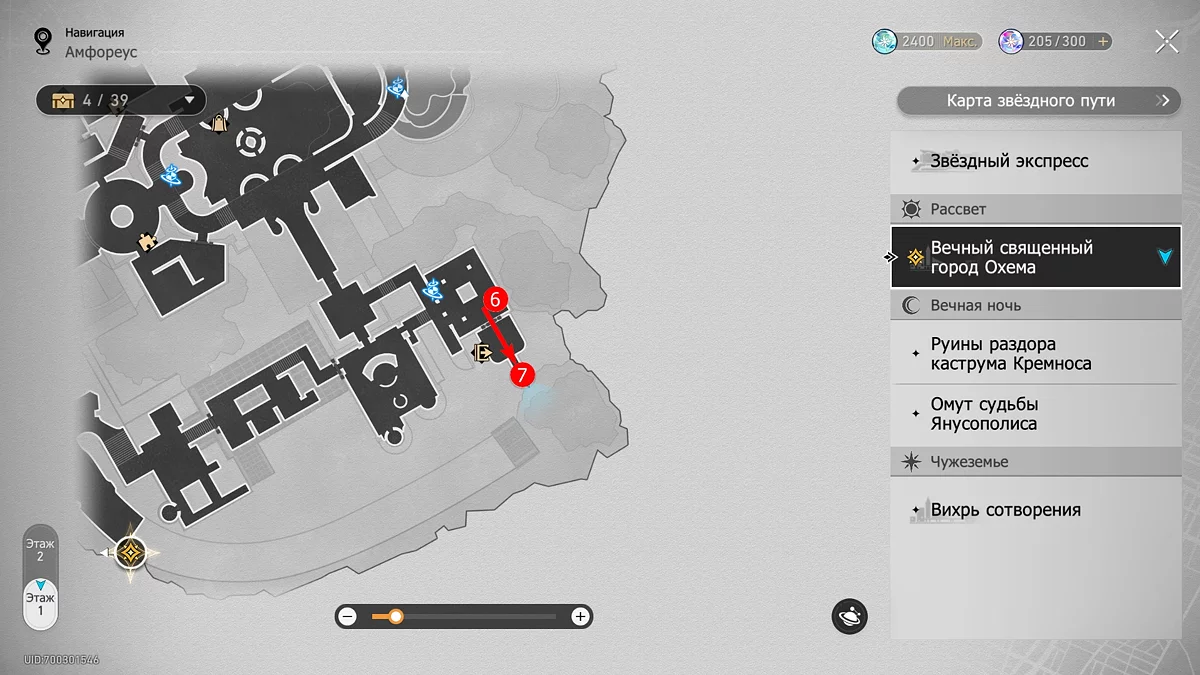
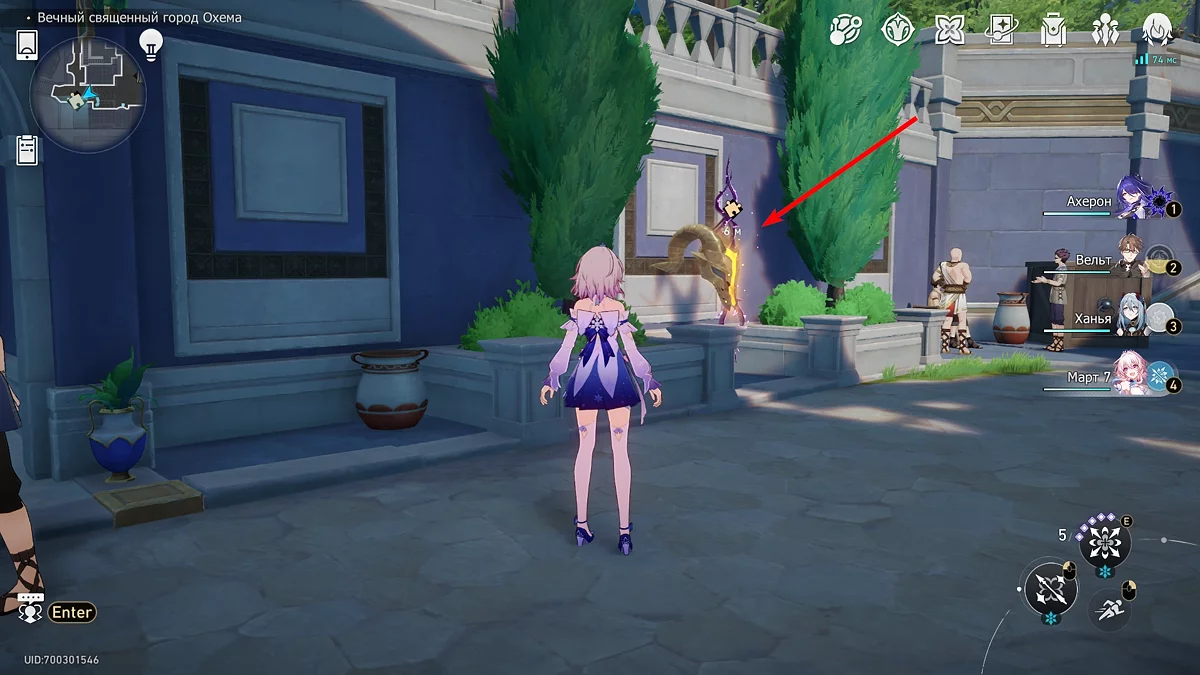
Teleport to the rest hall using the appropriate spatial anchor and approach the device in the other corner that looks like a goat's head. Interact with it to solve the puzzle.
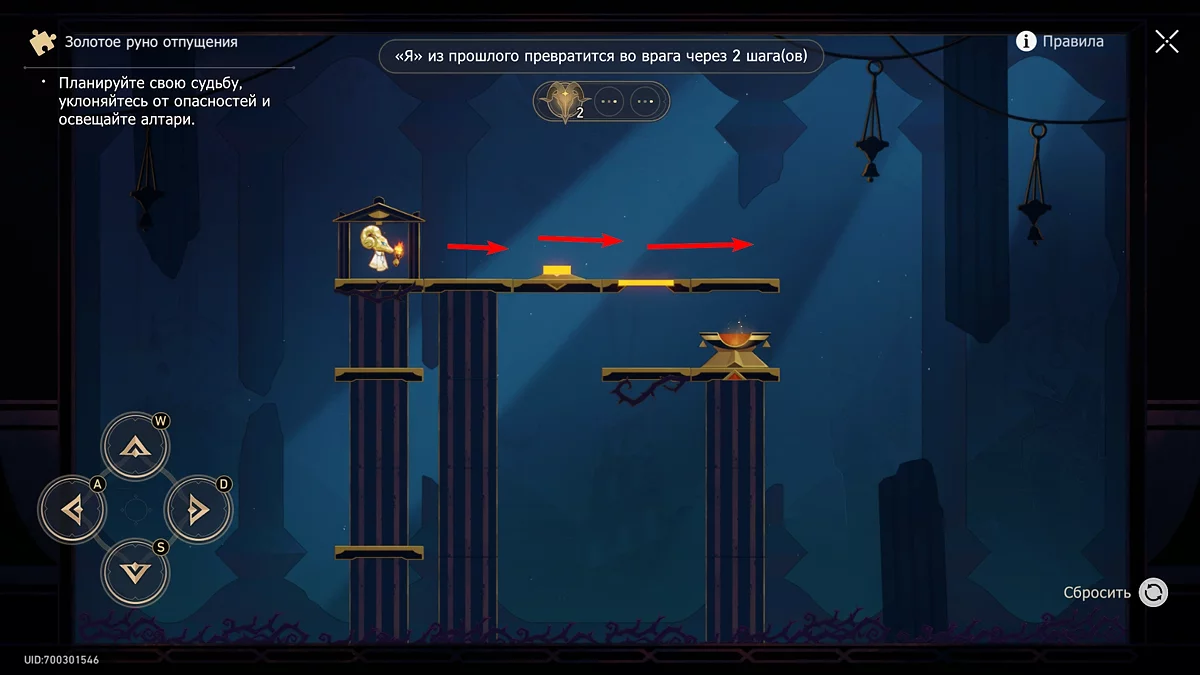
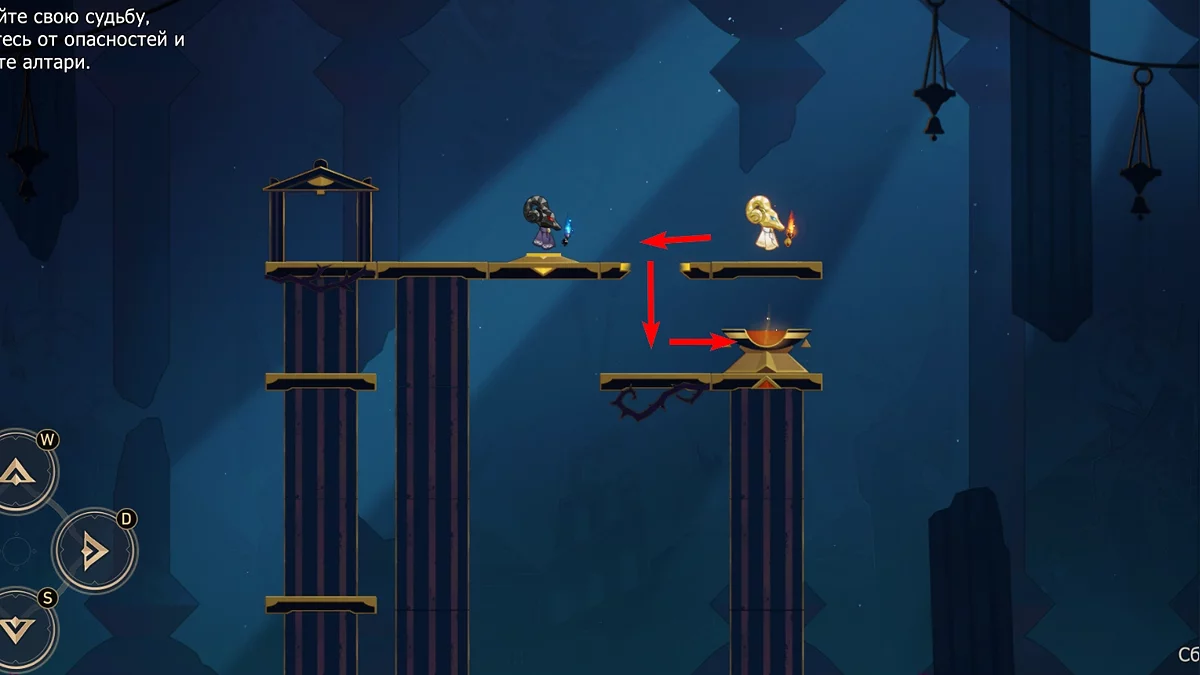
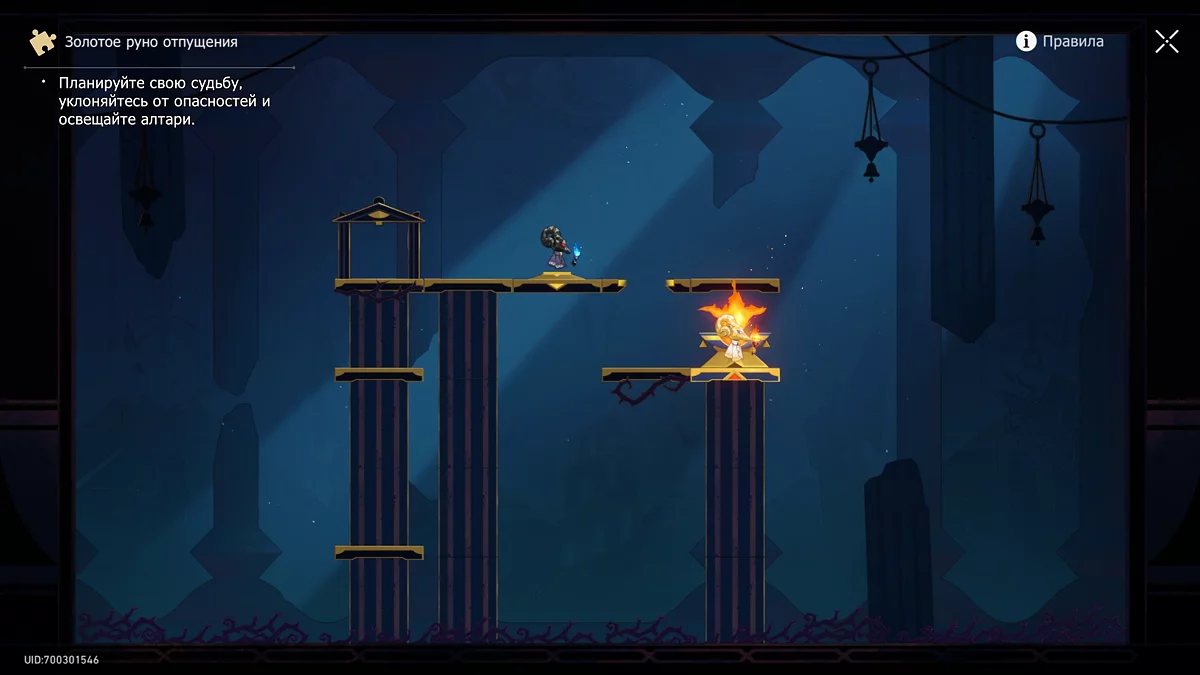
To solve the puzzle, you need to light the bonfire and not fall into the Abyss. To do this, controlling the creature with the goat's head, go to the end of the road, then take a step back and jump down. Then just step towards the bonfire and it will light up. After that, click "Get Chest".
Chest #7
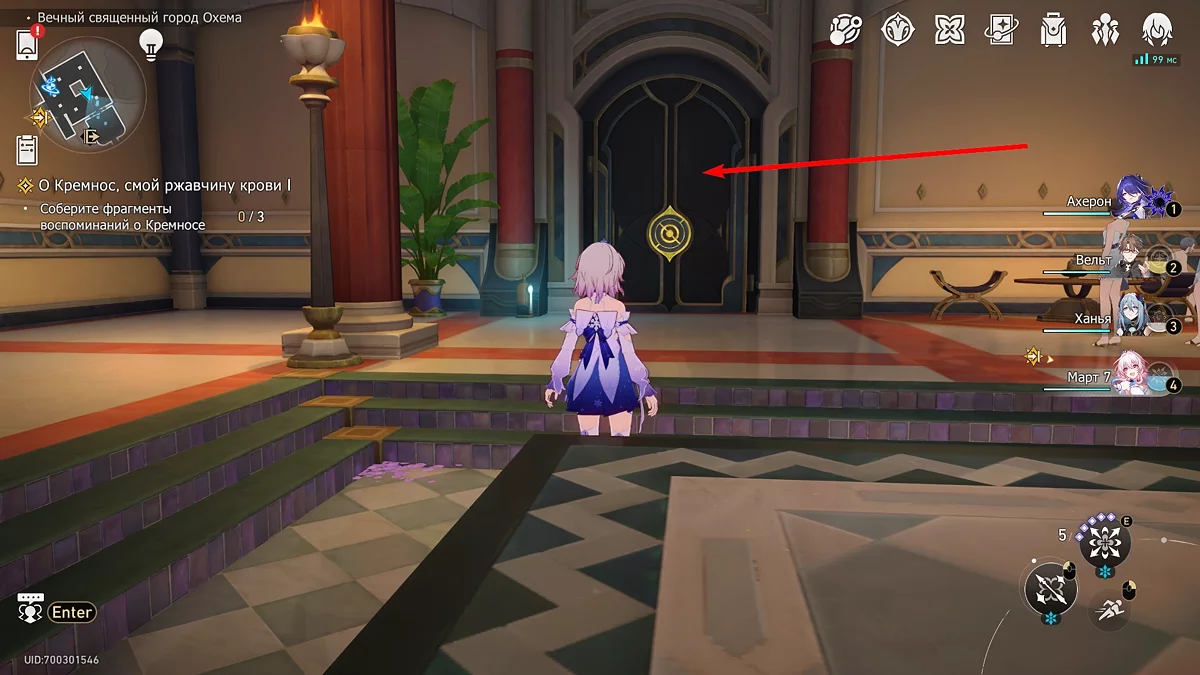
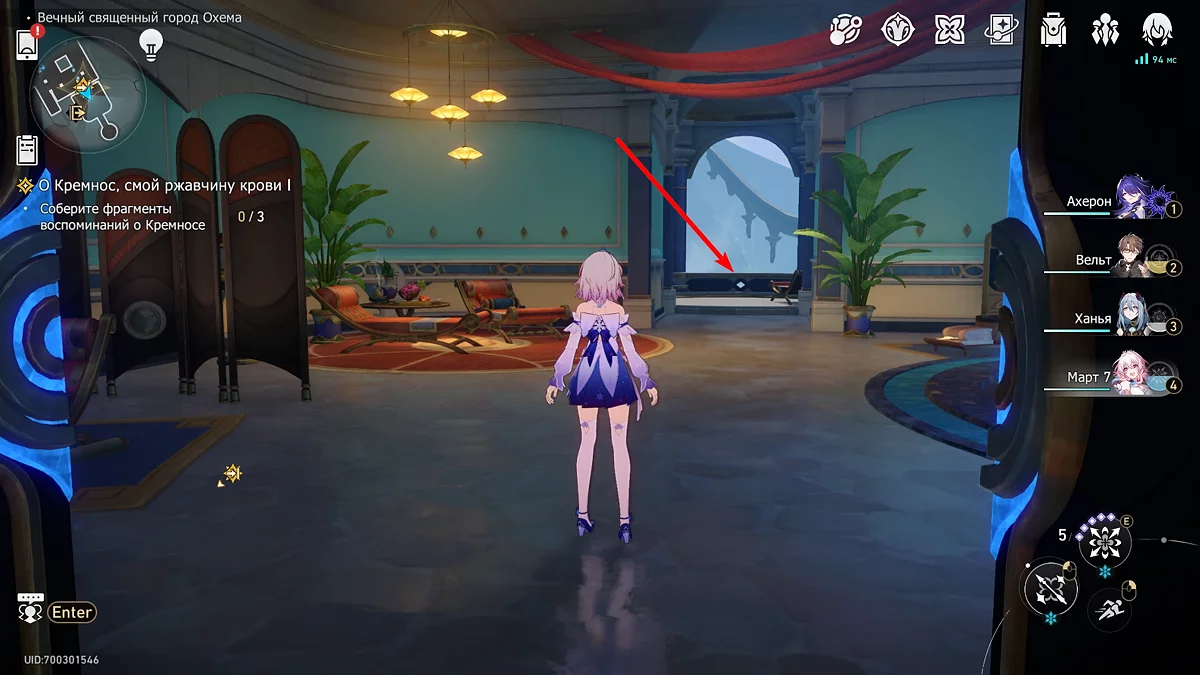
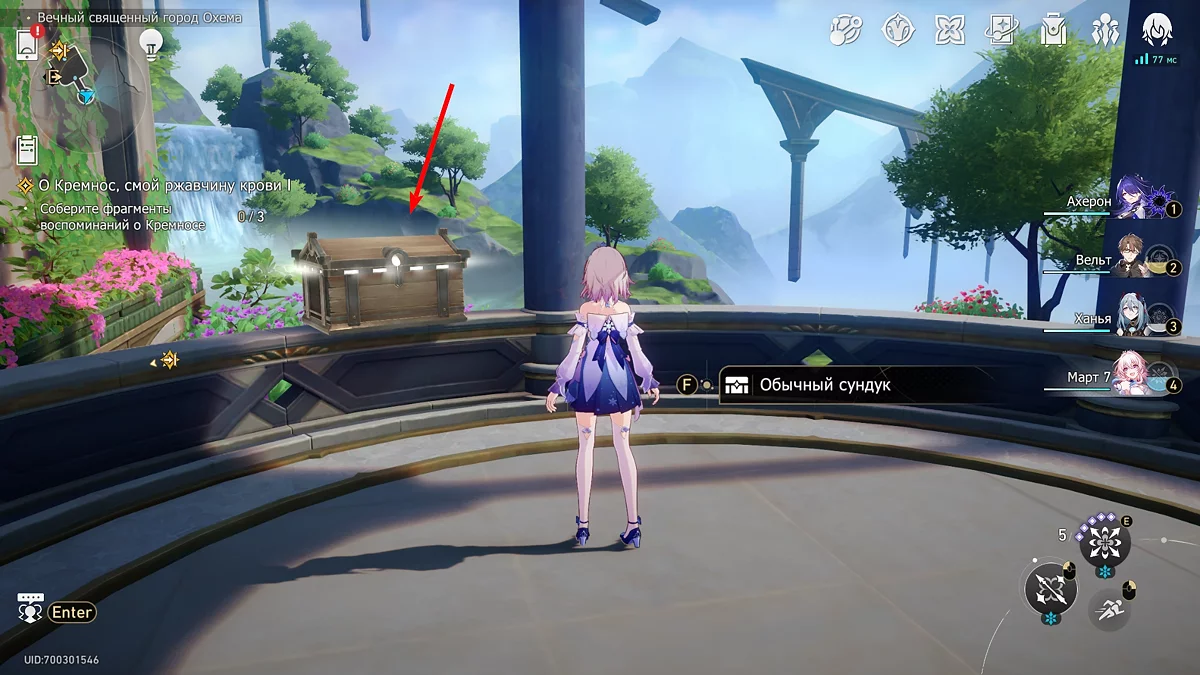
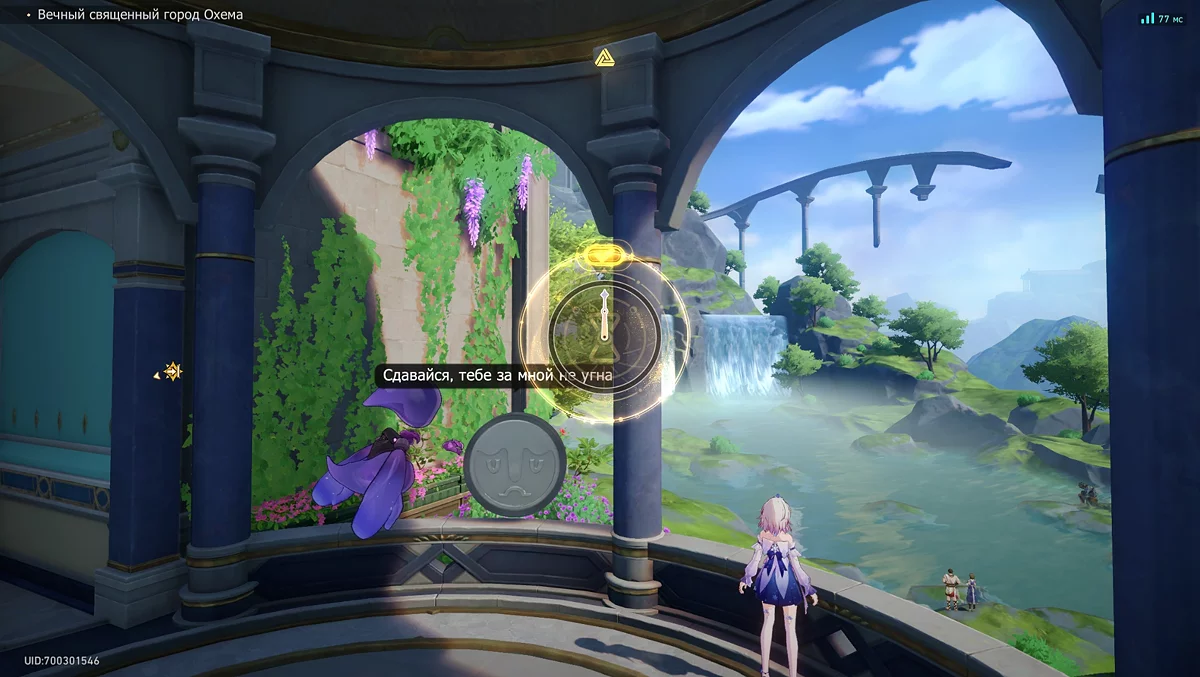
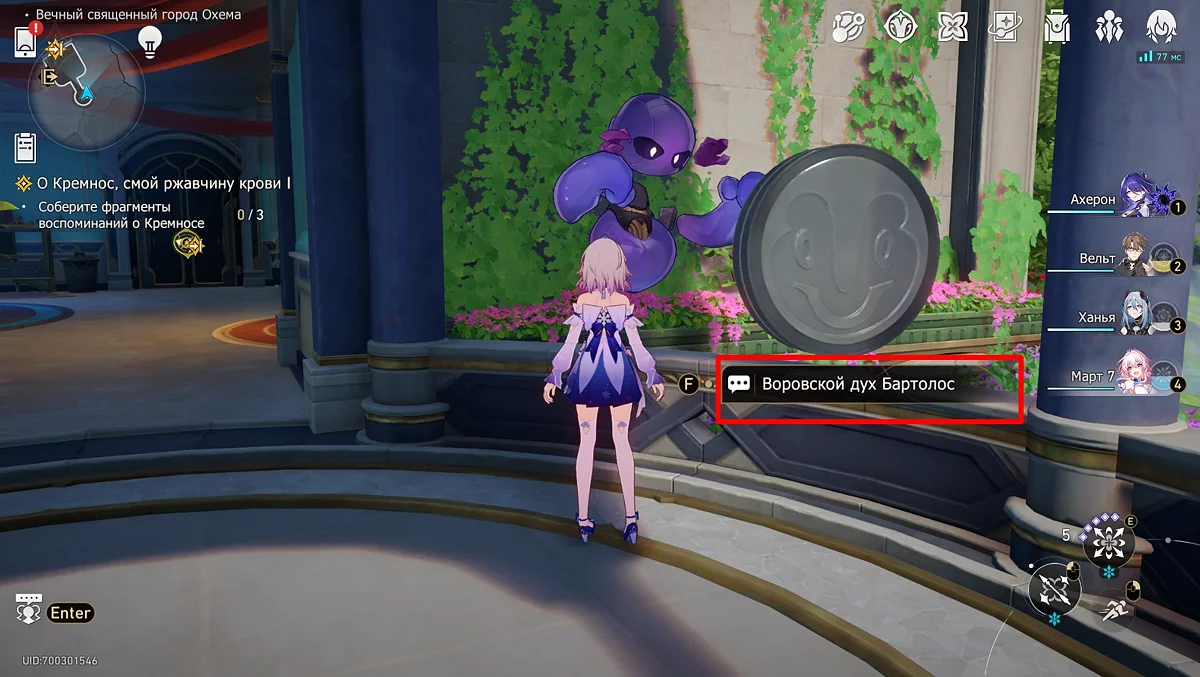
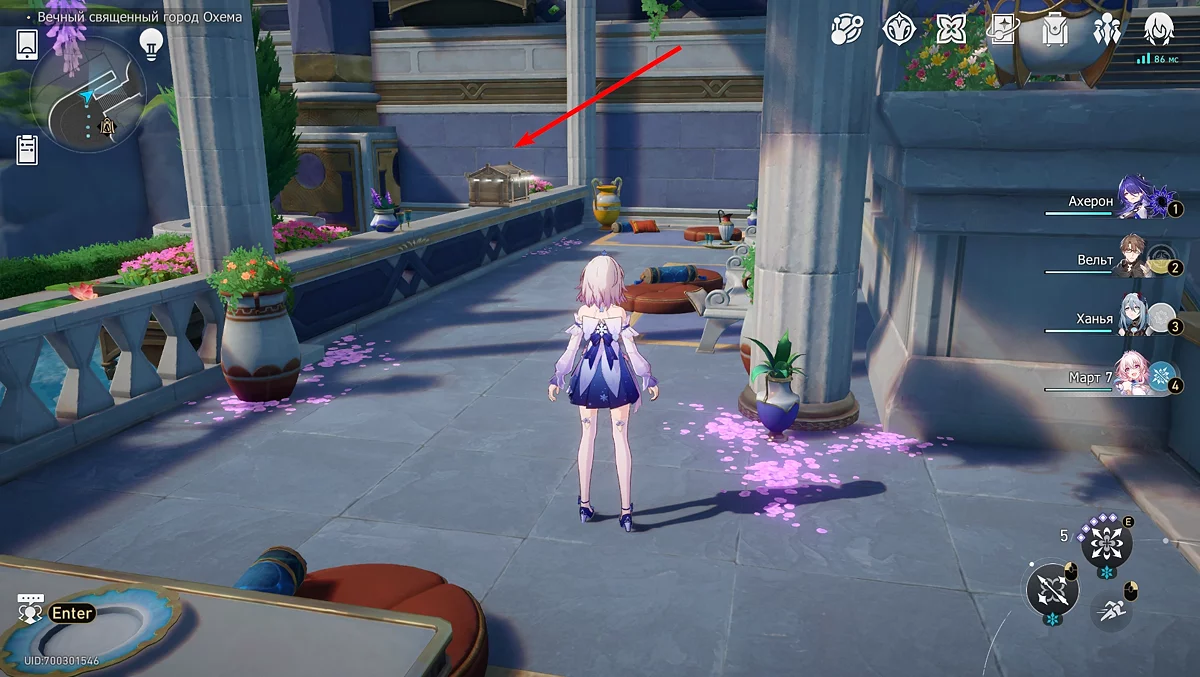
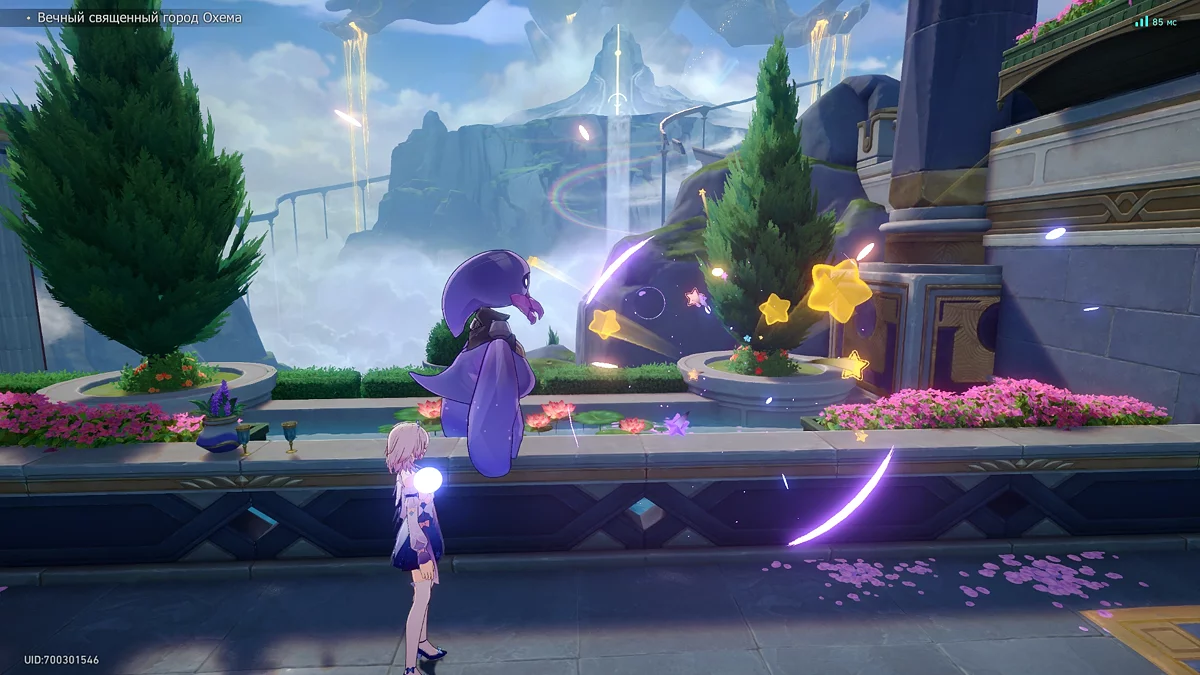
To take the next chest, enter the door next to the goat's head and proceed to the balcony: there will be another treasure chest. Try to take it, but a creature called the Thieving Spirit will steal the box.
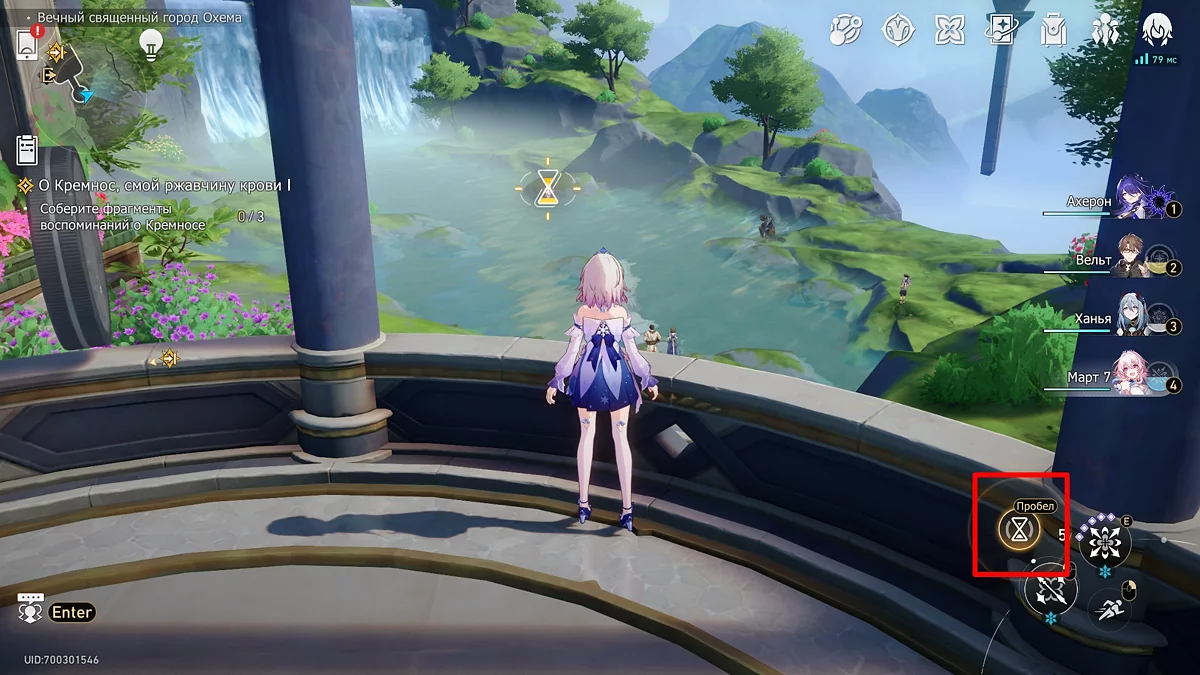
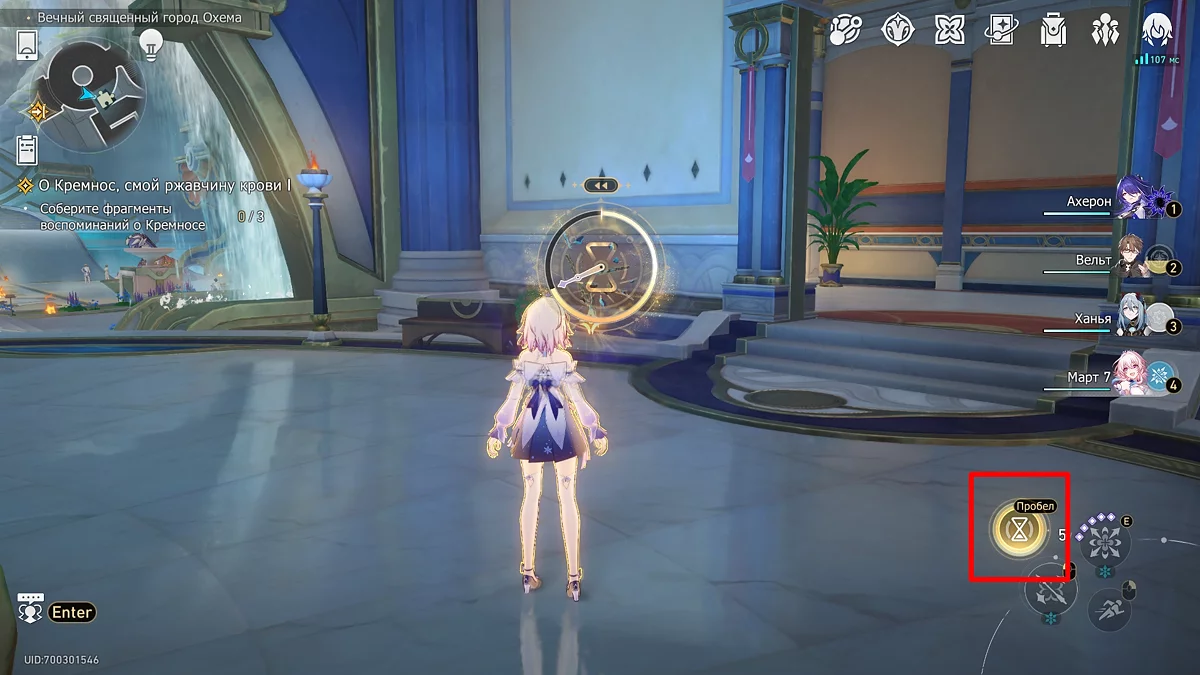
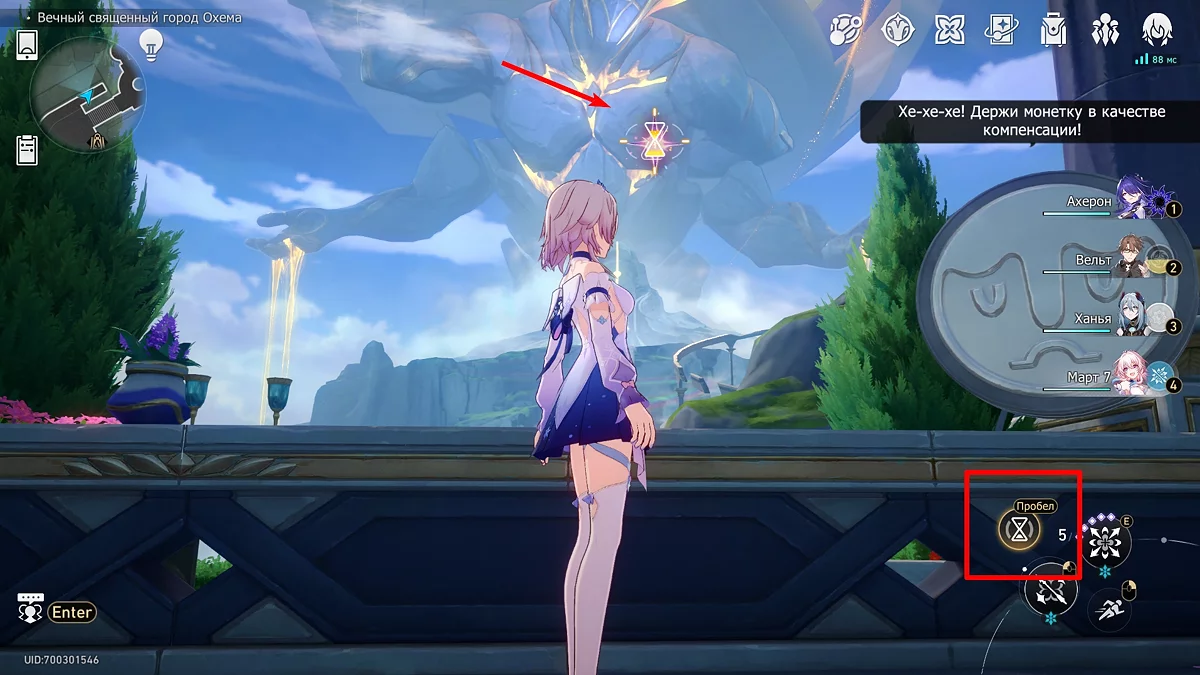
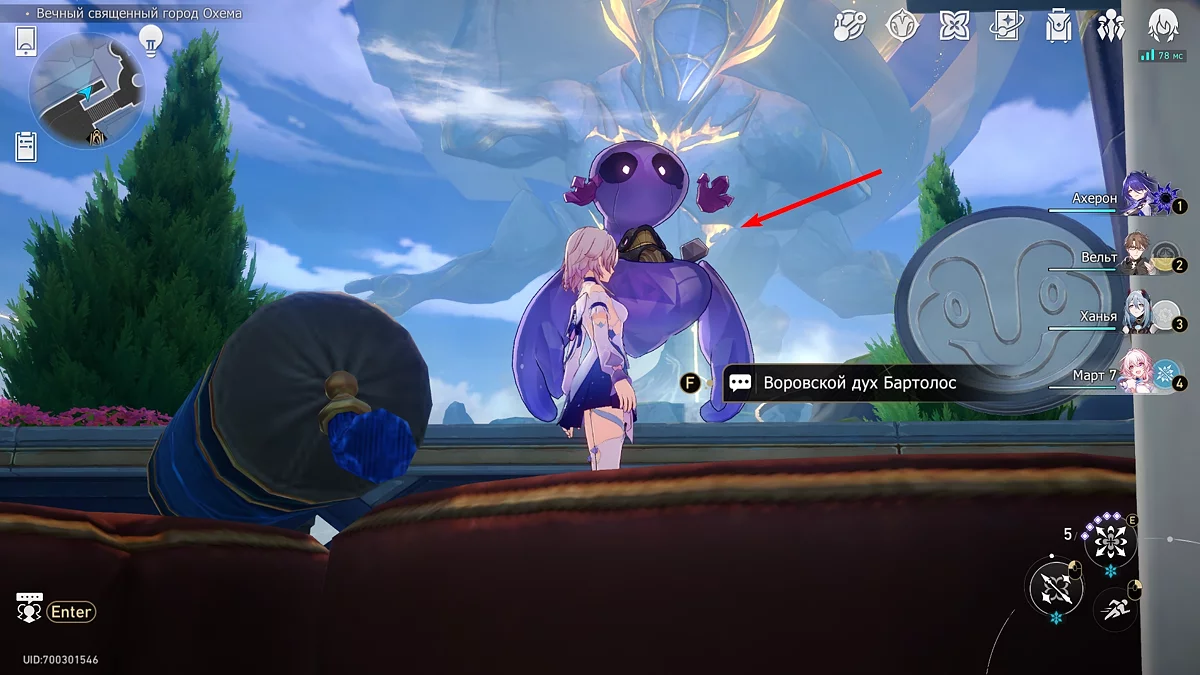
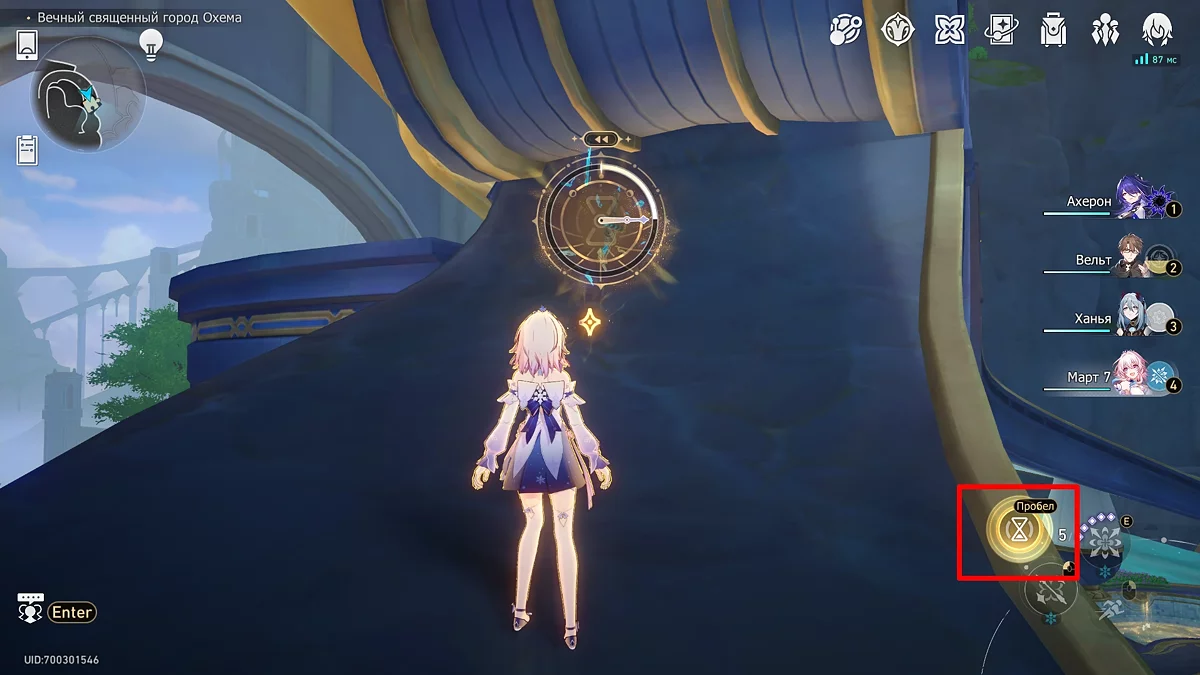
Return the creature by using seeds to rewind time. But be careful: in some zones marked in green, it will start to resist. Release the spacebar button, then quickly press it again to catch the spirit off guard. After that, fight the creature and you will be able to obtain not only treasures but also an additional 40 Stellar Jade.
Chest #8
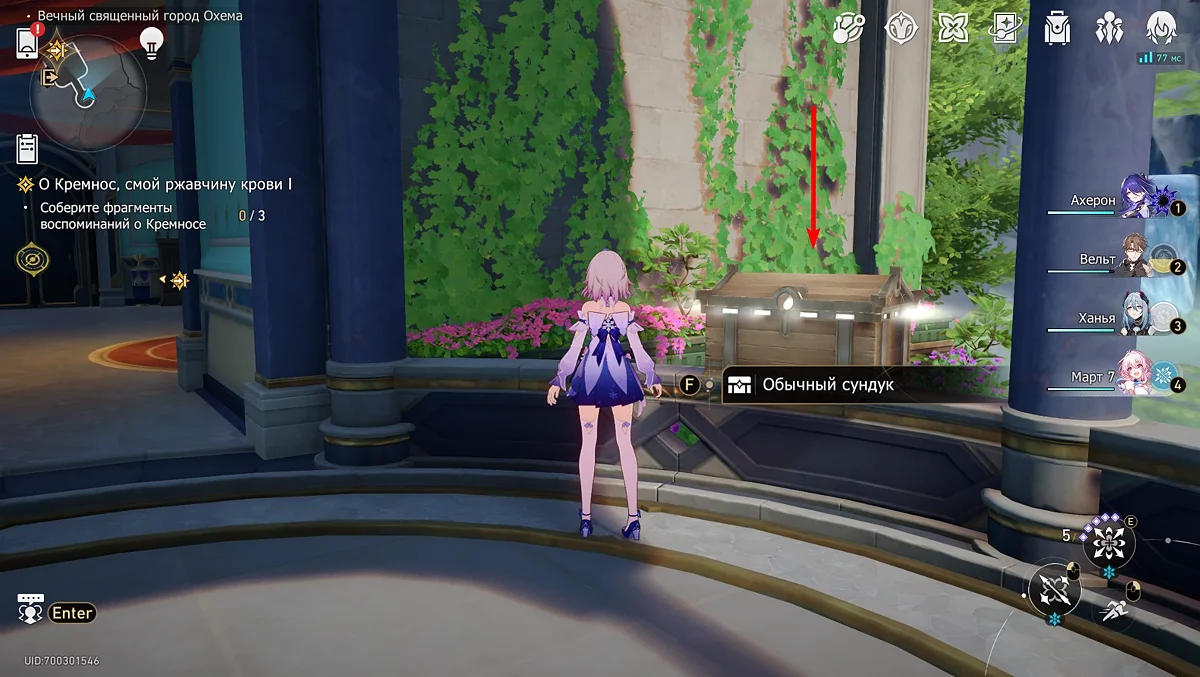
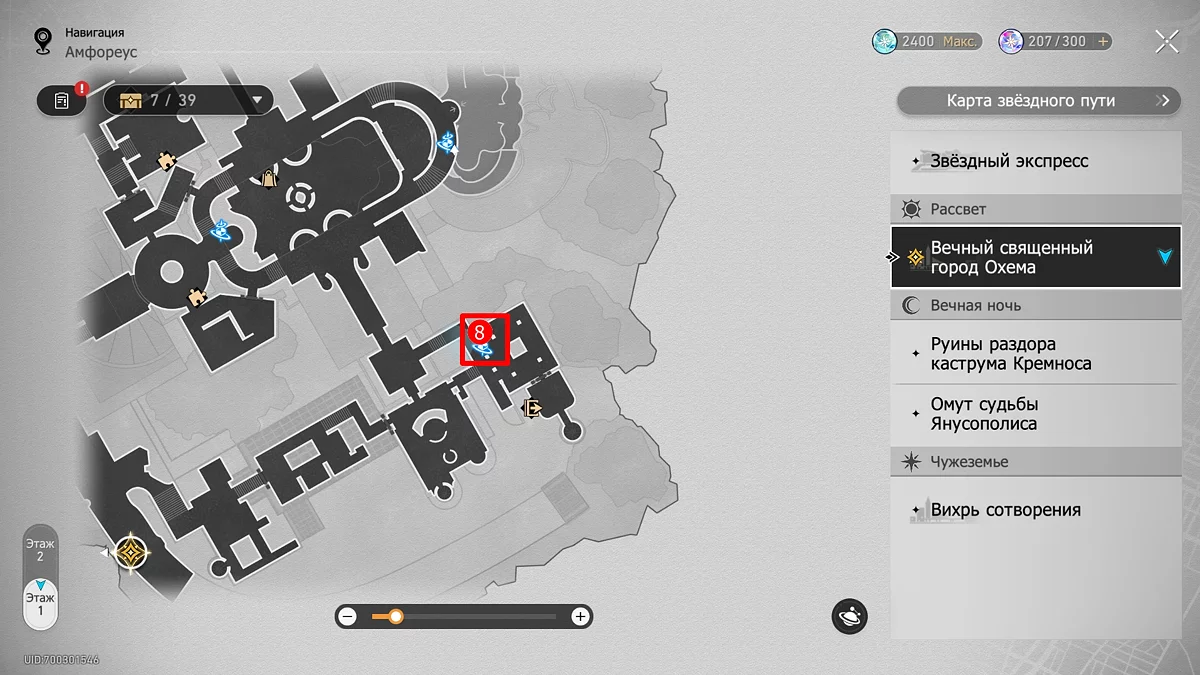
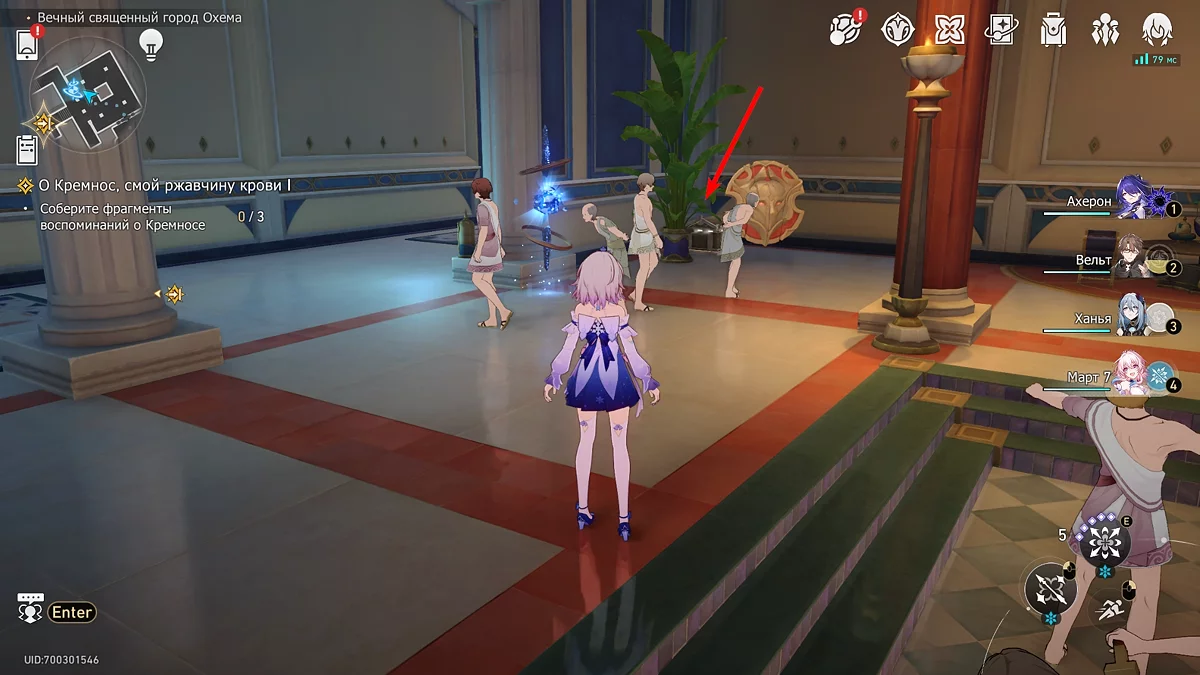
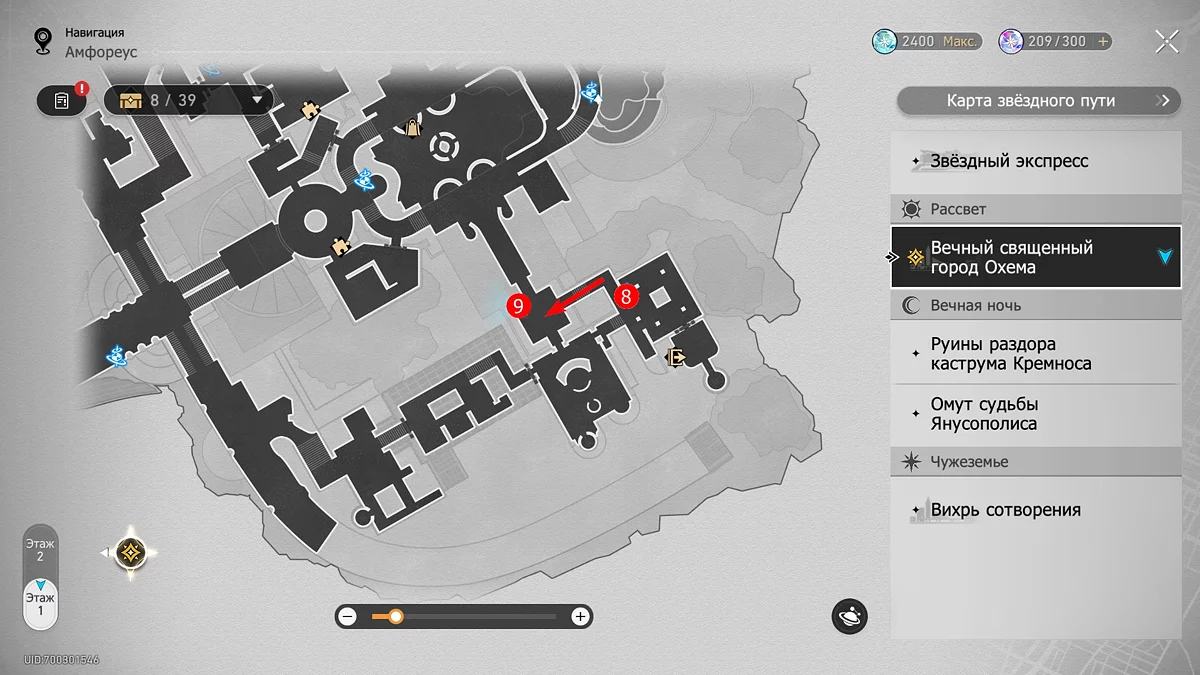
Return to the spatial anchor in the Rest Hall and right next to it, you will find another ordinary treasure chest.
Chest #9
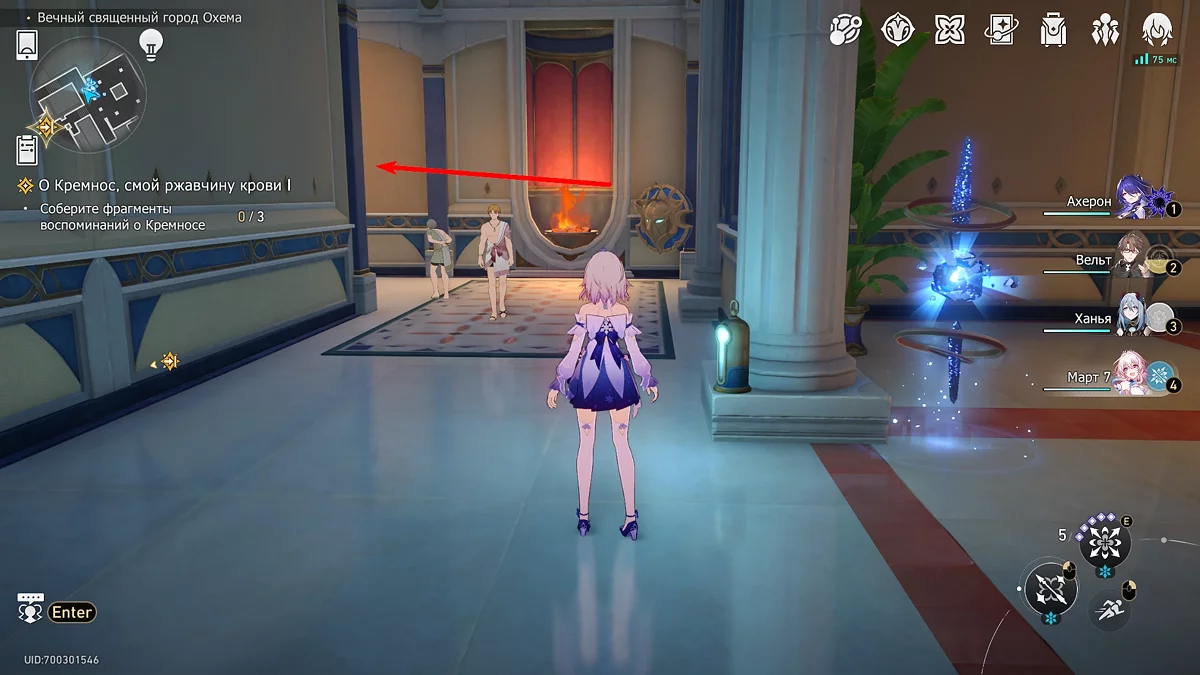
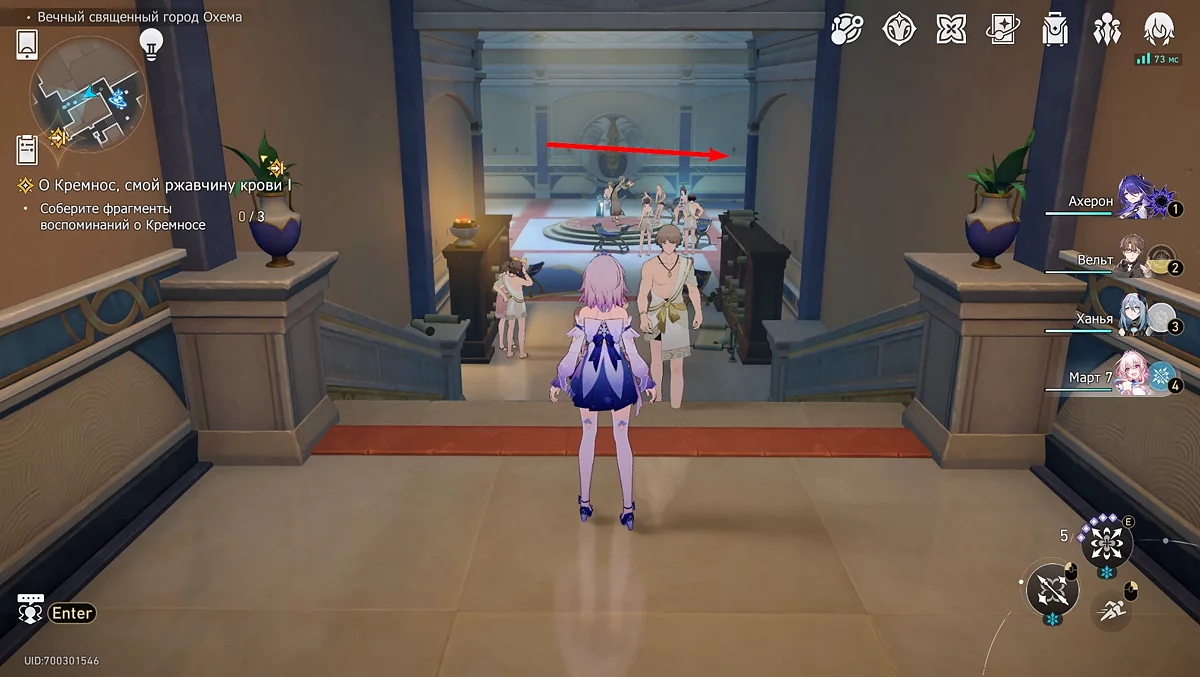
From the same teleport, turn left and descend into another room where locals are listening to stories. In the corner of the room, you will see the ninth ordinary chest standing next to a column.
Chest #10
Walk through the corridor next to the previous chest and turn left. In a small nook by the stairs, there will be another treasure chest, for which you can receive 5 units of Stellar Jade.
Chest #11
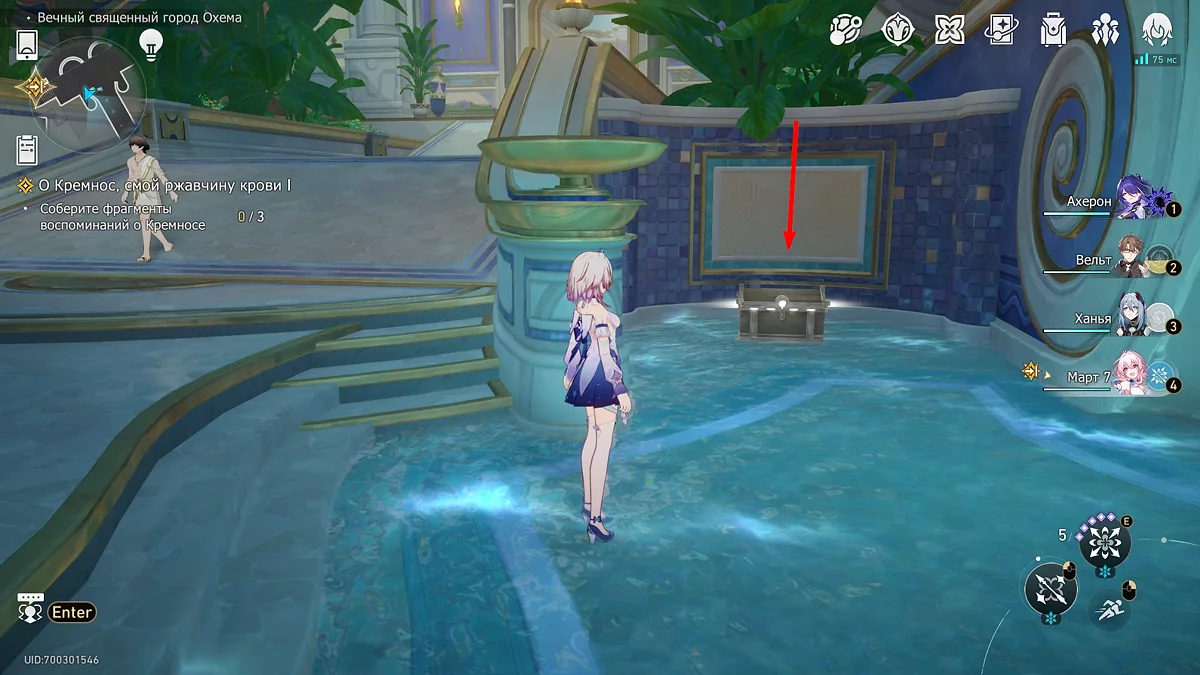
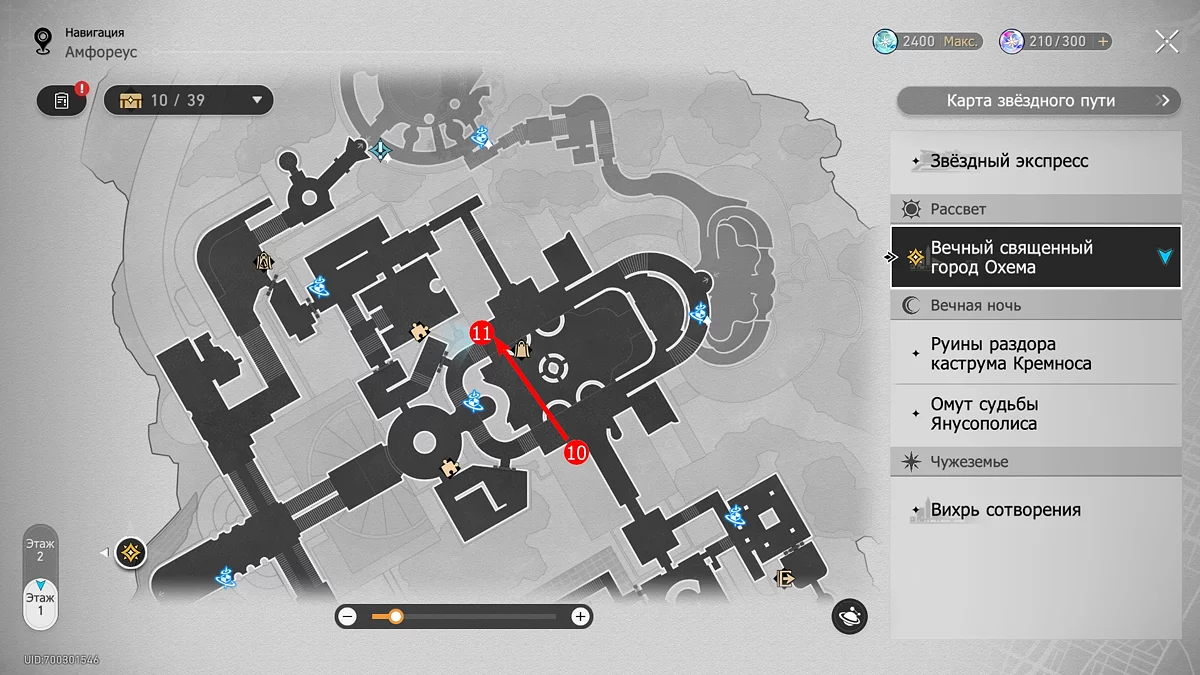
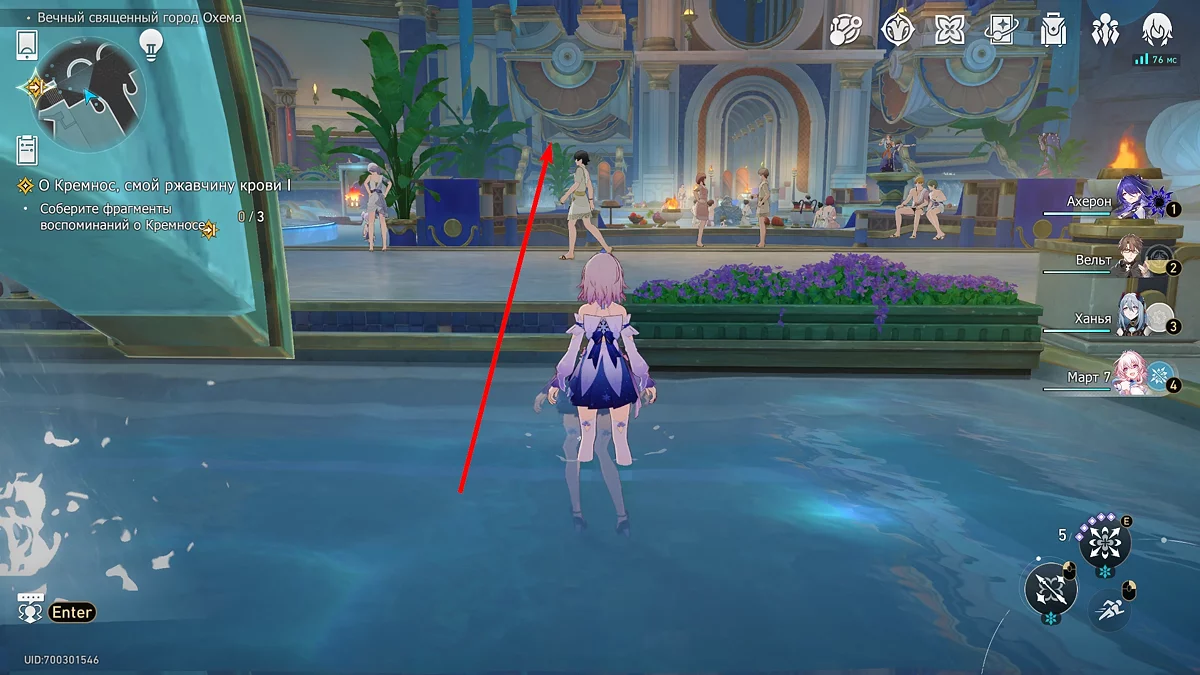
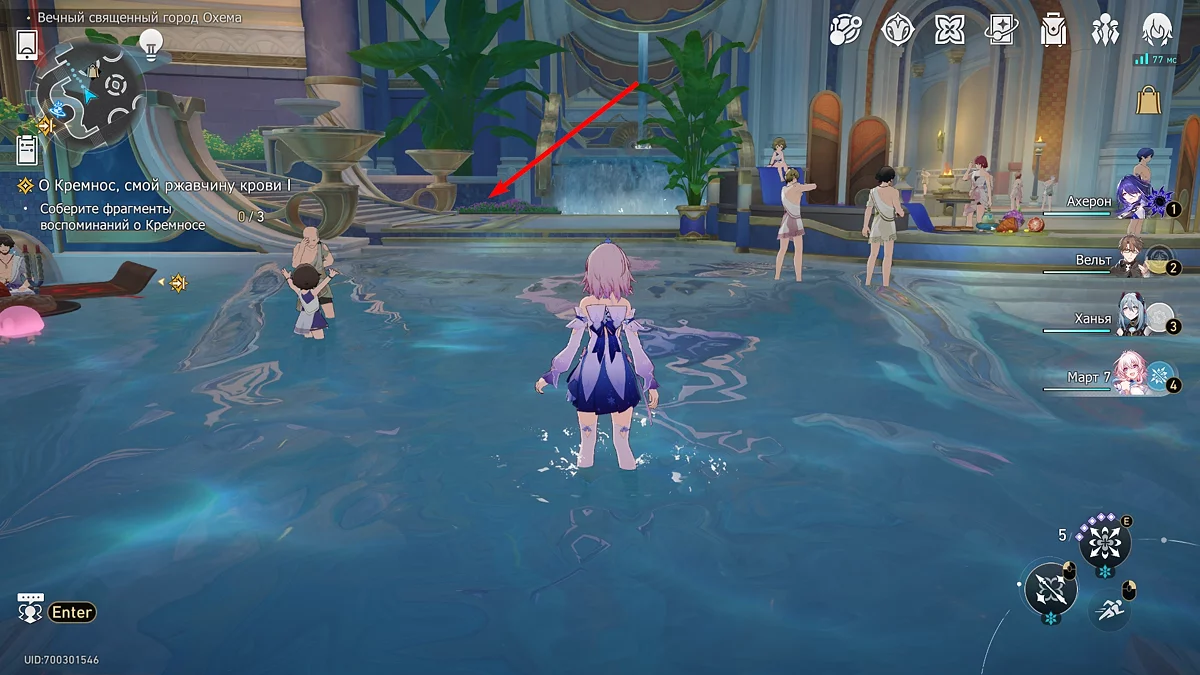
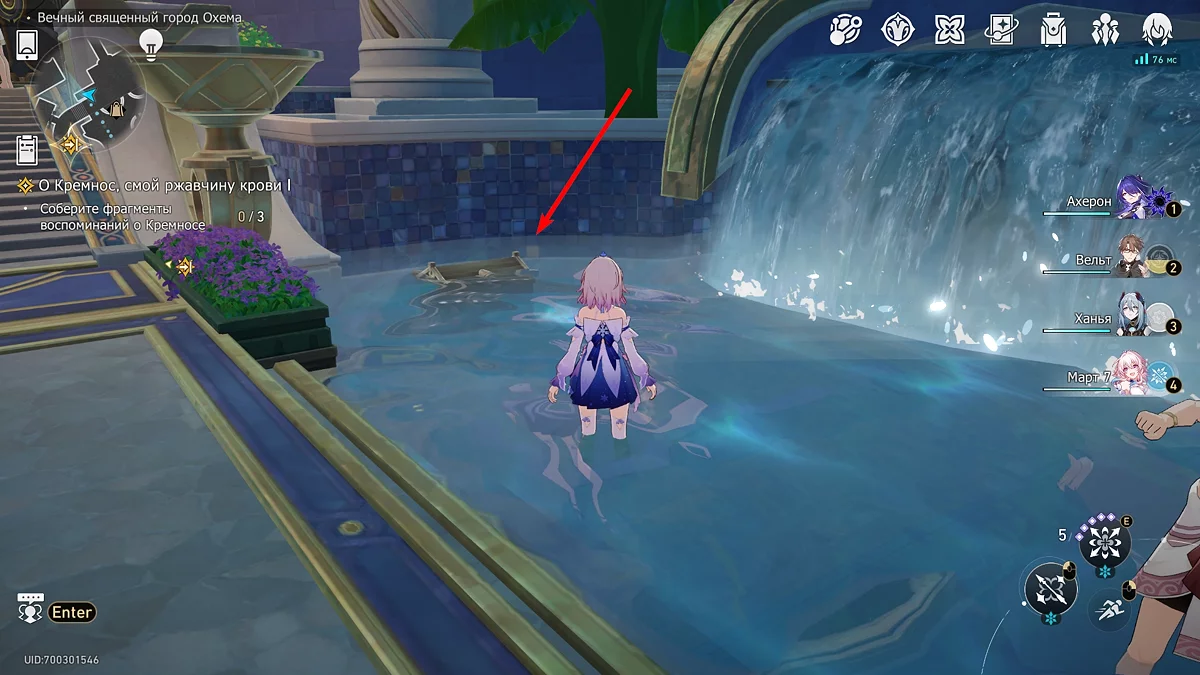
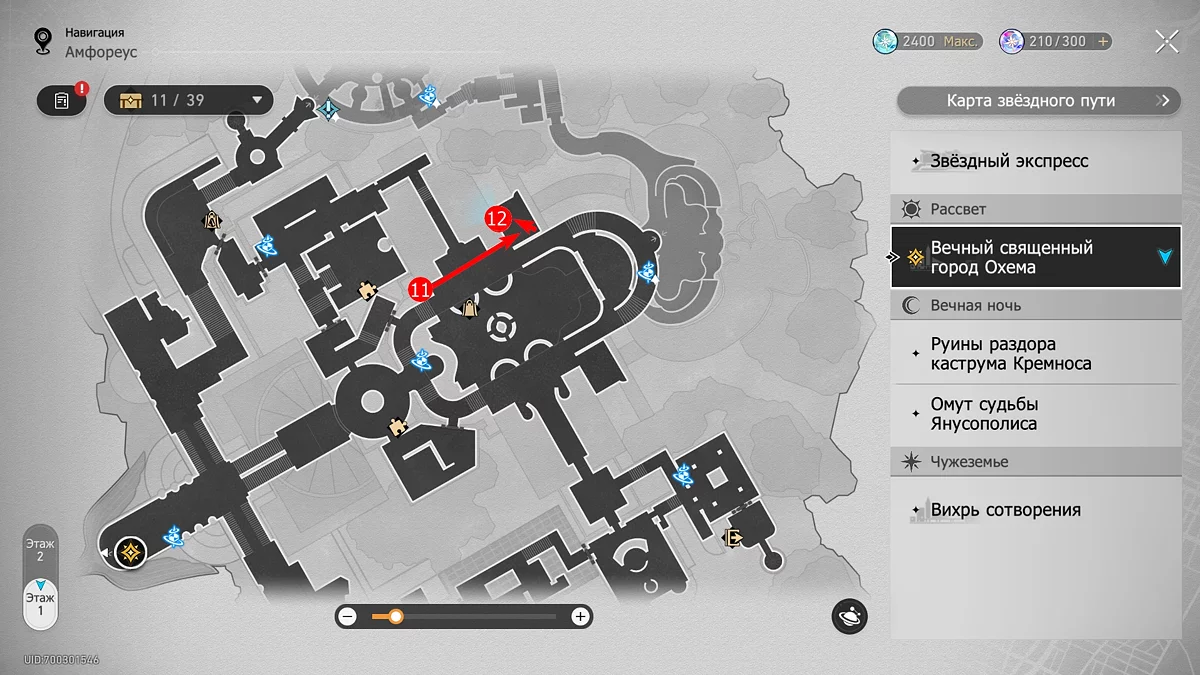
From the previous chest, head to the other edge of the room until you see a chest at the foot of the stairs. It will be standing in the water, next to a small waterfall and a flower bed.
Chest #12
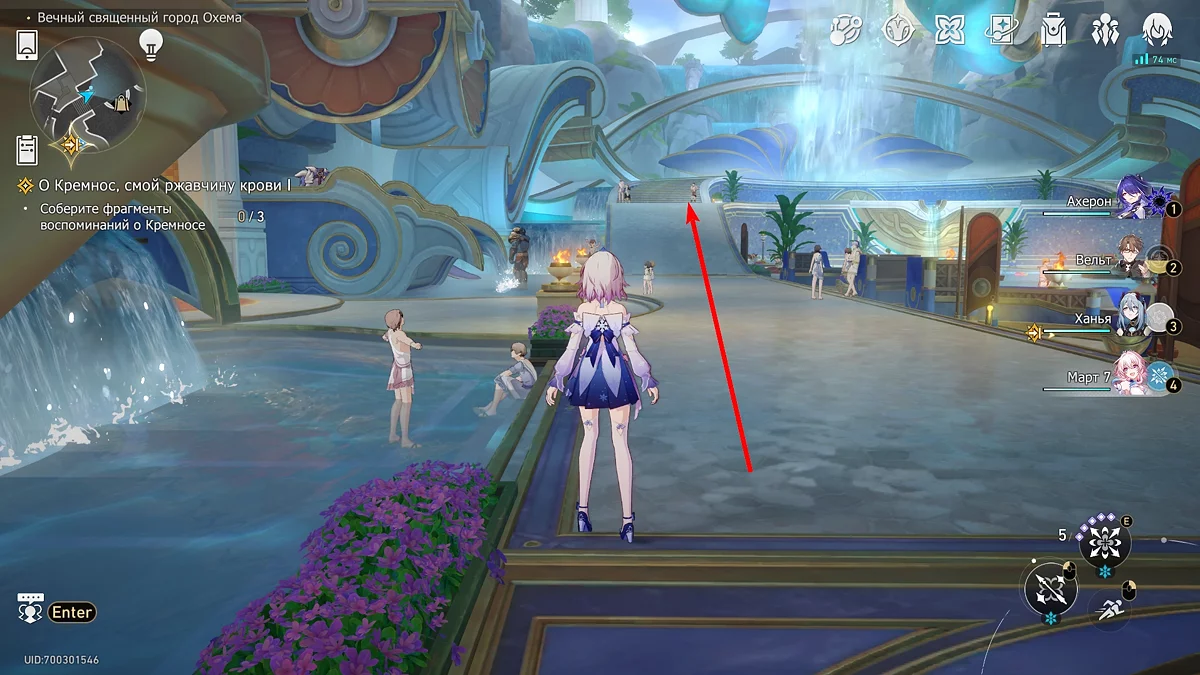
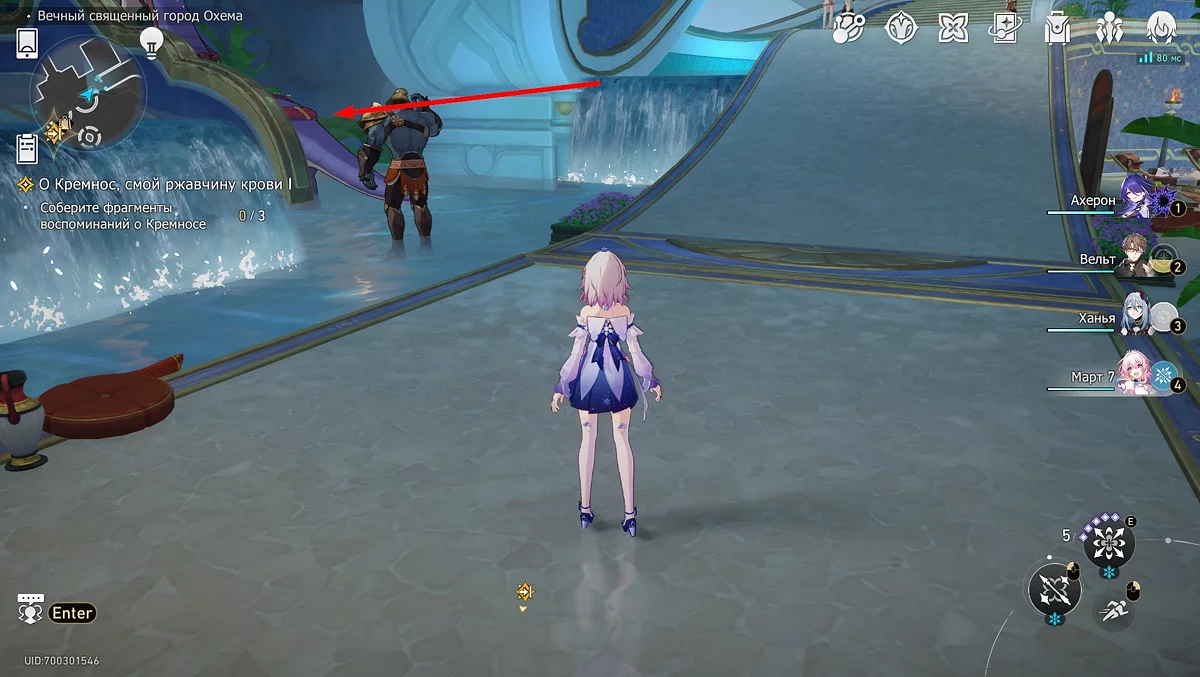
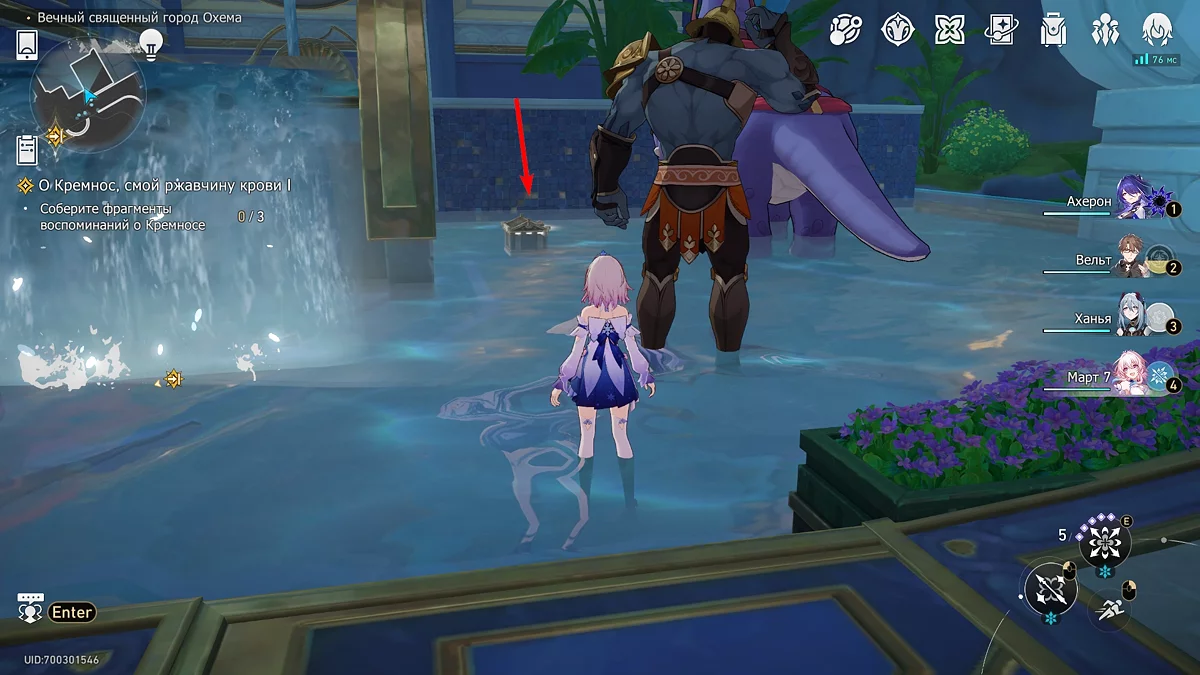
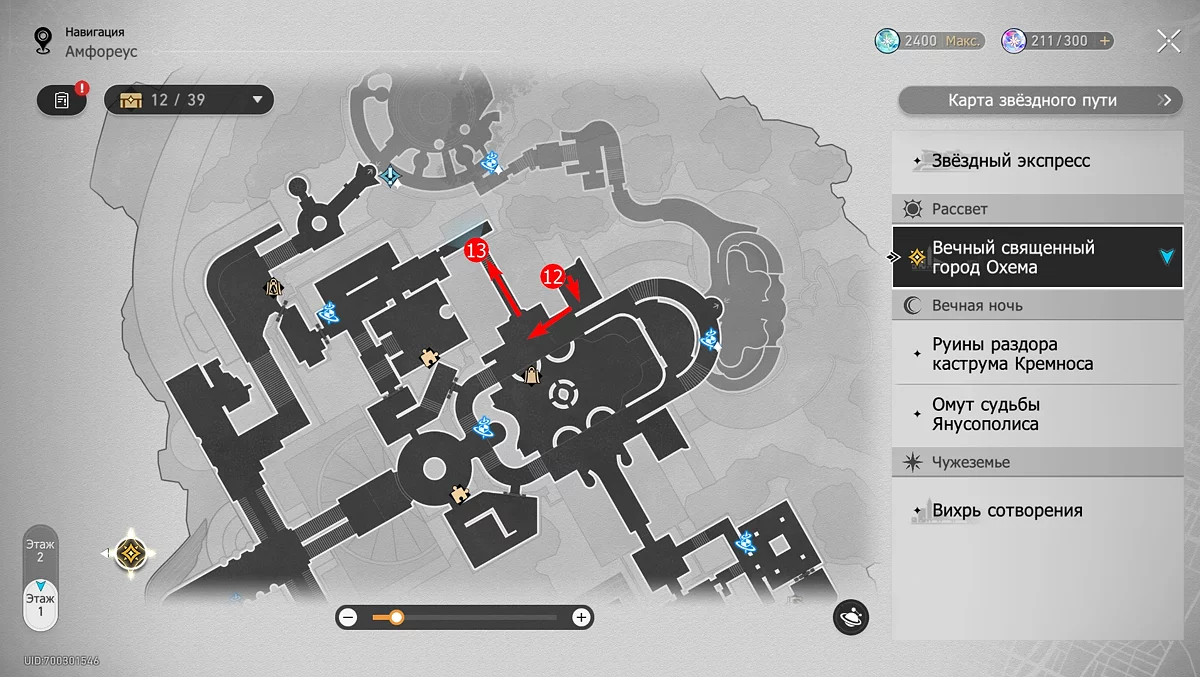
Proceed forward towards another small waterfall, and you will see a guard along with a geosaur near it. Turn towards them, and to the left of the creature, you will see an ordinary treasure chest.
Chest #13
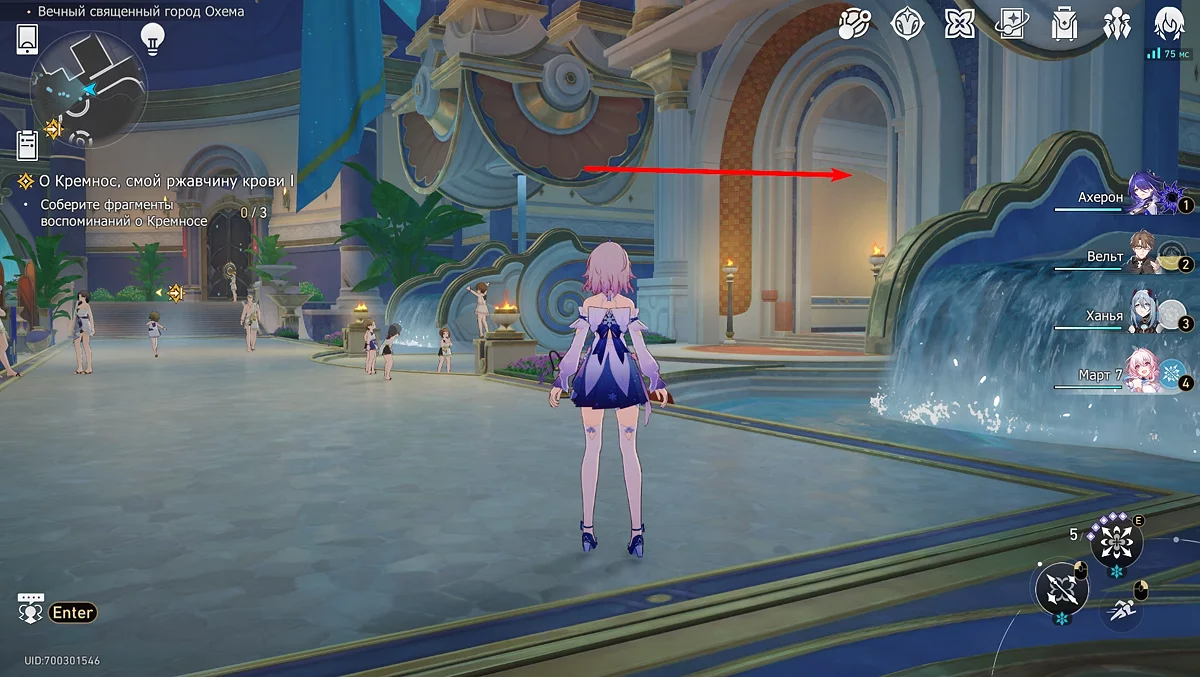
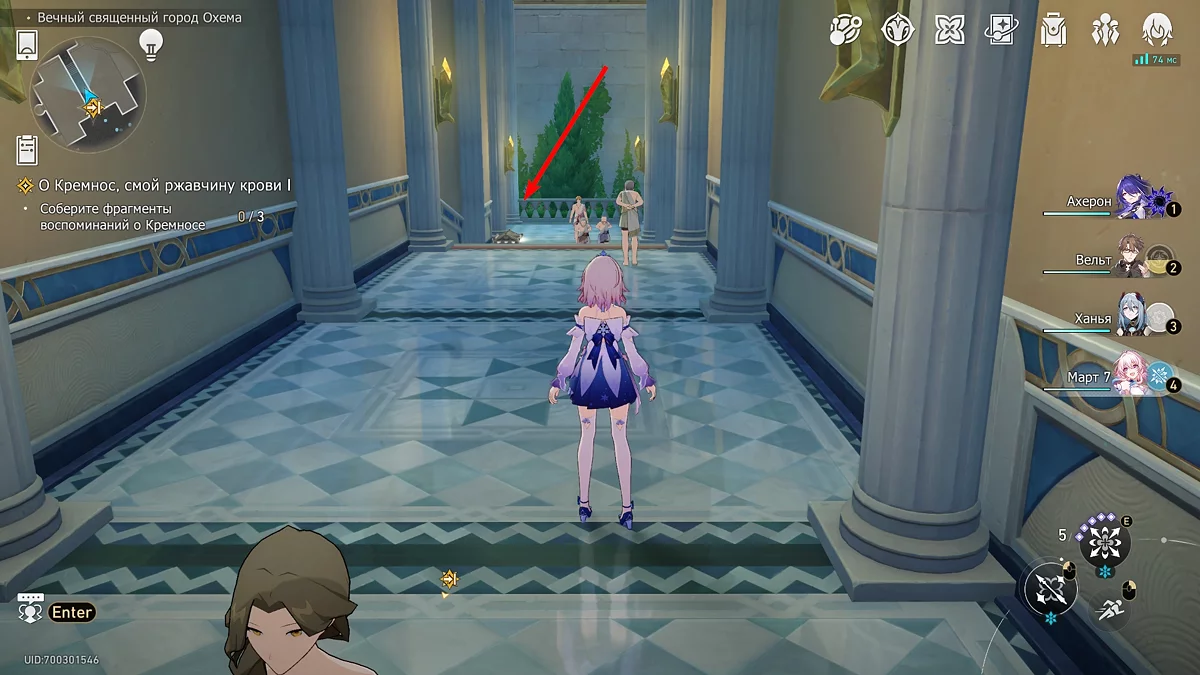
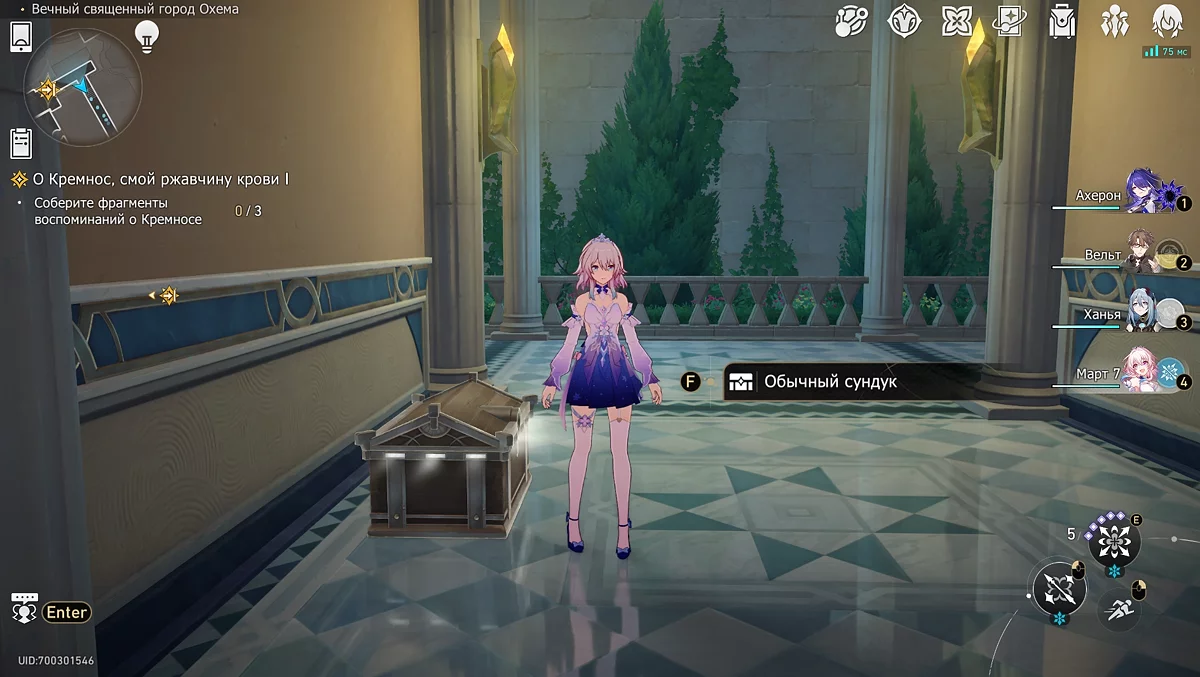
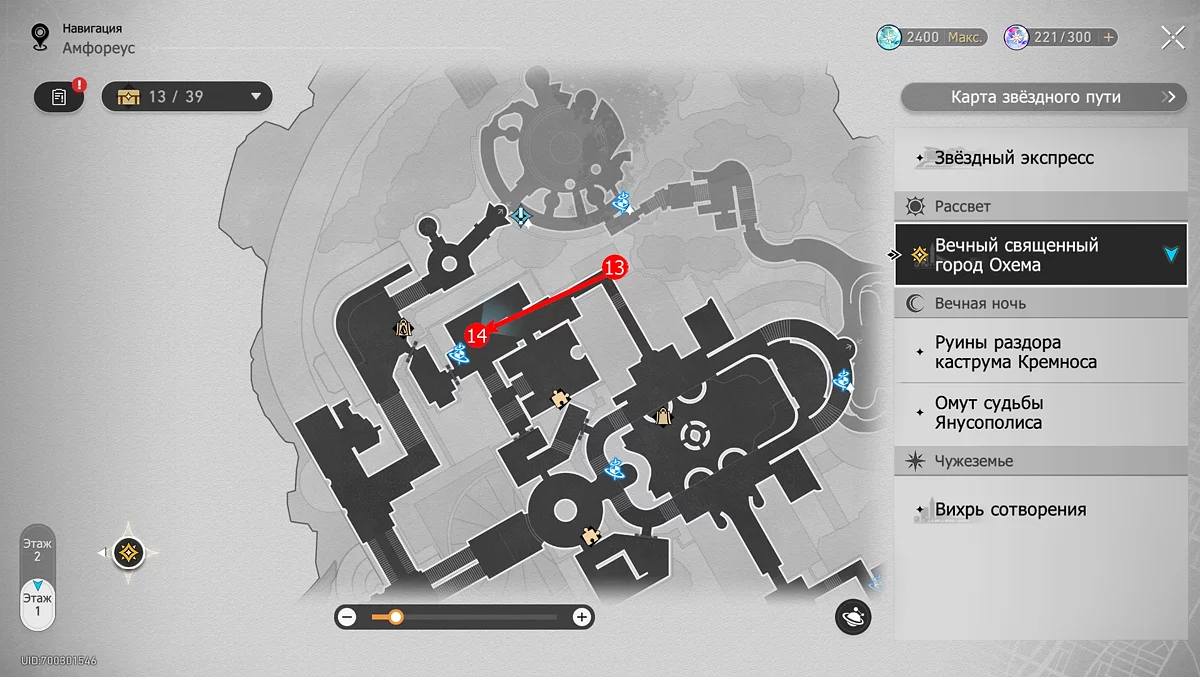
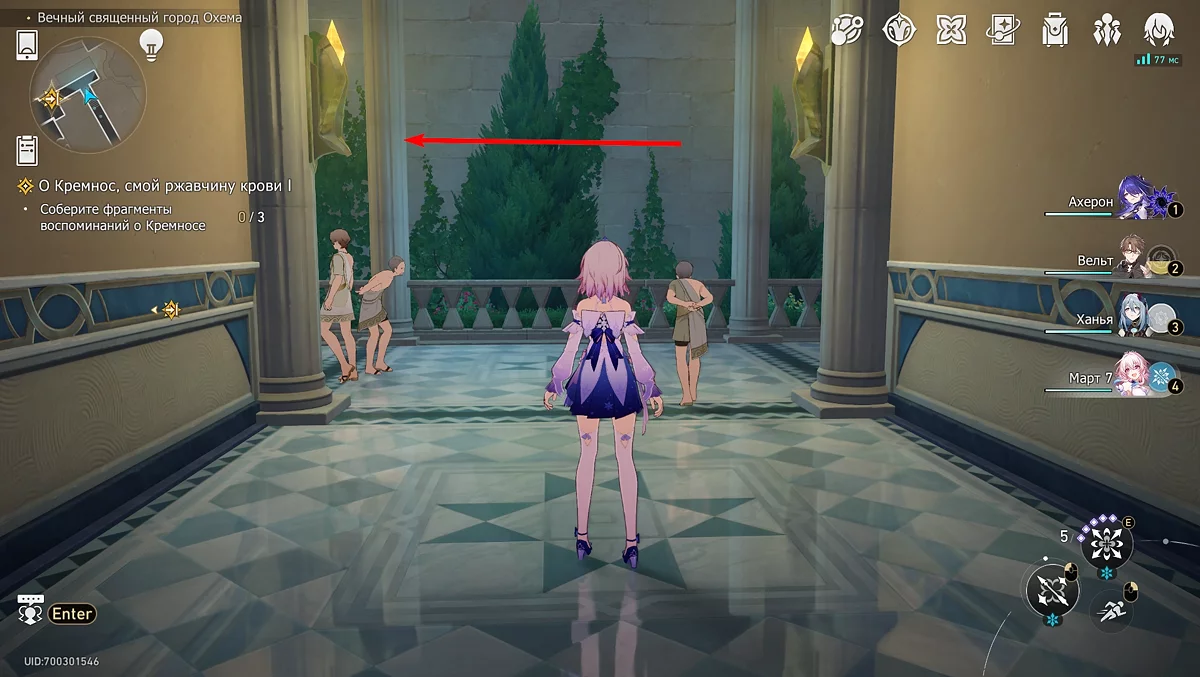
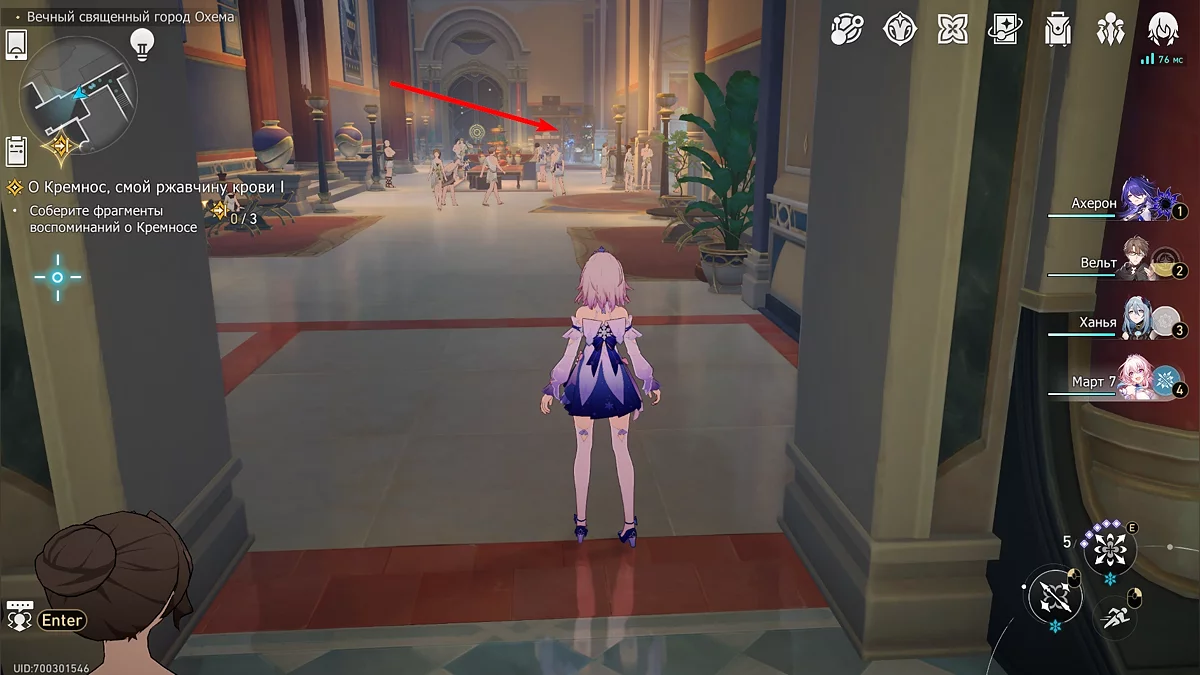
Go back a little and you will see an arched passage on the left hand side. Enter it and walk almost to the end, after which you will see another ordinary chest on the left, near the steps.
Chest #14
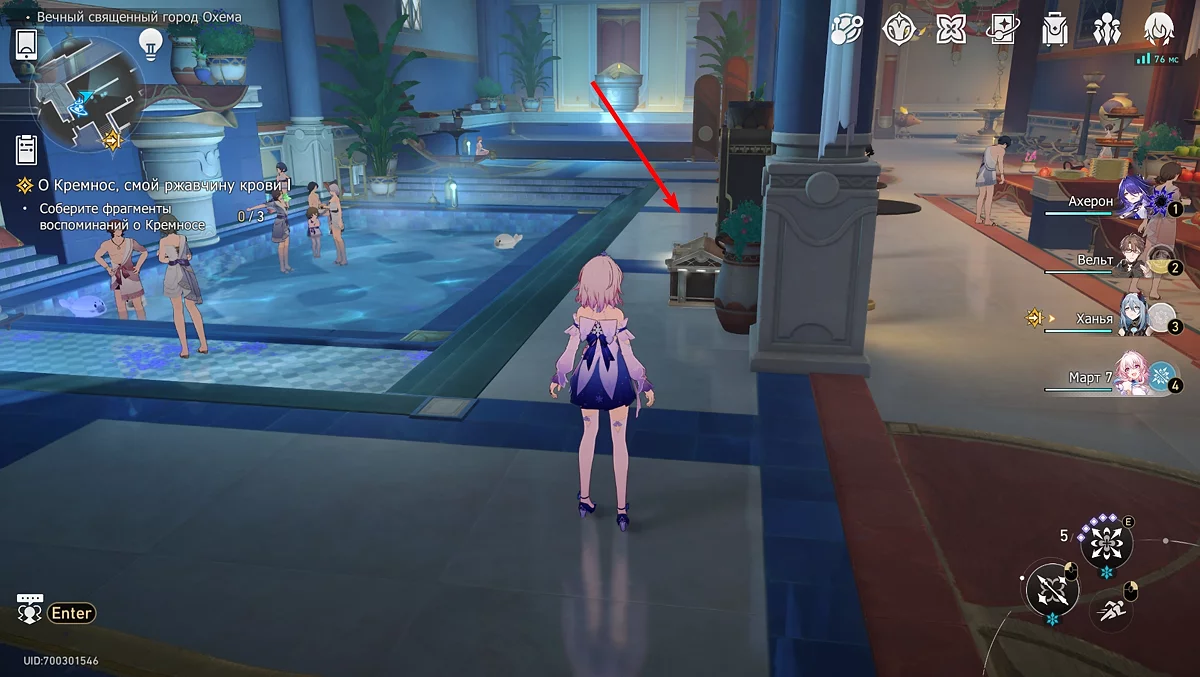
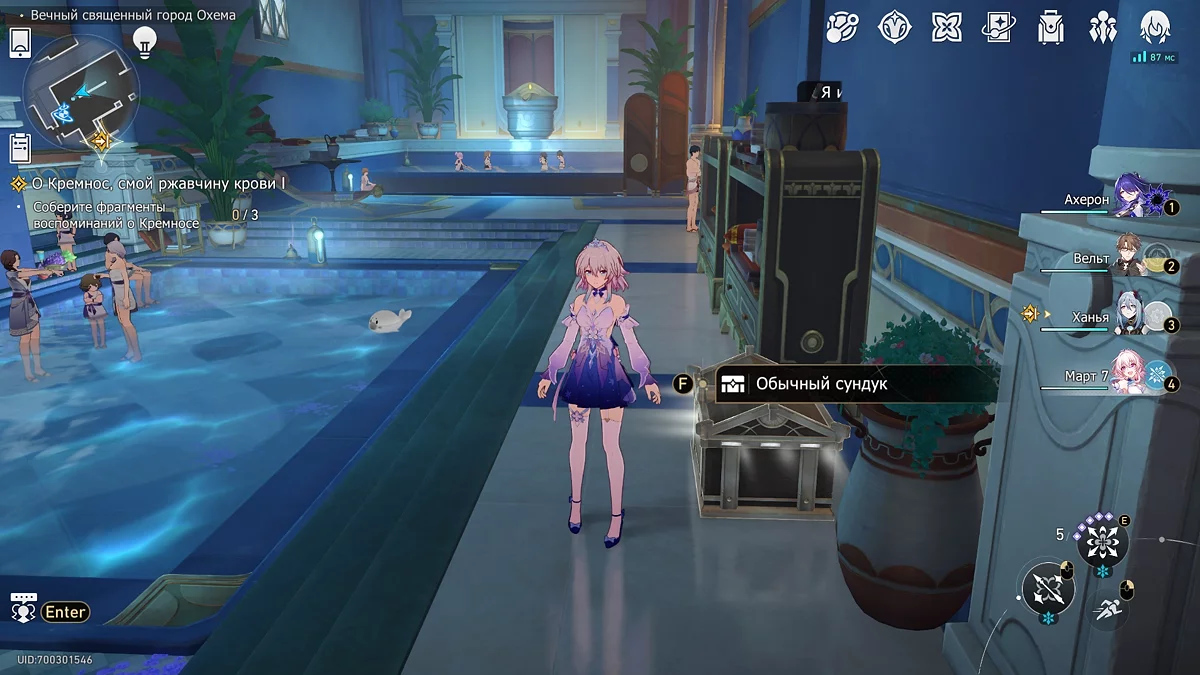
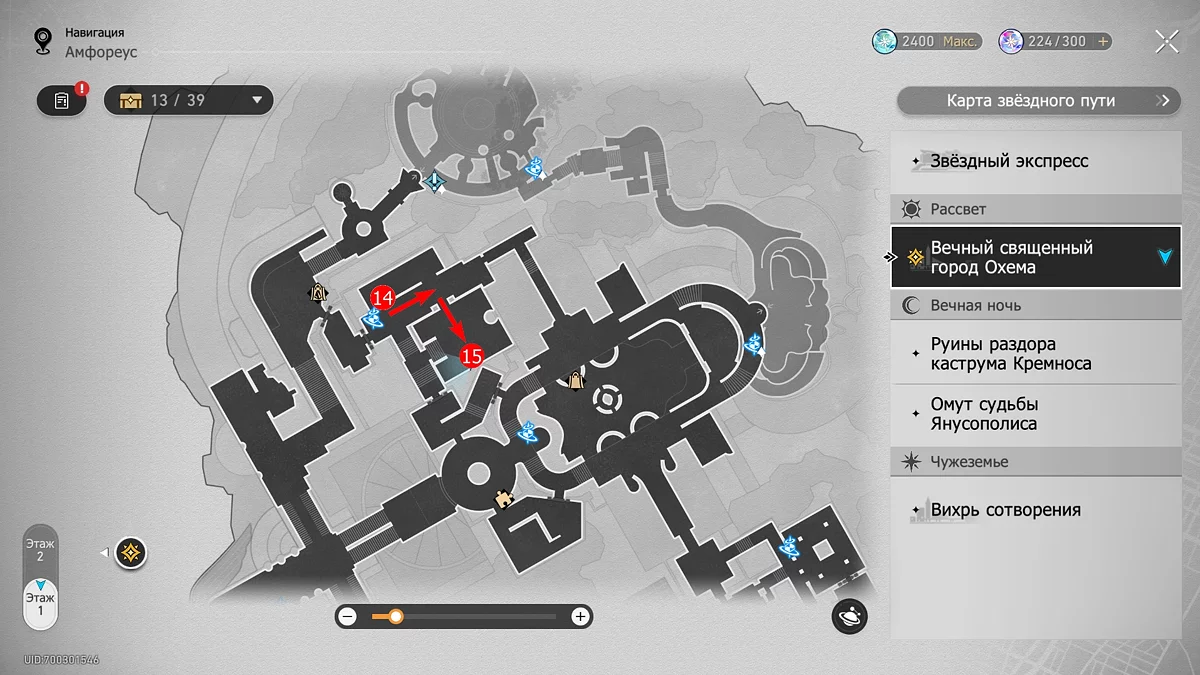
Walk through the corridor to the spatial anchor, or immediately use the teleport in the Court of Three Seasons and turn into the baths. Near the wall by one of the pools will be the desired treasure chest.
Chest #15
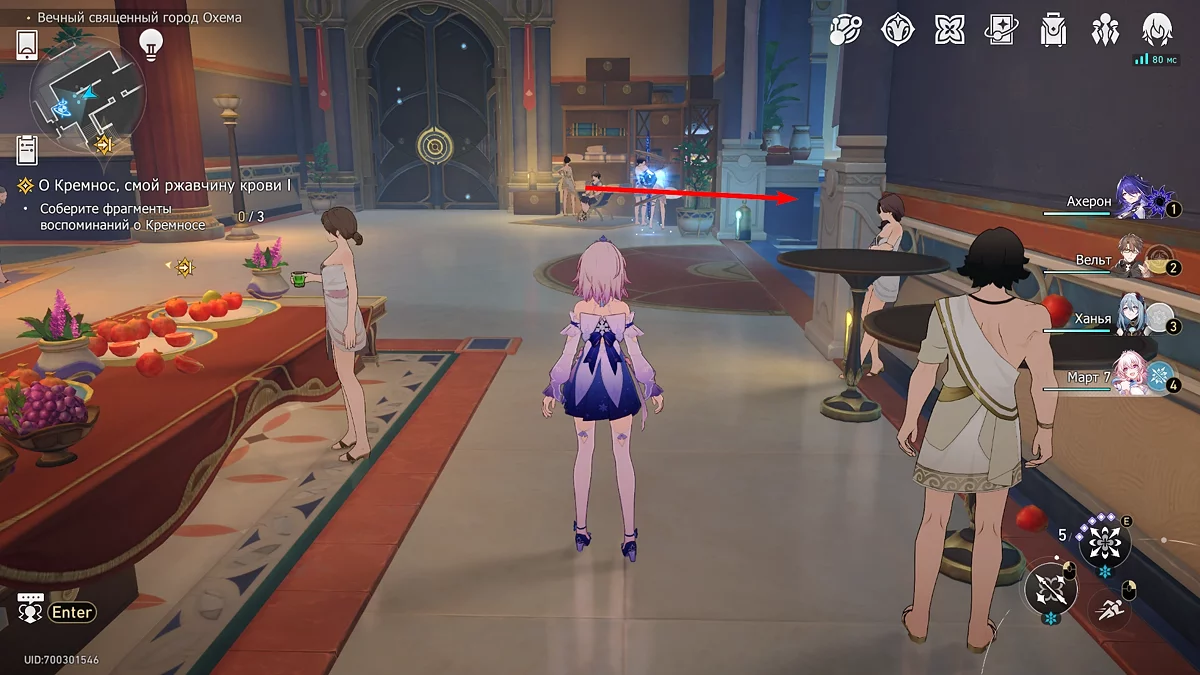
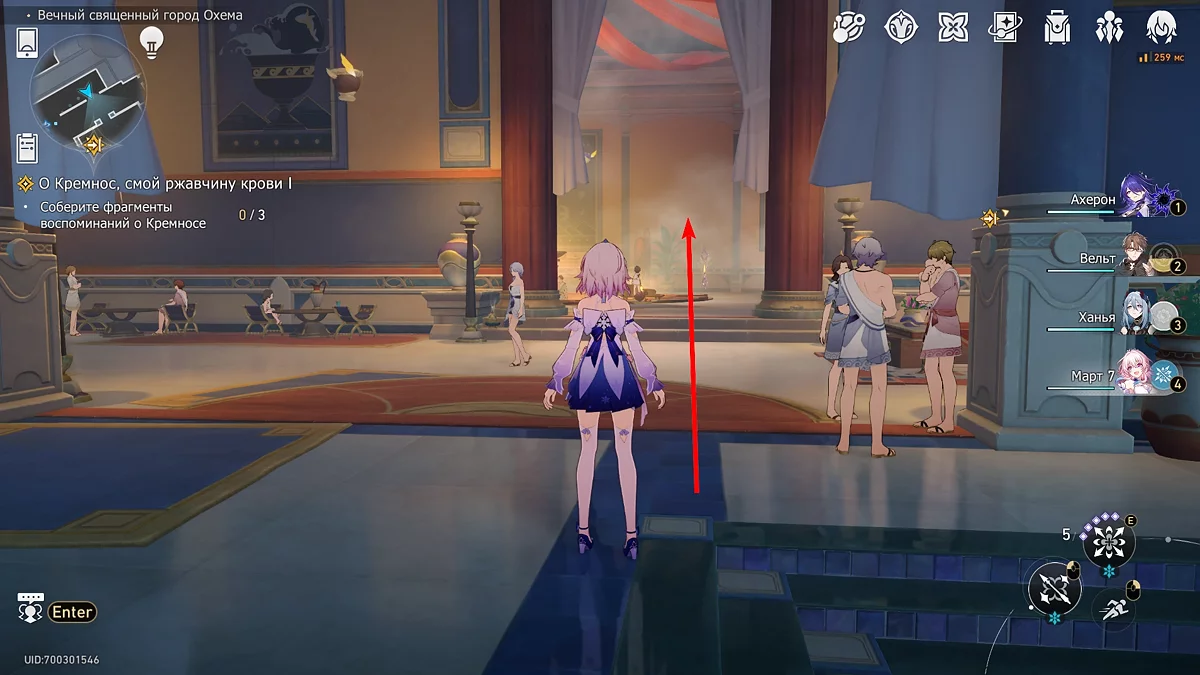
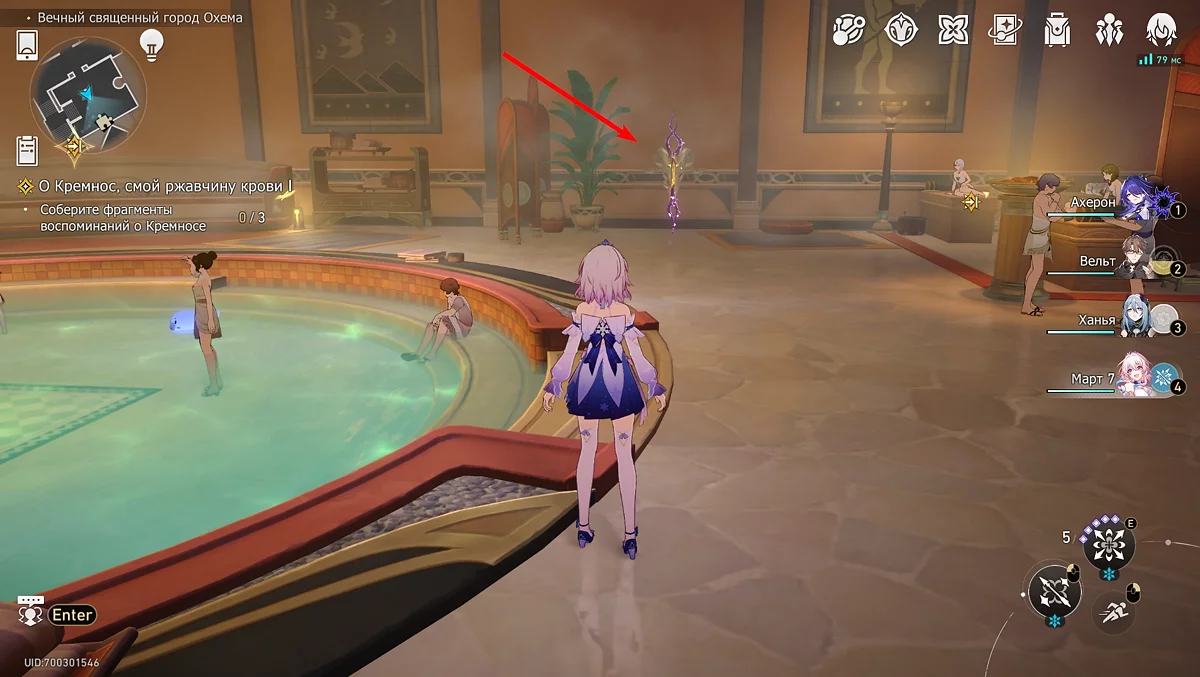
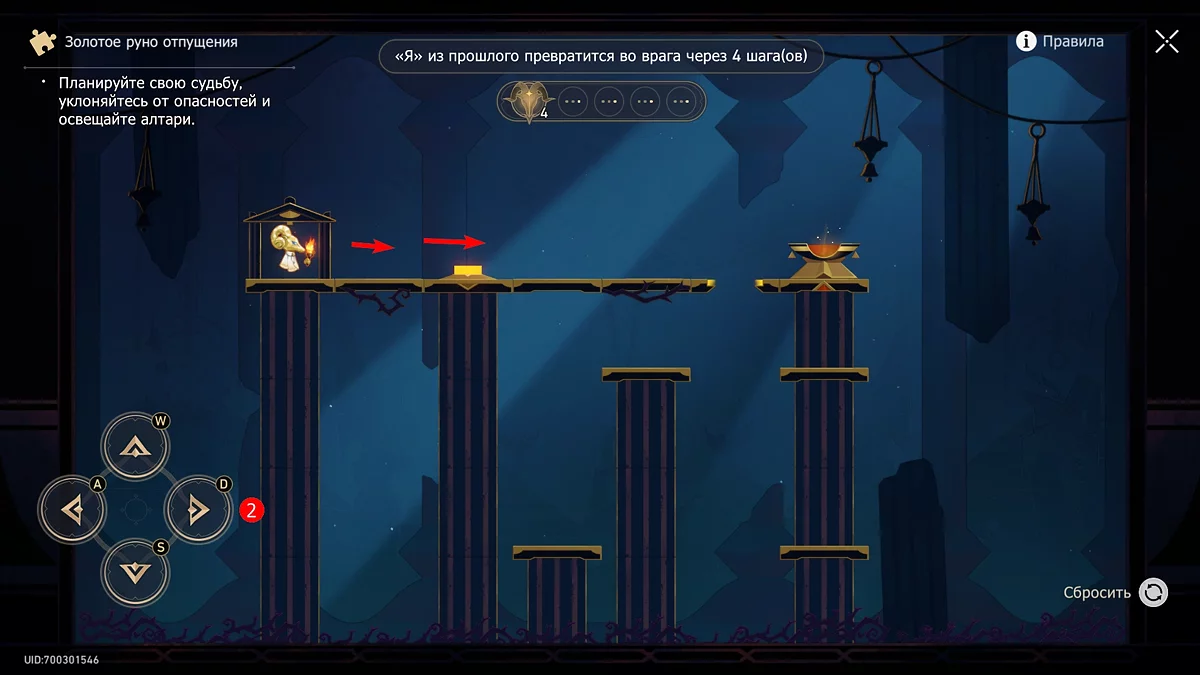
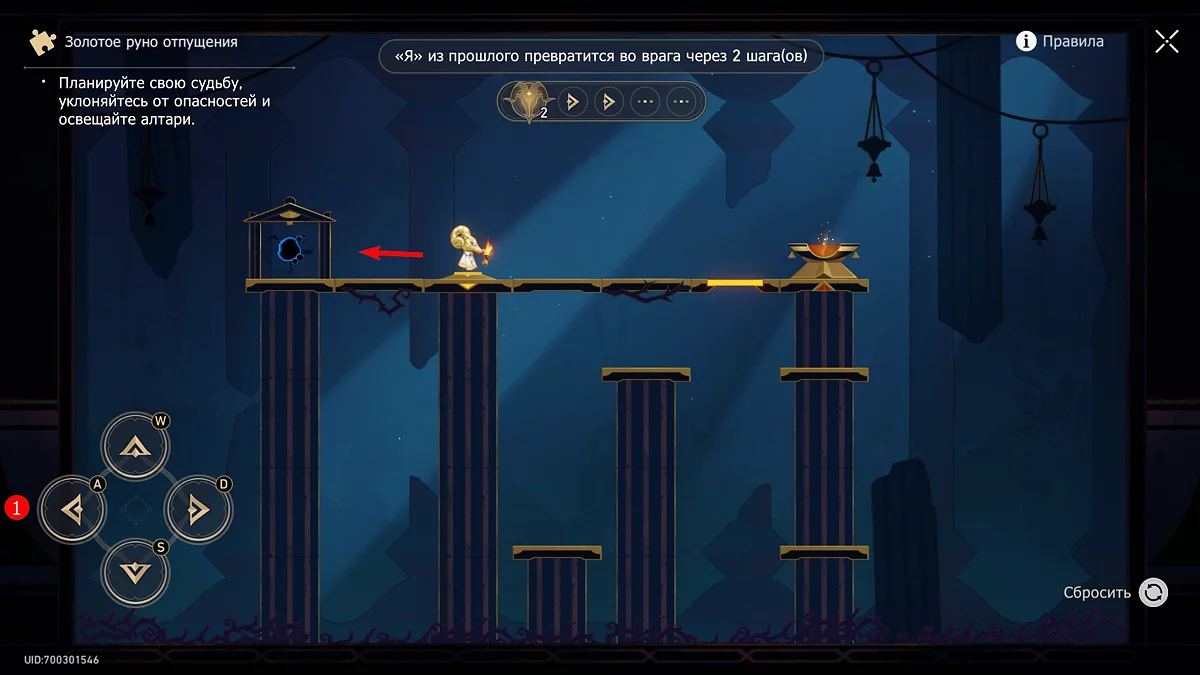
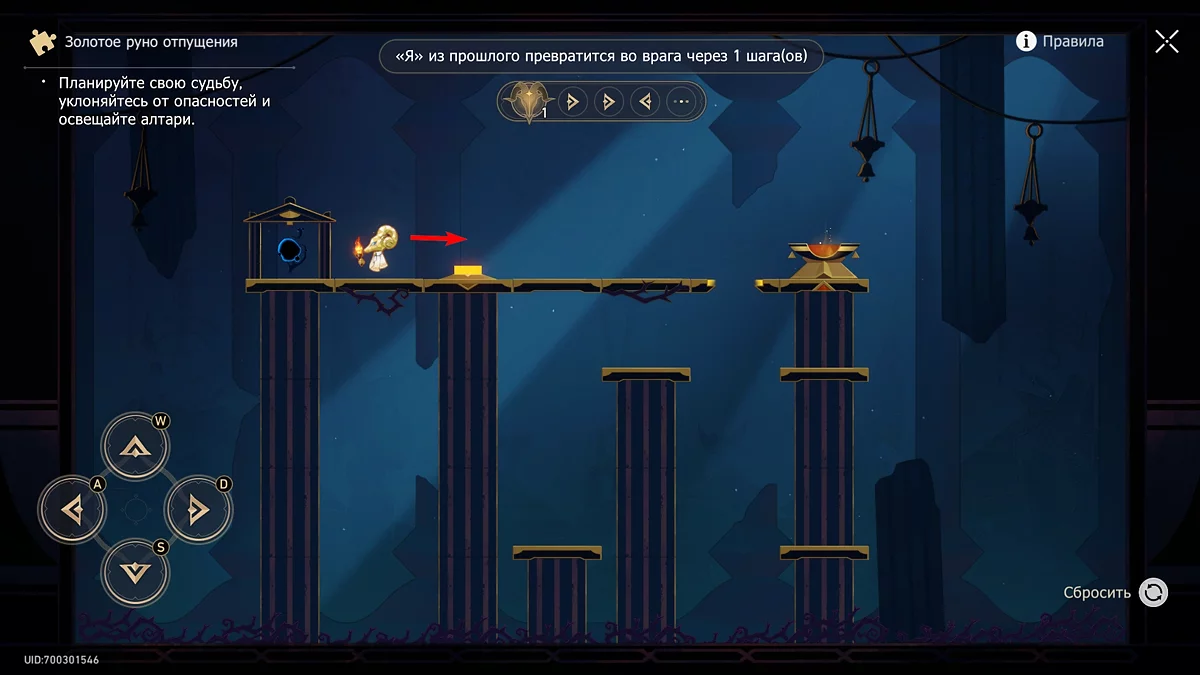
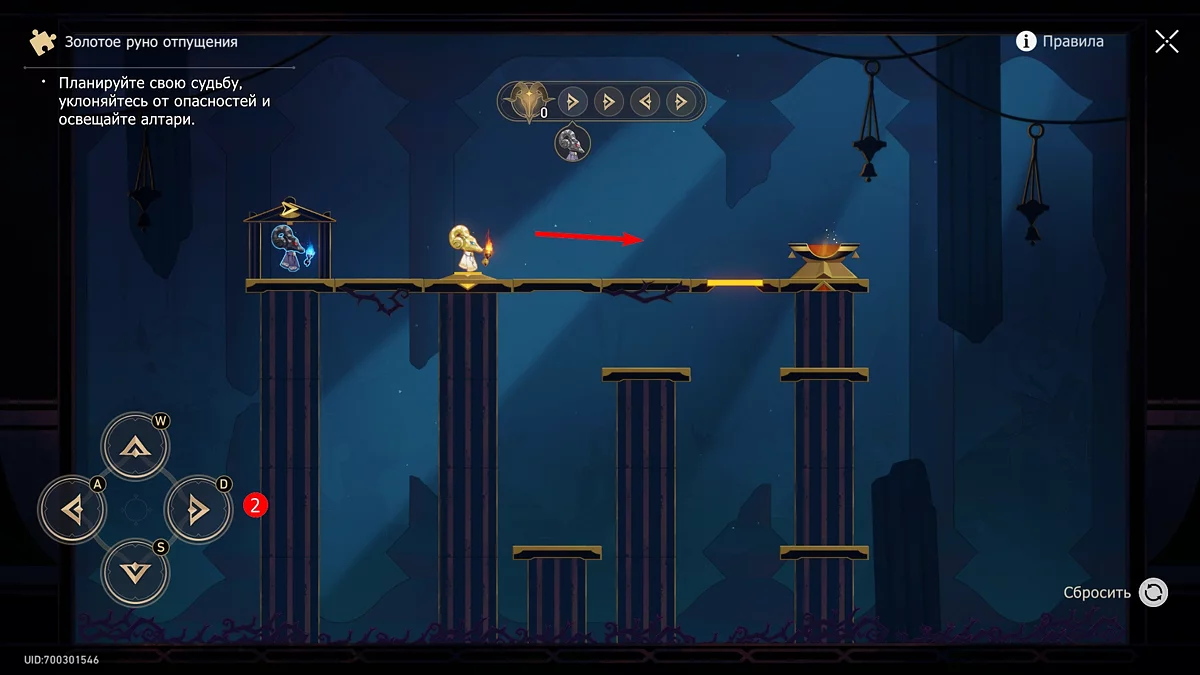
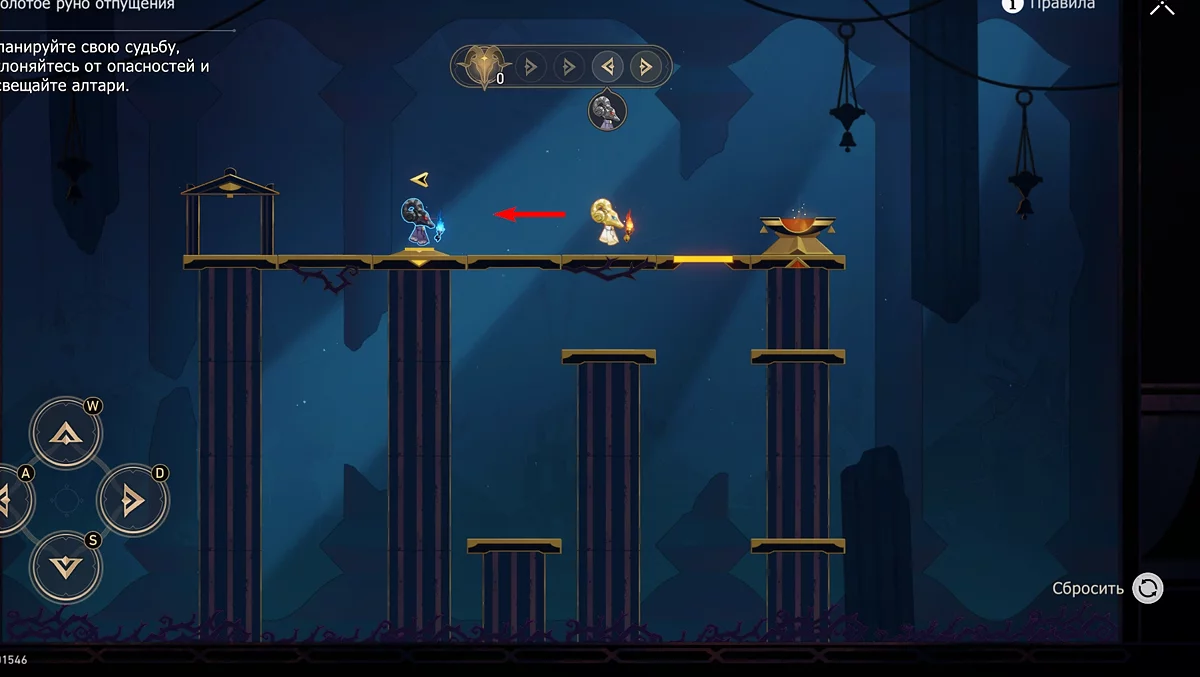
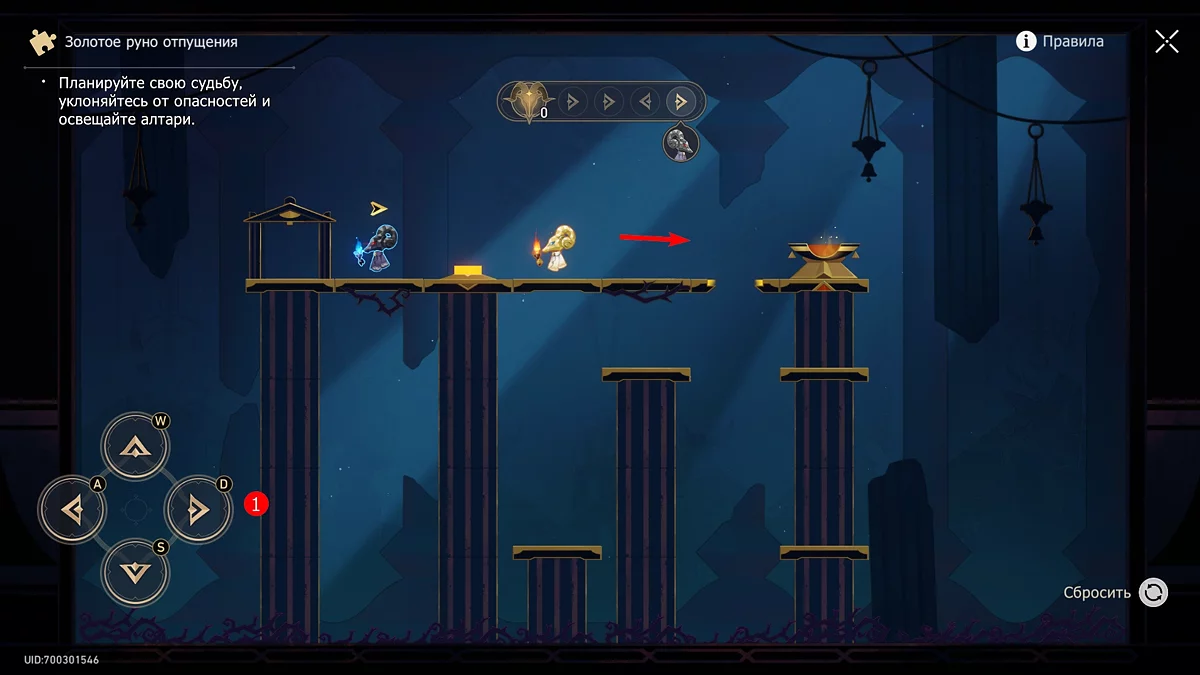
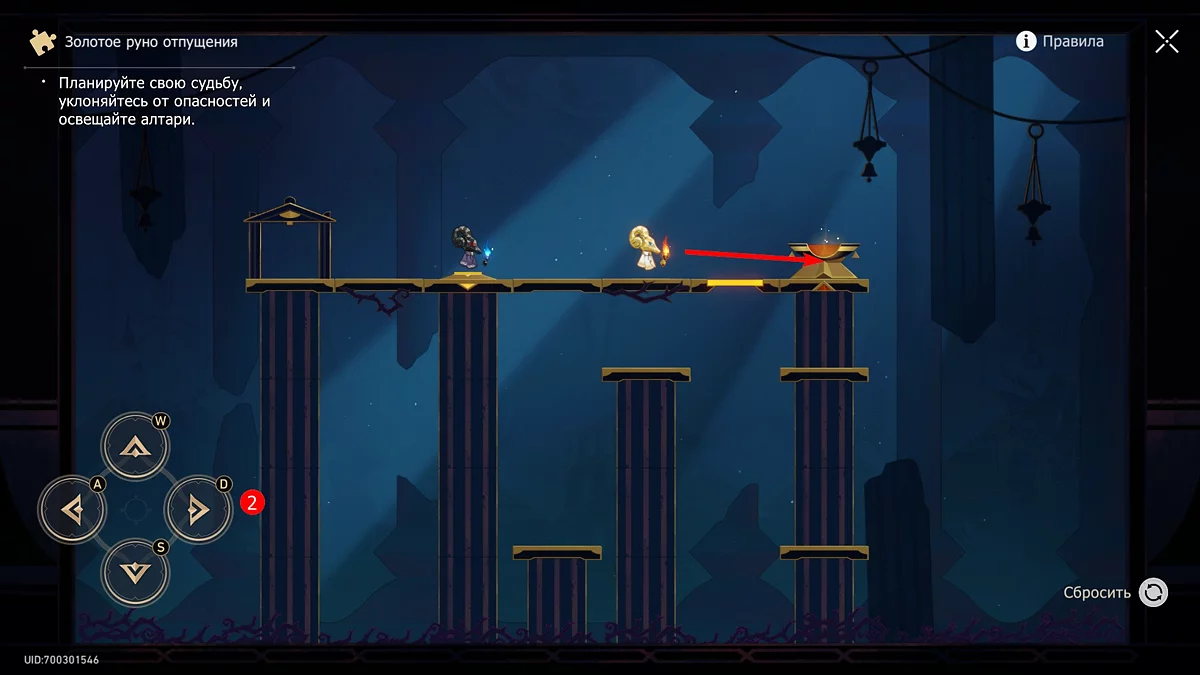
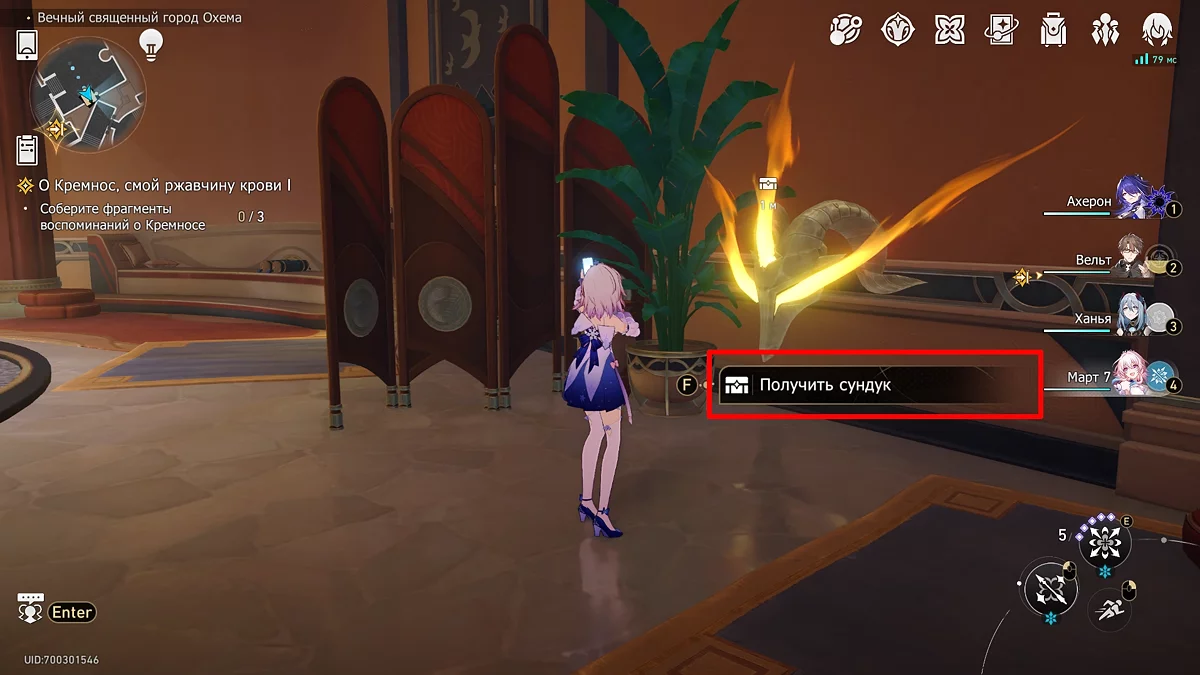
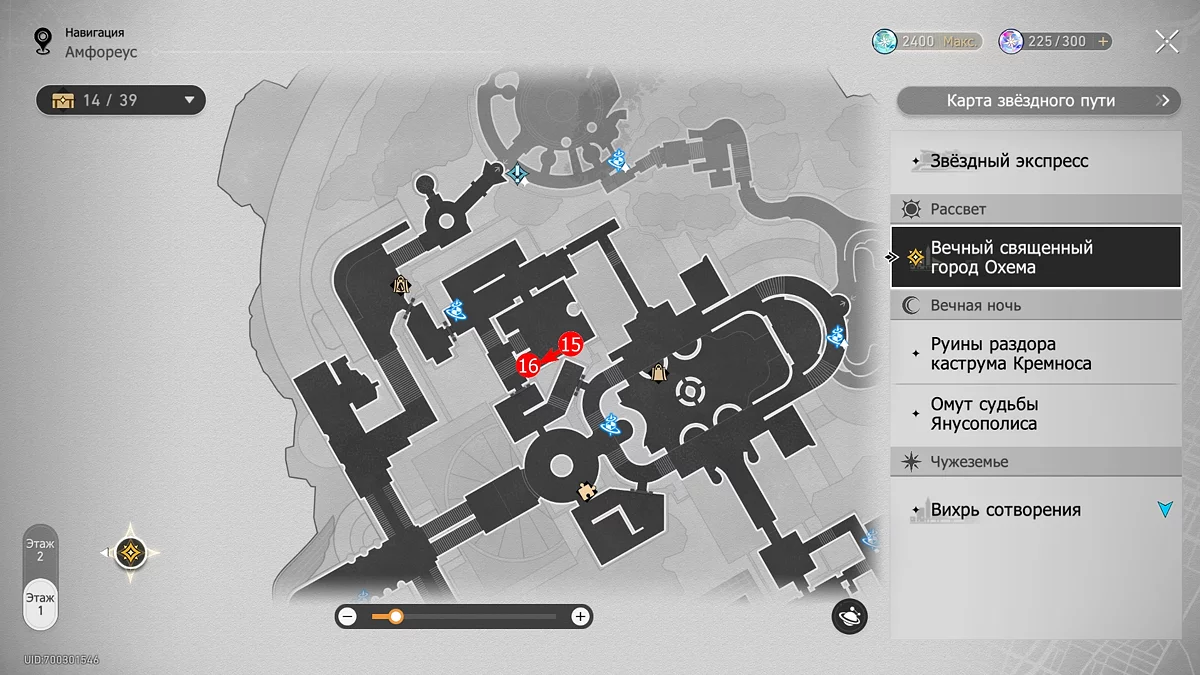
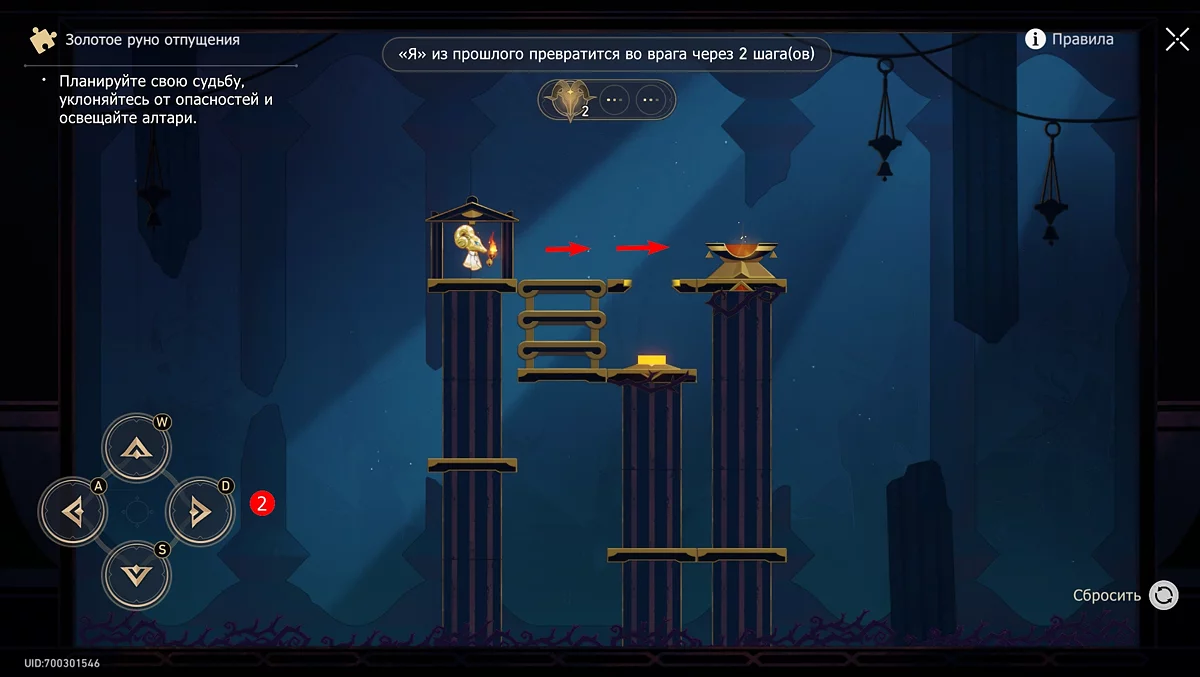
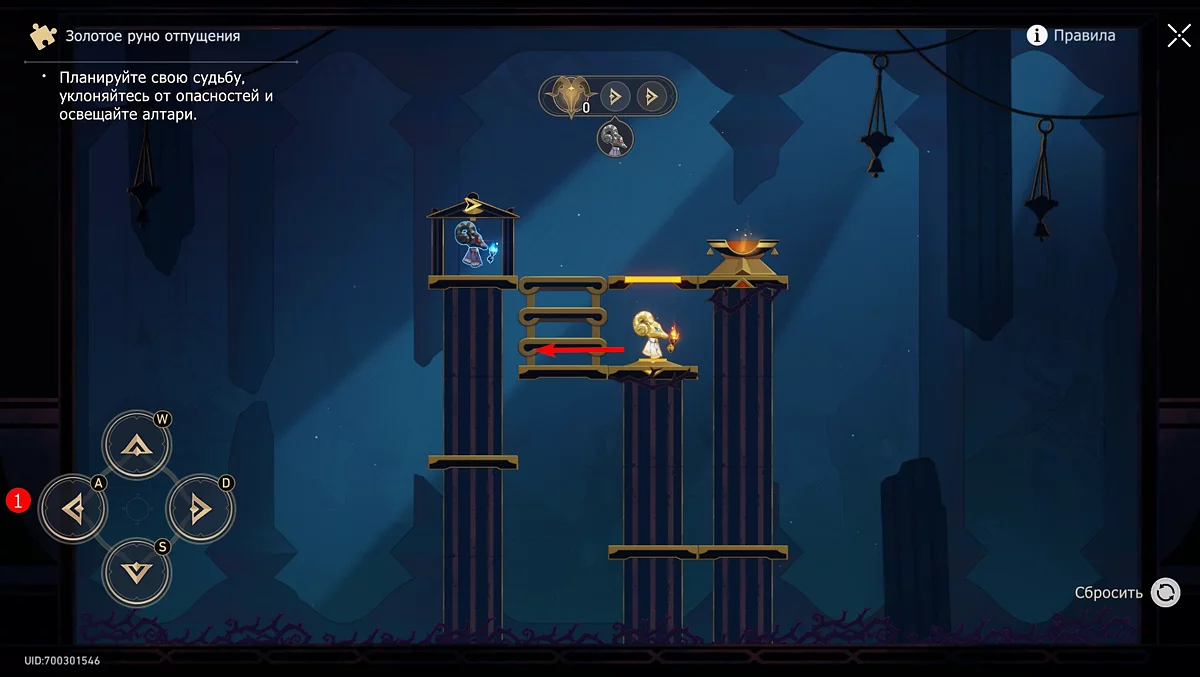
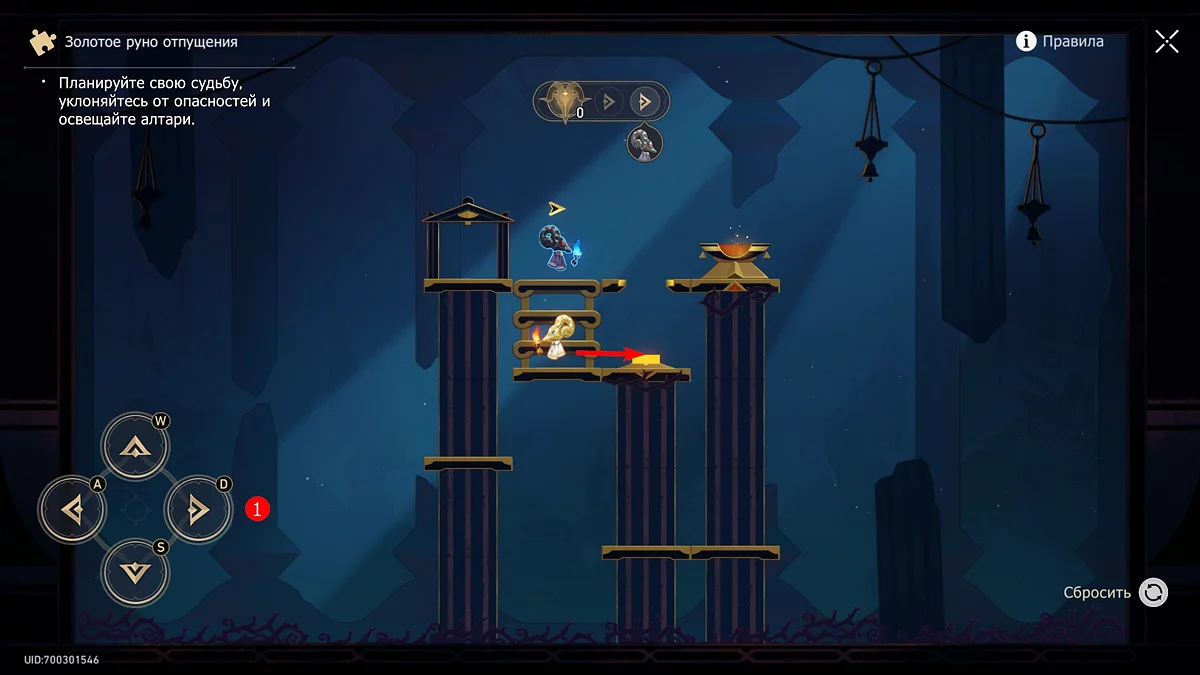
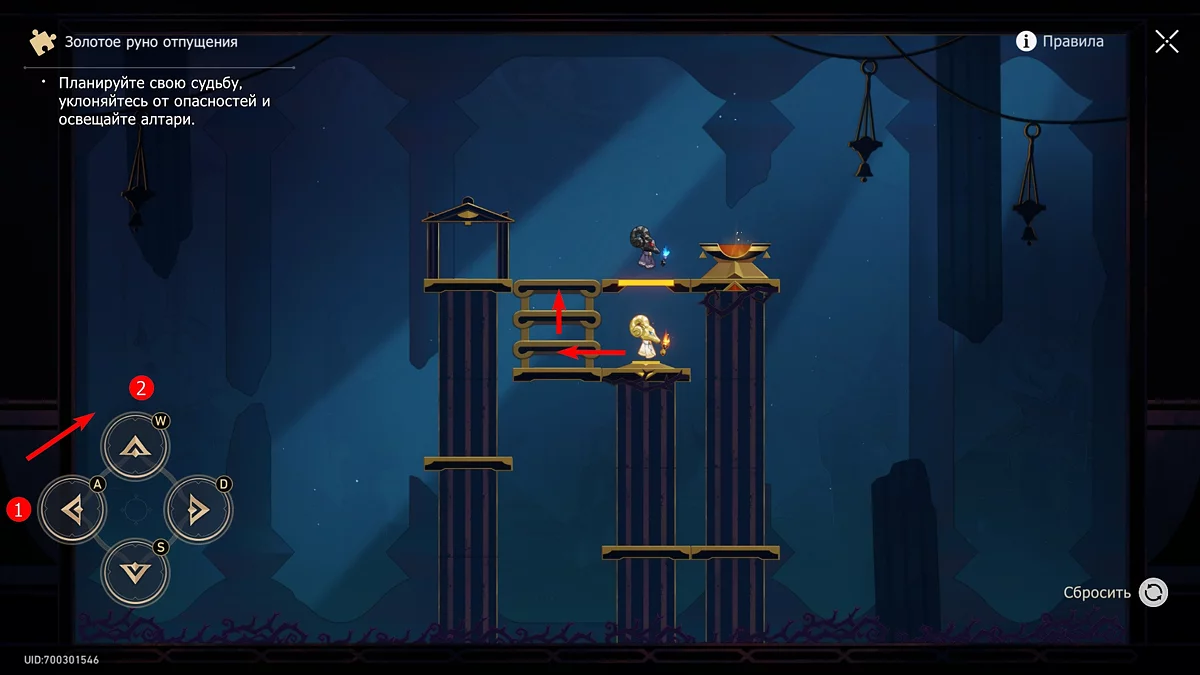
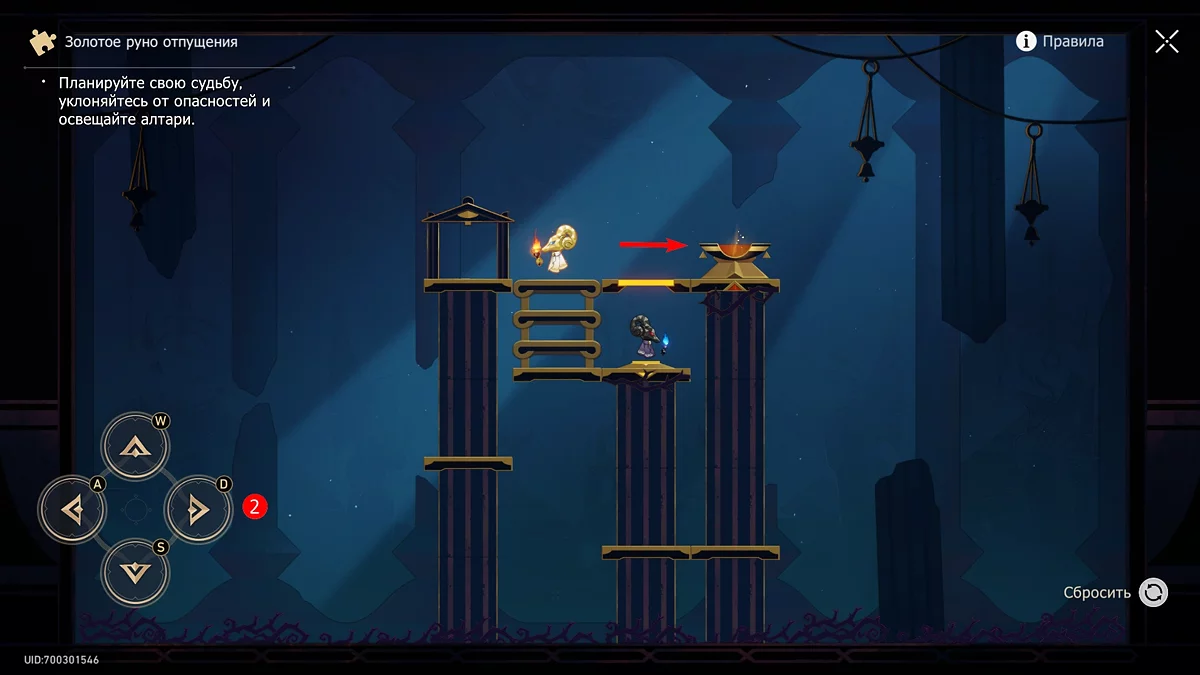
Move slightly forward from the previous chest and enter the steam-filled room. Walk to the opposite wall and you will see another puzzle with a ram's head. To solve it, follow the hints in the screenshots. Arrows indicate the direction you need to go, and numbers next to the keys indicate the number of steps.
Chest #16
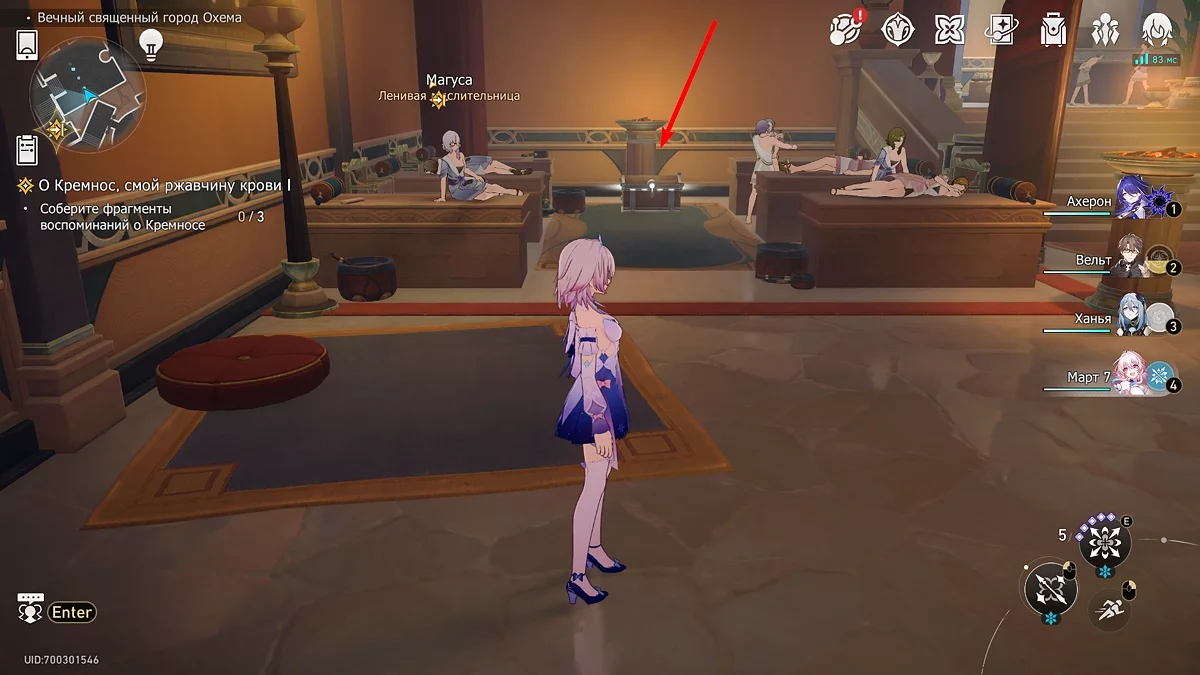
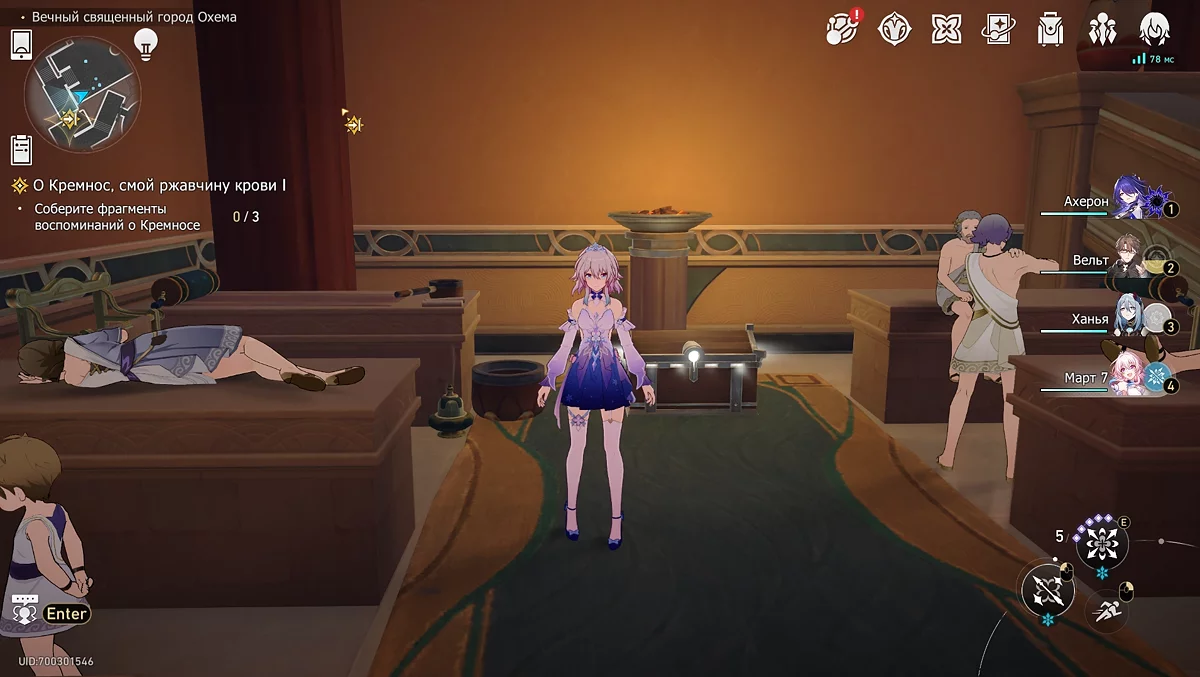
From the previous puzzle, turn right and go towards the massage tables. By the wall next to the brazier, you will see another ordinary treasure chest.
Chest #17
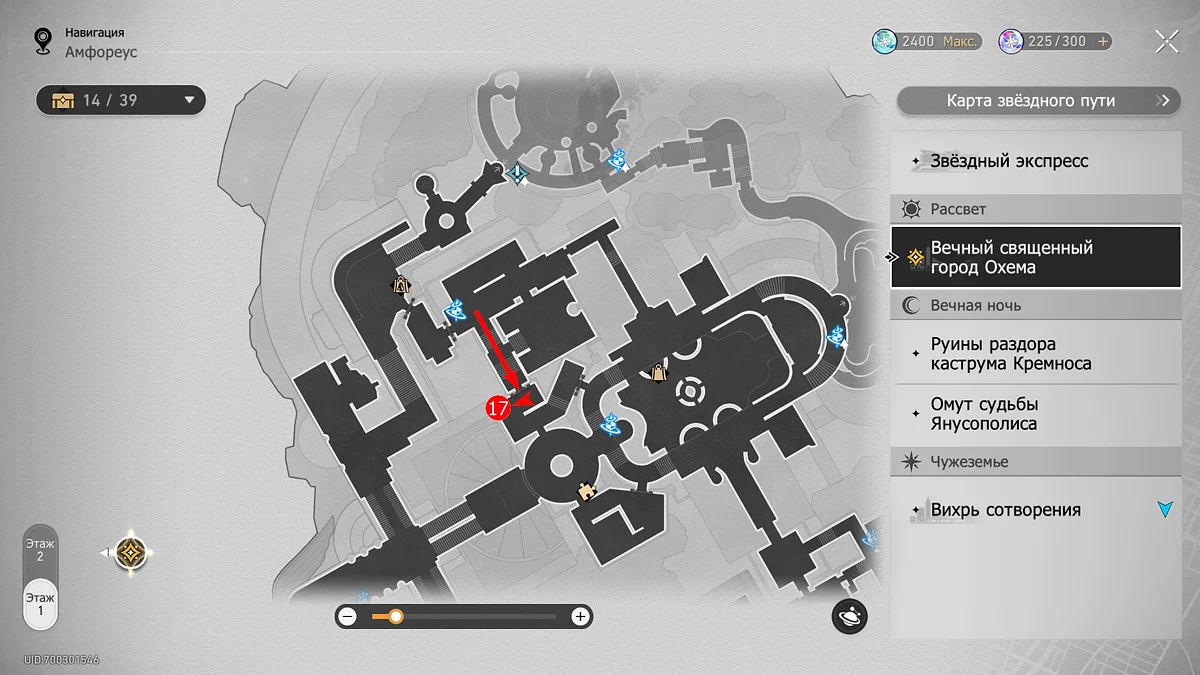
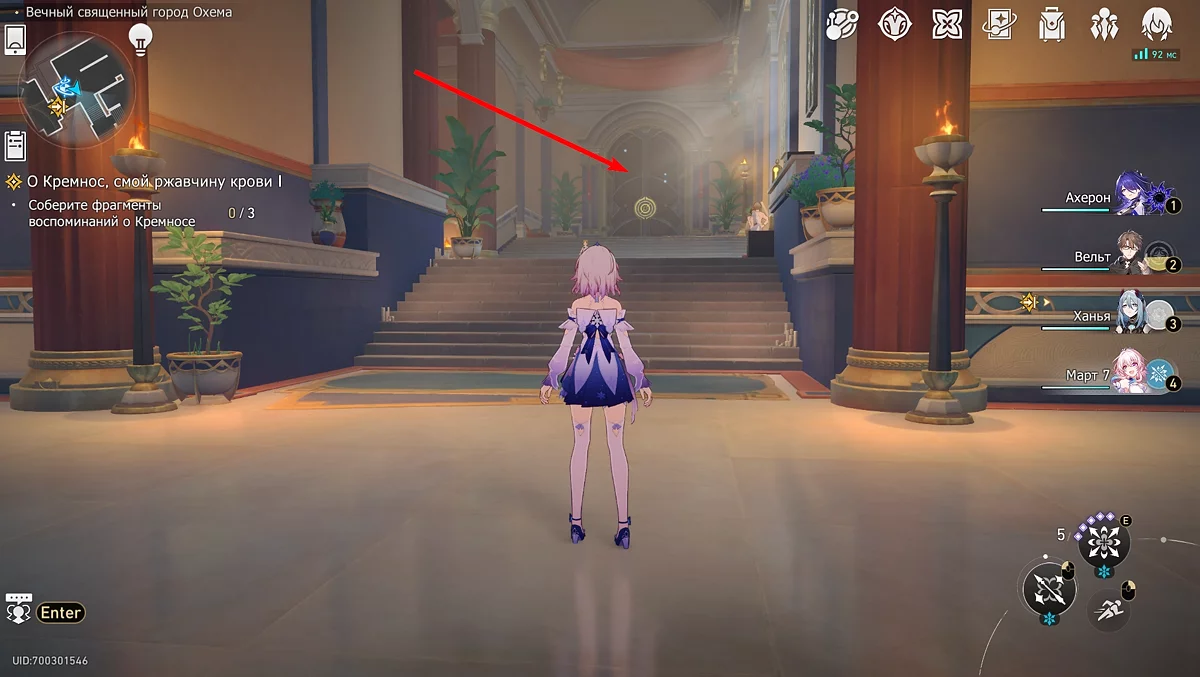
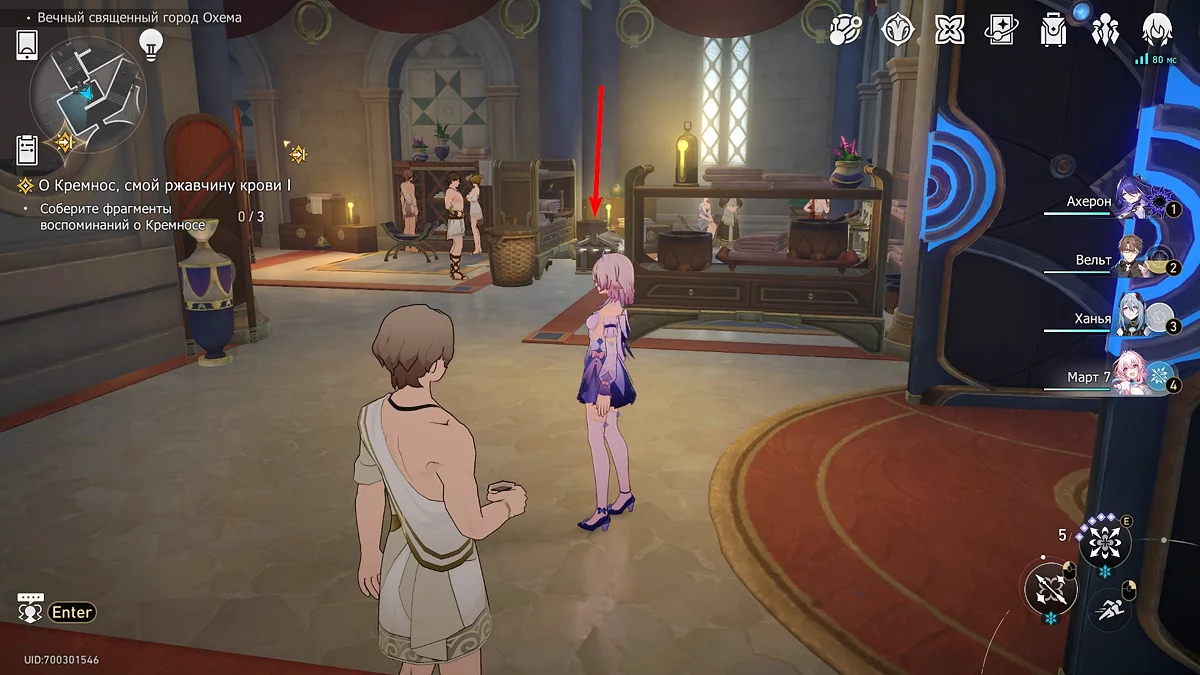
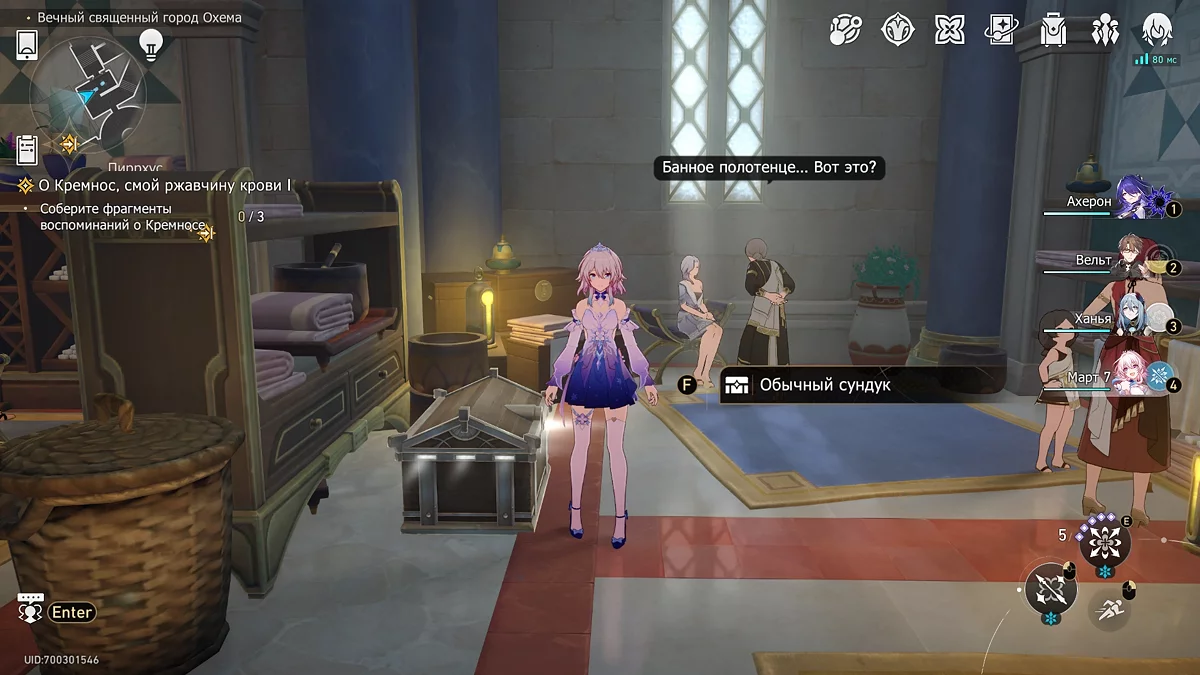
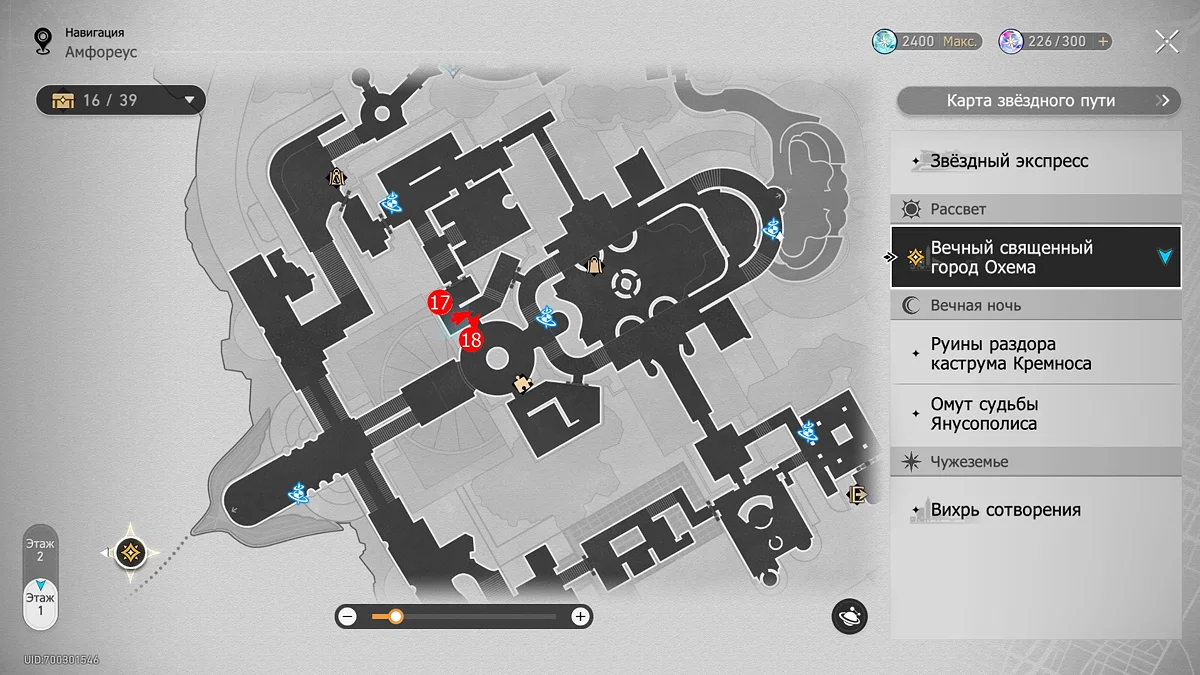
Teleport again to the anchor at the Court of Three Seasons and climb the stairs on the right. Then turn right again and find the chest behind the racks with bathing supplies.
Chest #18
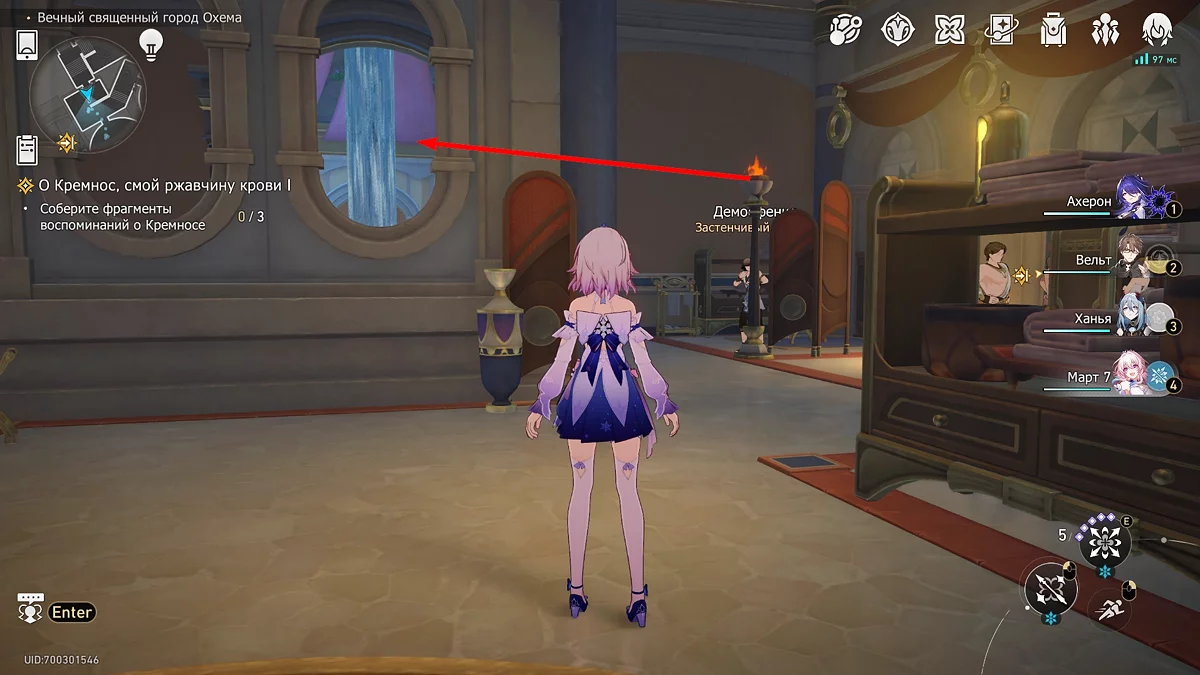
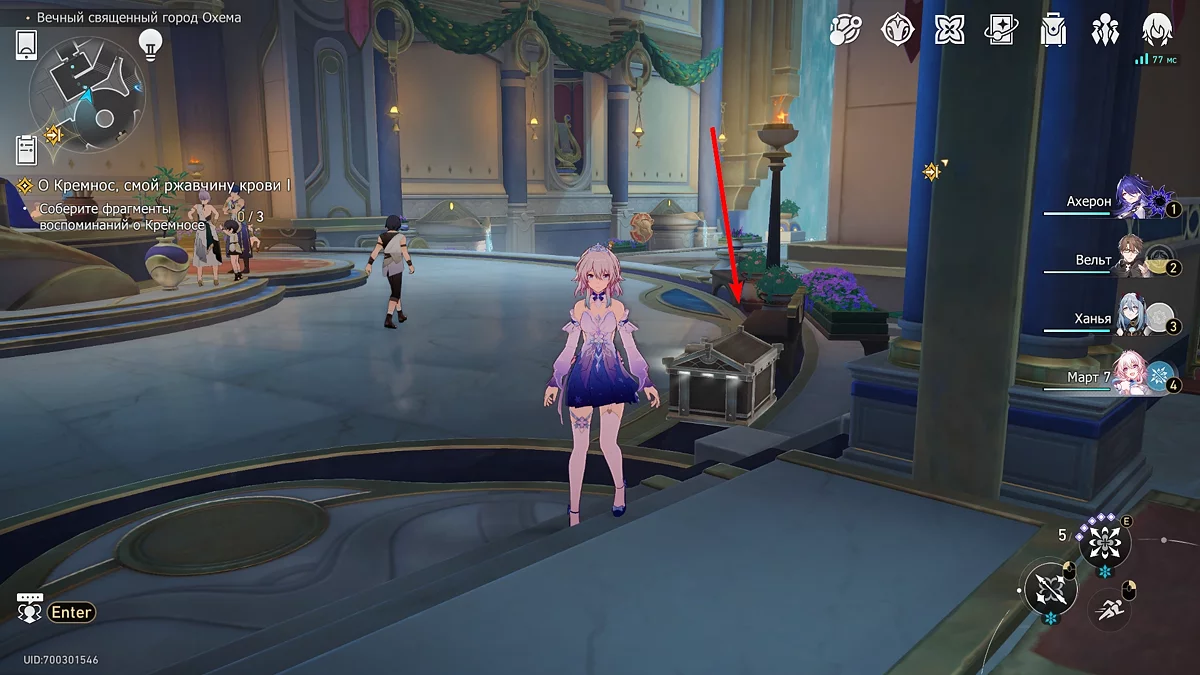
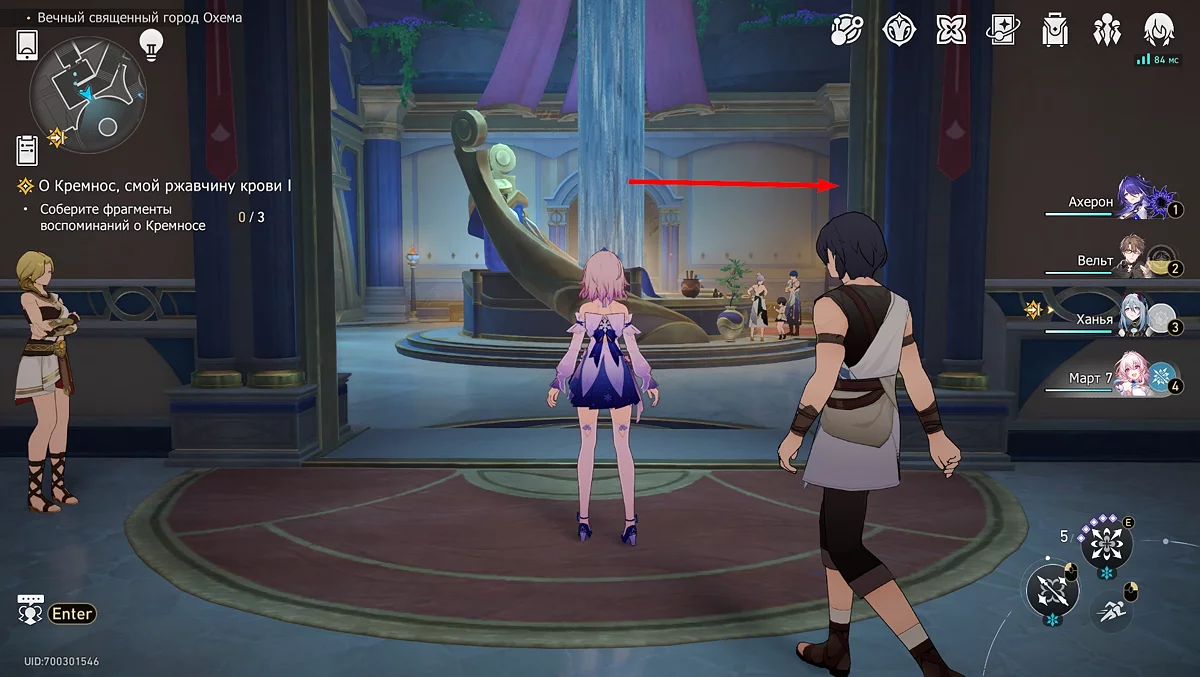
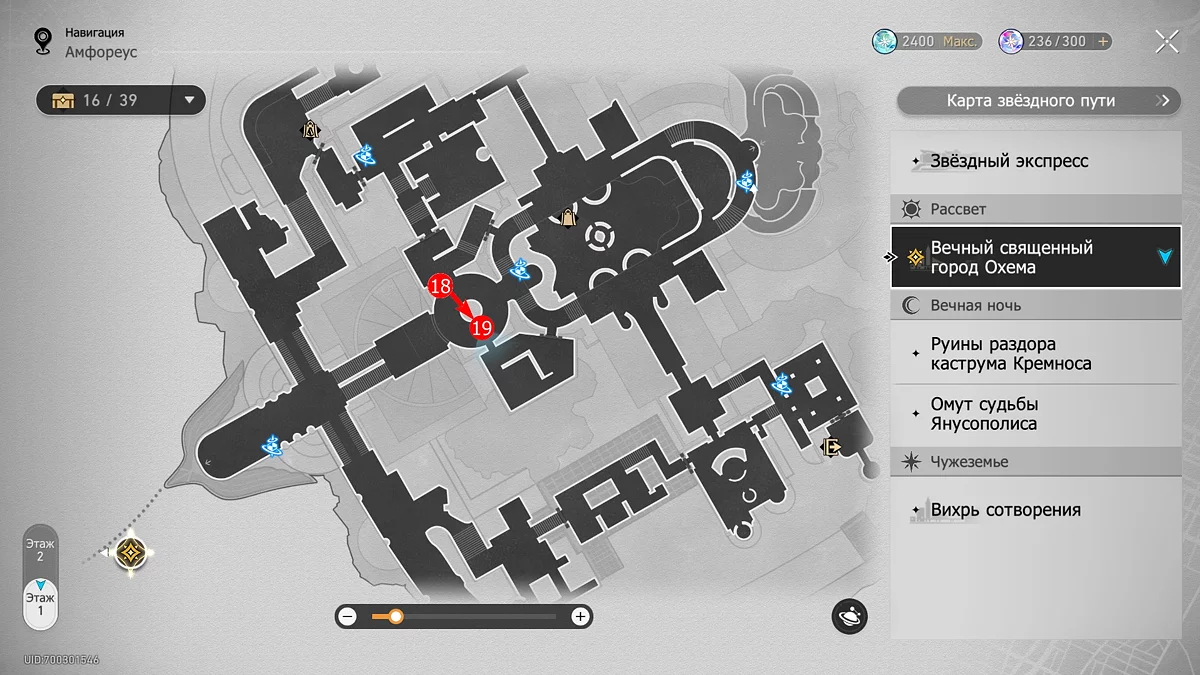
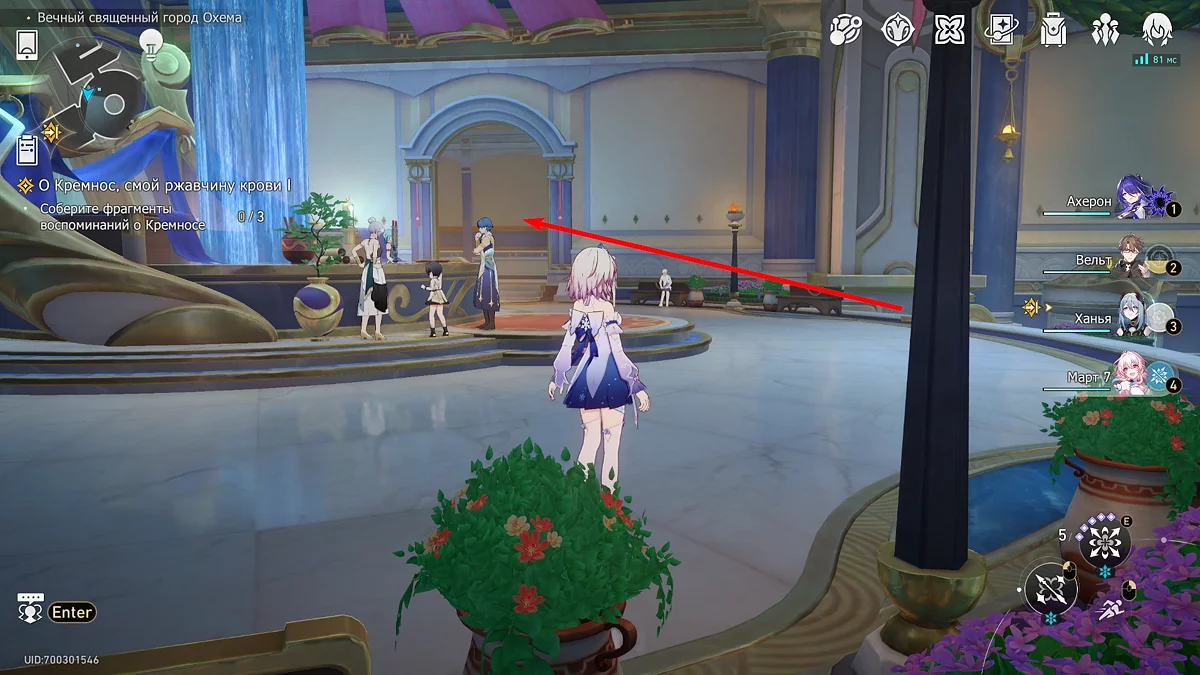
Proceed forward into the round room with high waterfalls, where the administration desk of the baths is located. Immediately to the right of the entrance, near the flower beds, there will be another box with 5 units of Stellar Jade.
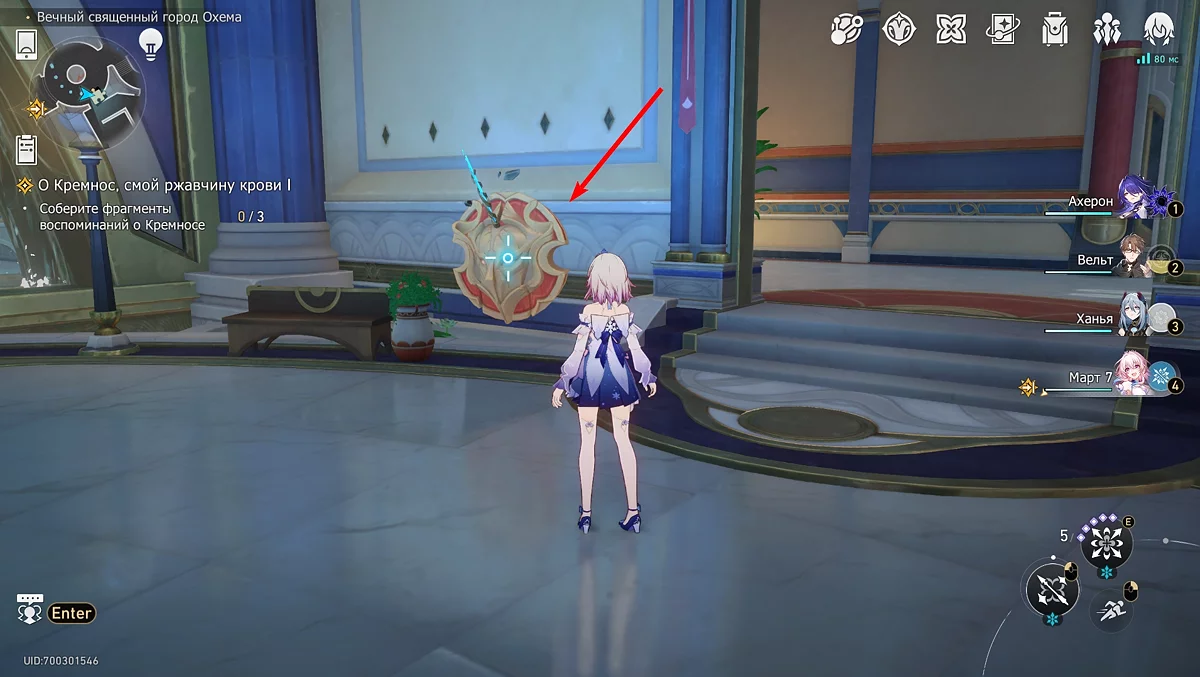
Chest #19
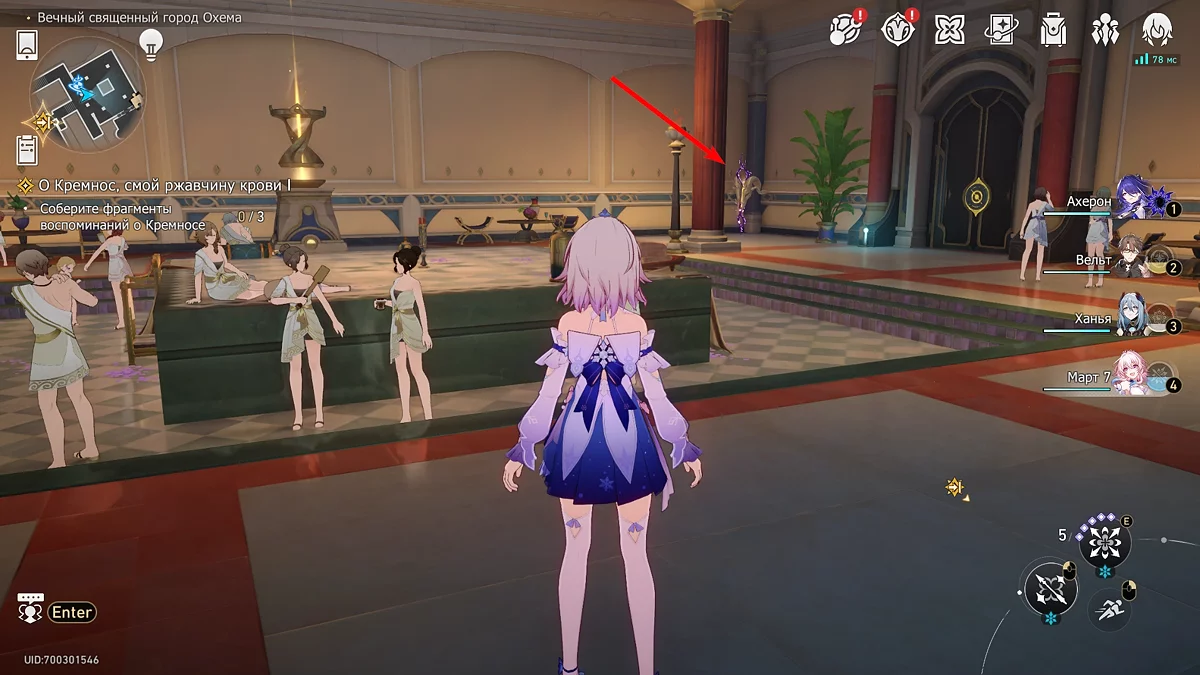
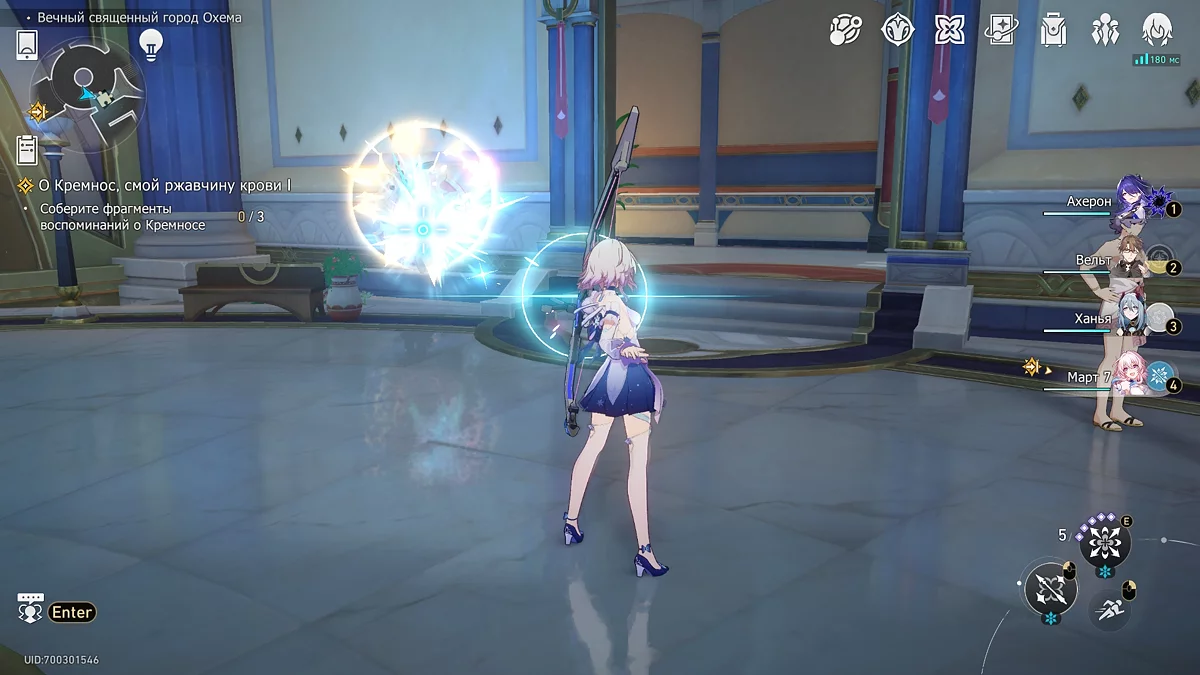
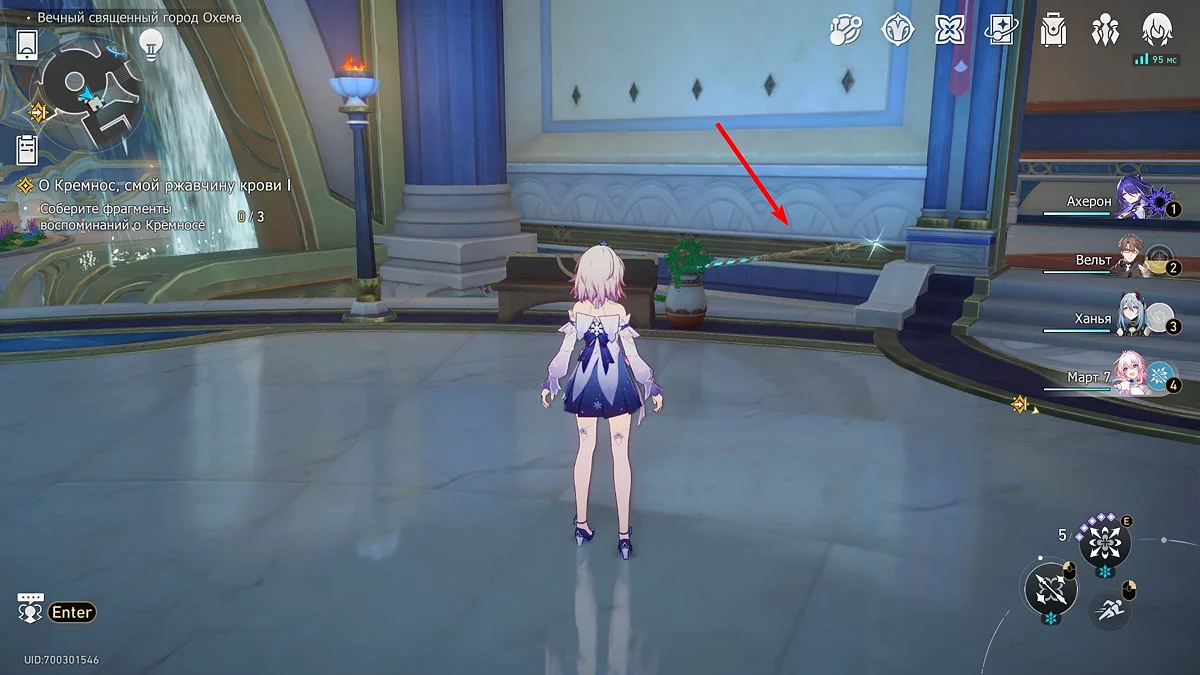
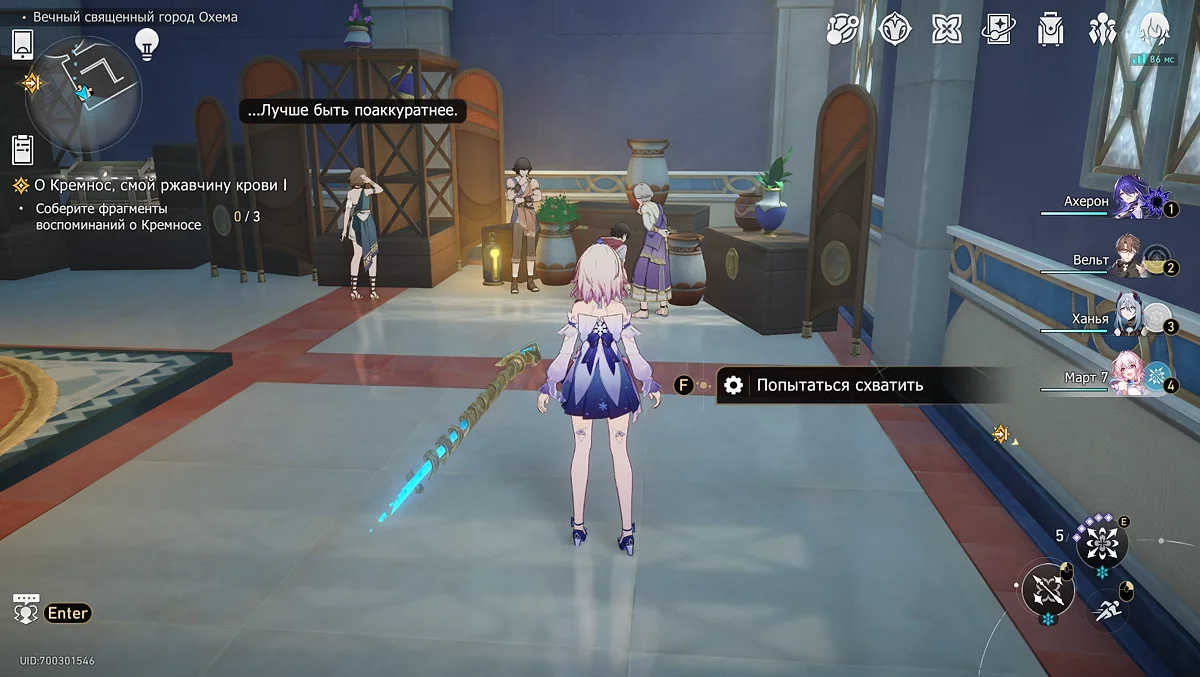
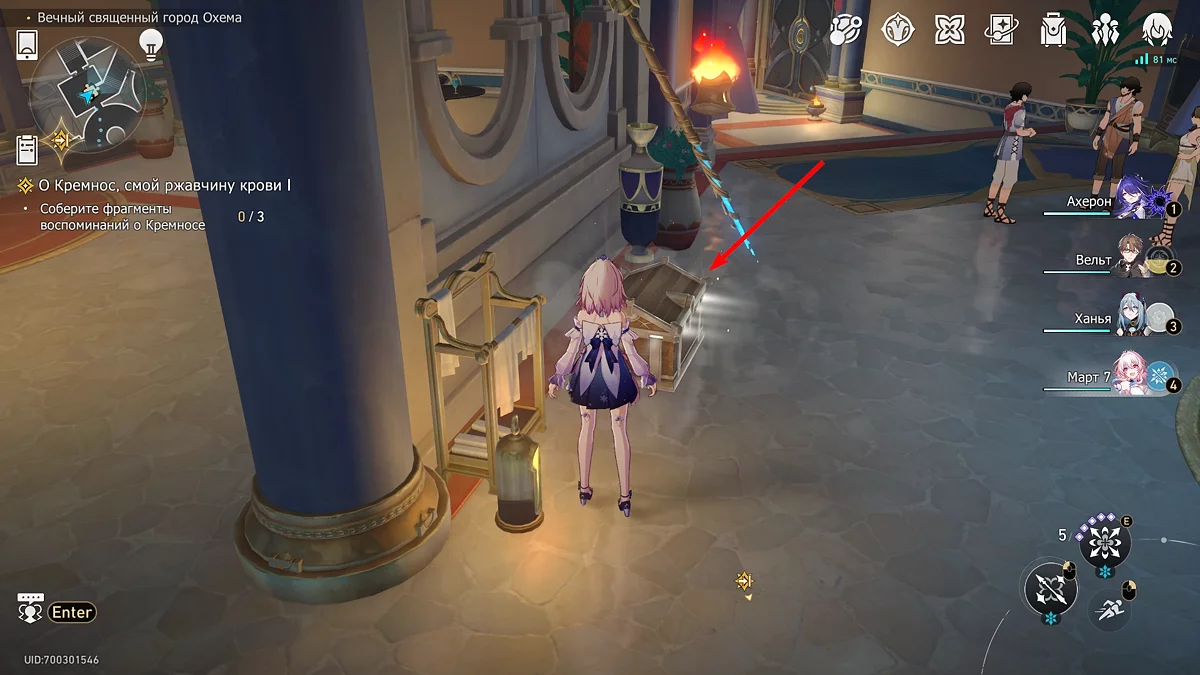
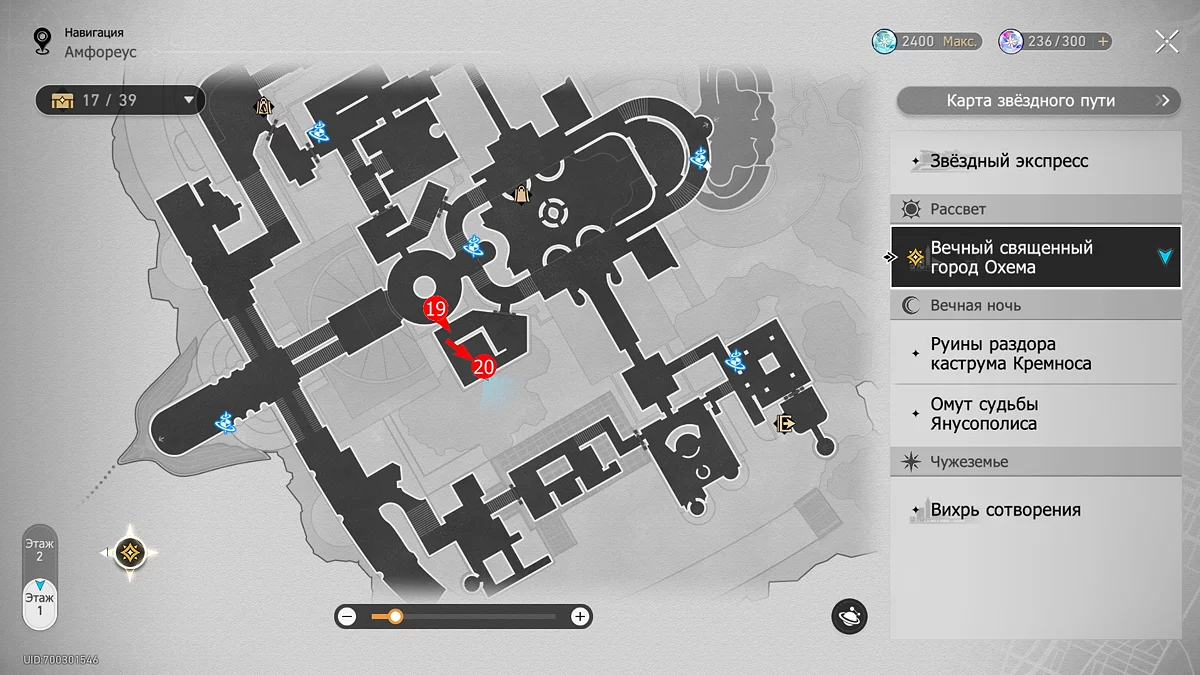
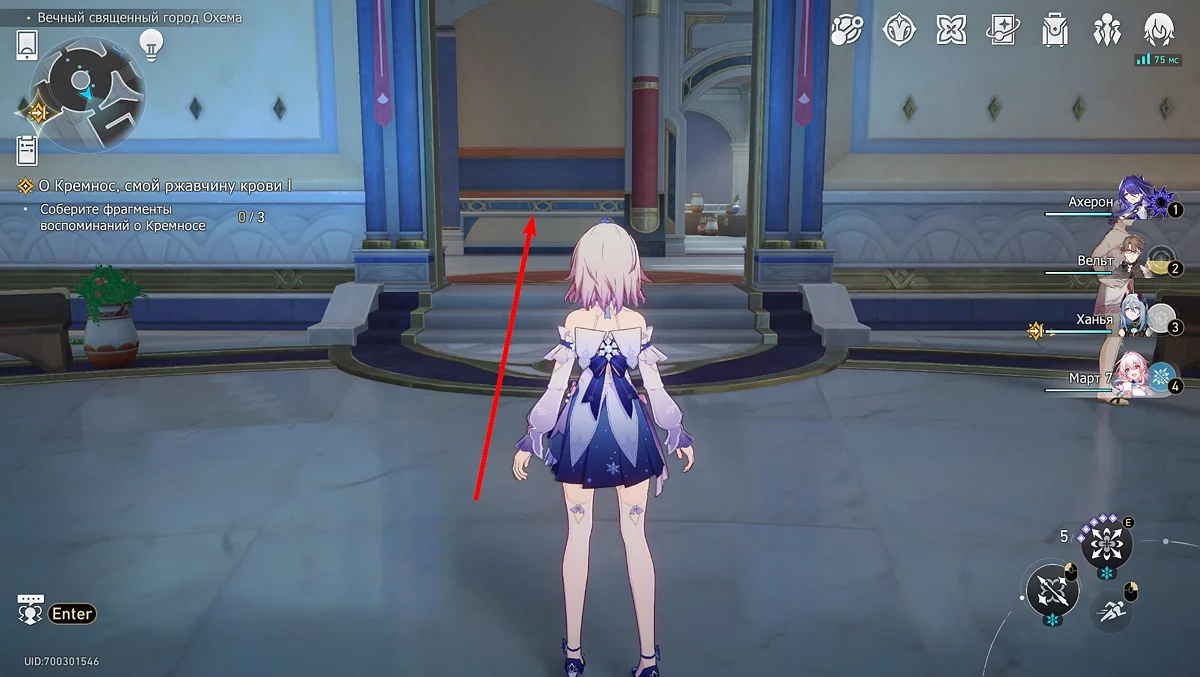
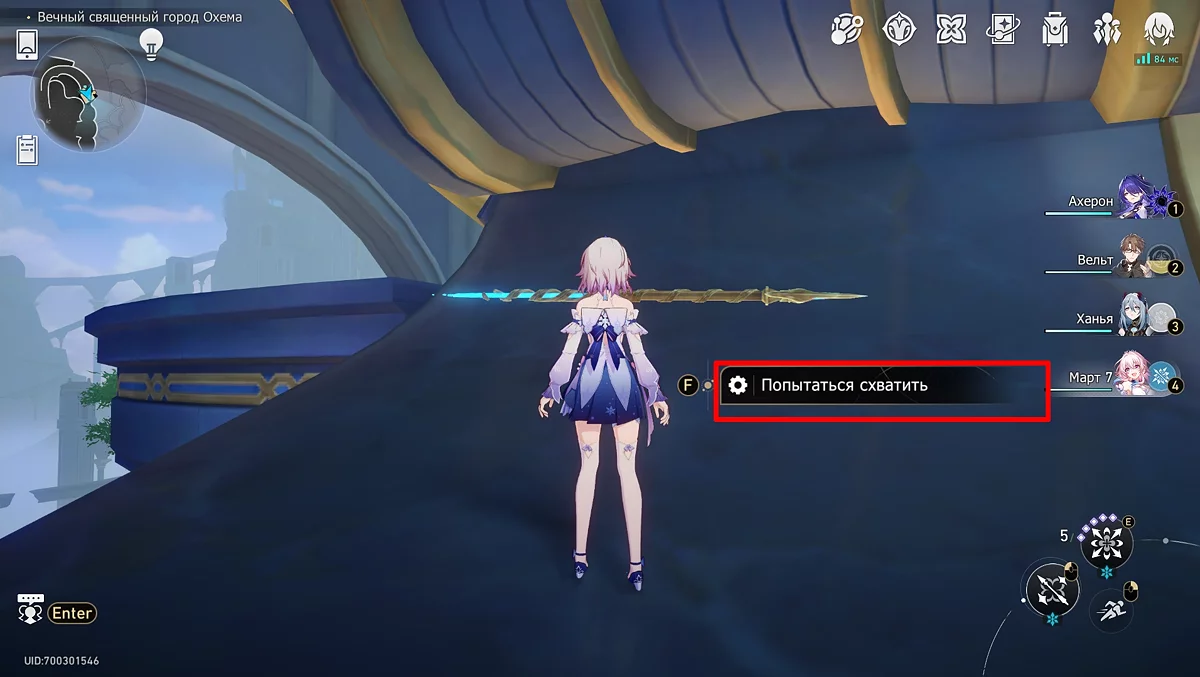
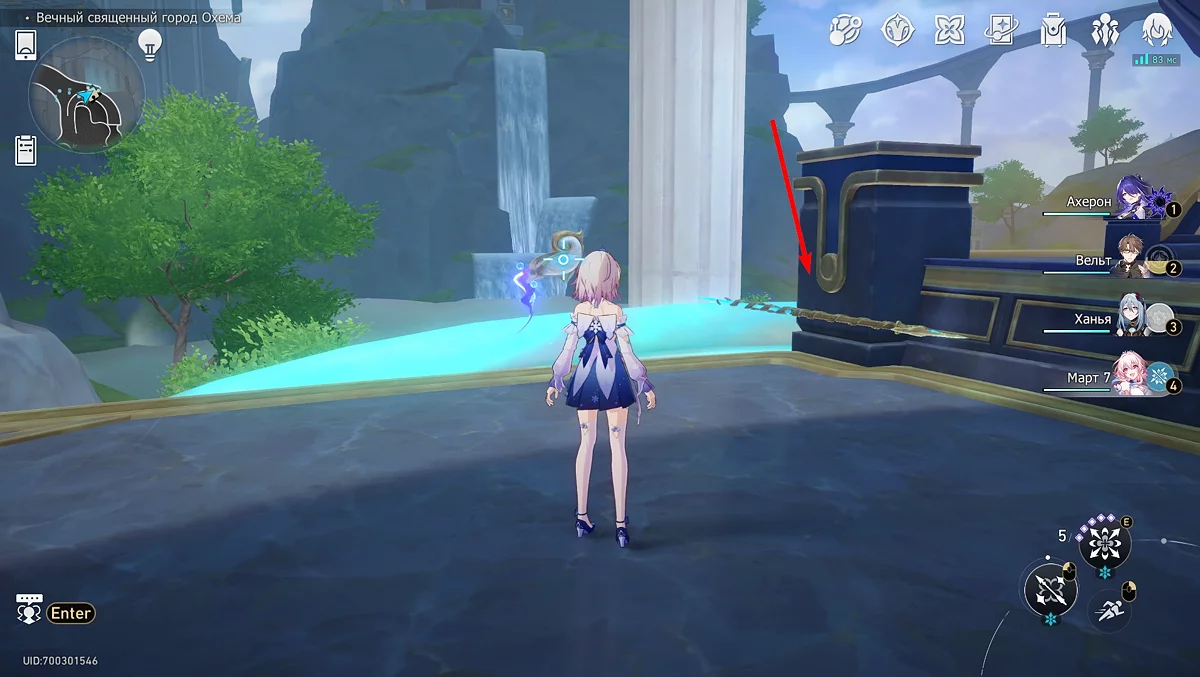
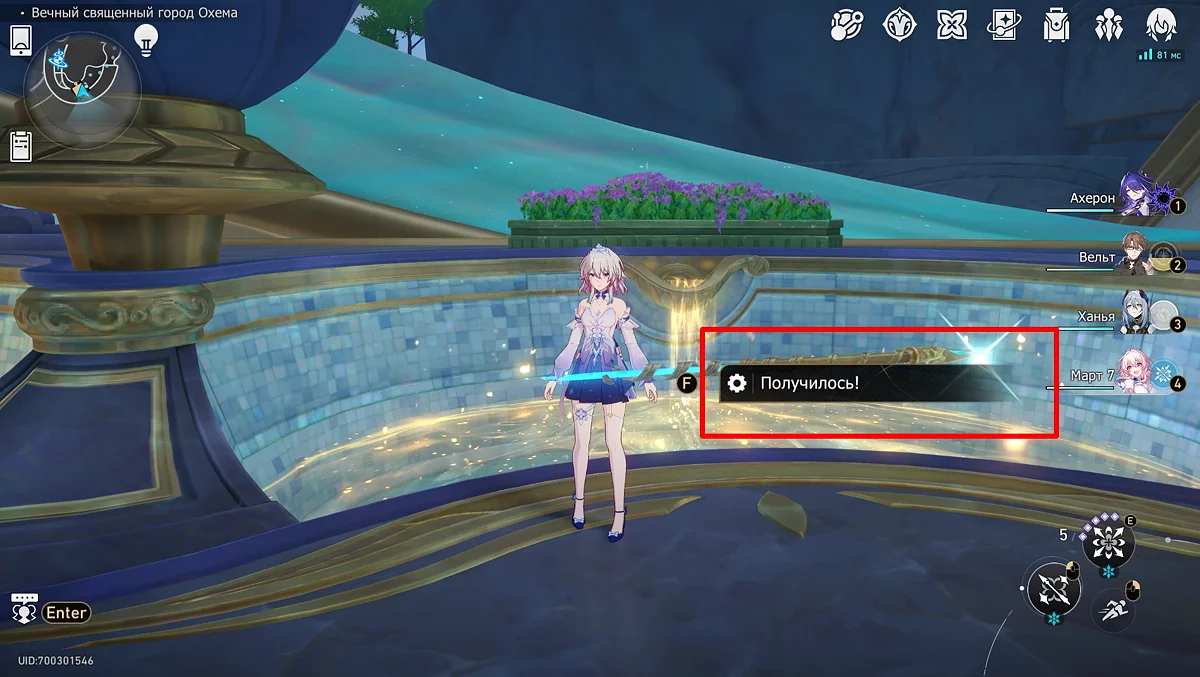
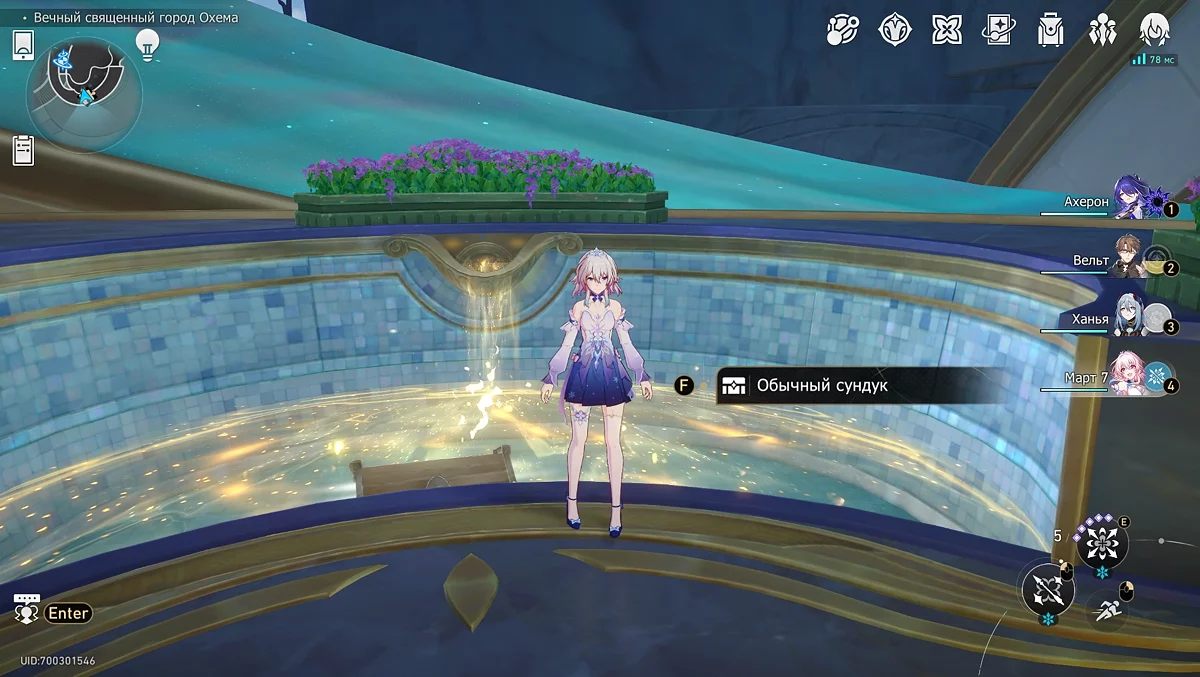
Circle around the administration room of the baths and reach the opposite entrance, where you will see a wooden shield. Break it with any character's attack and interact with the spear. Then follow it until it leads you to the chest.
Chest #20
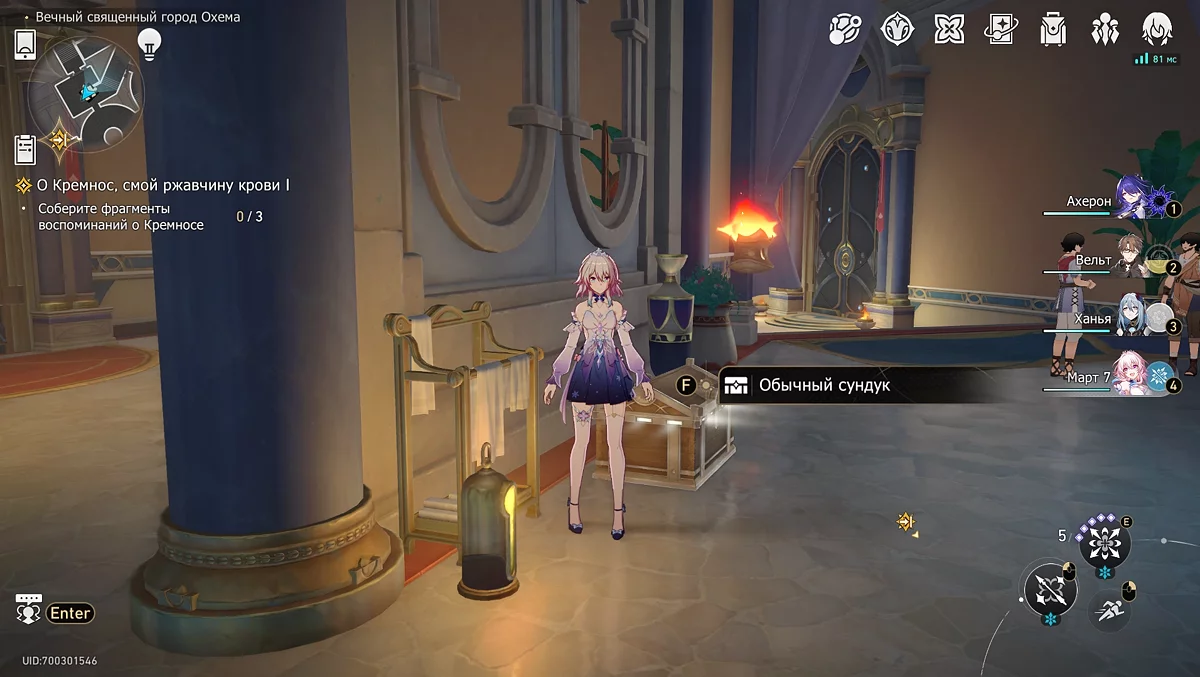
Returning to the position where the dart was initially, enter the adjacent room. Walk straight without turning, and by the wall next to the shelves and screens, you will find another ordinary treasure chest.
Chest #21
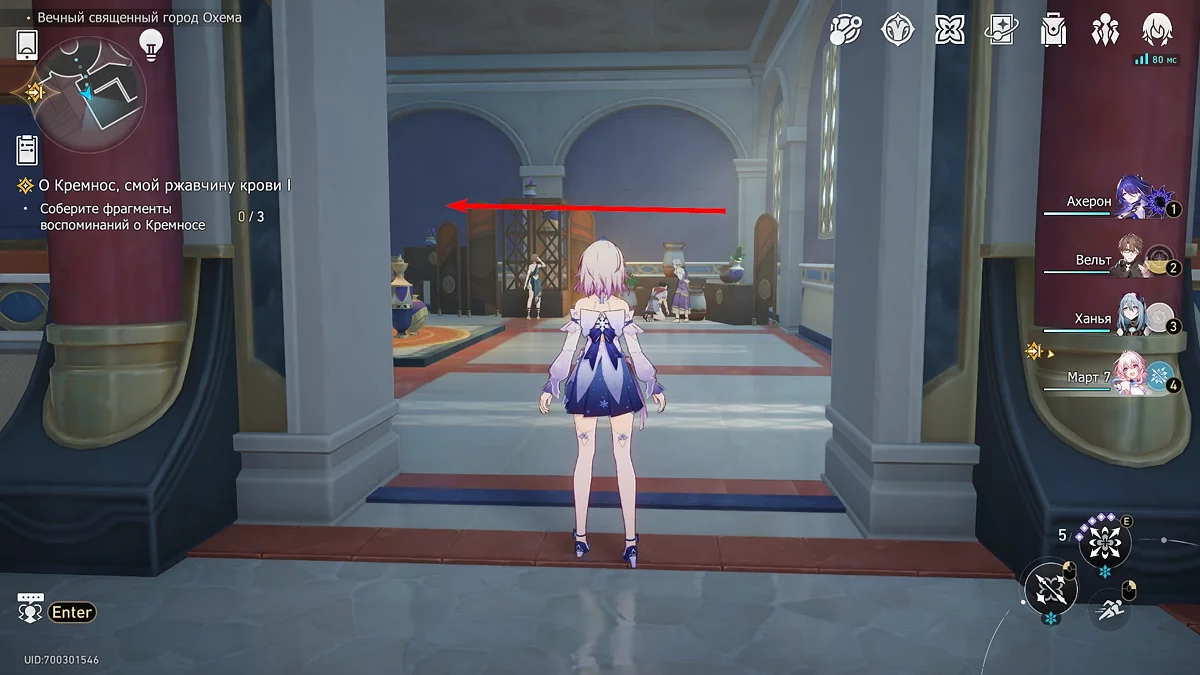
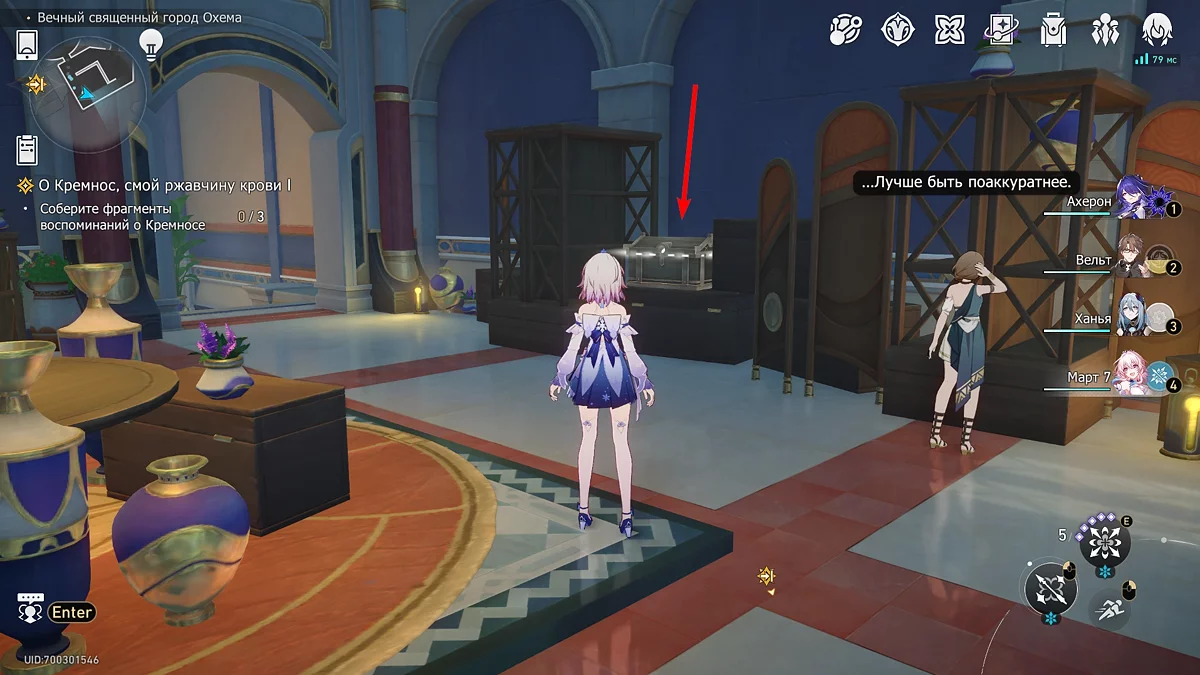
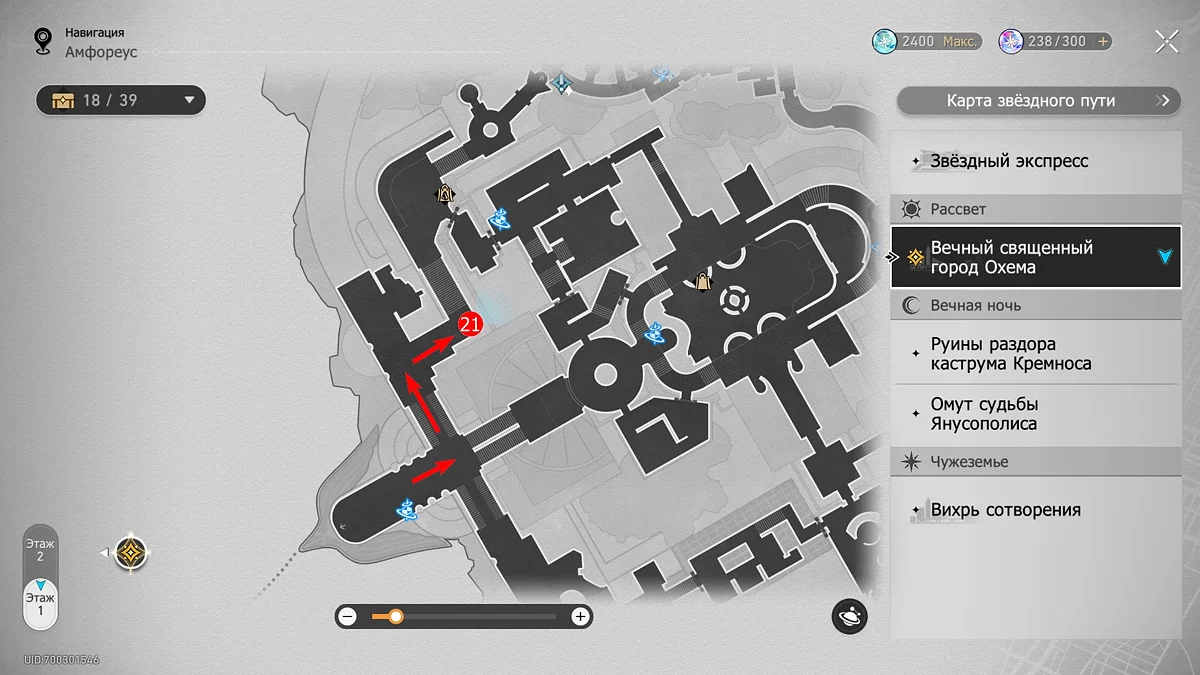
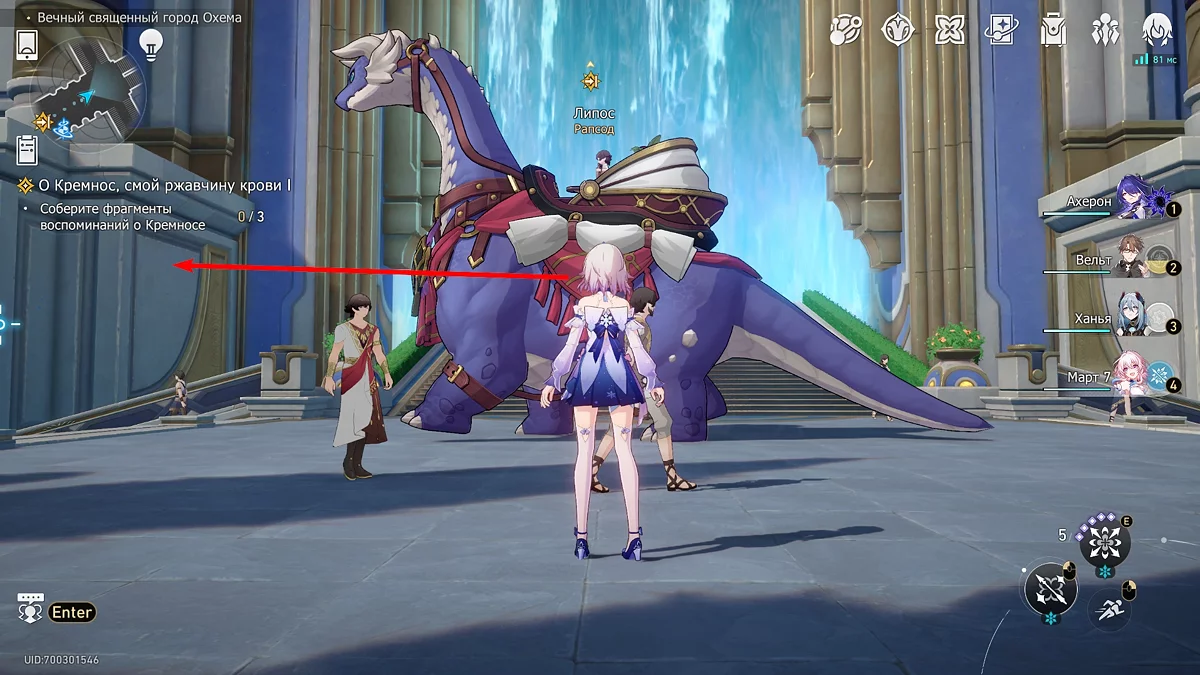
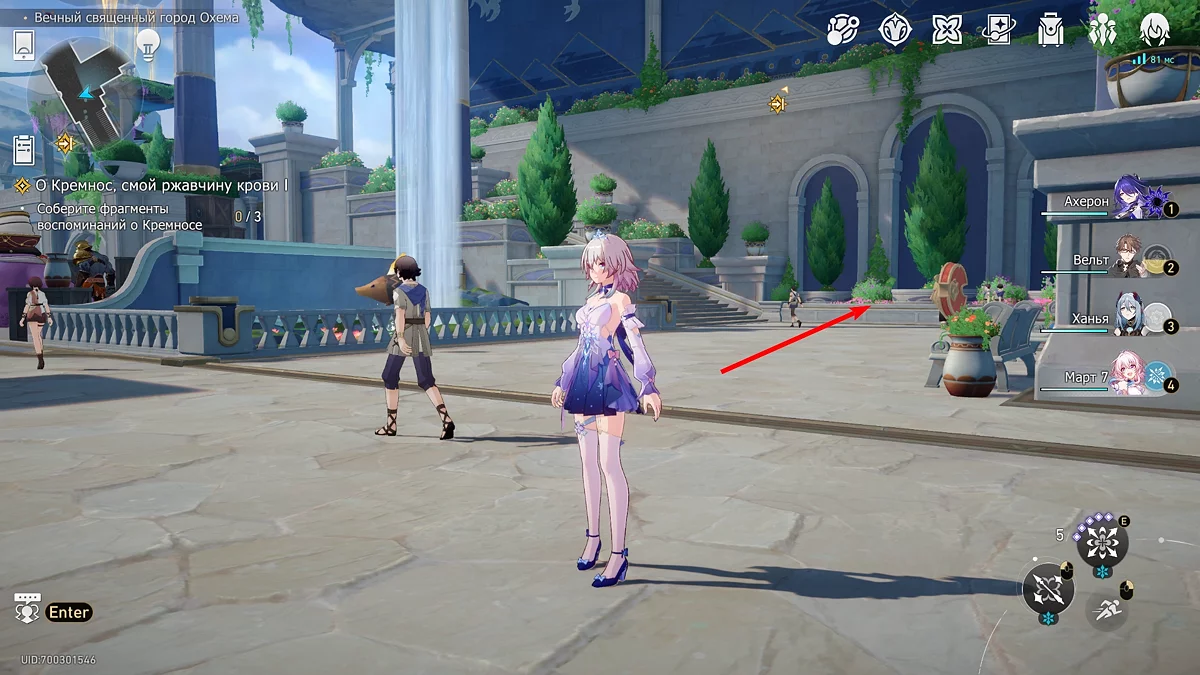
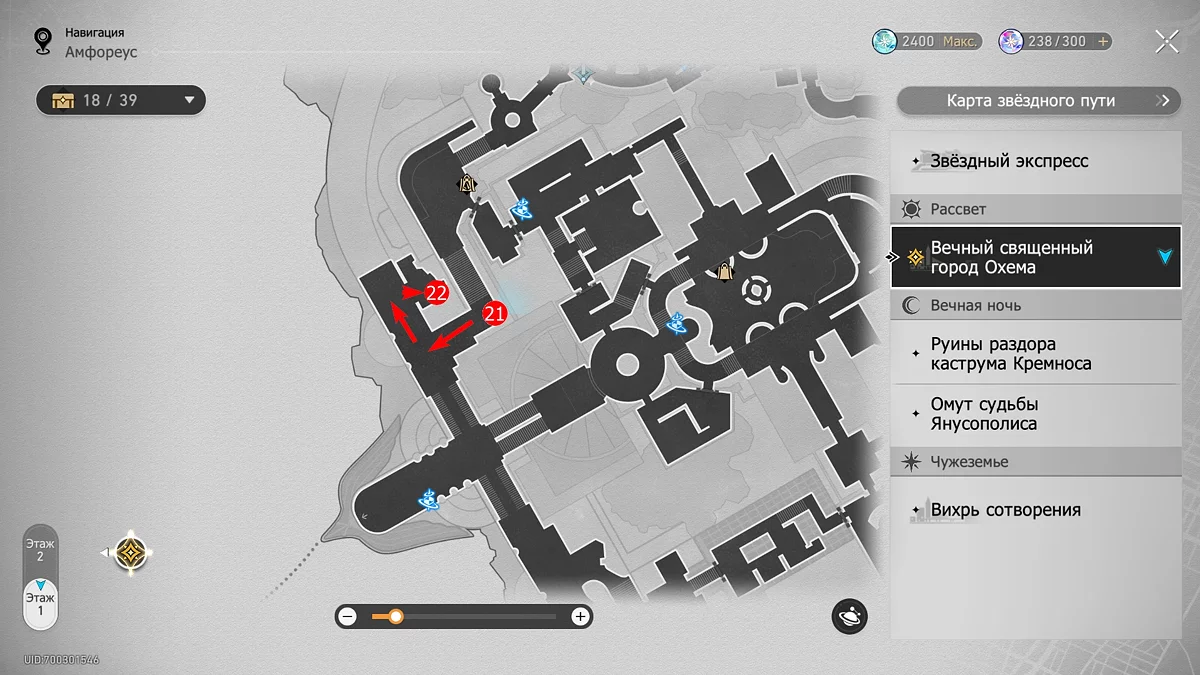
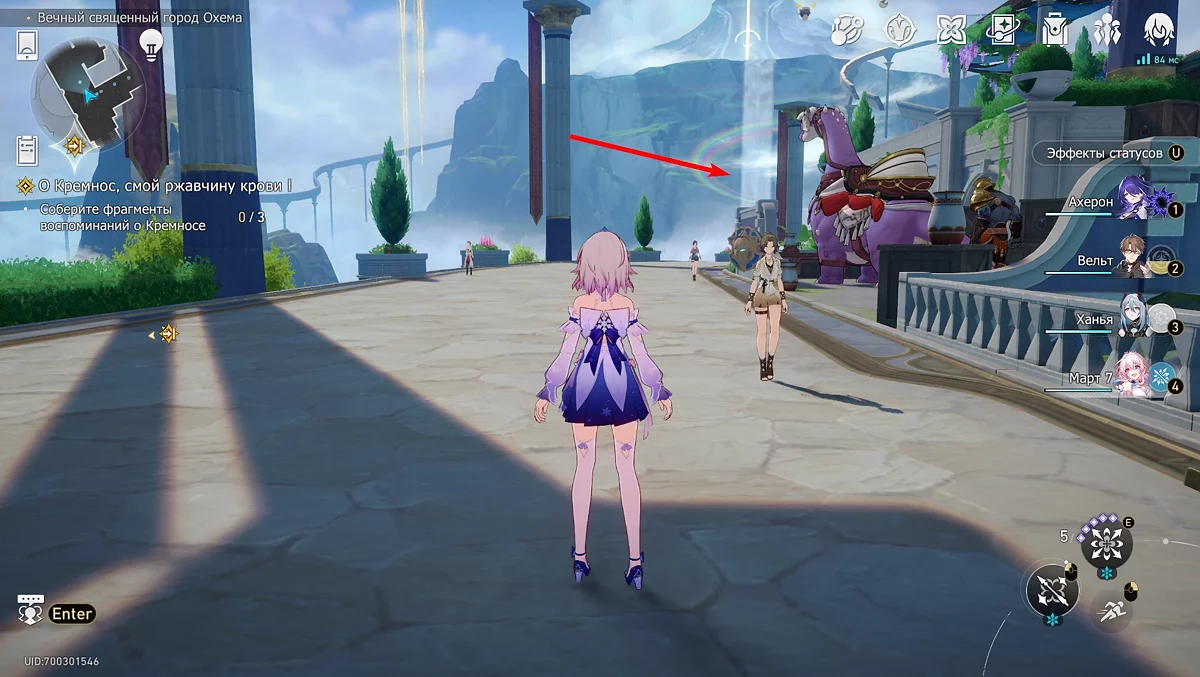
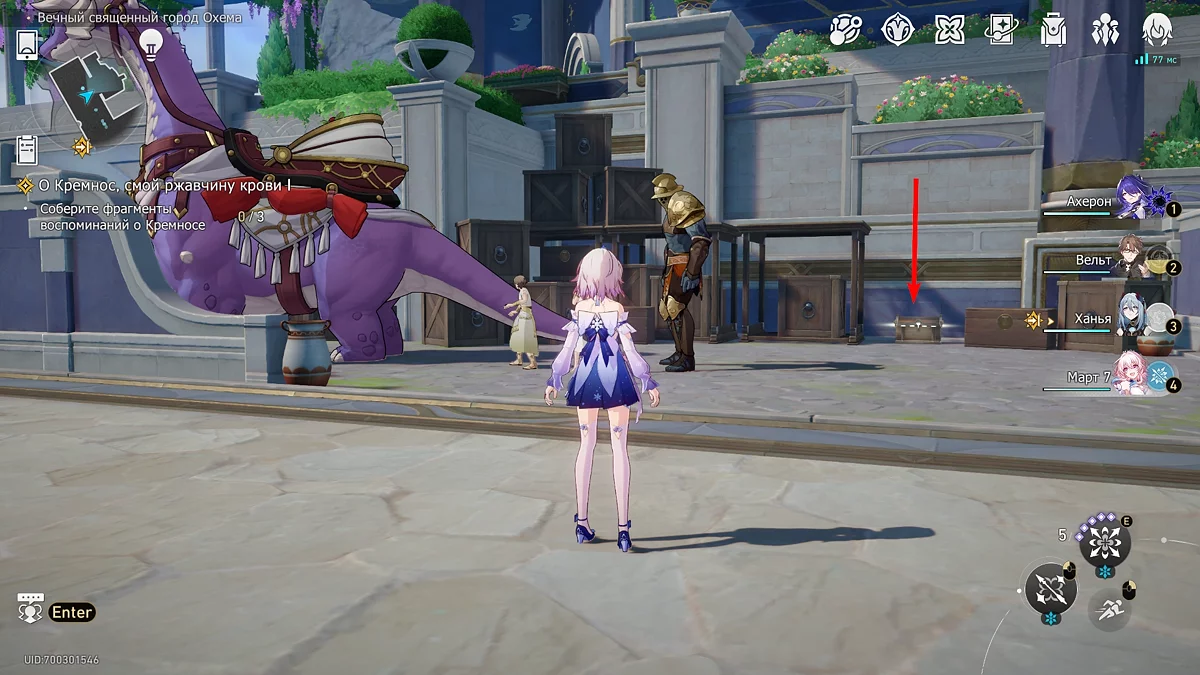
Teleport to the Marble Palace and turn left at the waterfall. At the first fork, go right to a group of characters near a flower bed. A chest will be standing next to them.
Chest #22
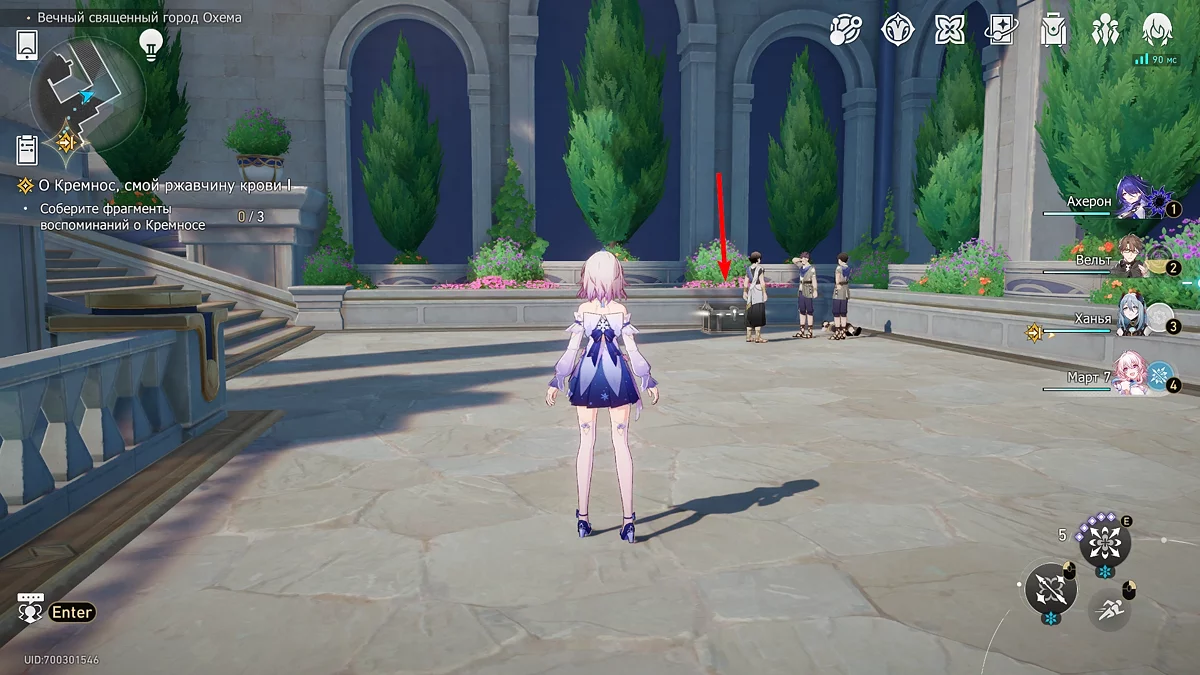
Return back to the fork and move slightly forward. You will see the guard Amphoreus and a geosaur. Next to them on a shelf will be another treasure box.
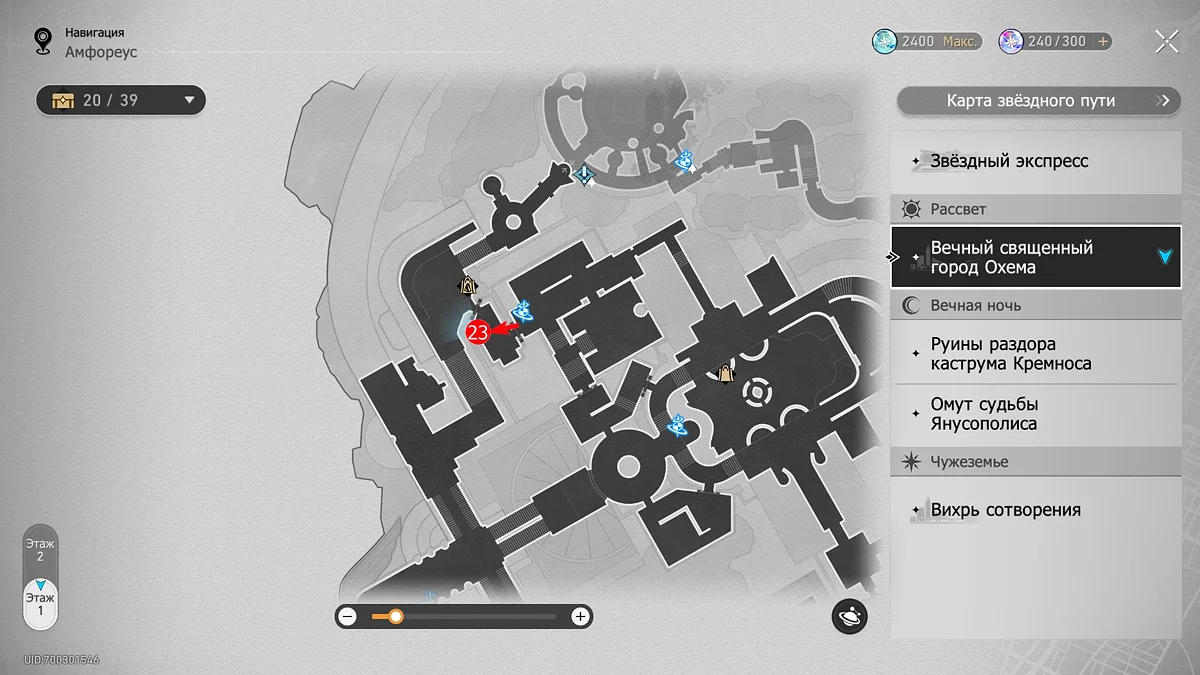
Chest #23
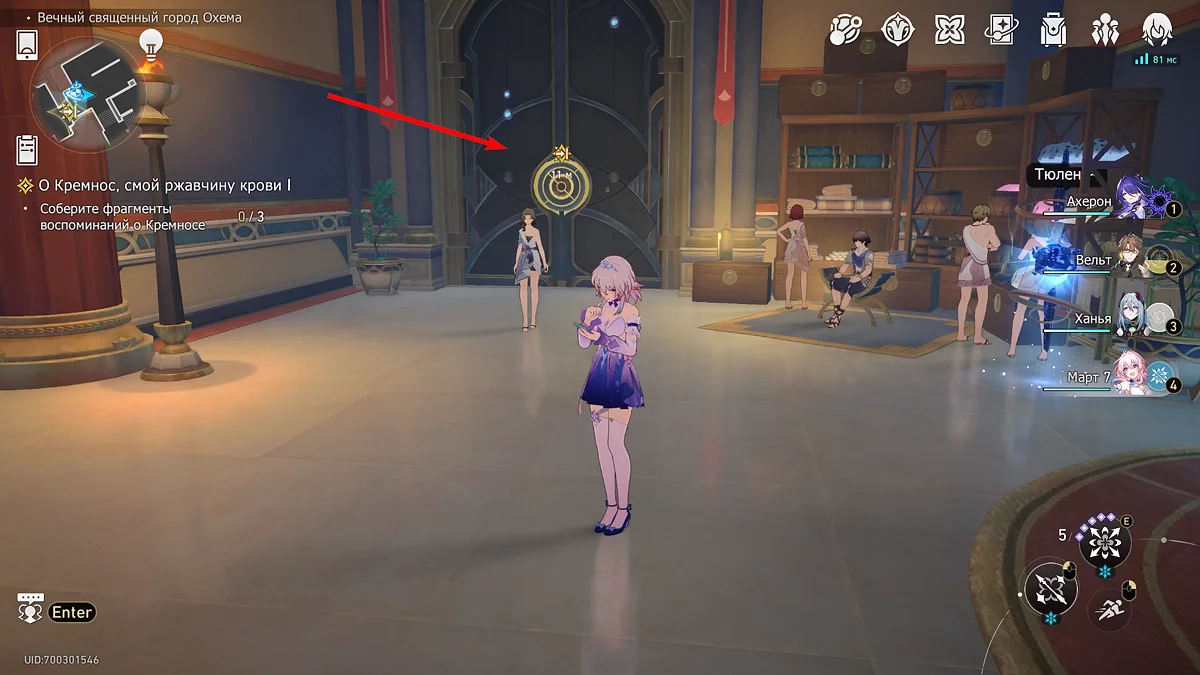
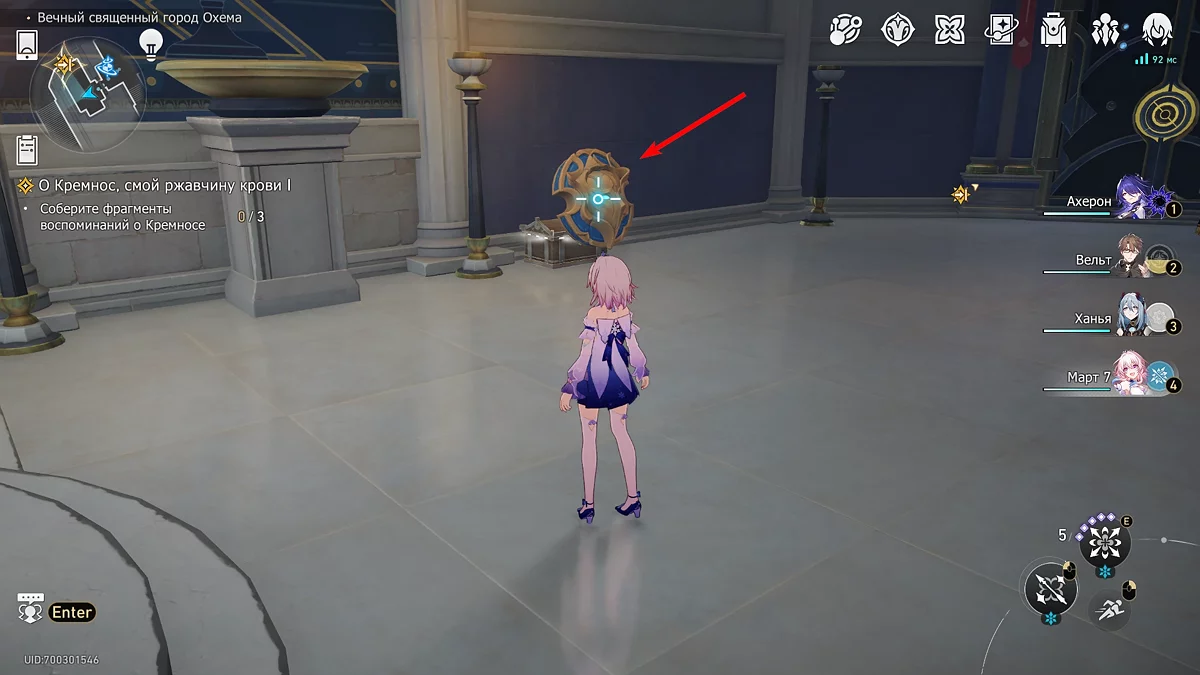
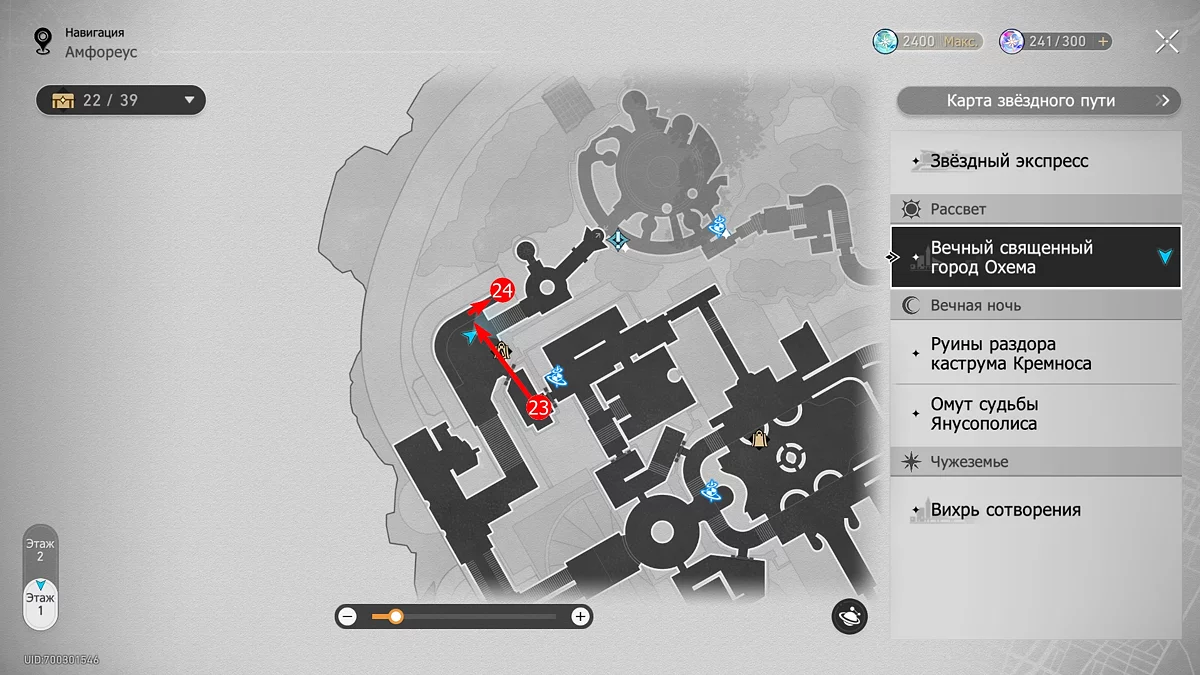
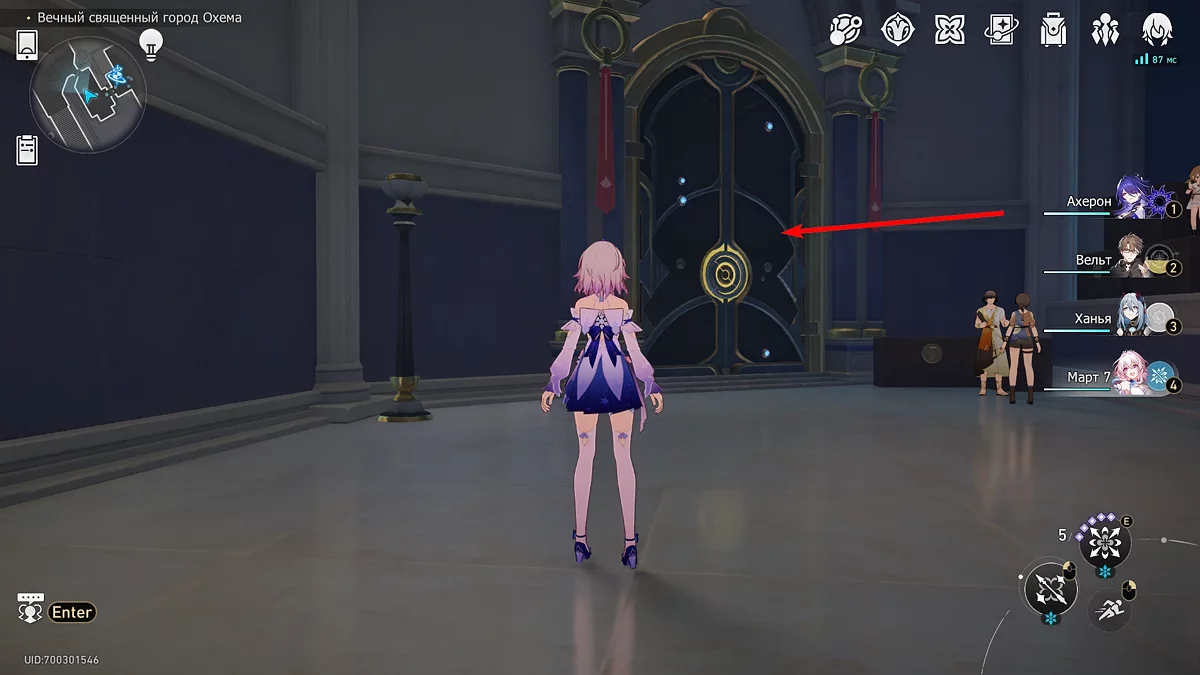
From the spatial anchor at the Court of Three Seasons, proceed to the closed door. It will lead you to another bathhouse room. Behind a wooden shield will be hiding chest #23.
Chest #24
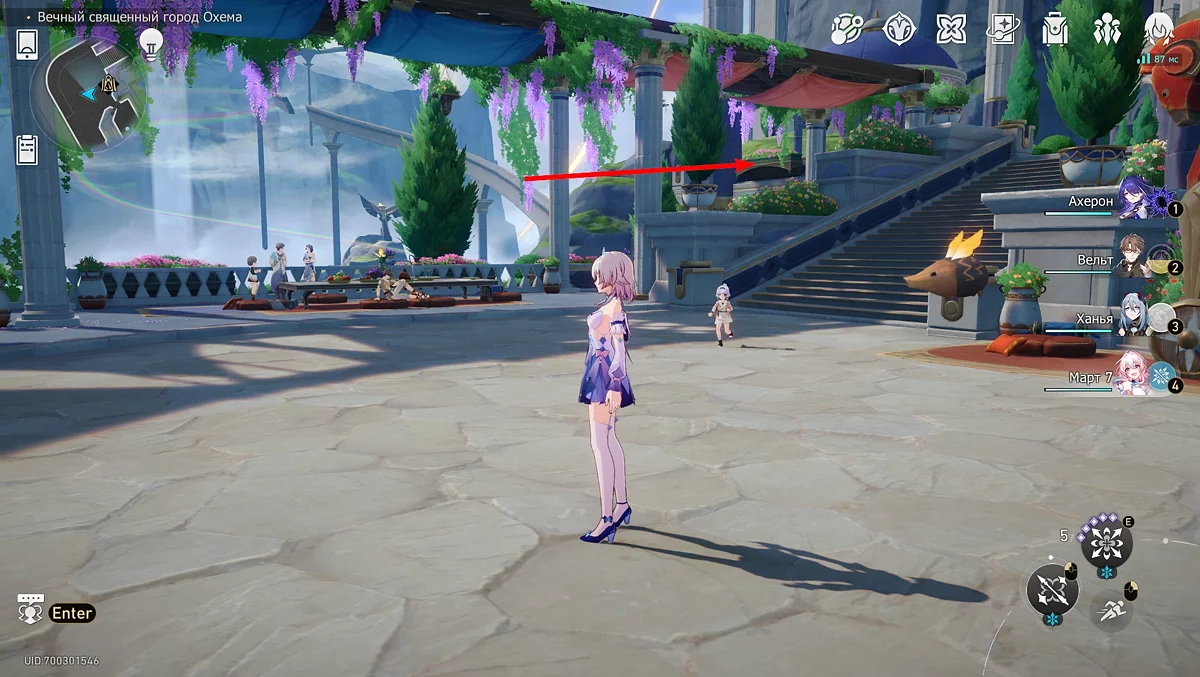
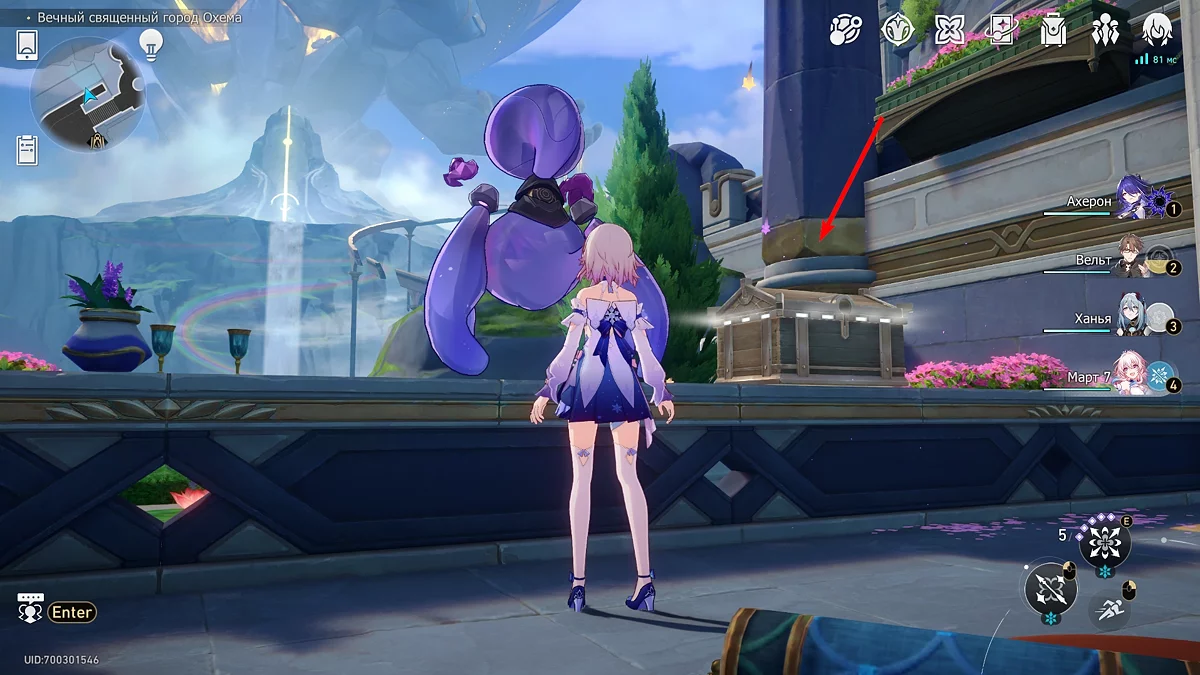
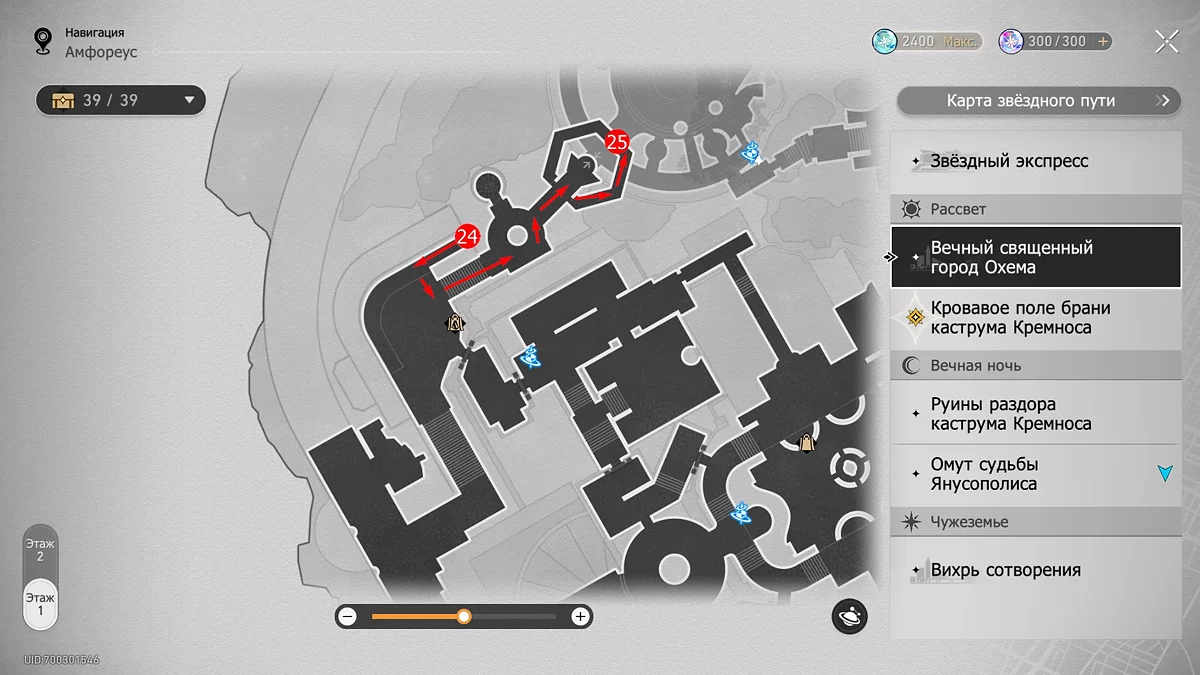
Enter the door opposite the previous chest and you will find yourself outside. Keep to the right and, passing the stairs up, turn towards the narrow balcony. On the railing will be a treasure chest, but it will be stolen by the familiar Thieving Spirit Balos. As with chest #7, rewind time and talk to the creature. In addition to the chest, you can get 40 units of Stellar Jade.
Chest #25
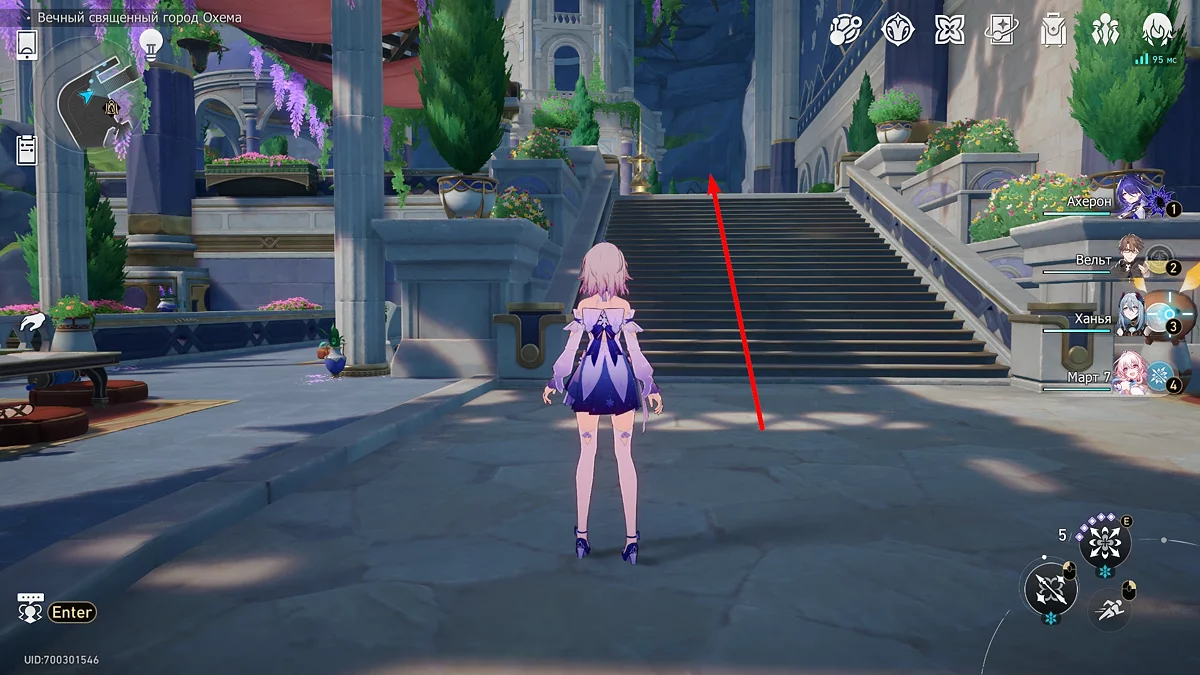
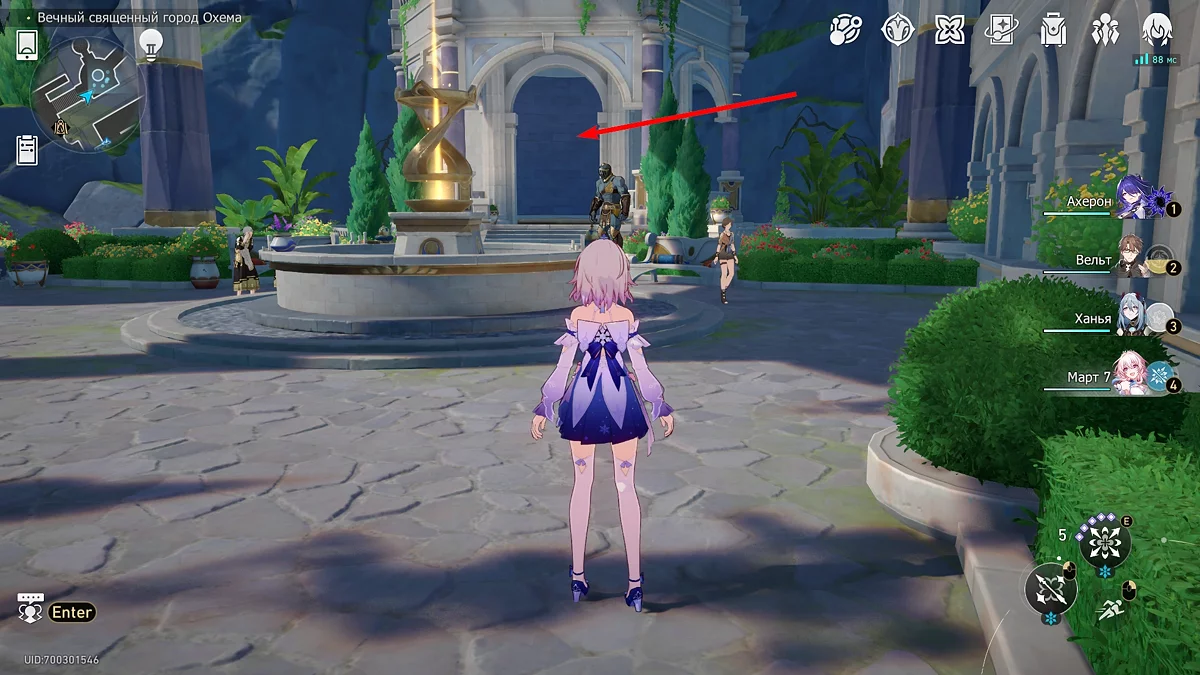
Climb the stairs next to the balcony and go straight to the elevator, but do not use it. Instead, turn into the narrow corridor next to it. Walking in a circle, you will see the last chest on this floor.
All Chests on the Second Floor of the Upper Part of Ochema
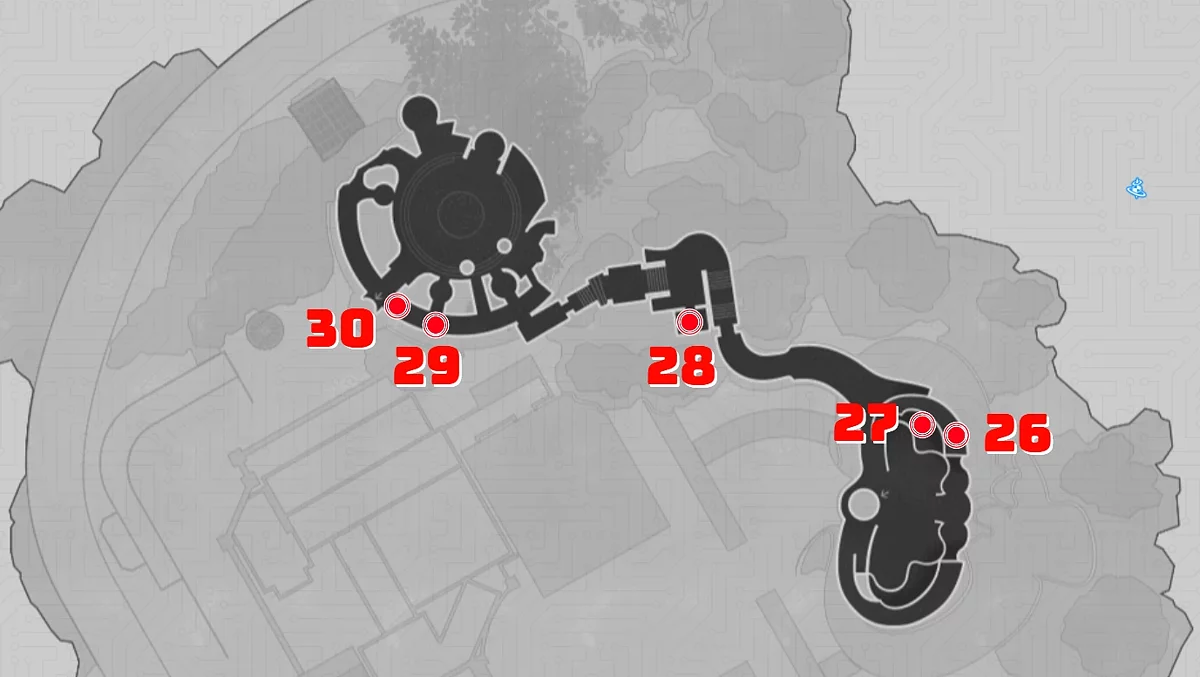
After clearing all the chests on the lower floor of the northeastern part of the city, you can safely search for treasure chests on the second floor, specifically in the locations of the Soul Basin and the Garden of Heroes.
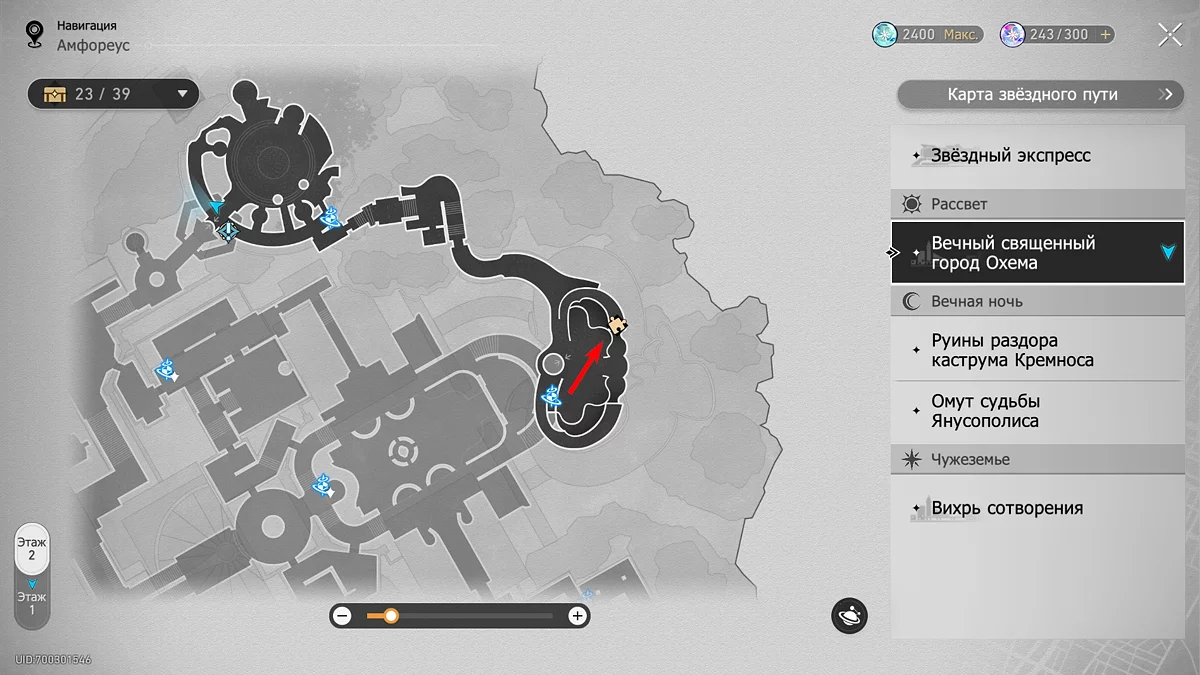
Chest #26
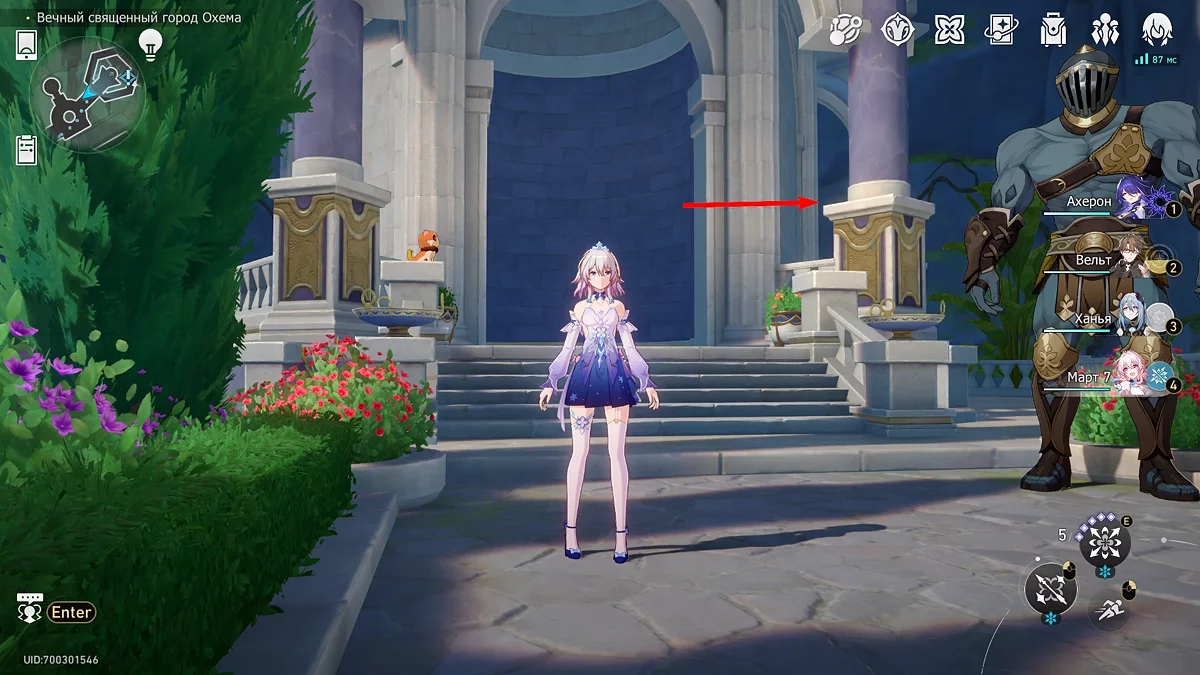
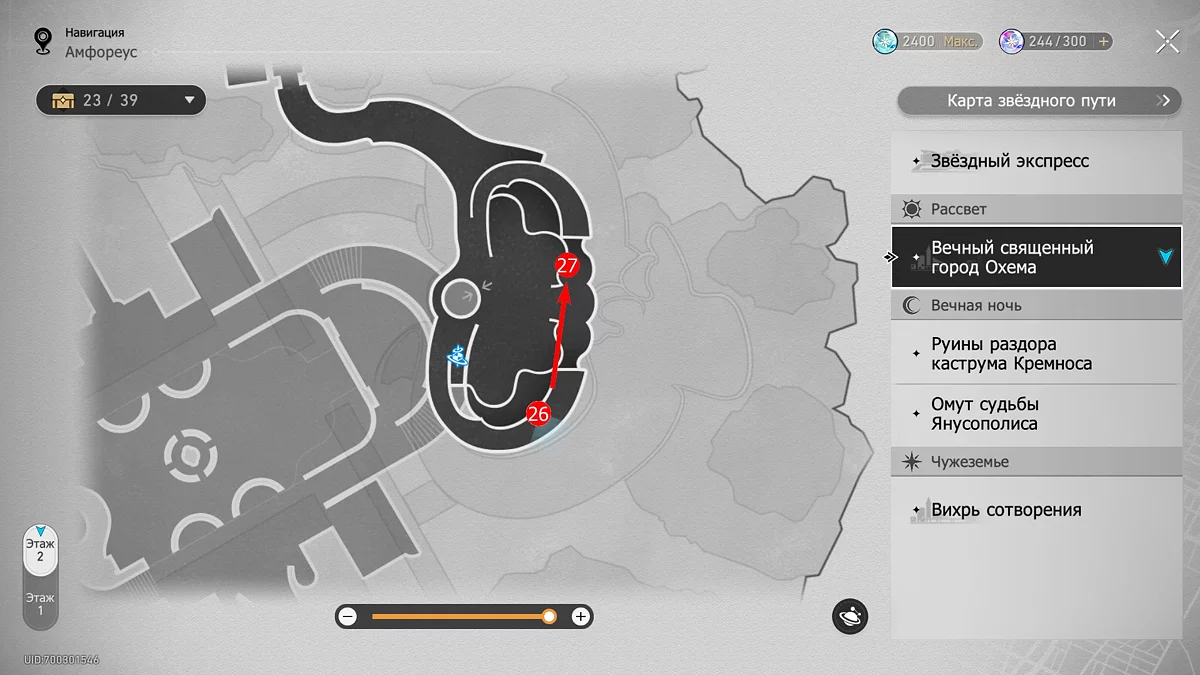
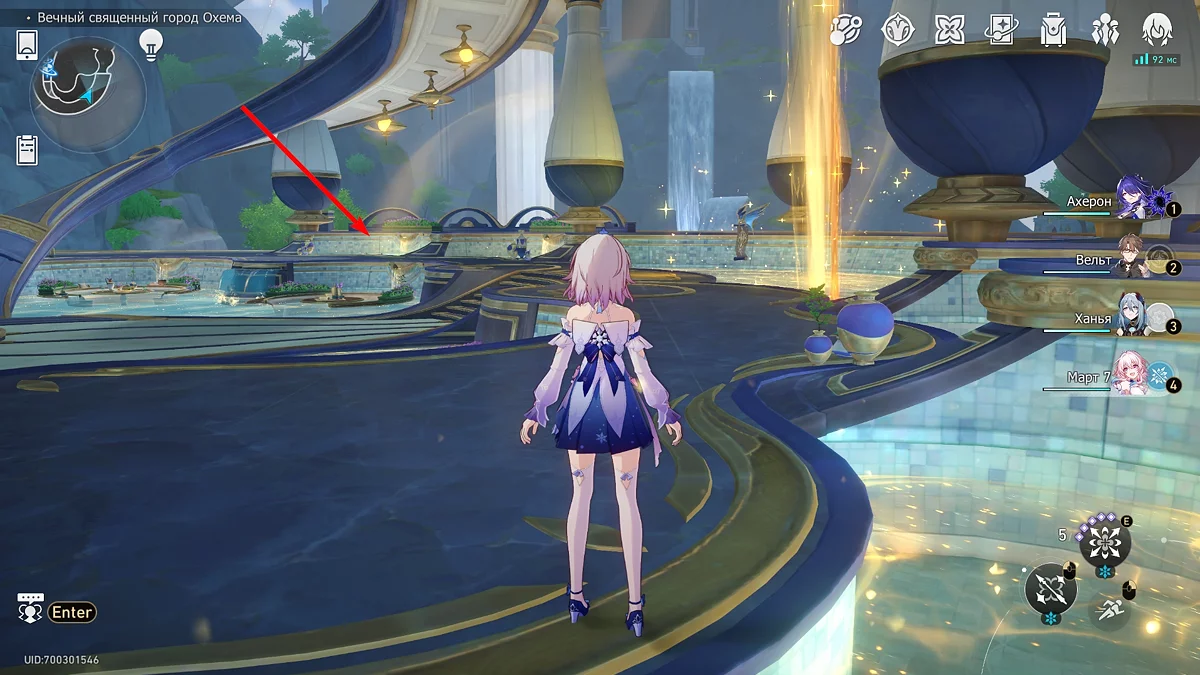
Use the teleport in the Soul Basin and climb the bridge on the left to the very top. There you will see a shield and a dart. Destroy the wooden object, use the power of time to gather the spear, and follow the weapon until it leads you to a chest, which will be in one of the golden baths.
Chest #27
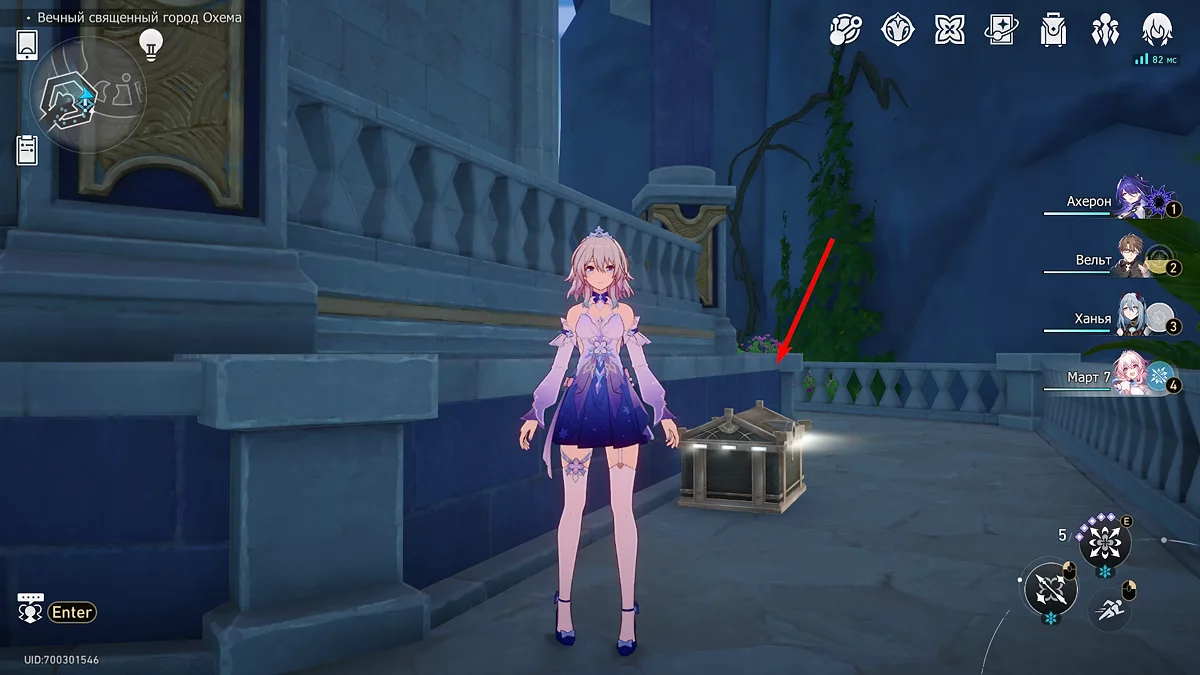
From the place where the previous box was, head to the very last golden bath at the opposite wall. There you will find another ordinary treasure chest.
Chest #28
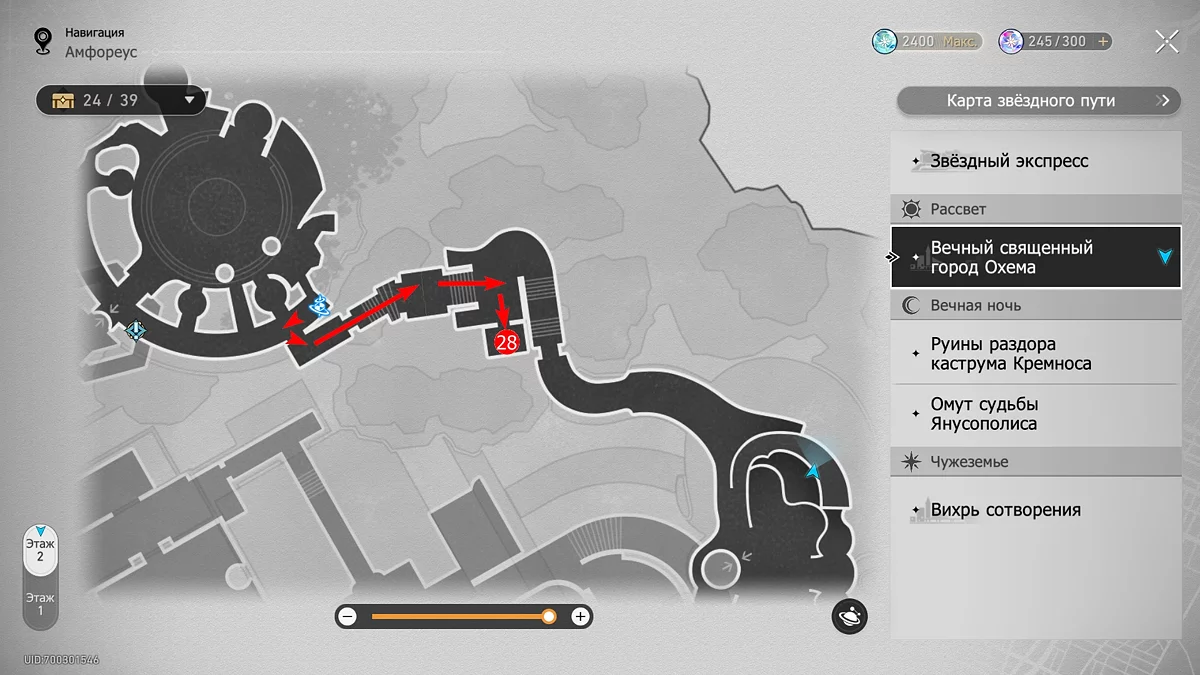
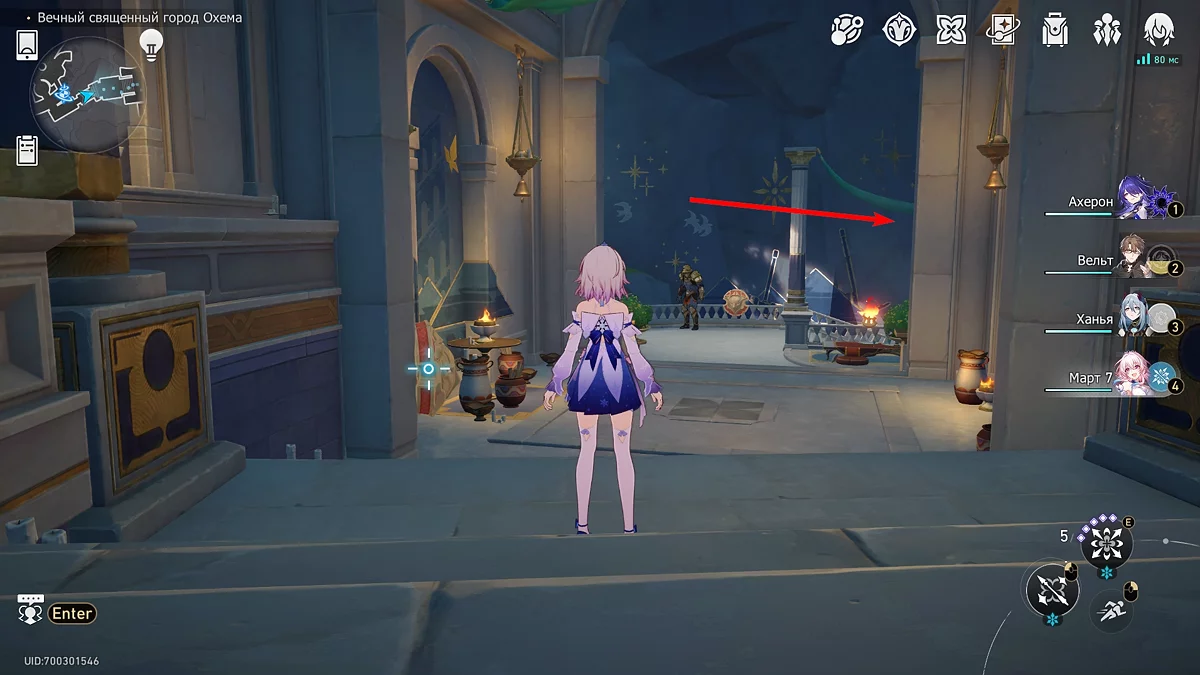
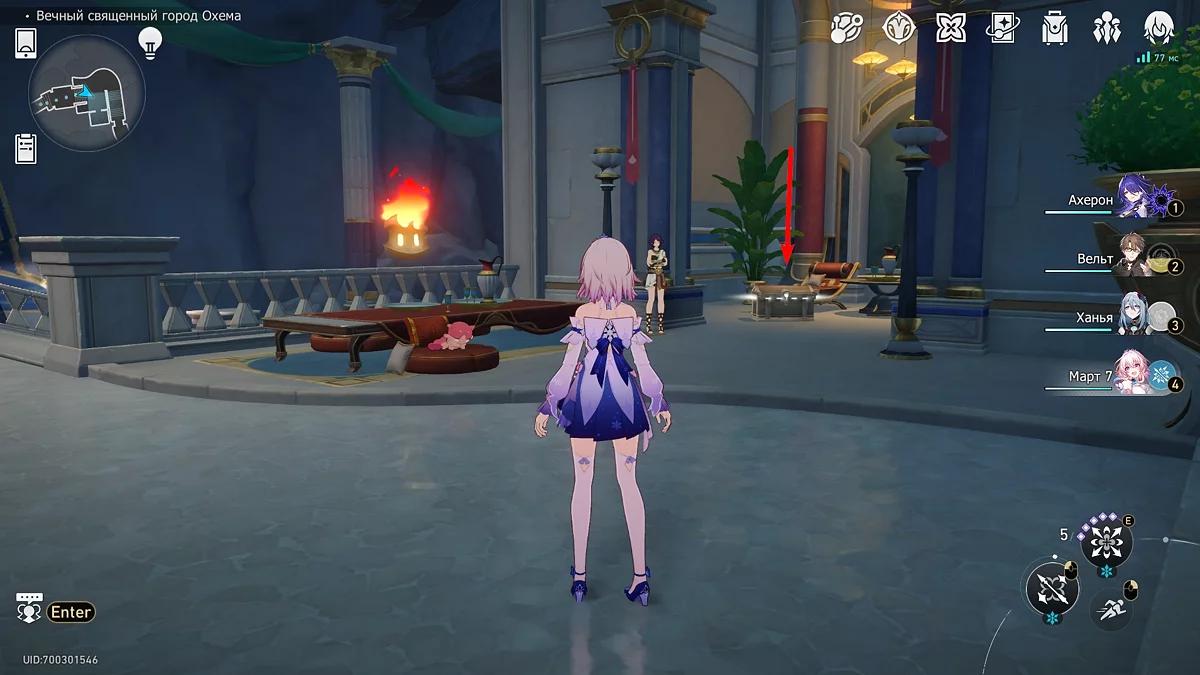
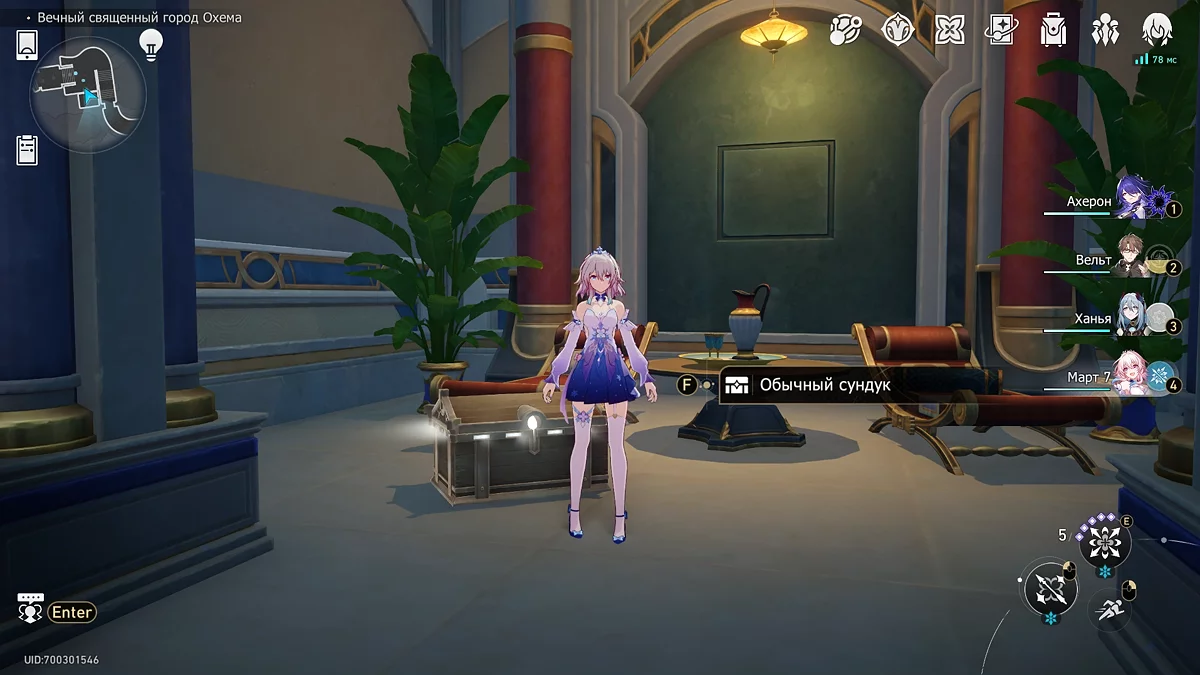
Teleport to the Garden of Life and walk straight down the corridor, then turn right at the fork into a small room with two loungers. In front of them will be a chest.
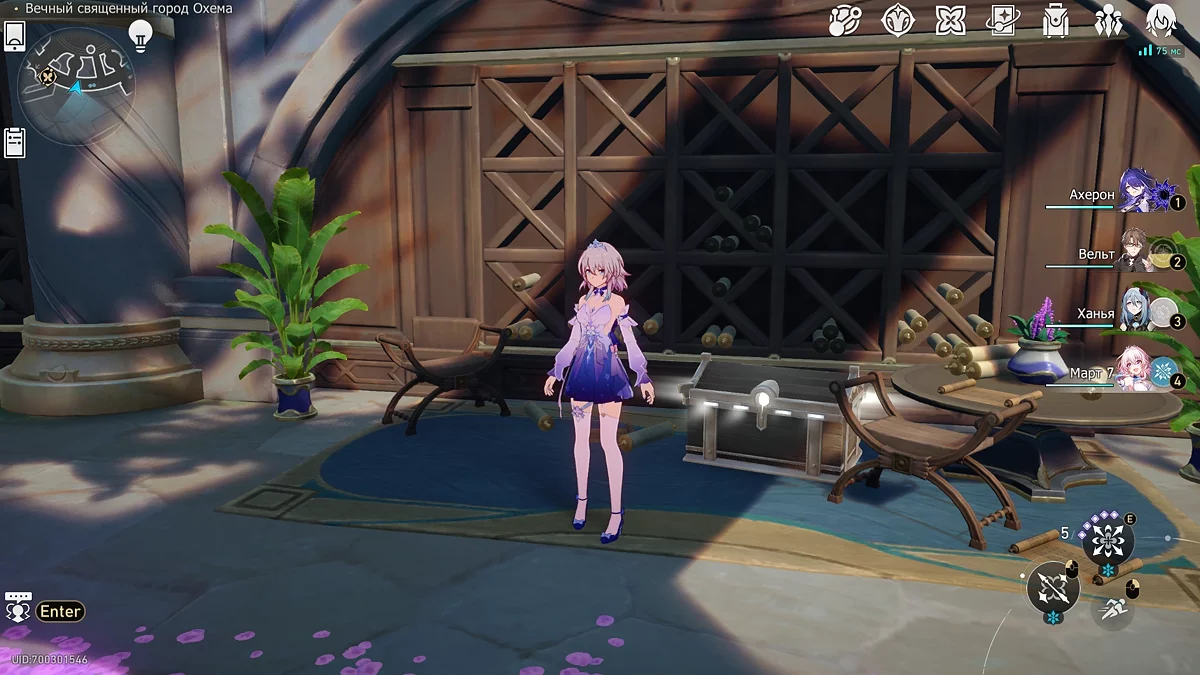
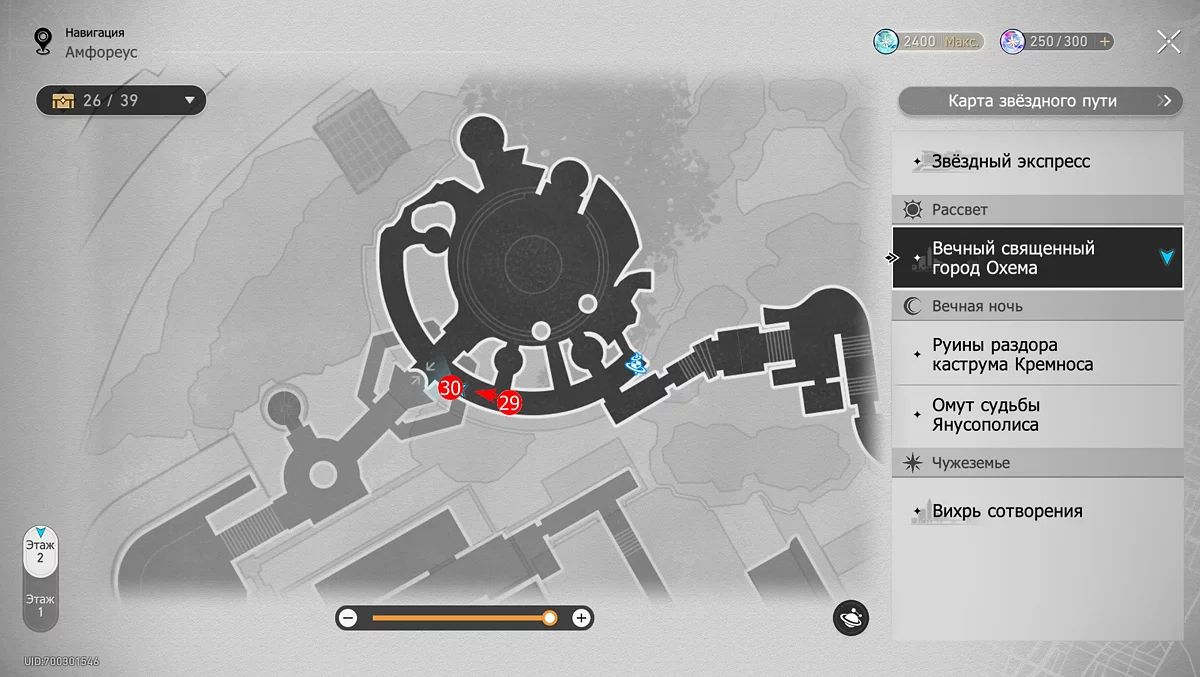
Chest #29
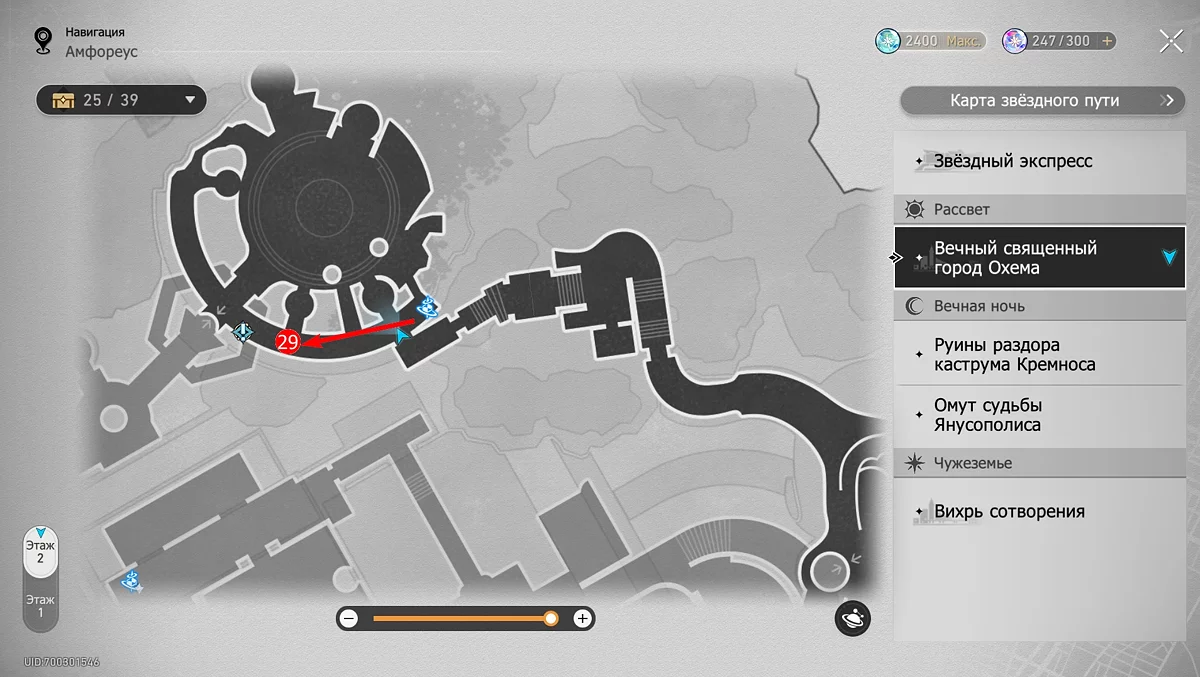
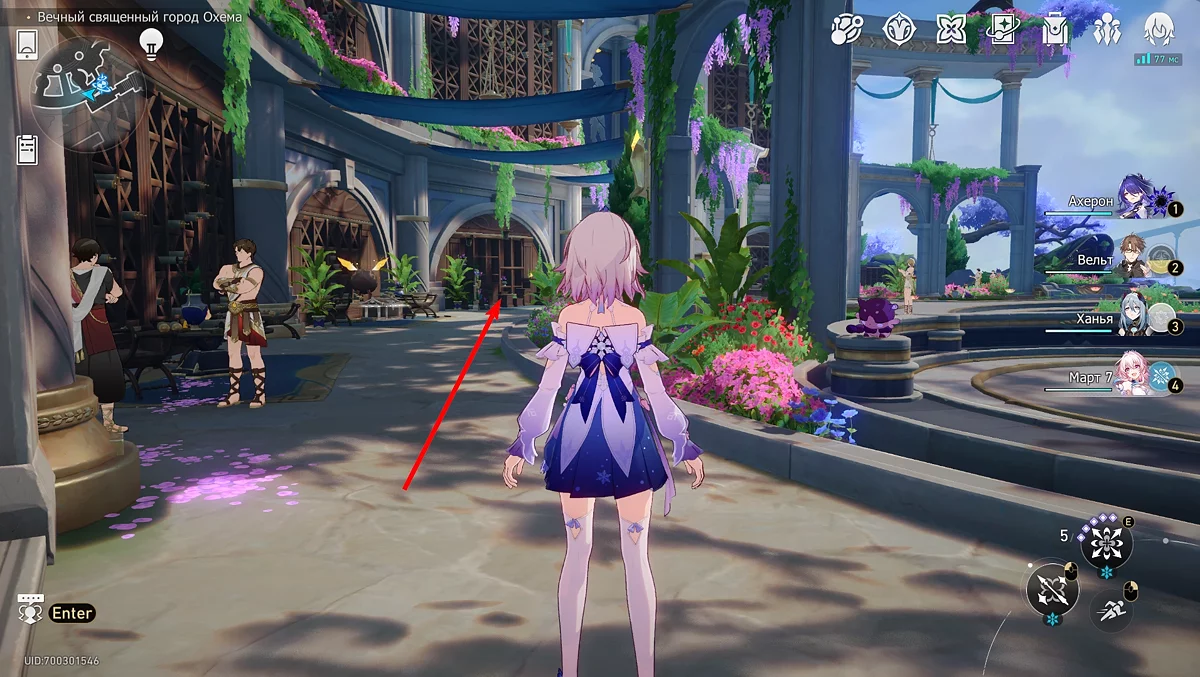
Return to the spatial anchor in the Garden of Life, but now head forward through the round corridor with shelves. Near one such shelf is another treasure box.
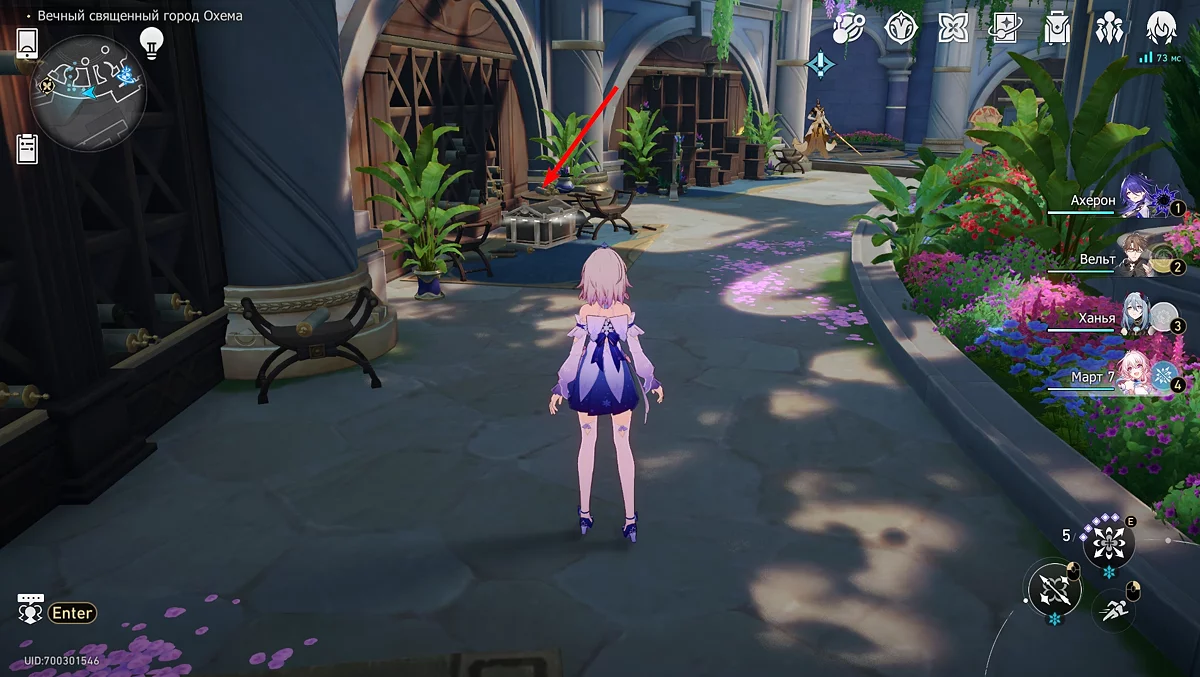
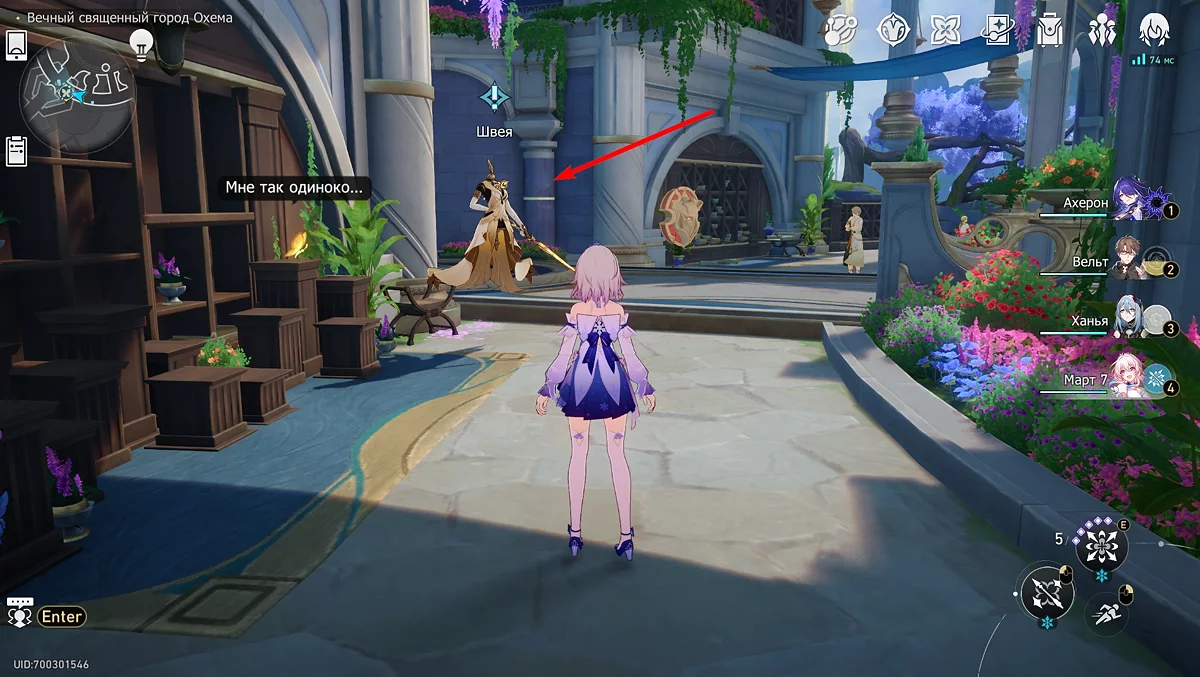
Chest #30
To obtain the last treasure chest in this location, you need to fulfill a series of conditions. First, from the previous chest, move slightly forward and you will see a mannequin. Talk to it to start the quest "Buzzing Secrets". Also complete the side mission "Once in Arcadia", but most importantly, find 20 golden butterflies (creation nymphs) in the Ochema territory. After that, talk to the mannequin and solve the main puzzle related to the prophecy.
All Chests on the First Floor of the Lower Part of Ochema
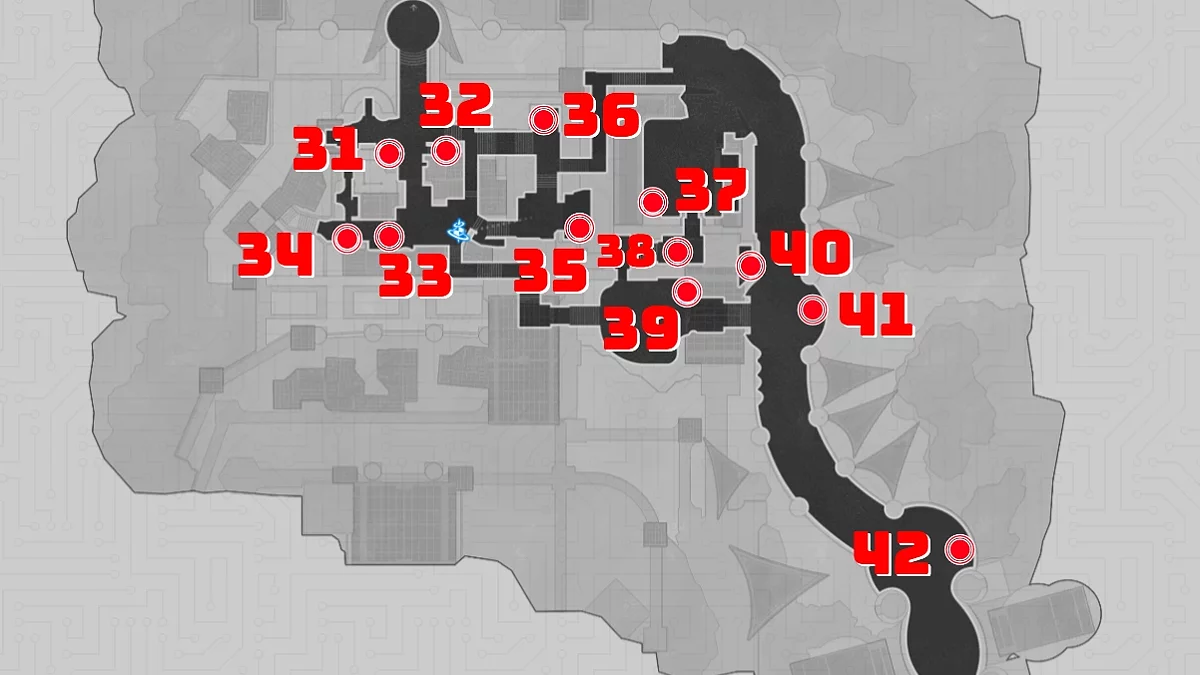
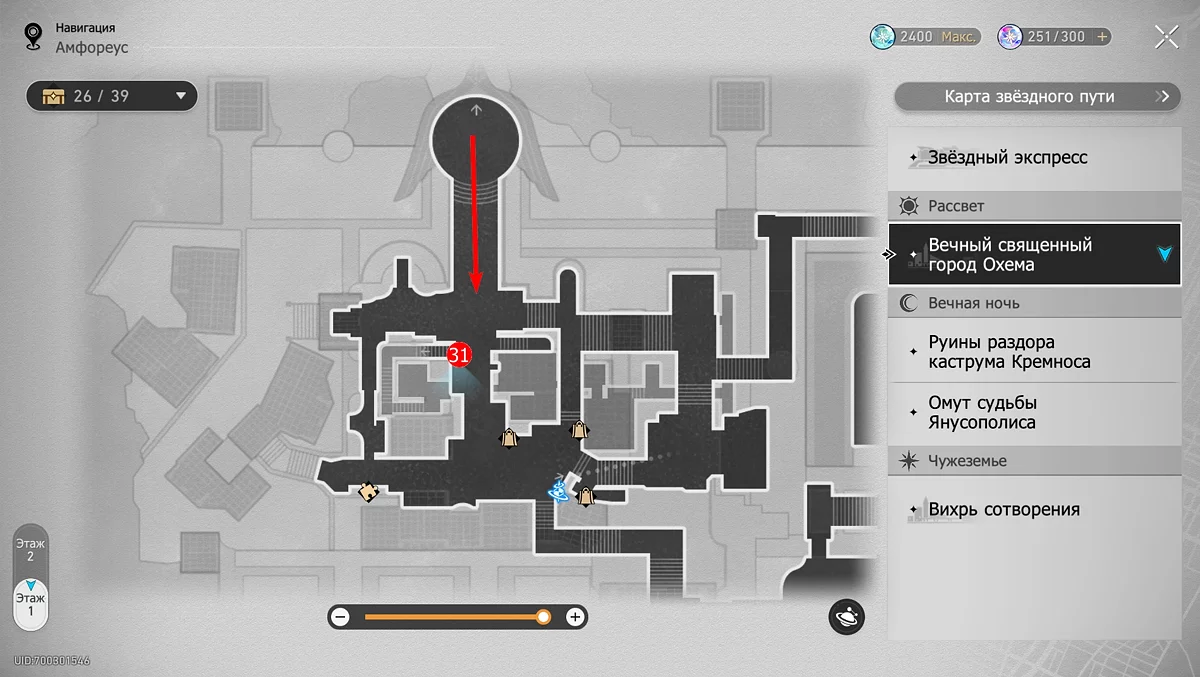
Teleport to the Marble Palace and use the bird wing-shaped teleport behind the spatial anchor to move to another part of Ochema. There you can collect a few more chests.
Chest #31
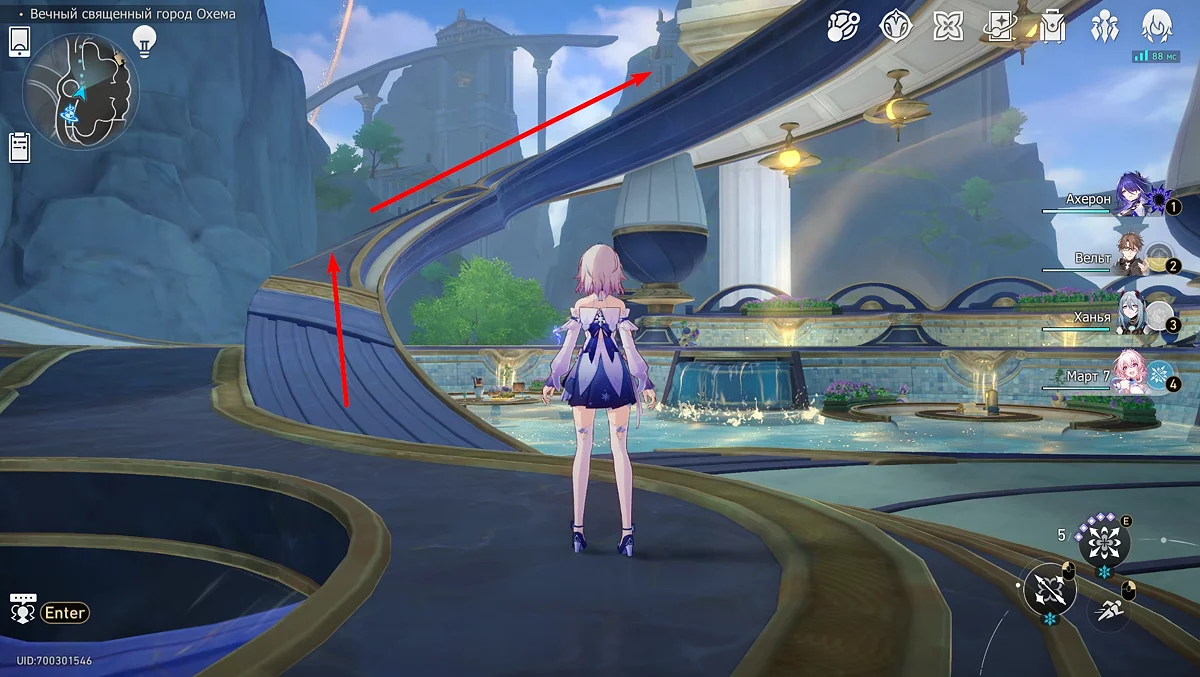
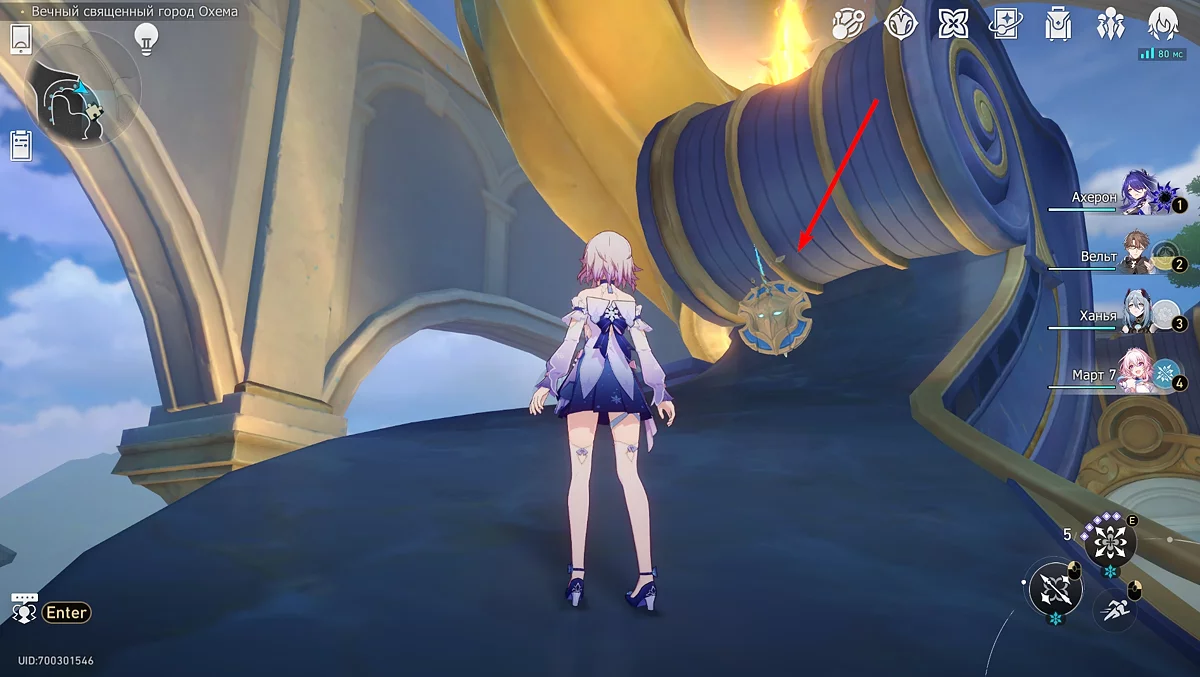
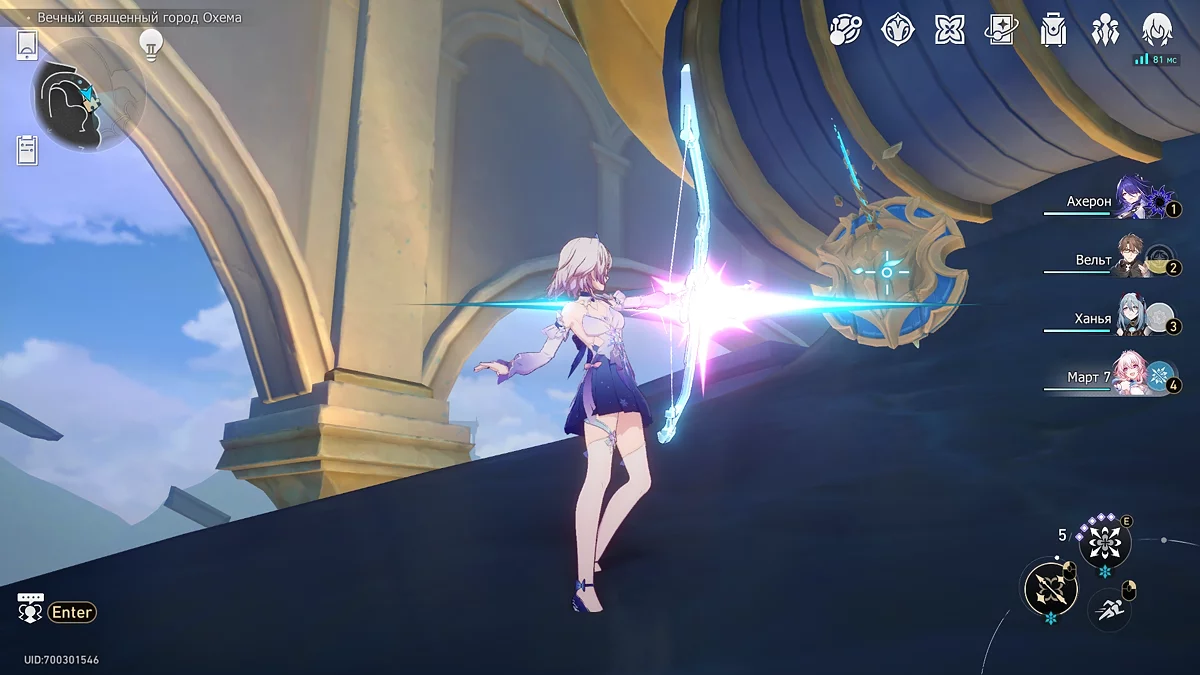
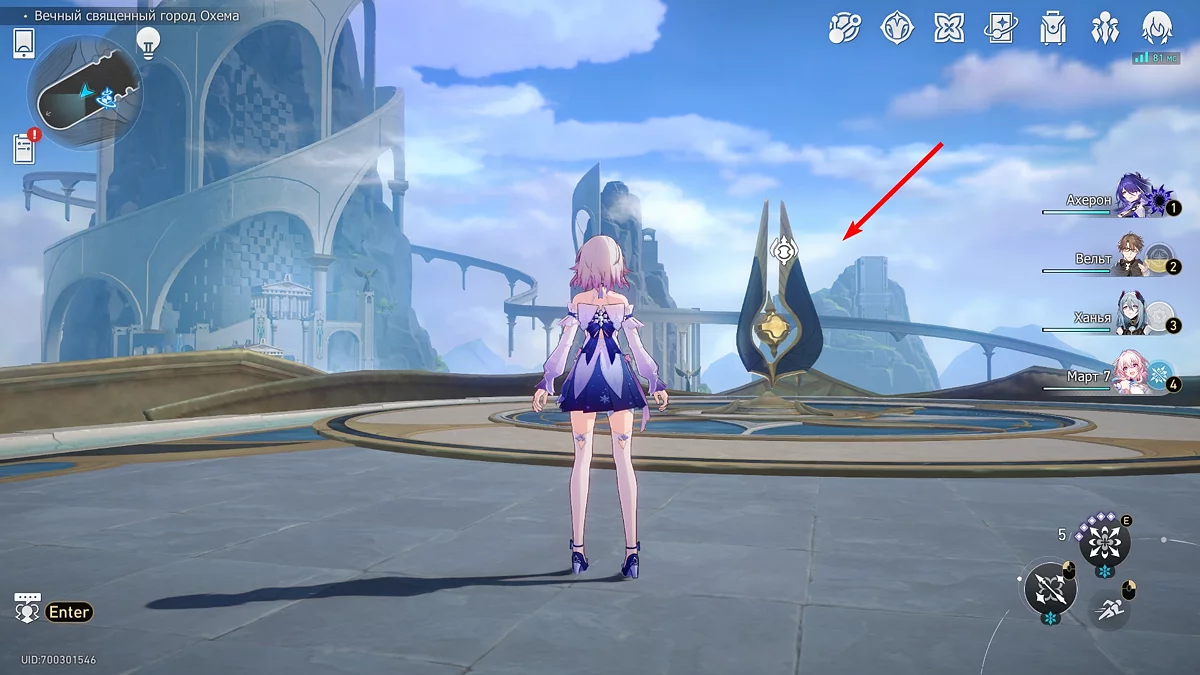
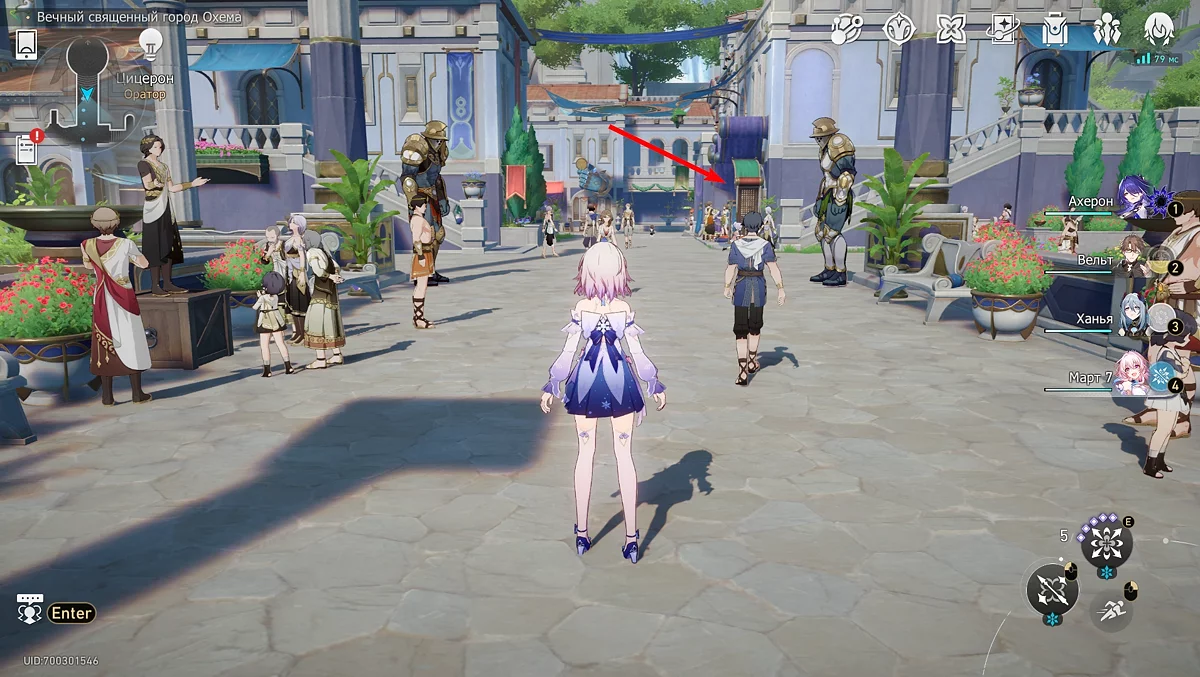
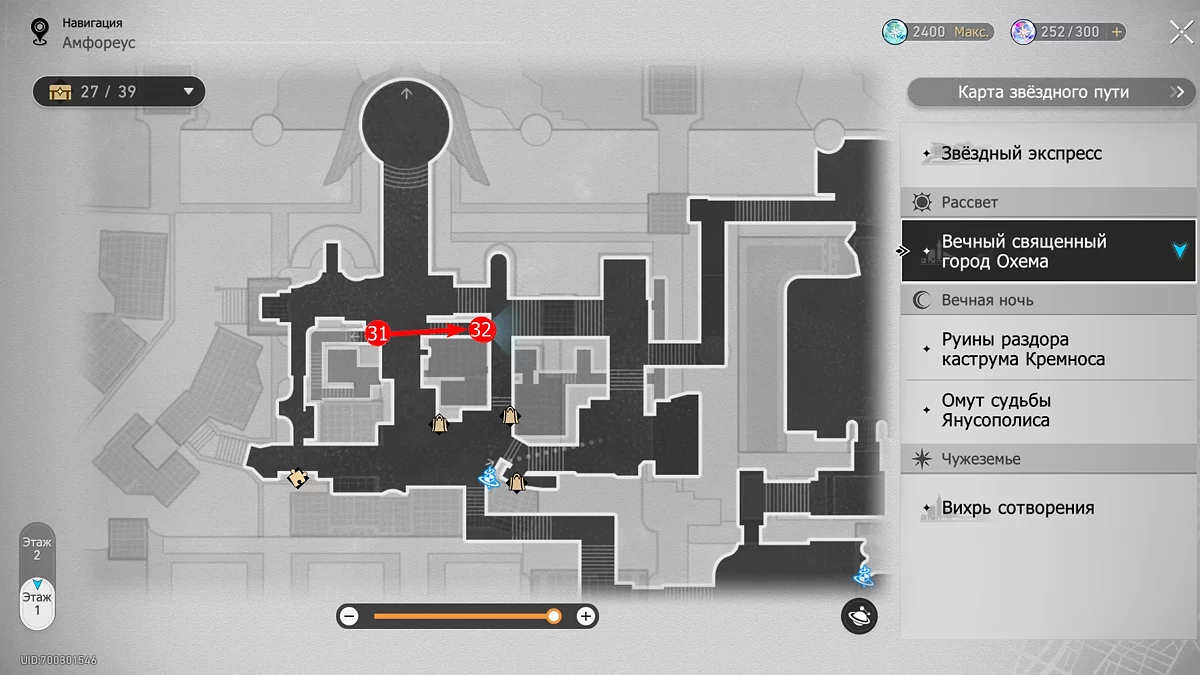
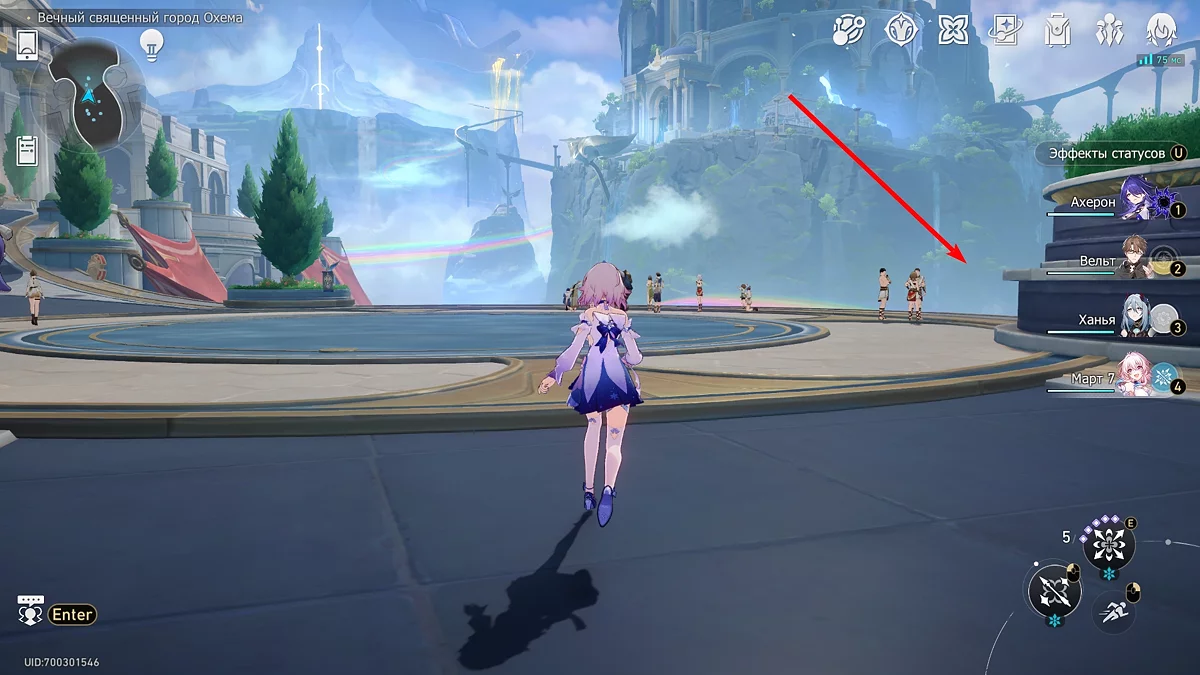
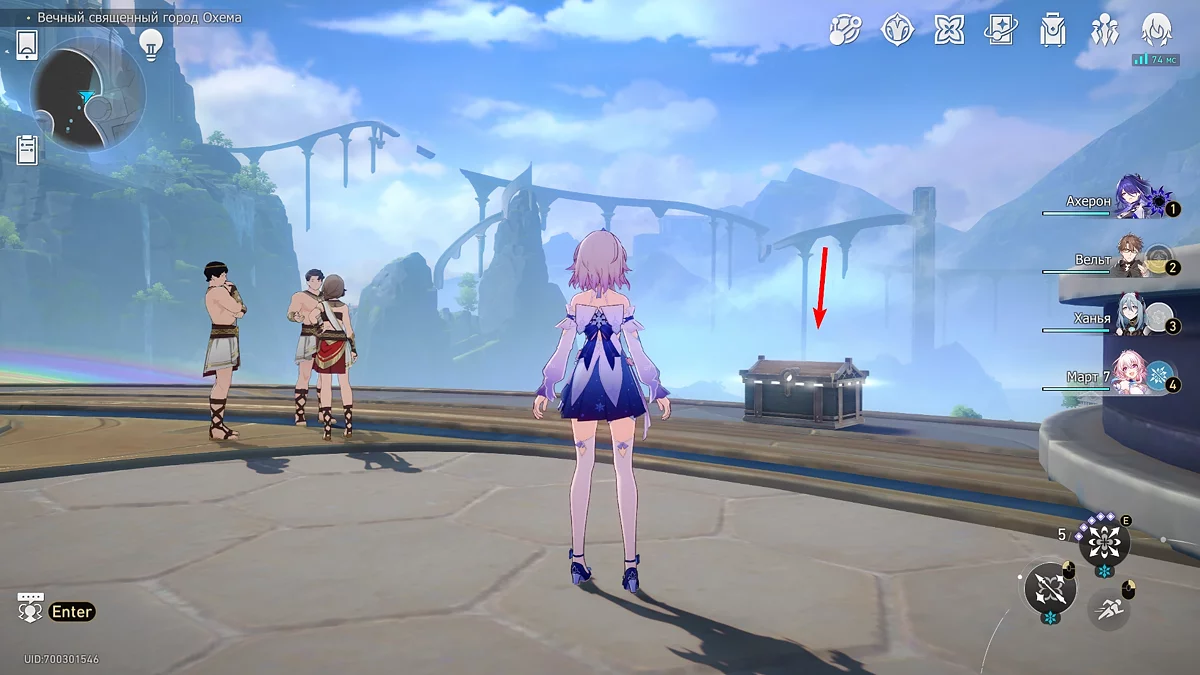
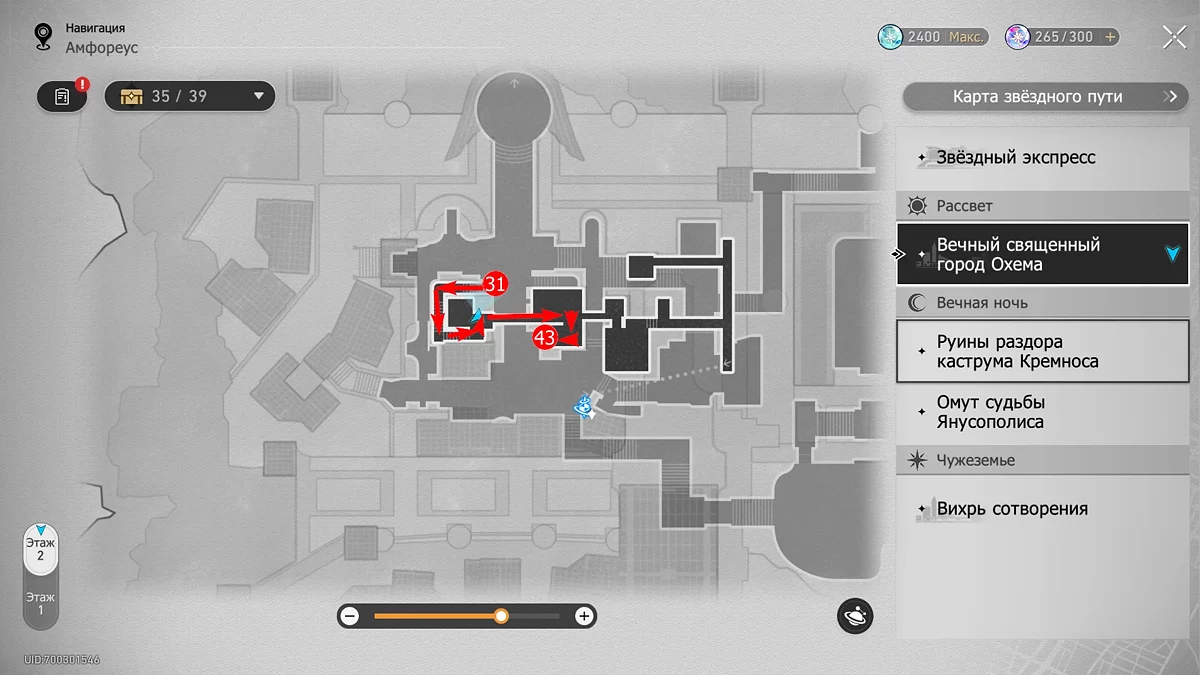
Teleport to the Marble Palace and use the bird wing-shaped teleport behind the spatial anchor to move to another part of Ochema. Move forward, keeping to the right. Near a small sewing boutique, you will see a golden dart. Destroy the shield, rewind time, and follow the spear, which will lead to a chest.
Chest #32
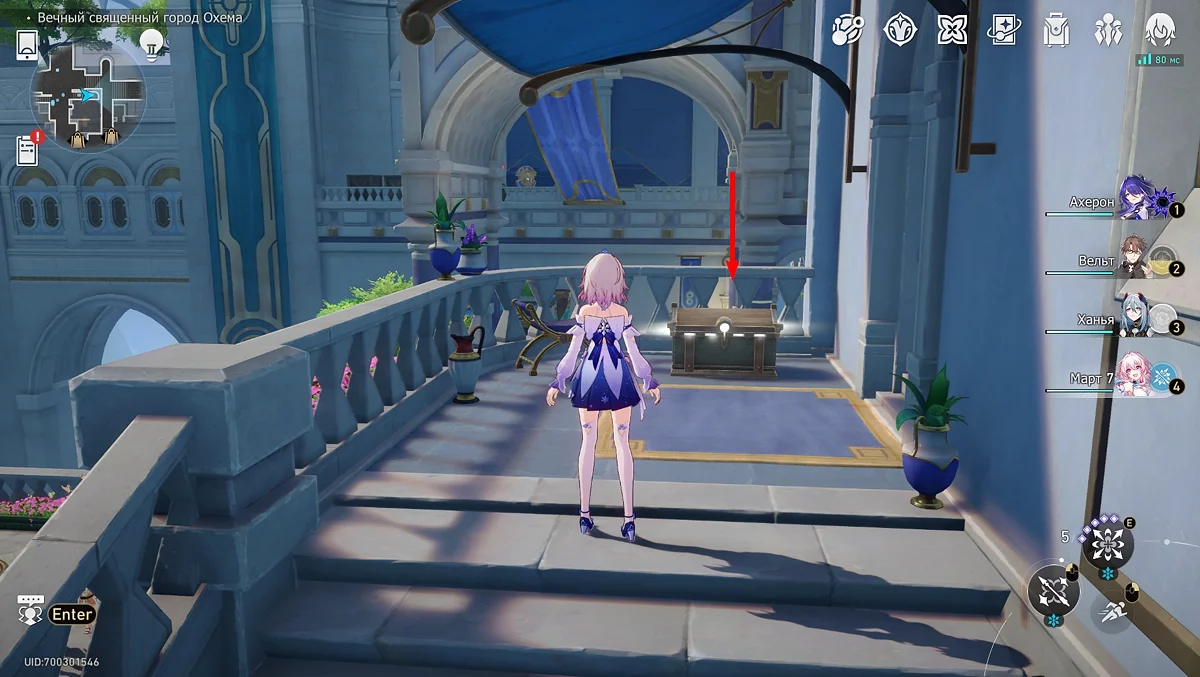
Return to the boutique where the dart was, and climb the stairs on the opposite side of the shop. Near a semicircular chair, there will be another treasure chest containing 5 units of star jade.
Chest #33
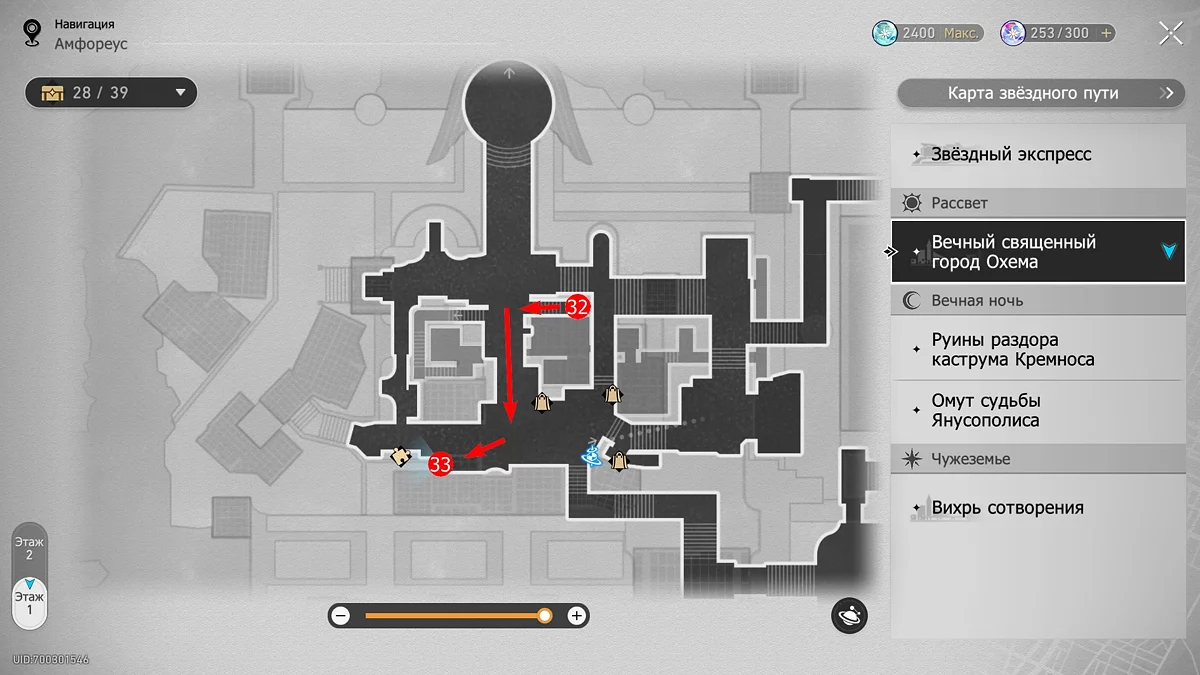
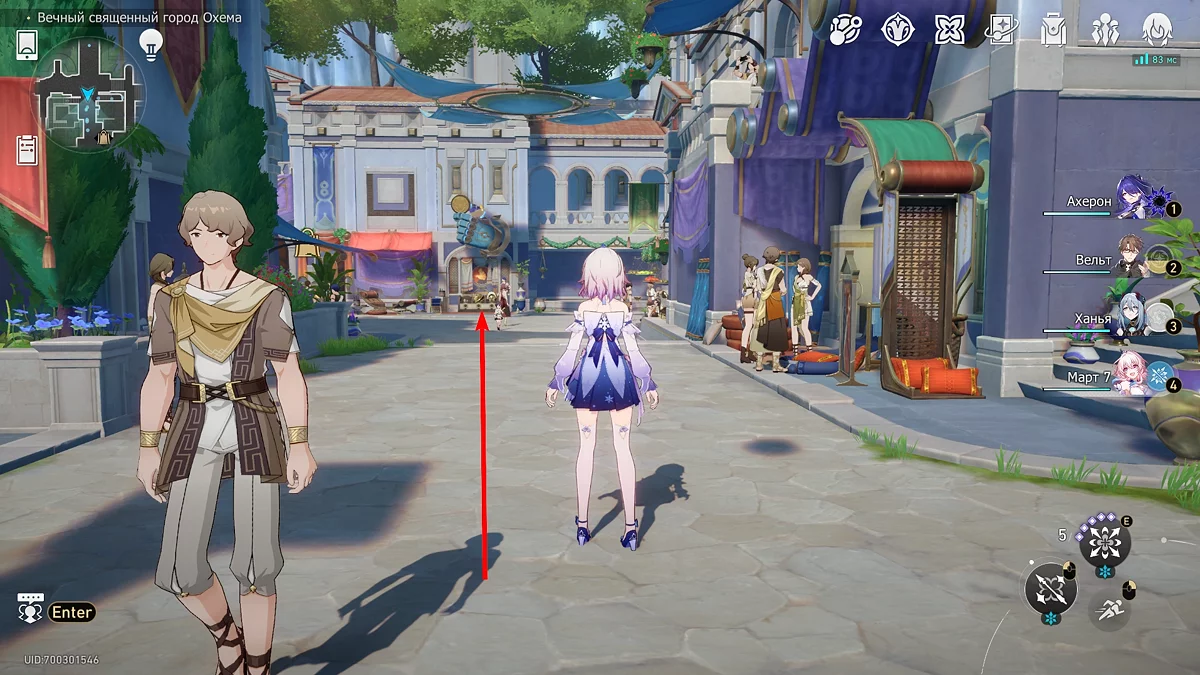
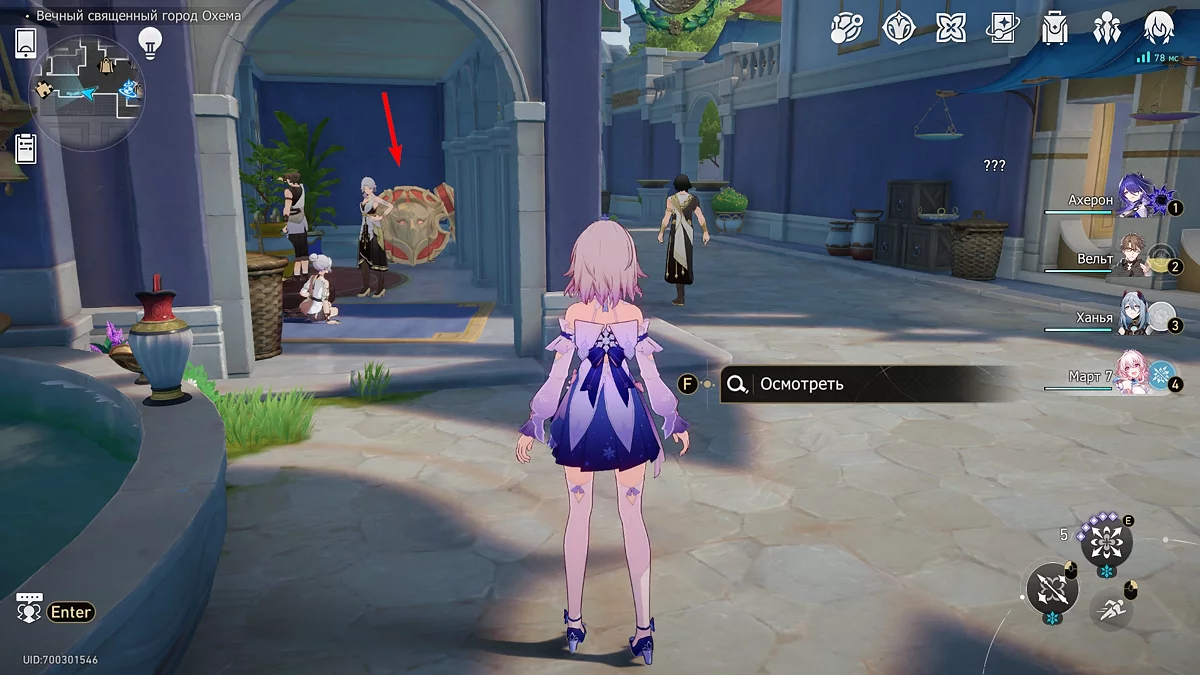
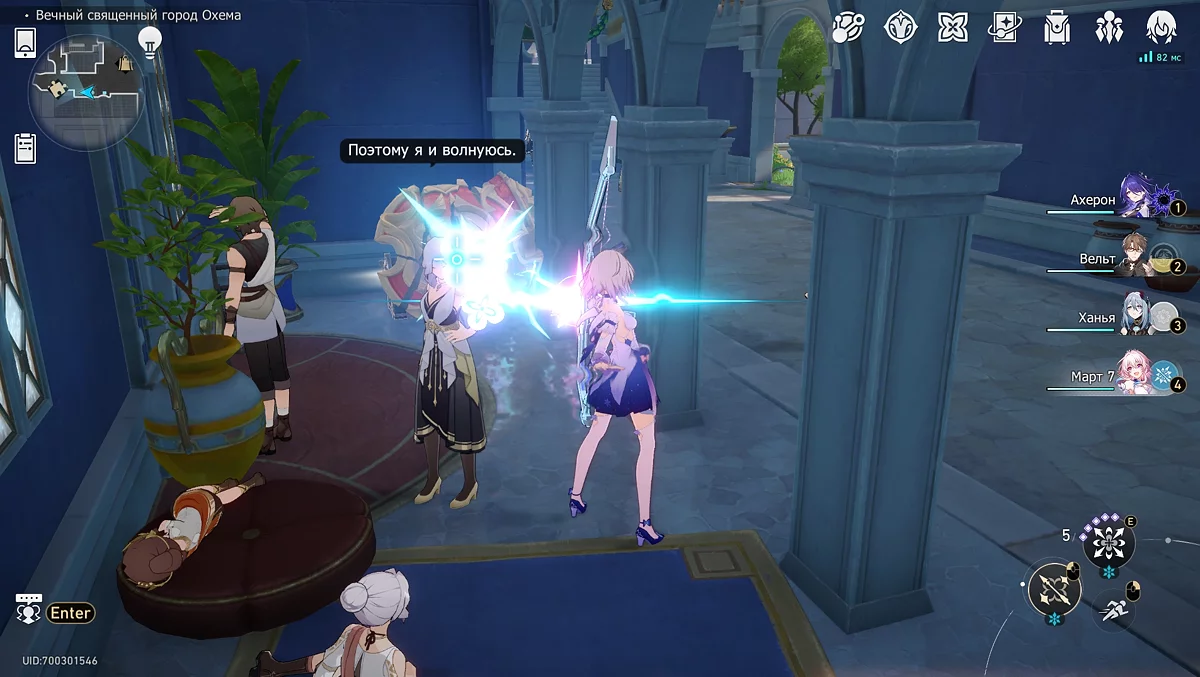
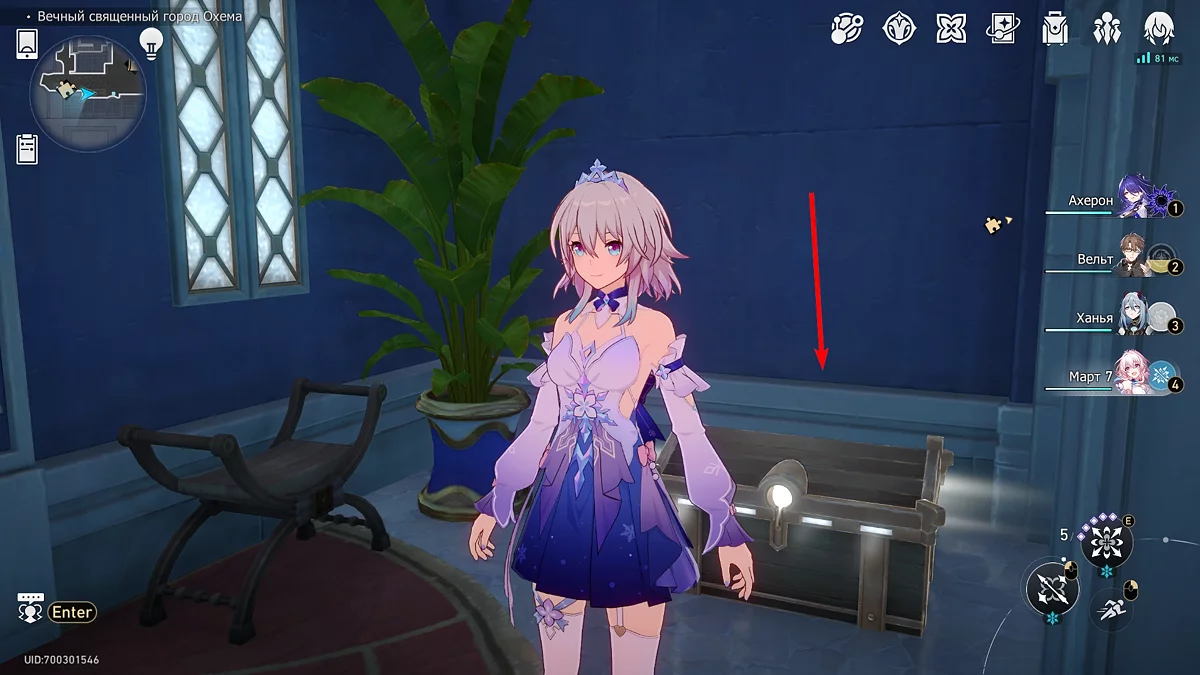
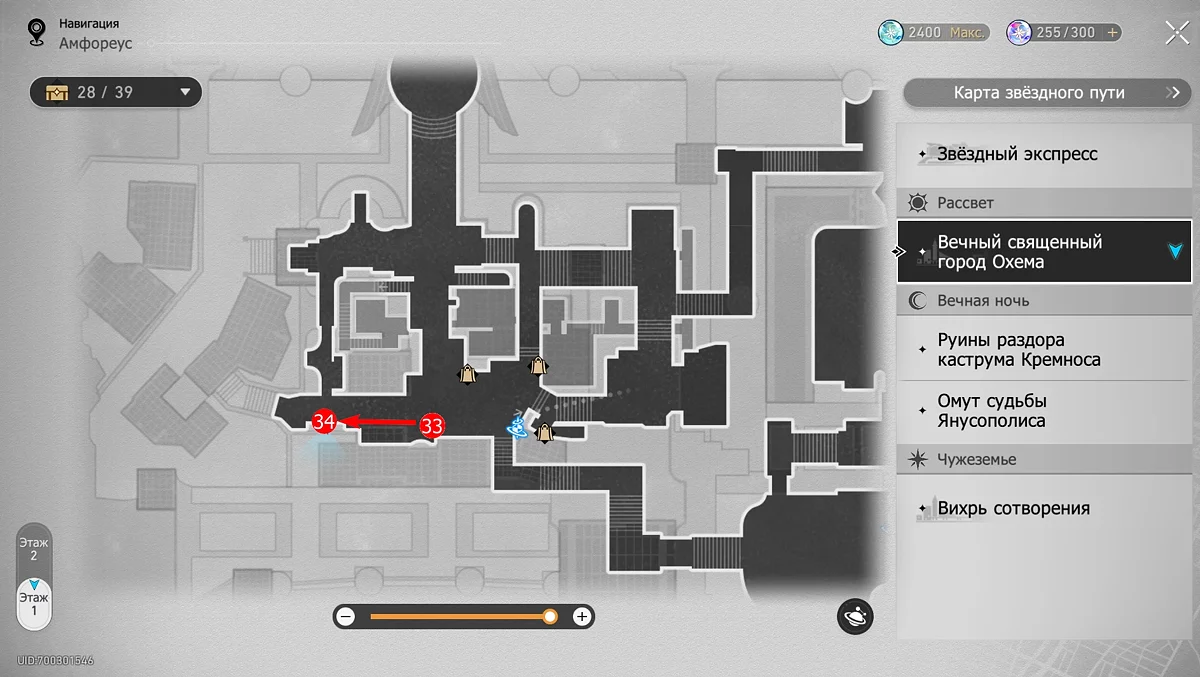
Descend from the previous chest and continue forward until you reach a shop with a sign depicting Titan Zagreus. From this store, turn right into the arched passage. There you will see two red shields: break them to take the box.
Chest #34
If you walk literally a couple of steps in the same direction, you will see a puzzle with the Golden Fleece of Absolution. Interact with the ram's head and perform the steps shown in the screenshots above.
Chest #35
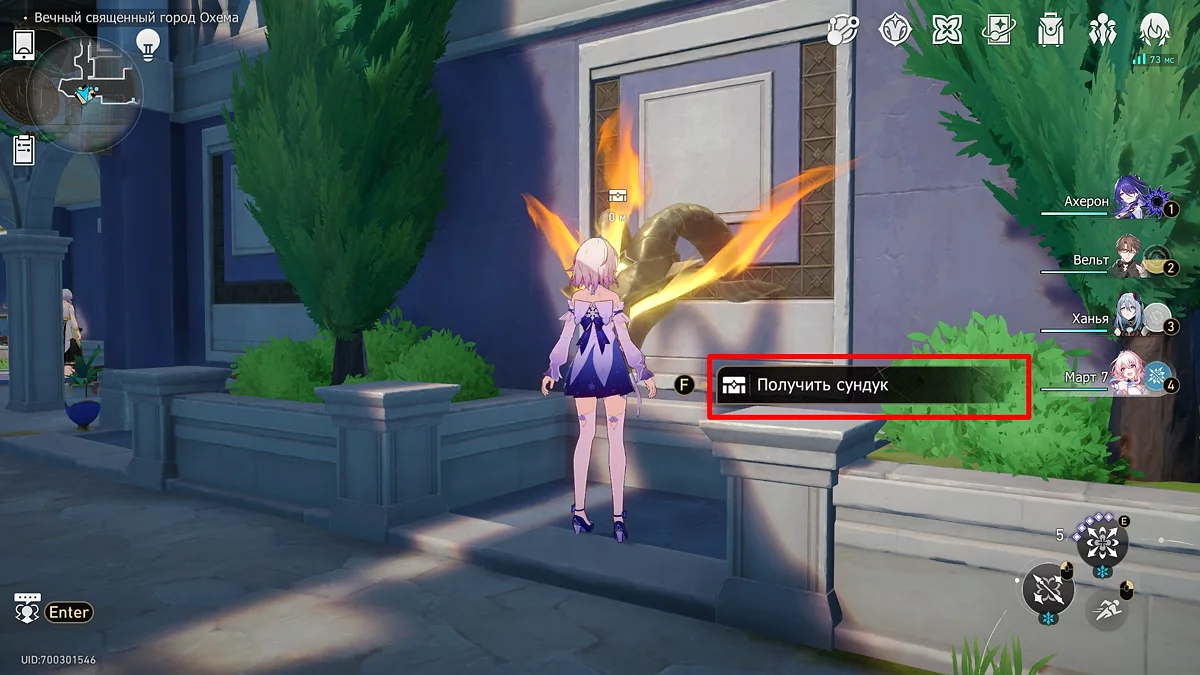
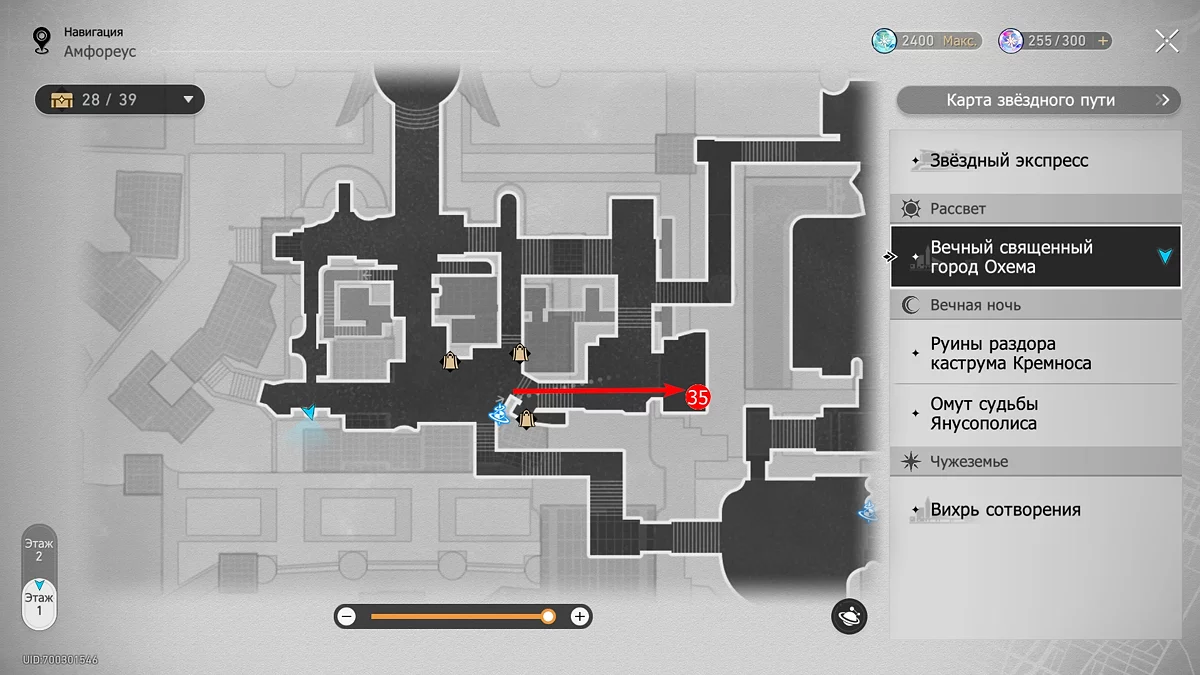
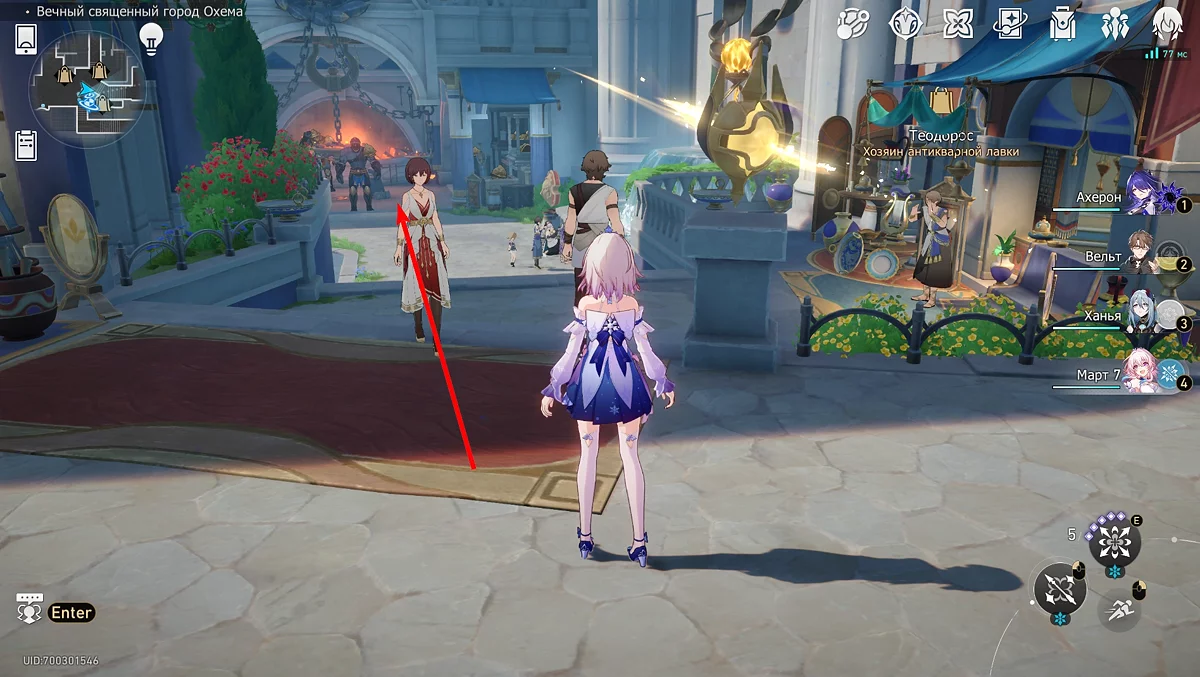
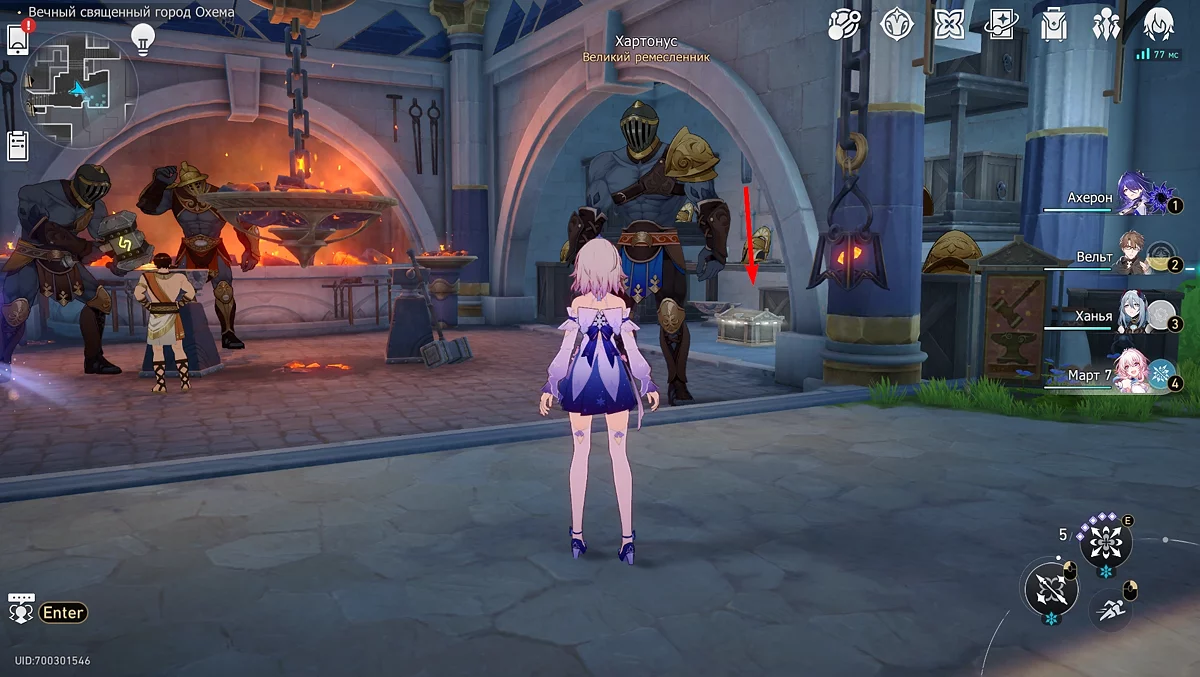
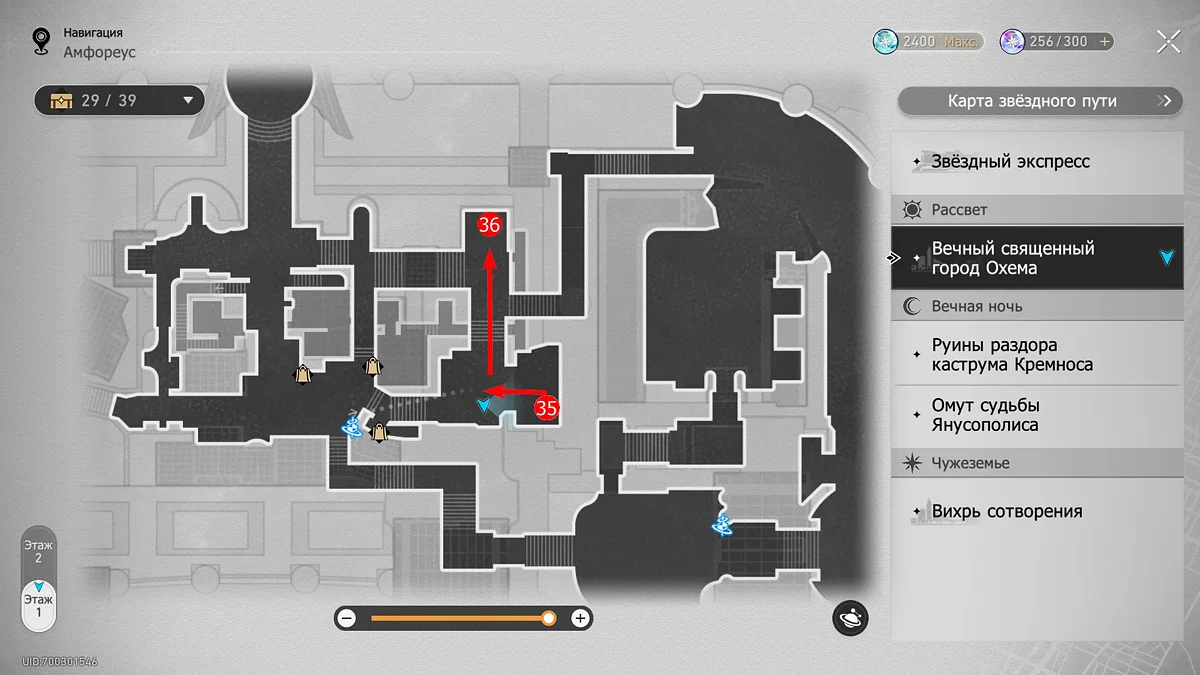
Teleport to the anchor at the Marble Fair and go down the large staircase. Head to the forge: it can be identified by the symbol of an anvil in chains. The chest is located near Hartonus's forge, under the stand with helmets.
Chest #36
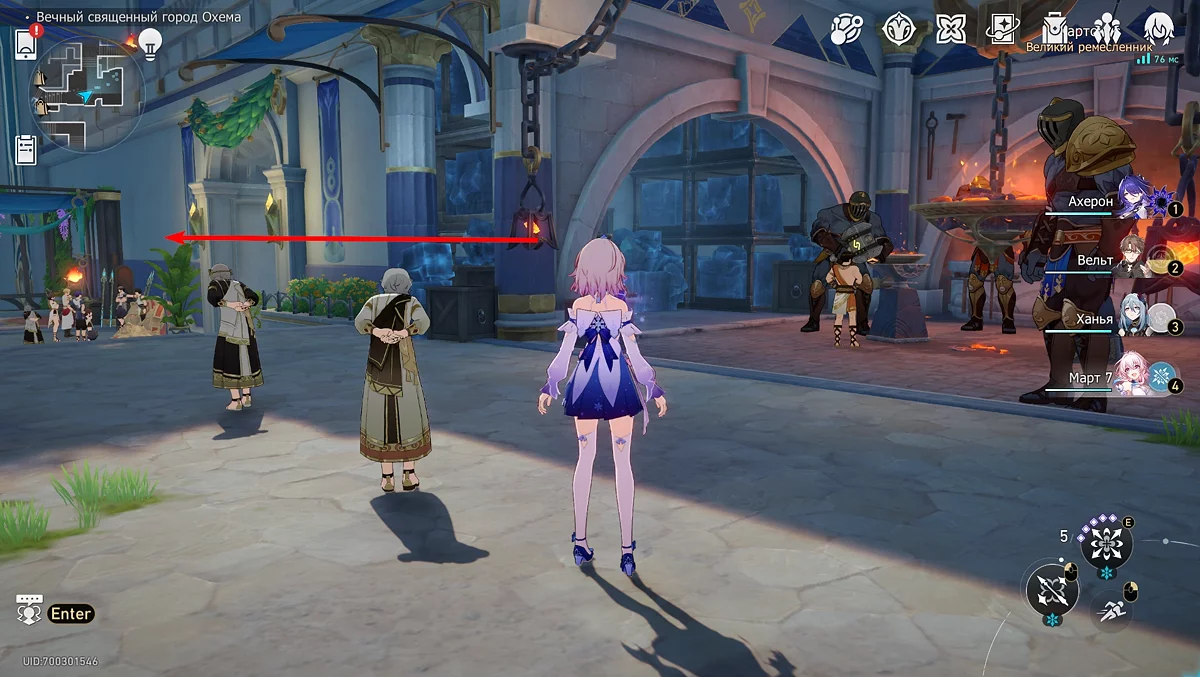
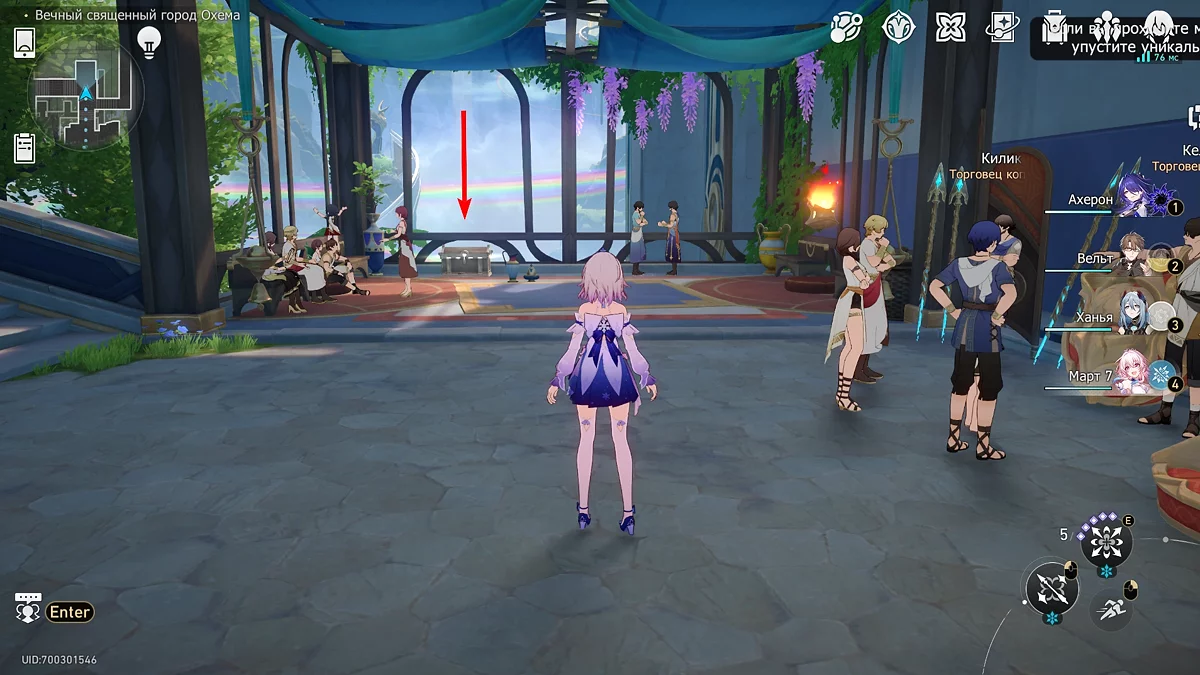
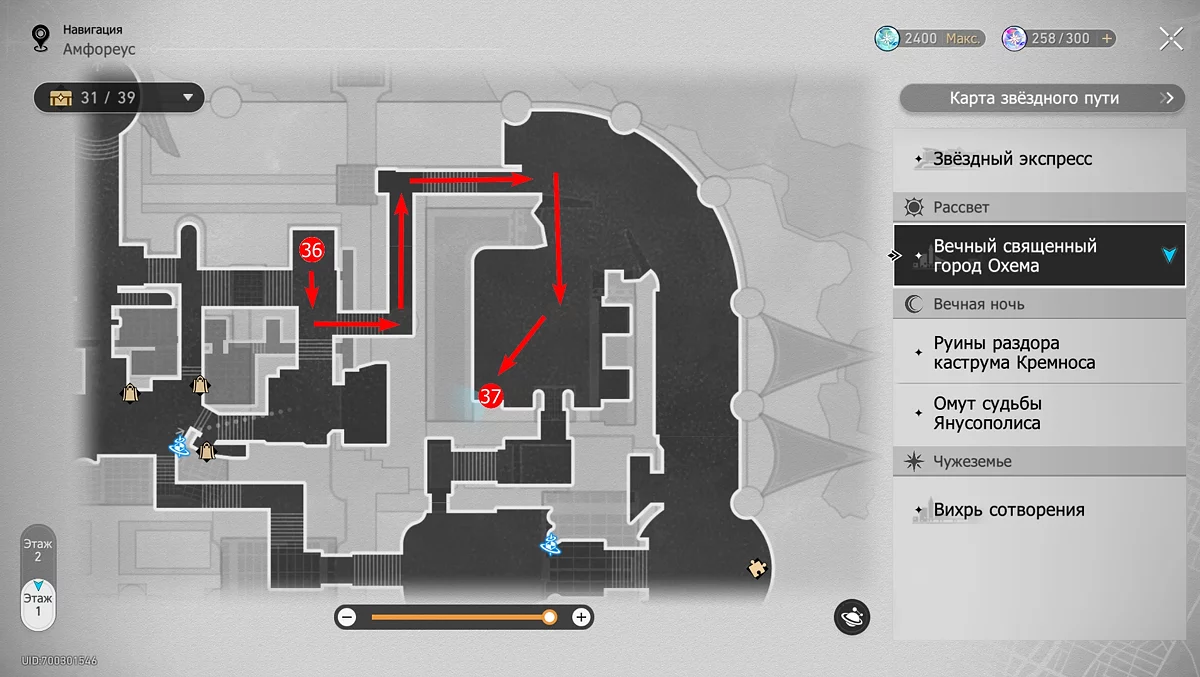
From the forge, turn left and go straight until you see a wooden gazebo. There, near a jug, will be another treasure chest.
Chest #37
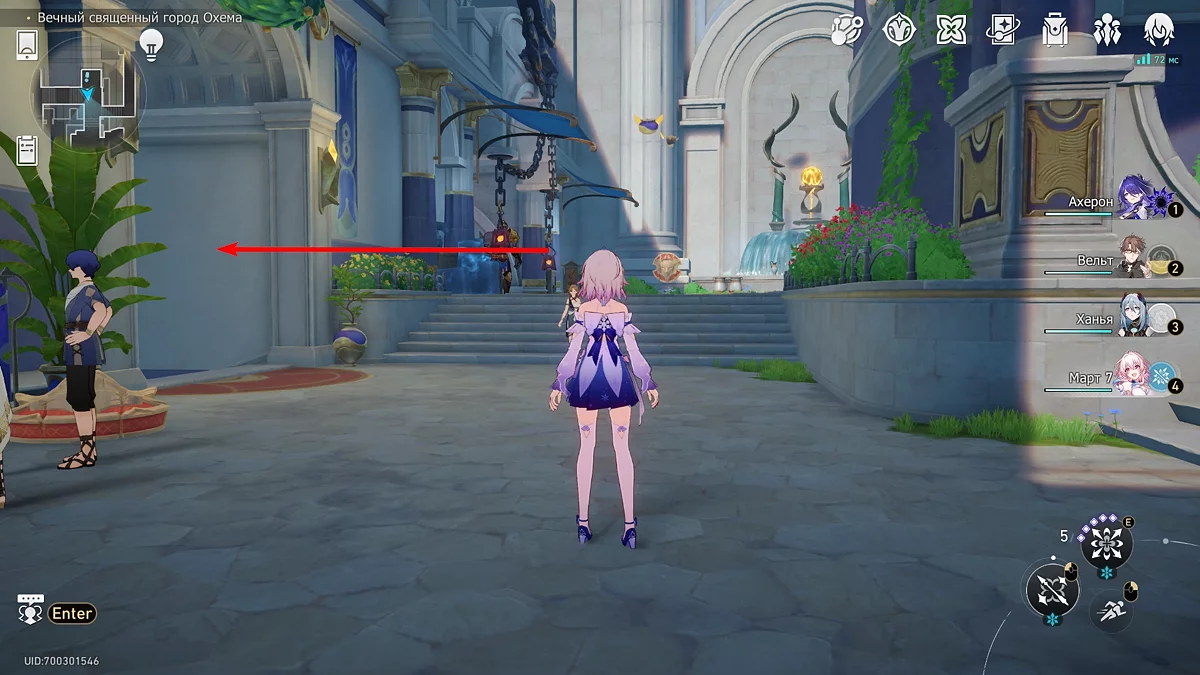
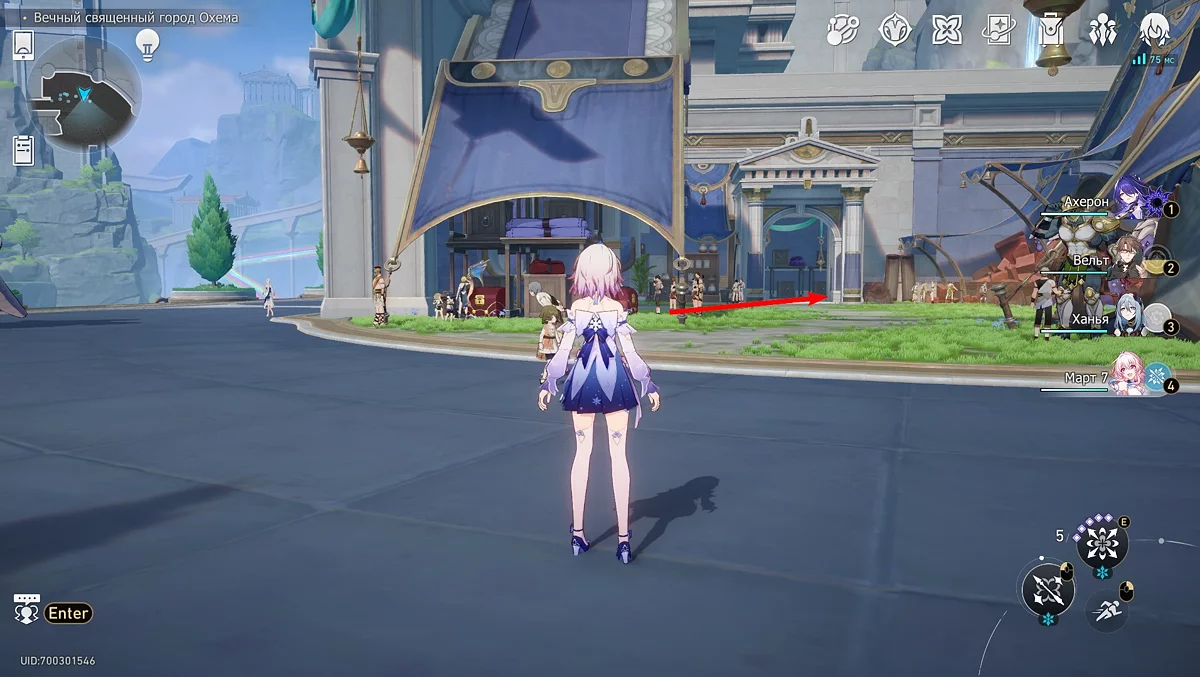
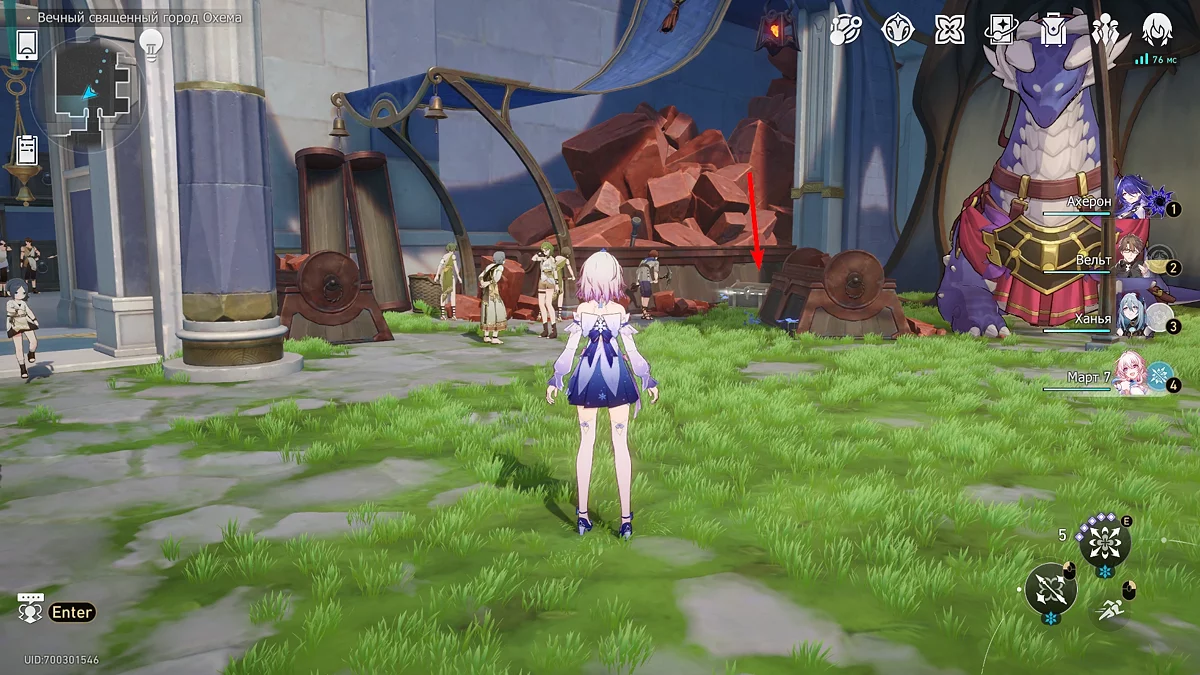
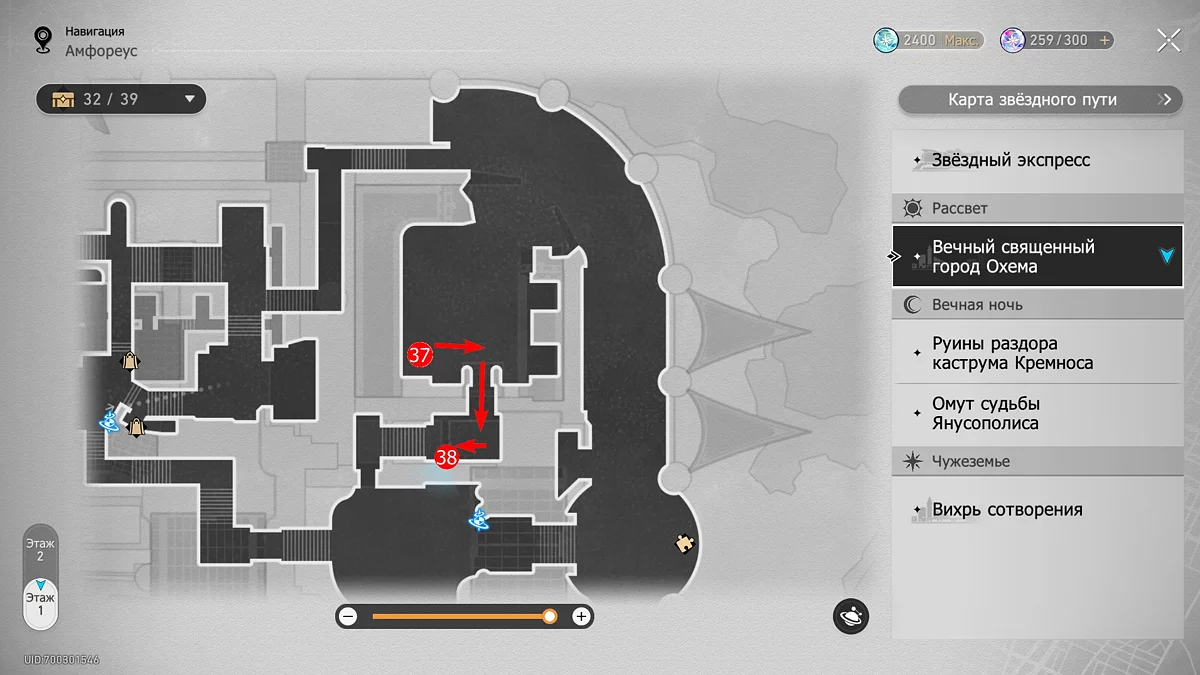
Go back a little and turn left at the fork into an arched corridor decorated with branches of an unknown plant. Then go right to the clearing with geosaurs. You can find the box near the feeding trough for these animals.
Chest #38
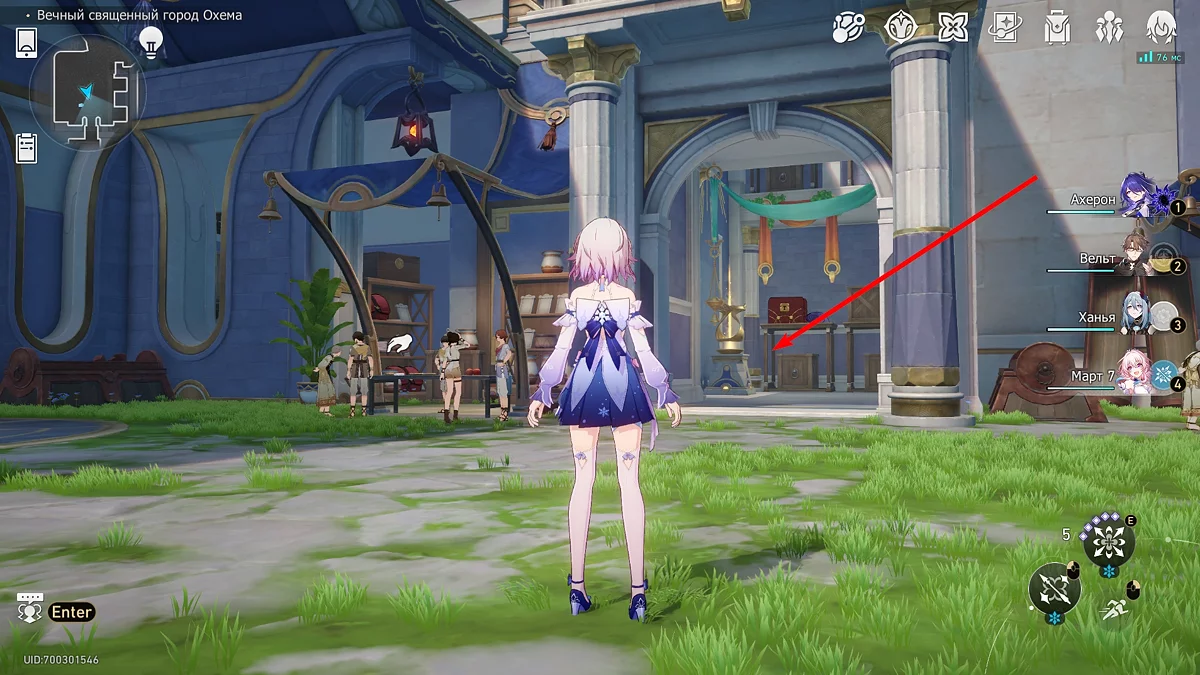
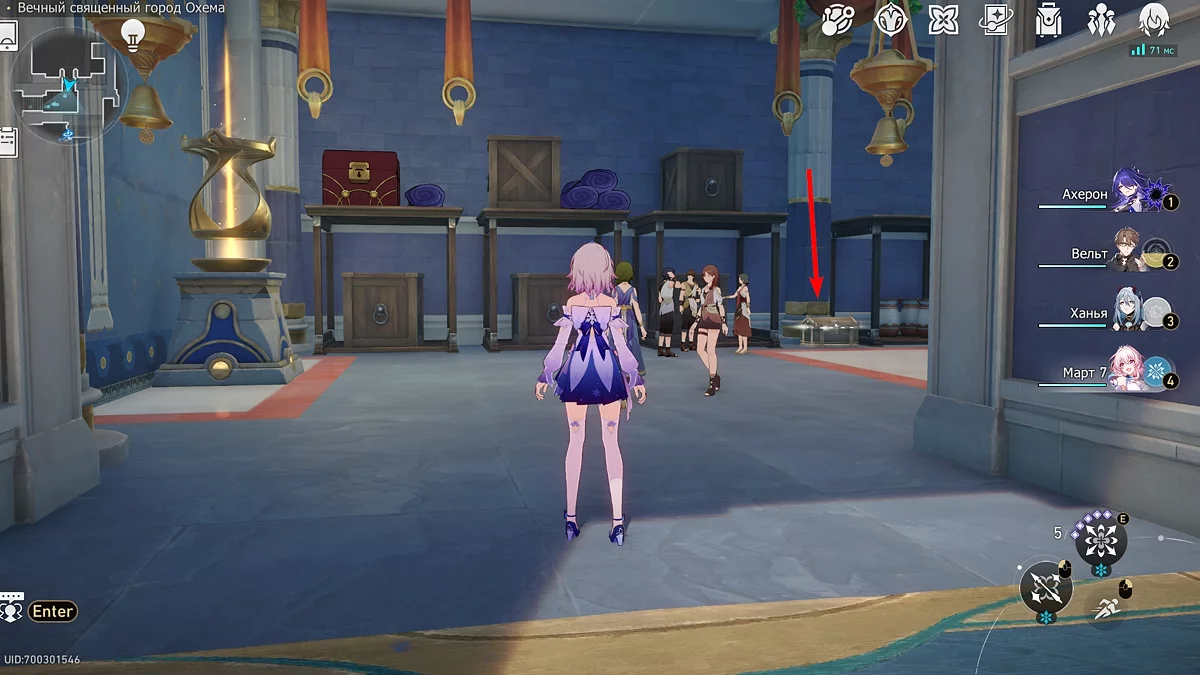
In the clearing with geosaurs, there will be an entrance to a building. Head there, then turn right. Opposite the statue with the hourglass, between the shelves, there will be a chest.
Chest #39
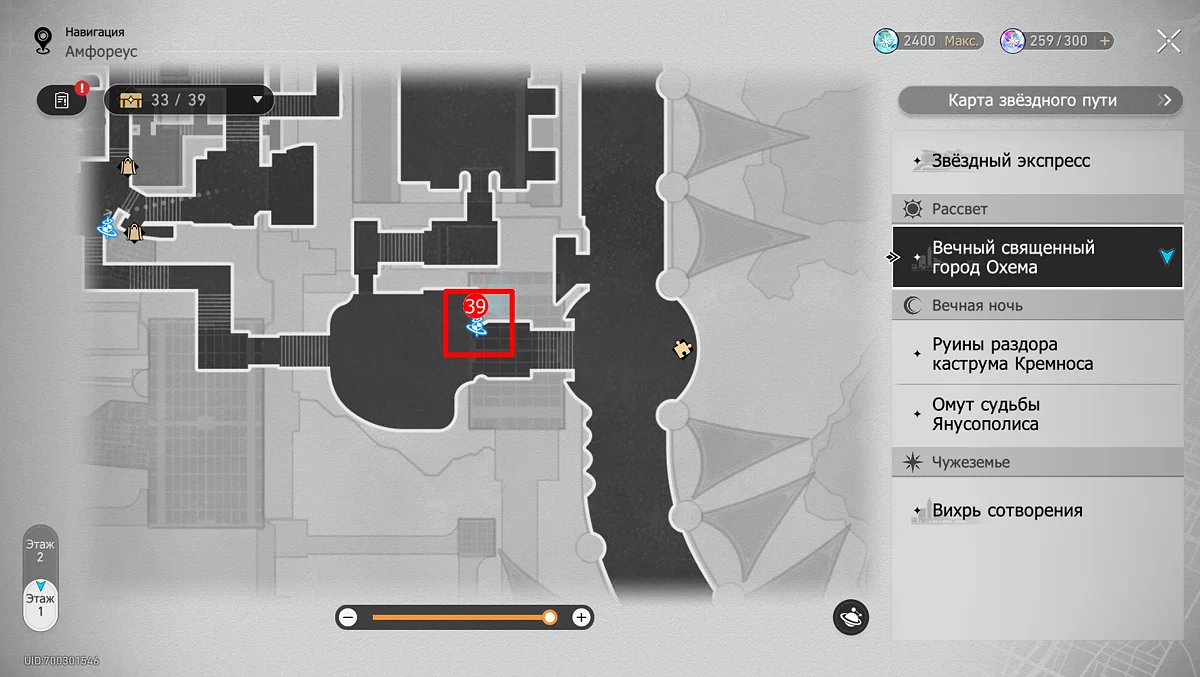
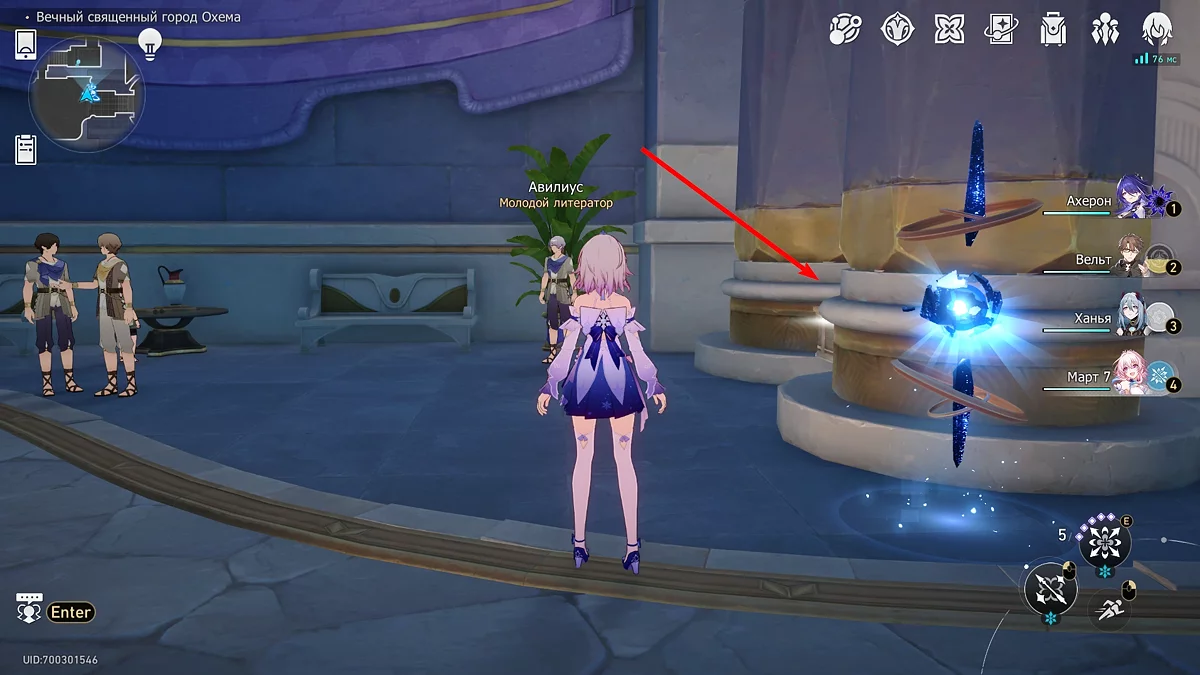
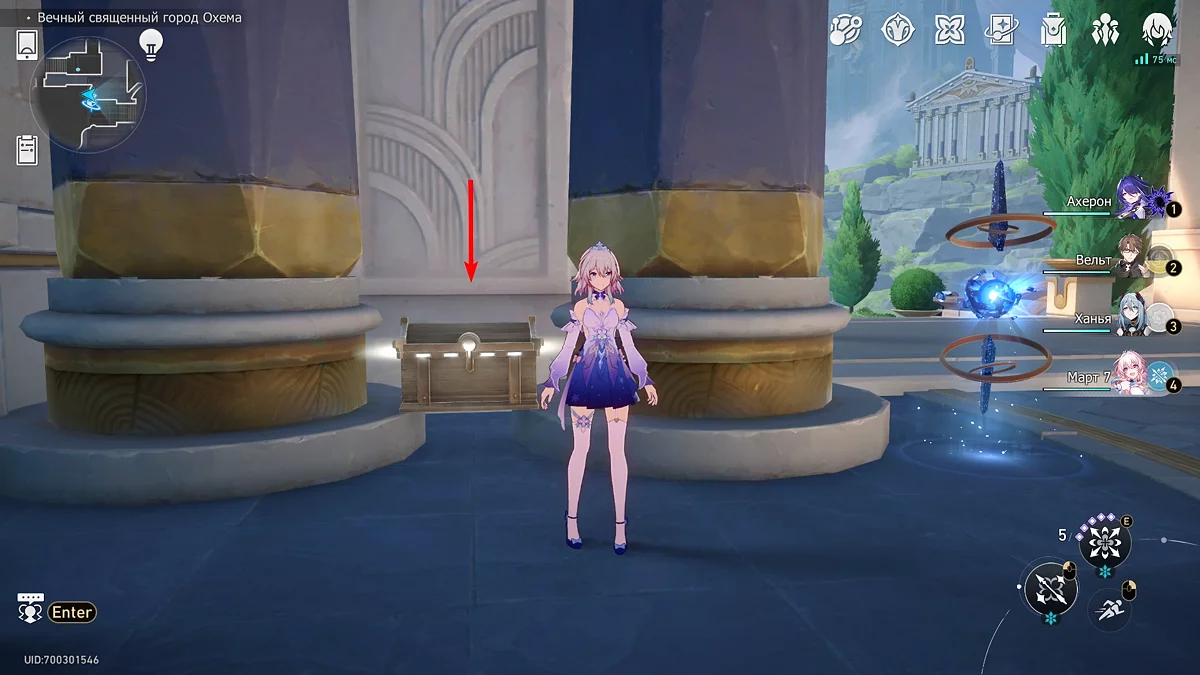
Use the spatial anchor on Kefal Square and find the next treasure chest standing between two columns to the side of the teleport. For this box, you can get 5 units of star jade.
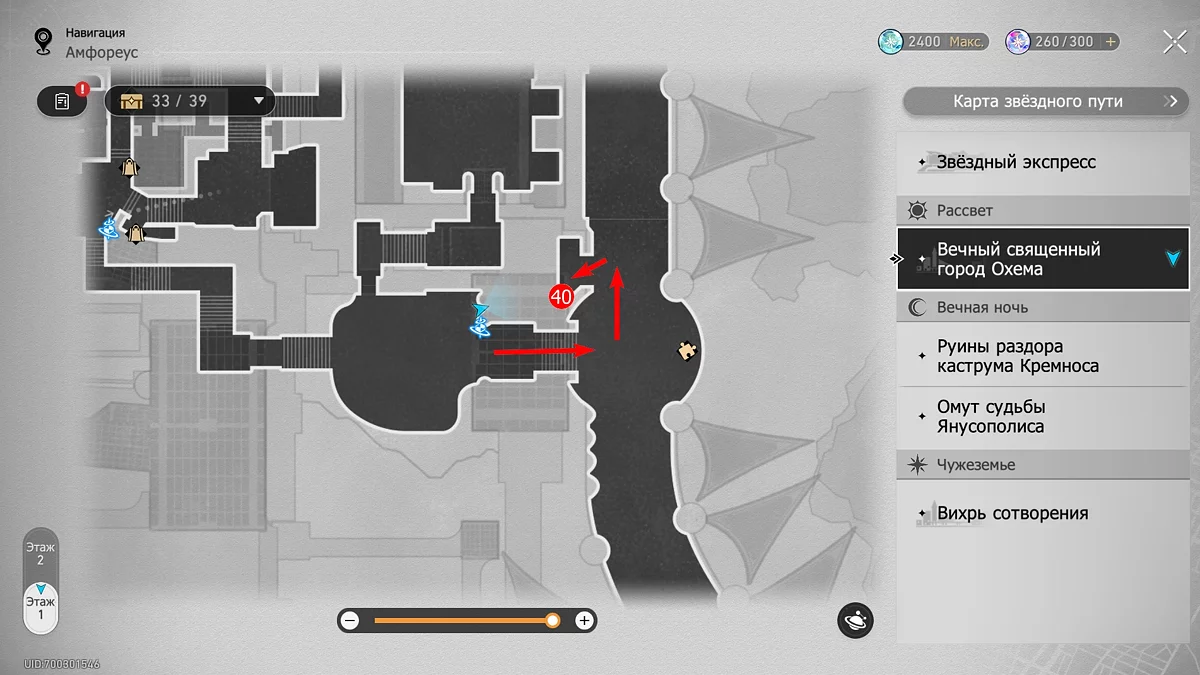
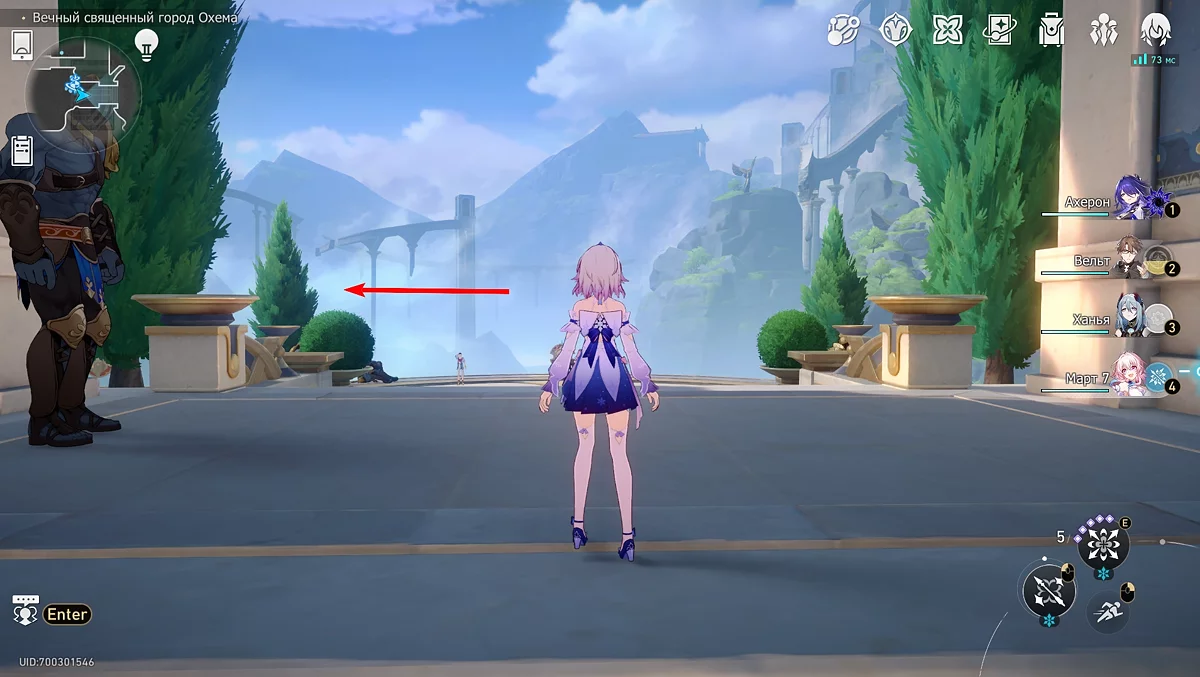
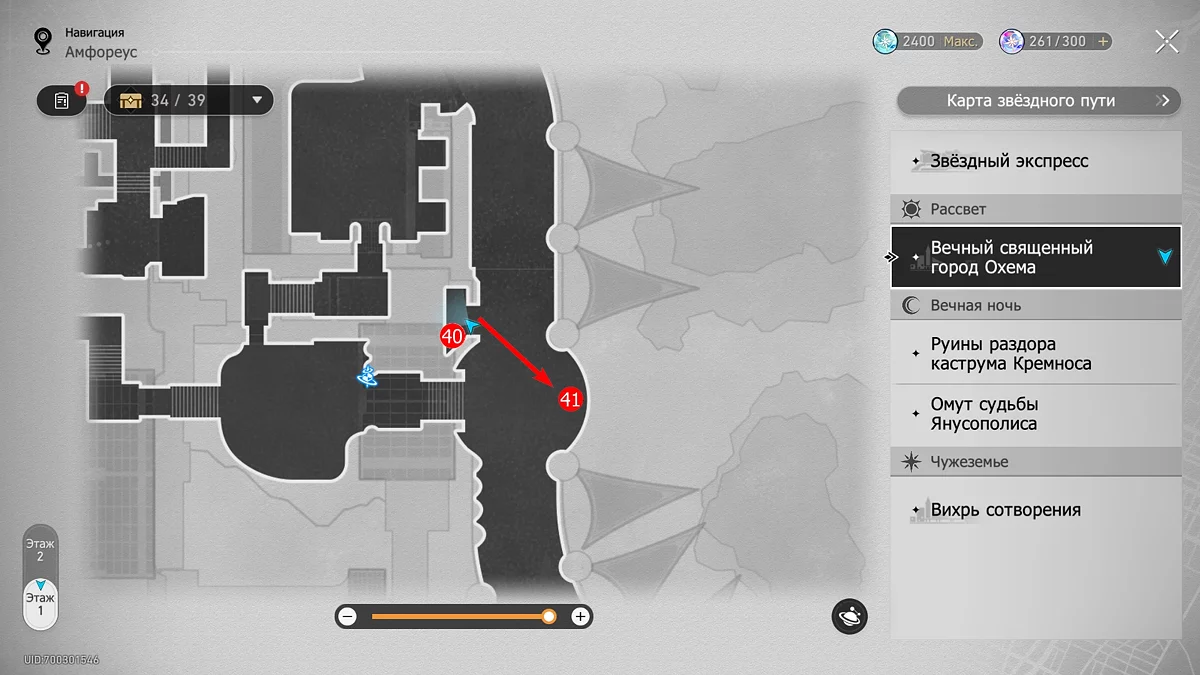
Chest #40
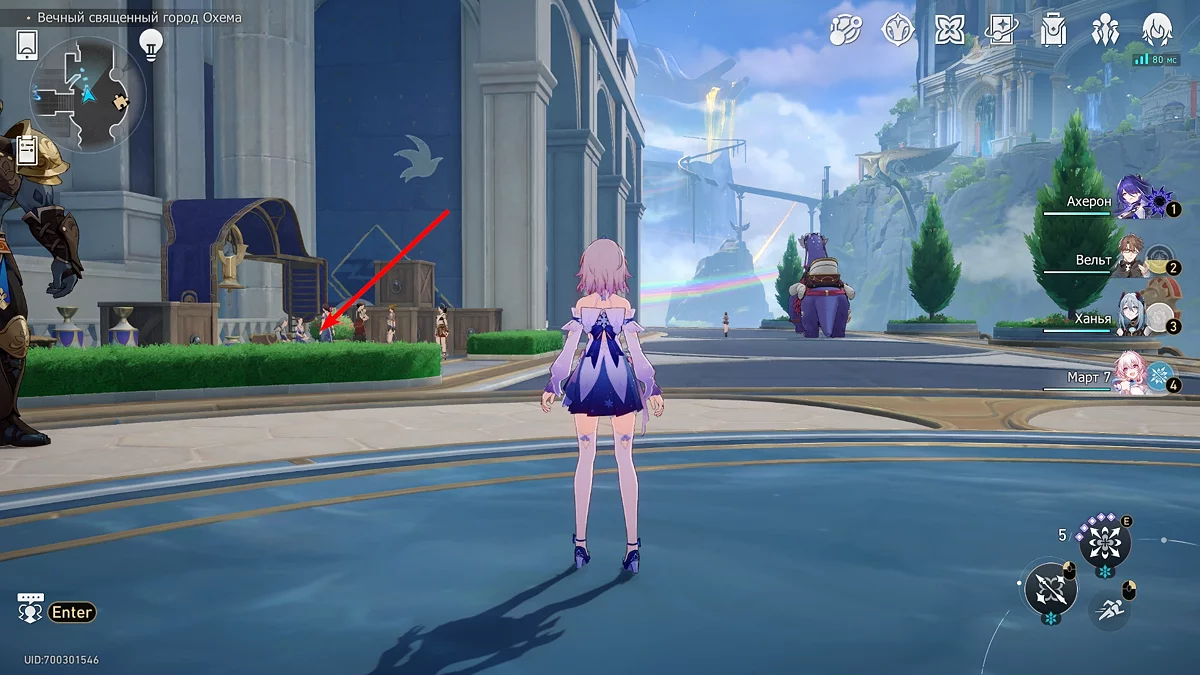
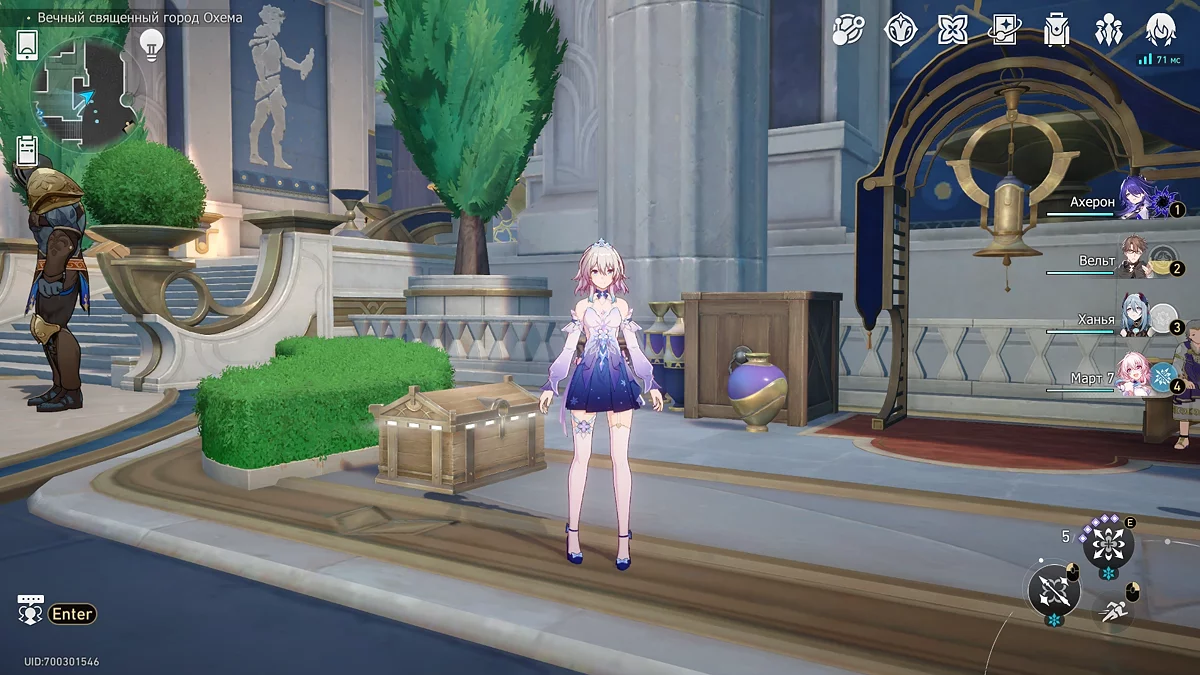
From the same teleport, go towards the exit of the building, then turn left to a small stop. Behind the flower bed will be the fortieth chest.
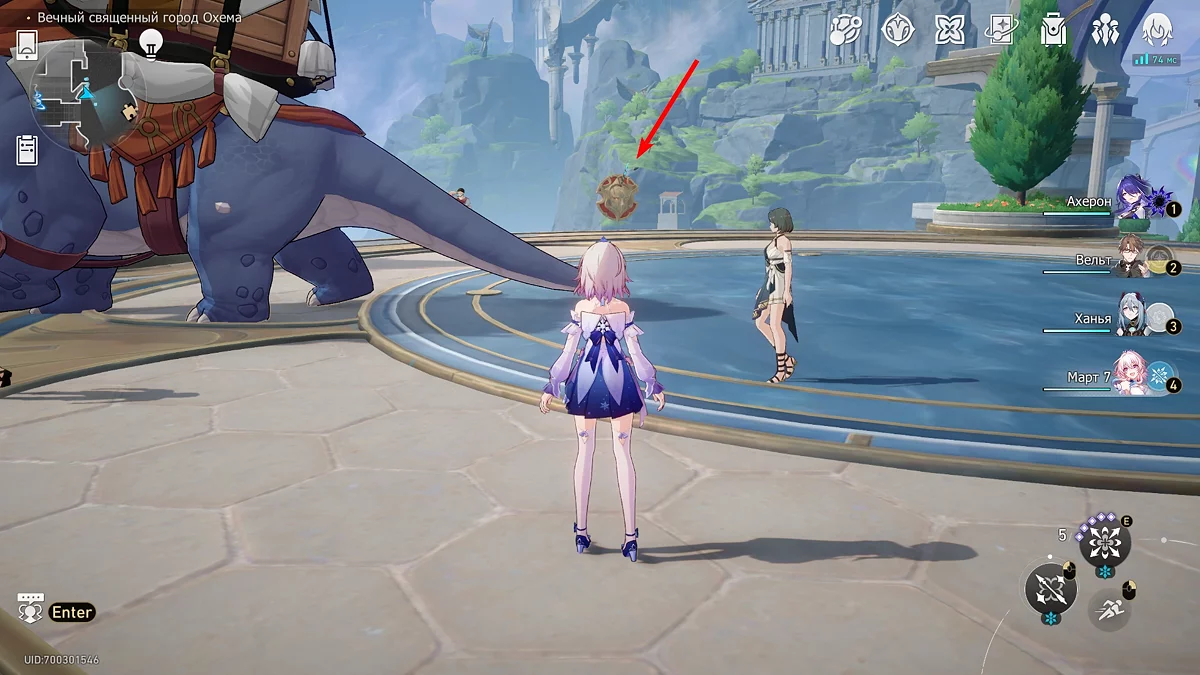
Chest #41
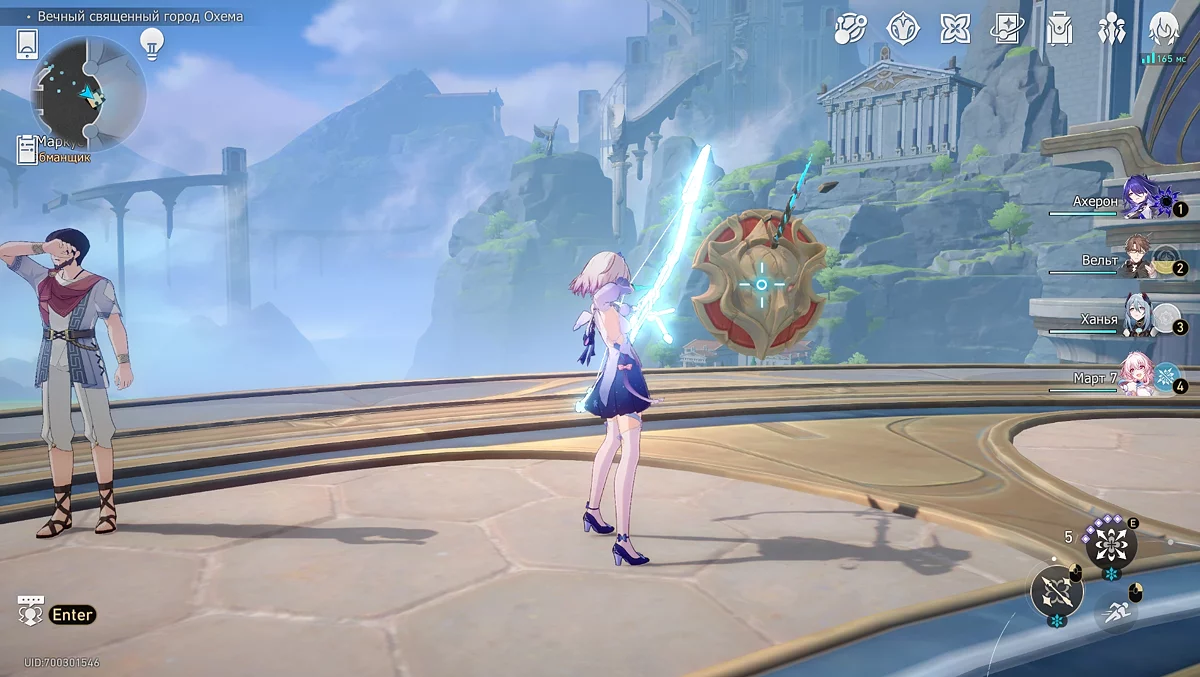
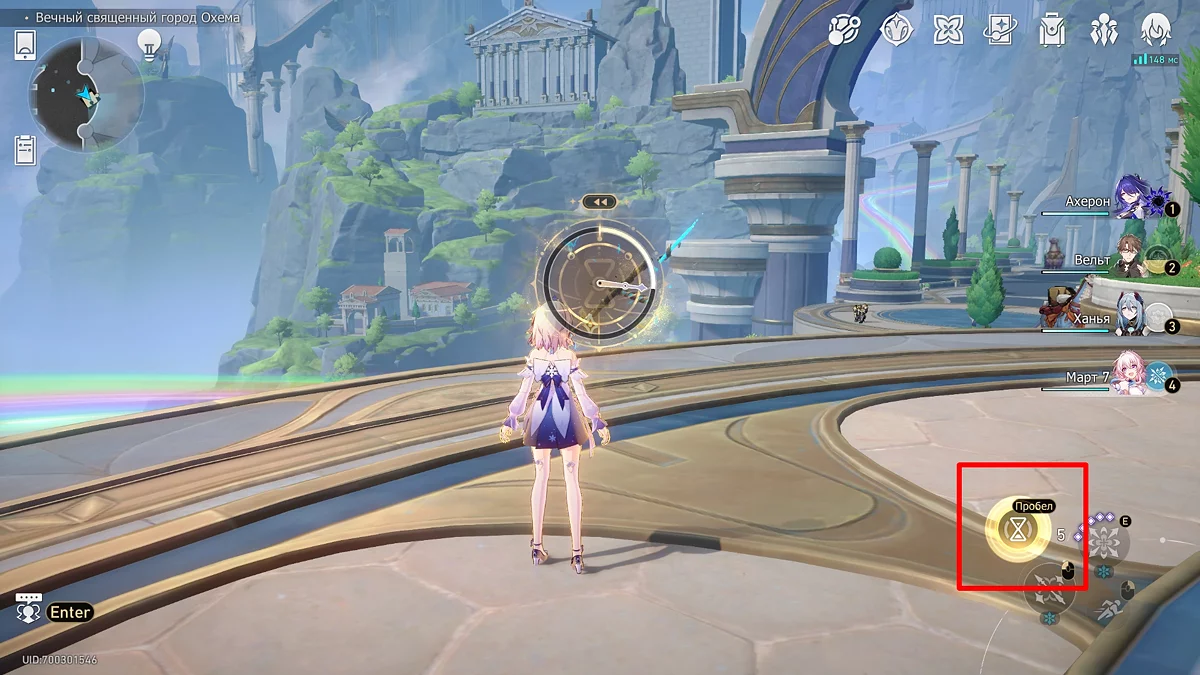
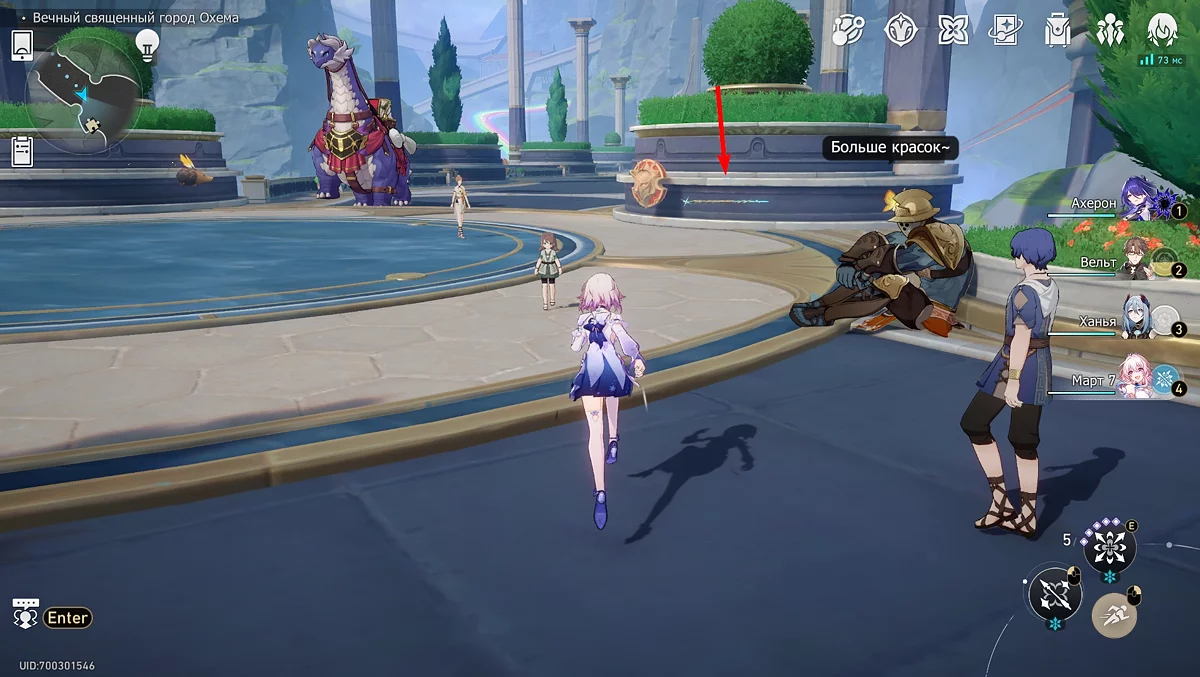
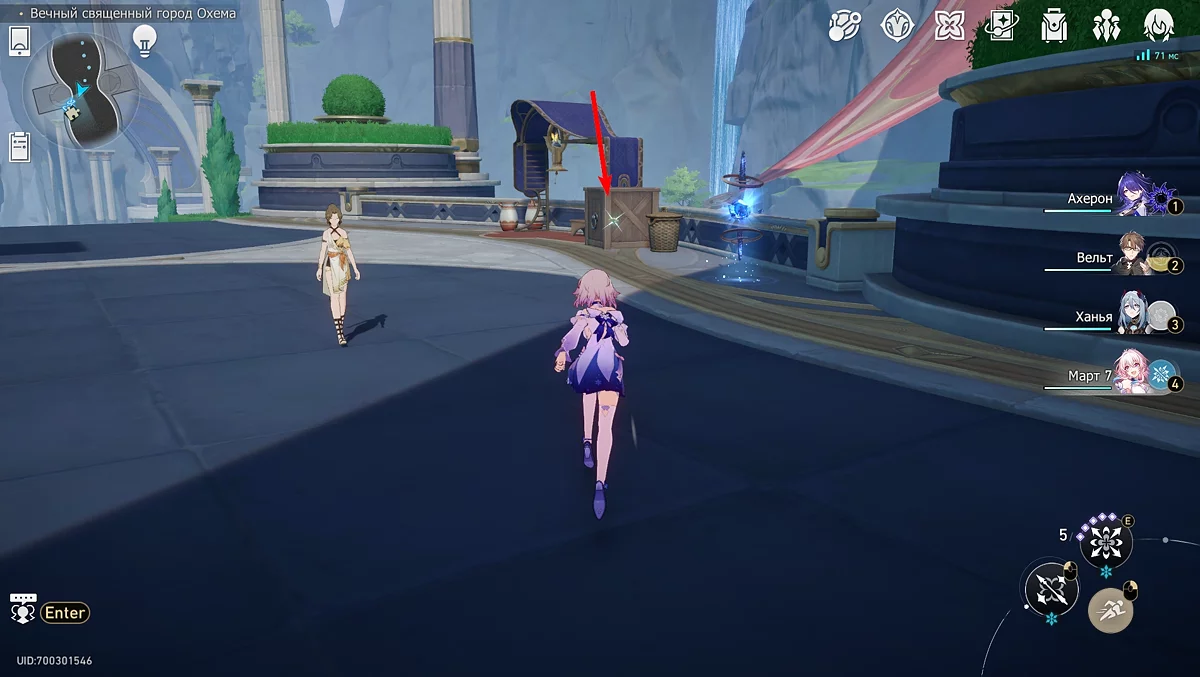
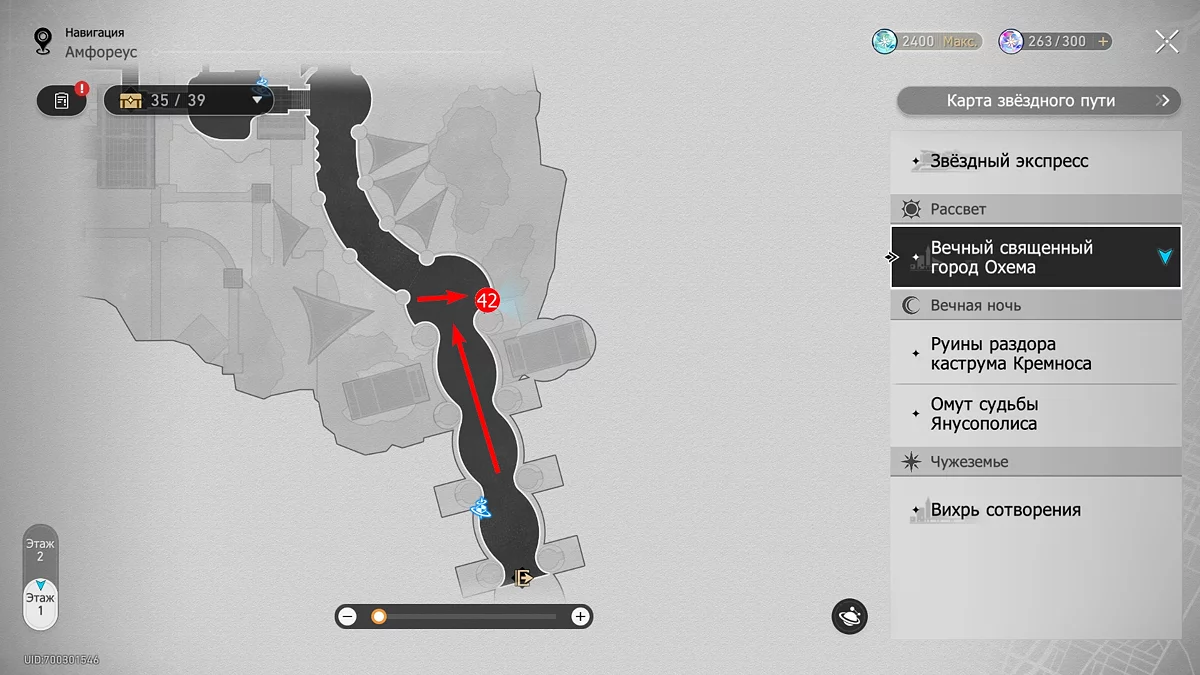
Opposite the stop, on the other end of the street, you can find a golden dart. Break the shield, rewind time, and follow the arrow, which will lead to a box with 5 units of star jade and other useful supplies.
Chest #42
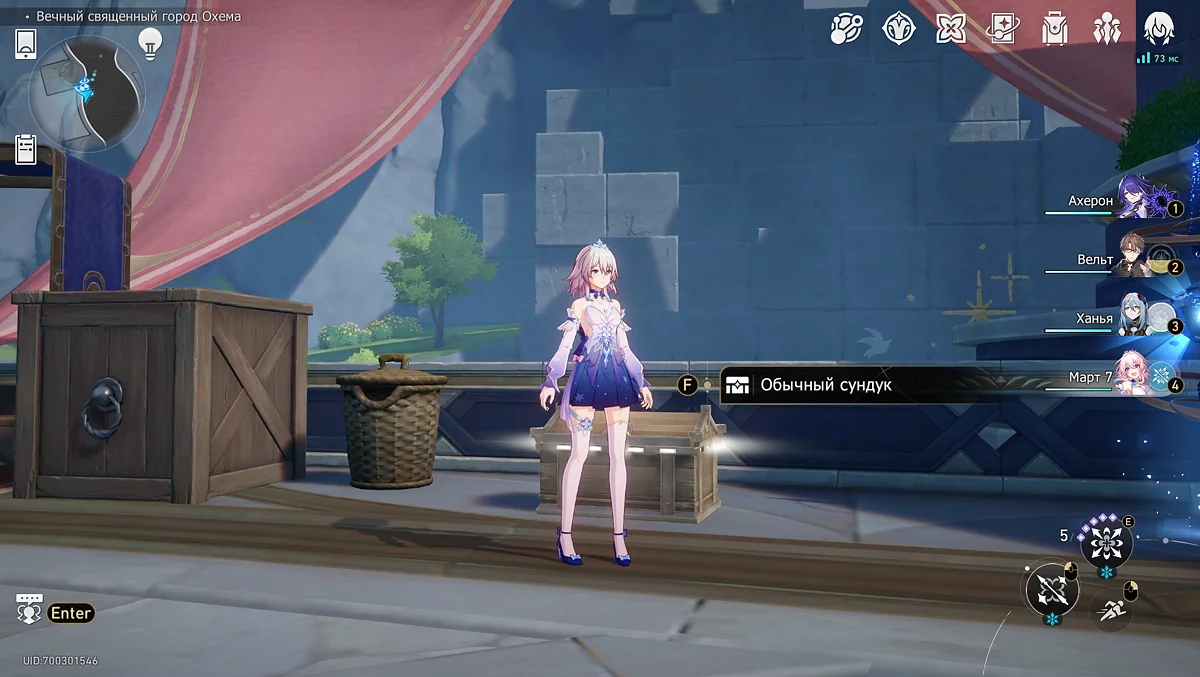
From the place where the dart landed, go slightly north to the observation deck. In the very corner, you will find another ordinary chest.
All chests on the second floor of the lower part of Ochema
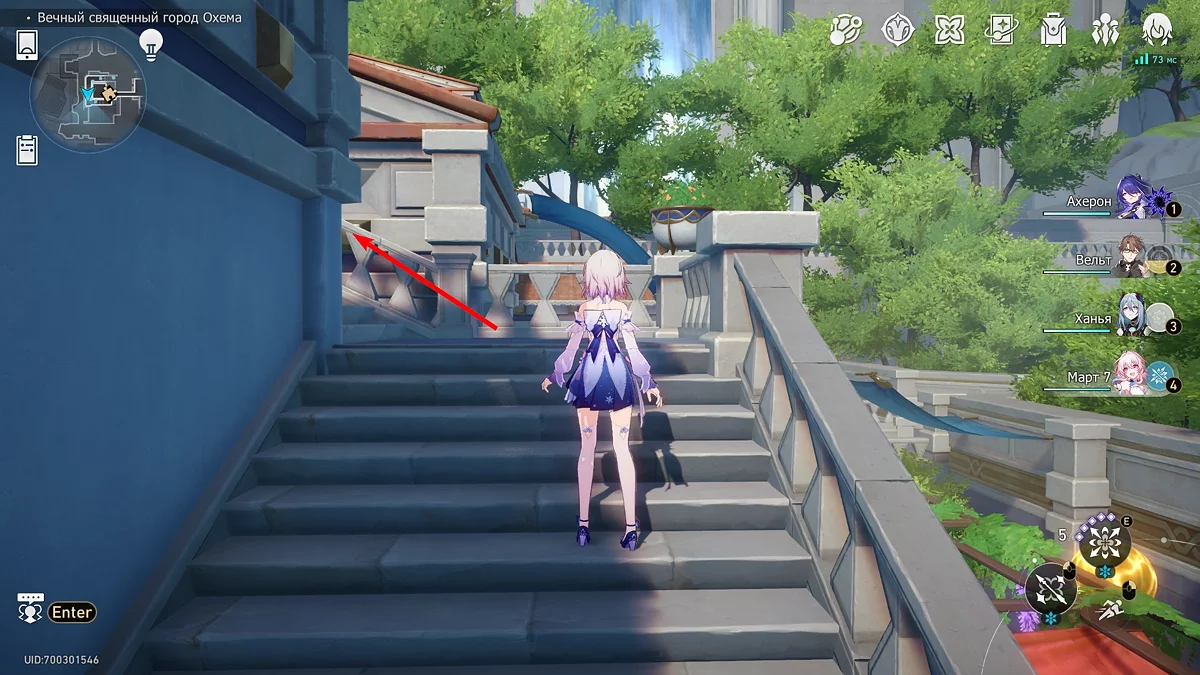
The remaining four chests can be found on the second floor of the southwestern part of Ochema. You can reach it from the stairs near chest #31.
Chest #43
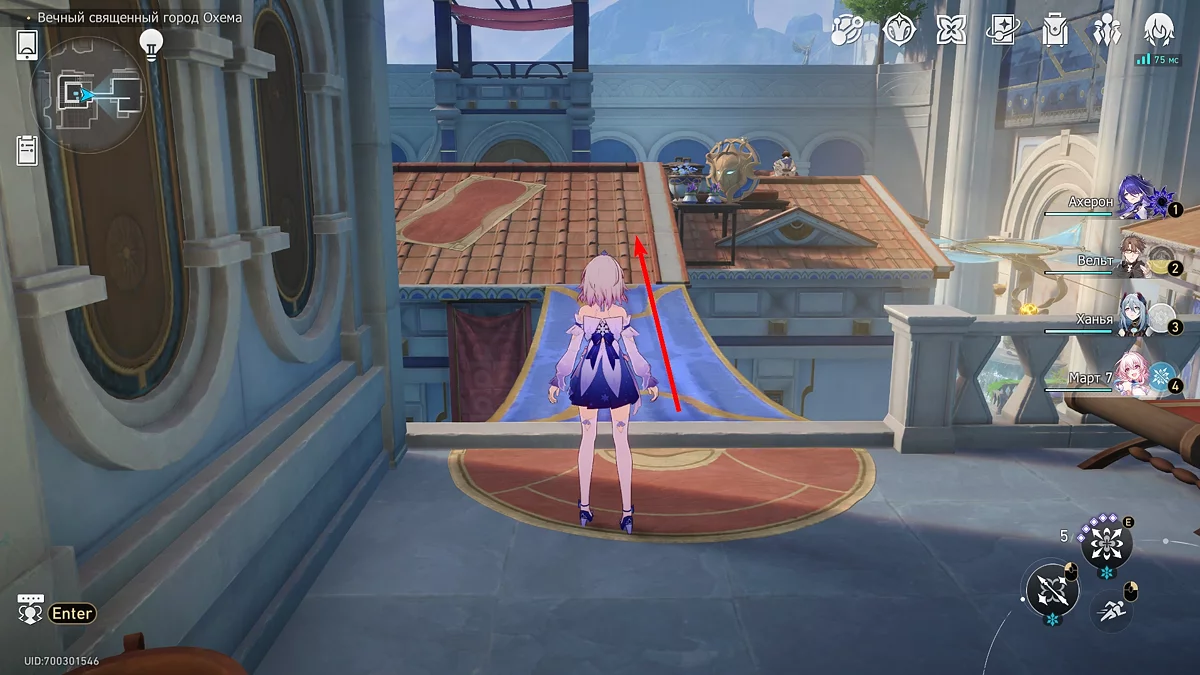
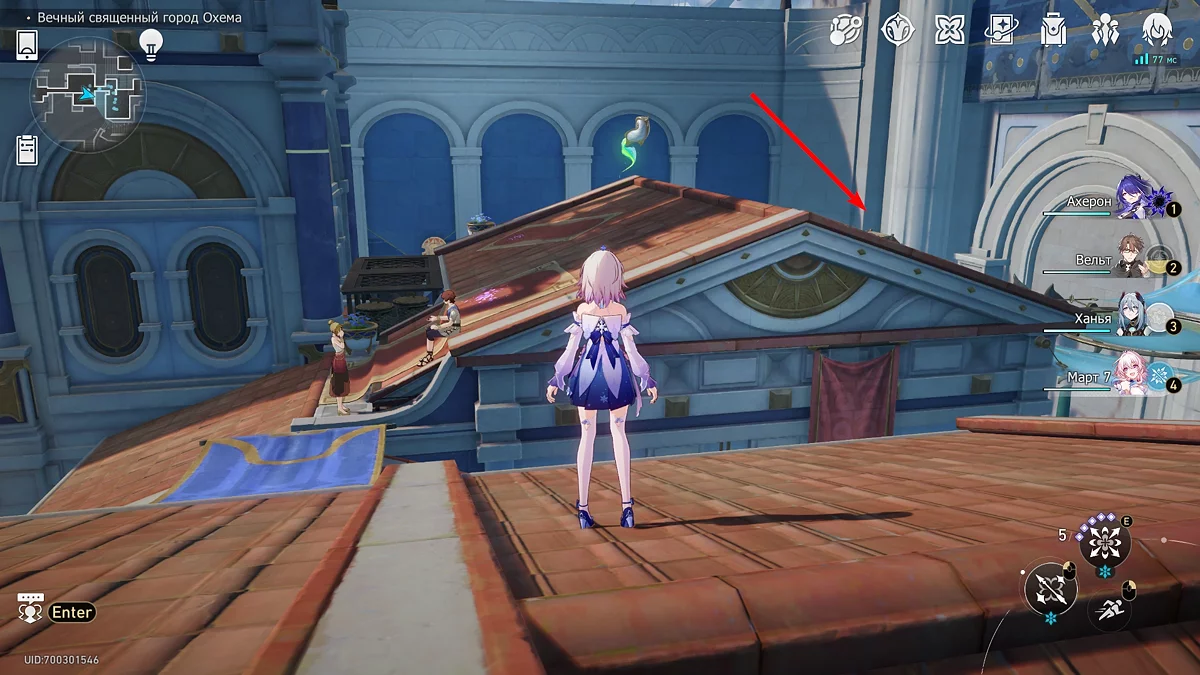
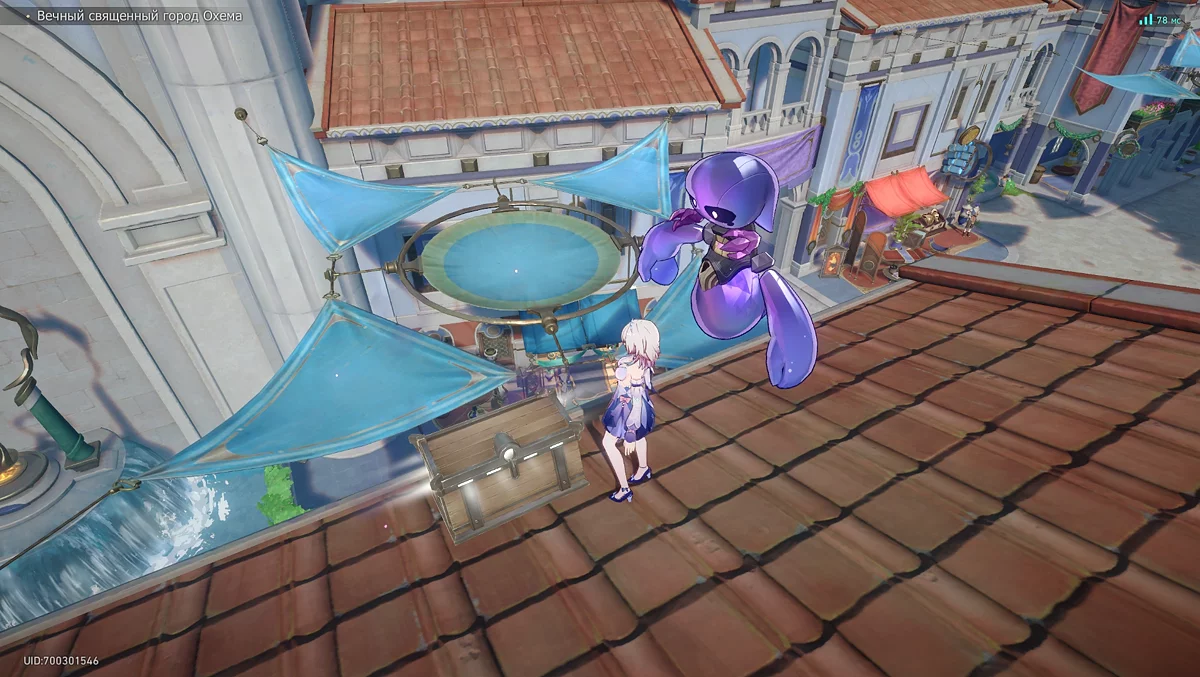
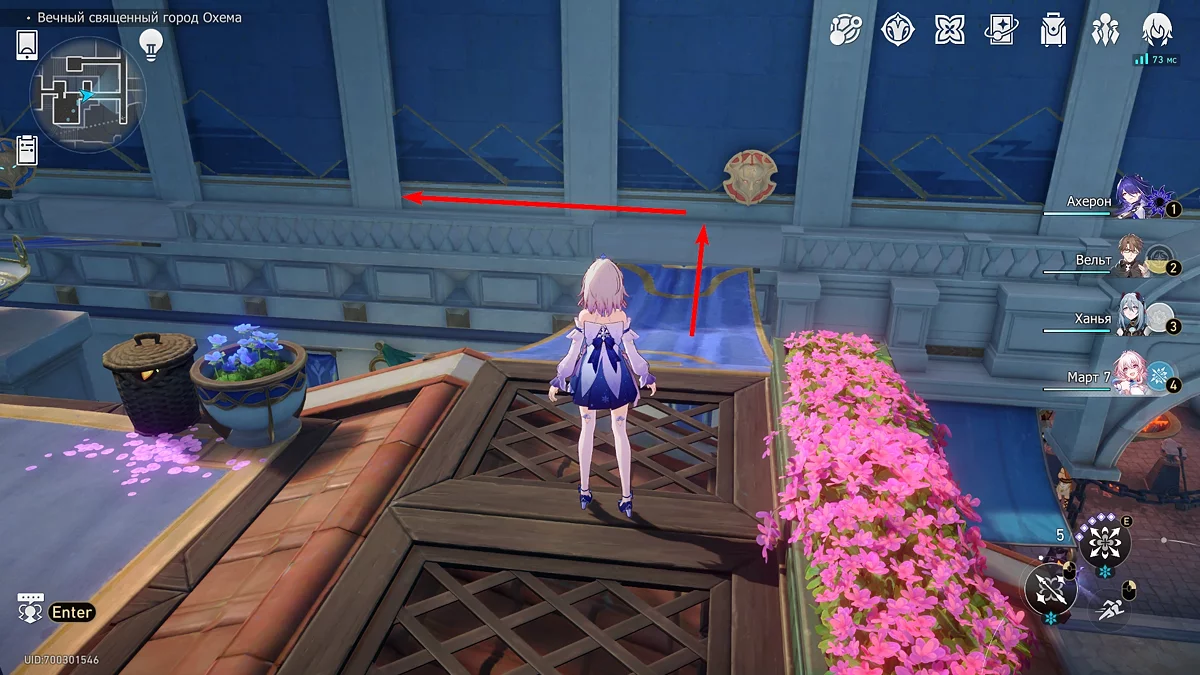
Climb the stairs, then get onto one house's roof, and then onto another. But the ordinary chest will once again prevent you from taking the Thieving Spirit. Using the same time-rewind mechanism, return the thief to its place, talk to it, and besides the regular treasure chest, receive 40 star jade.
Chest #44
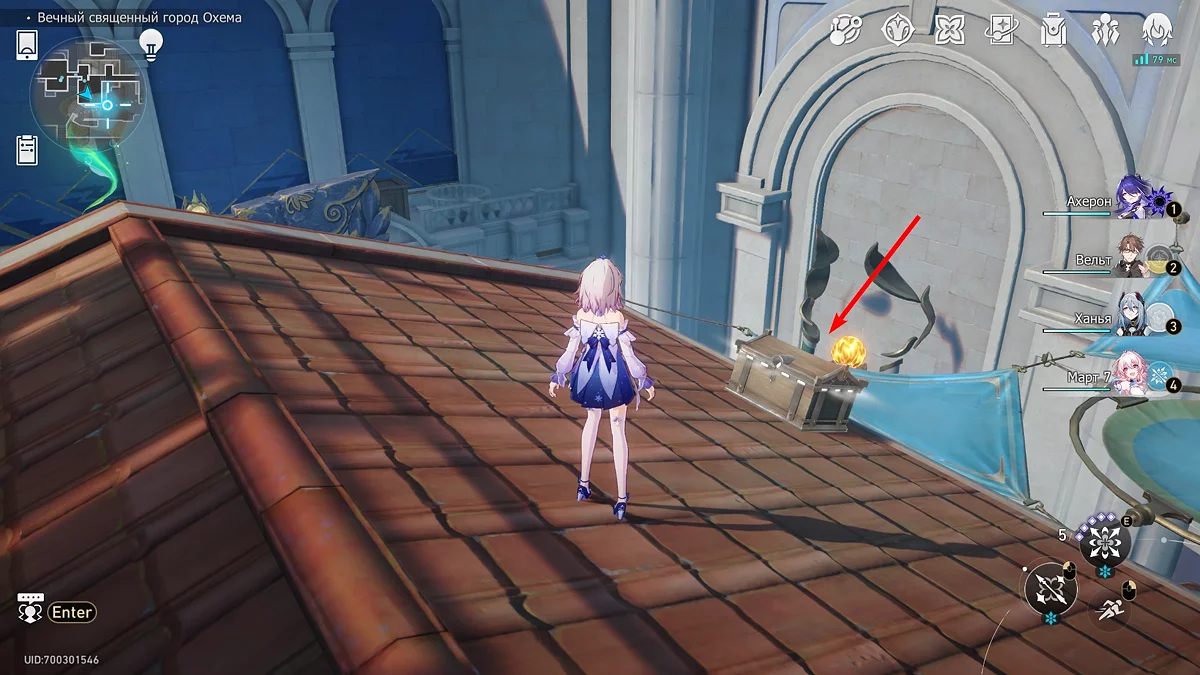
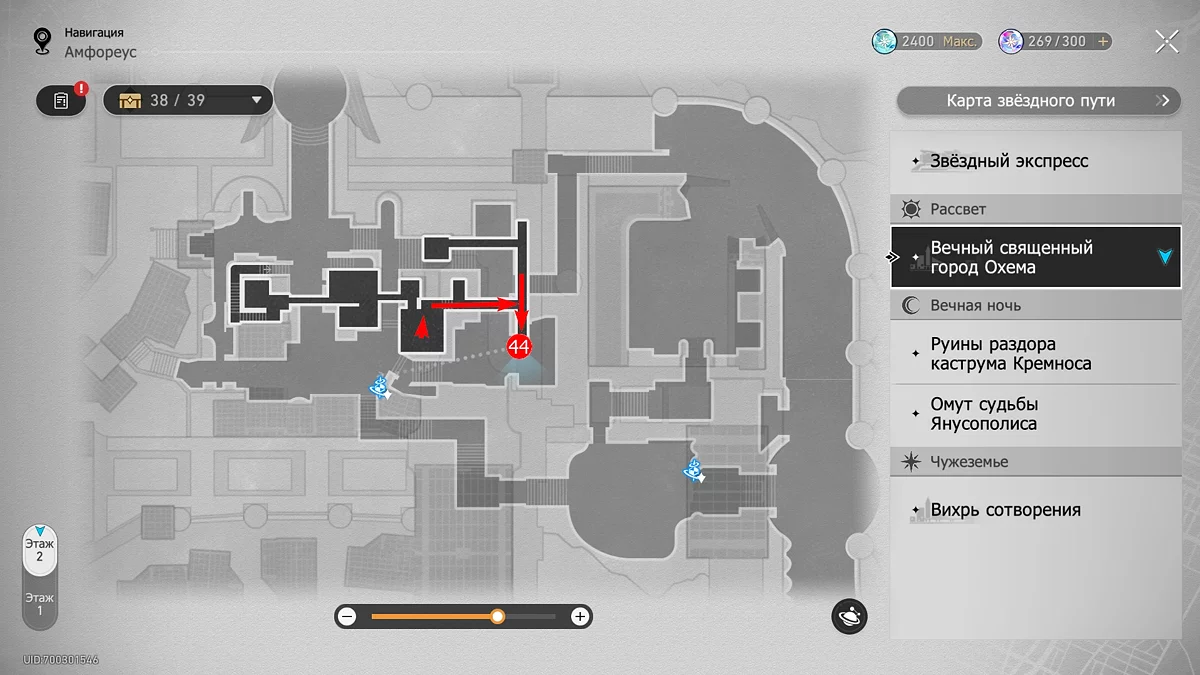
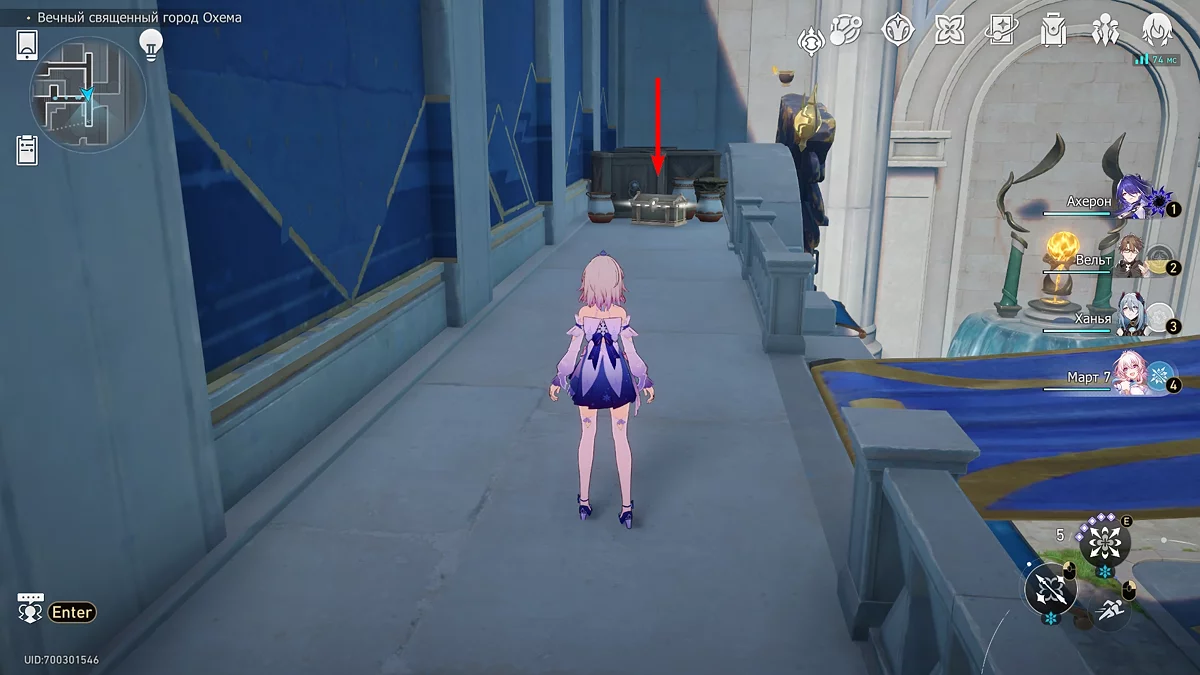
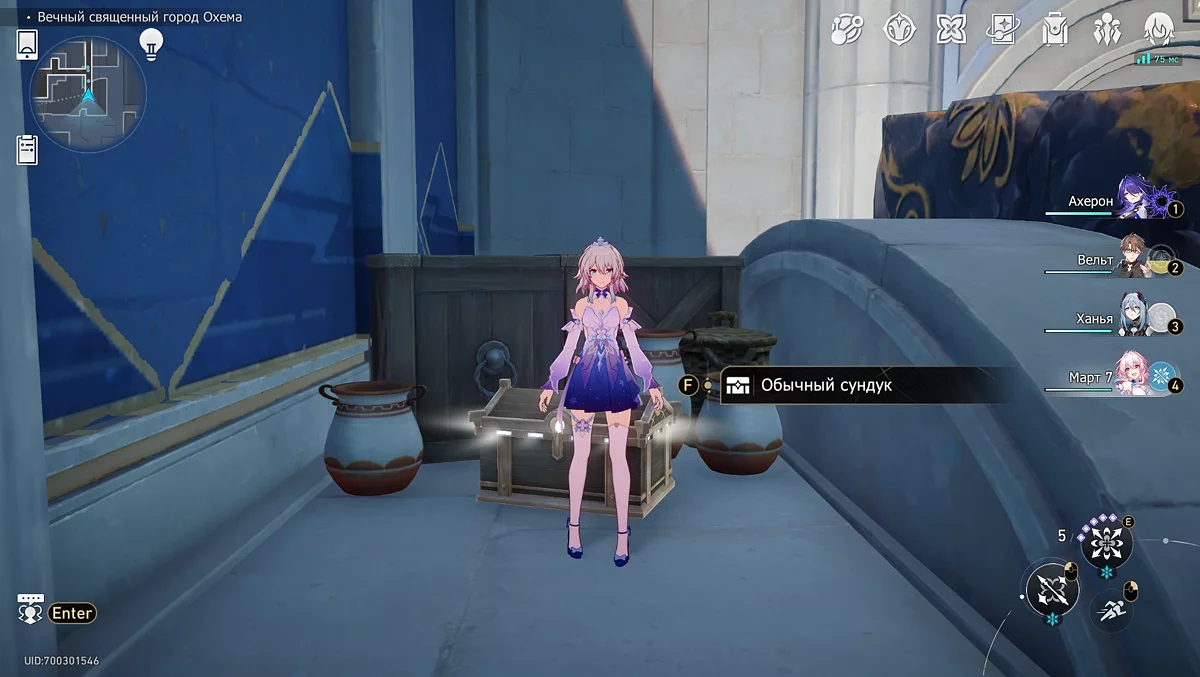
Continue moving across the roofs of the second floor until you reach a narrow stone balcony. Turn right, and at the very end of the passage, you will see another chest.
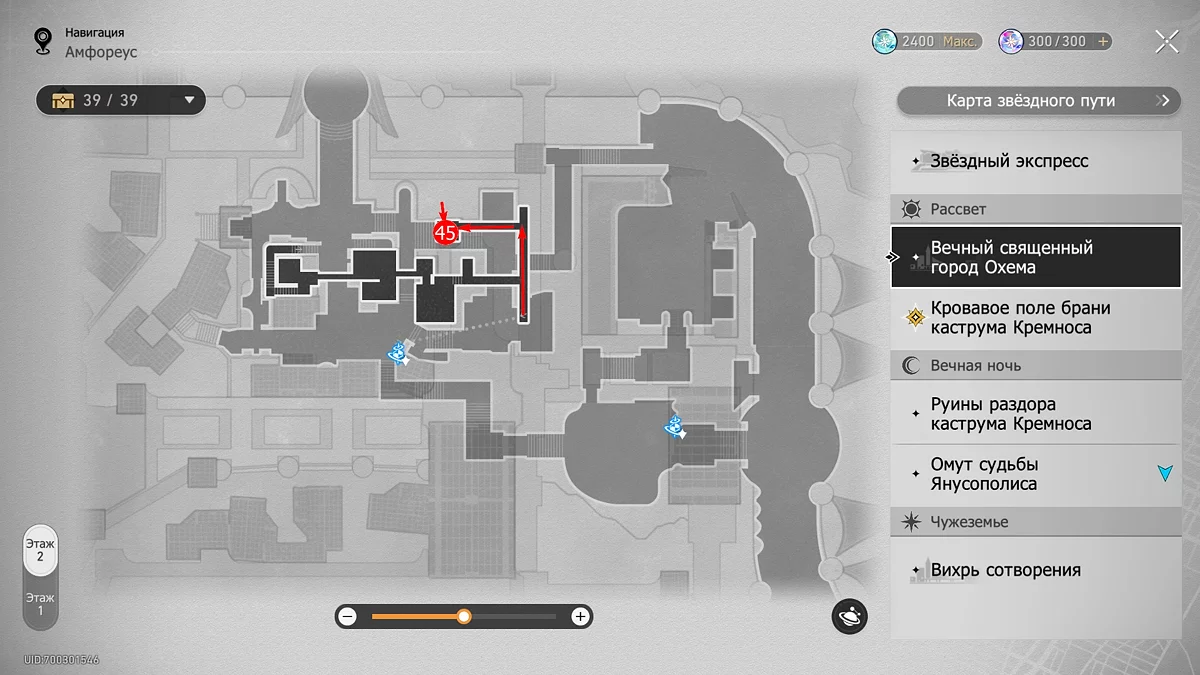
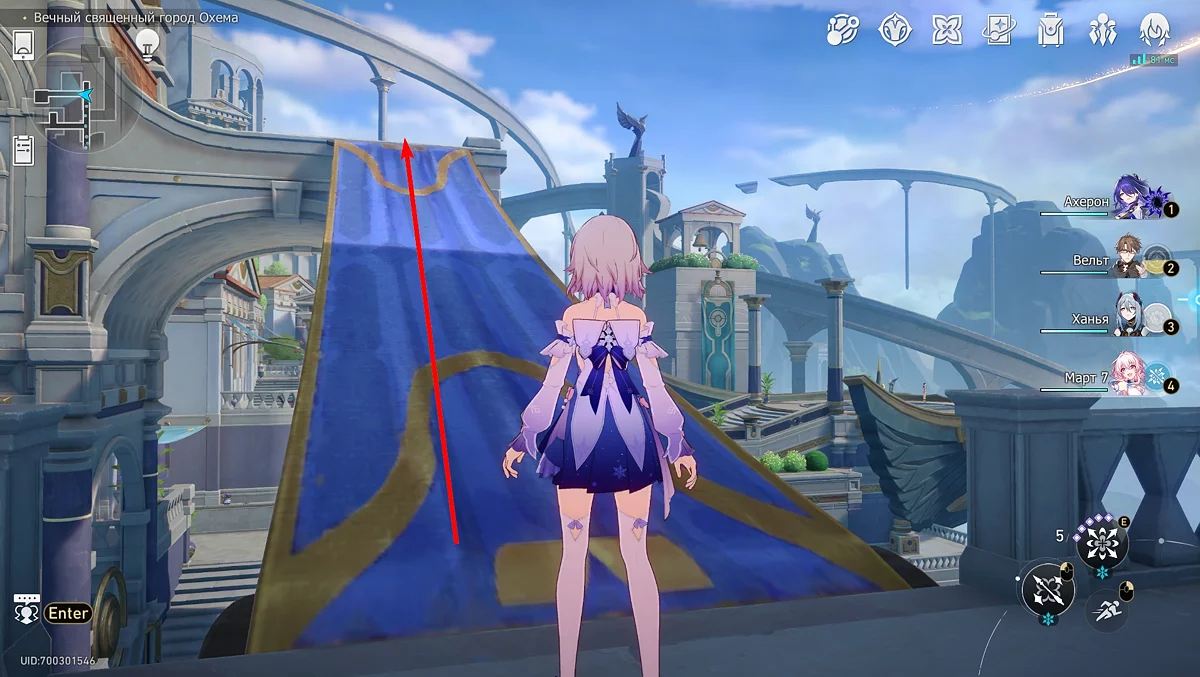
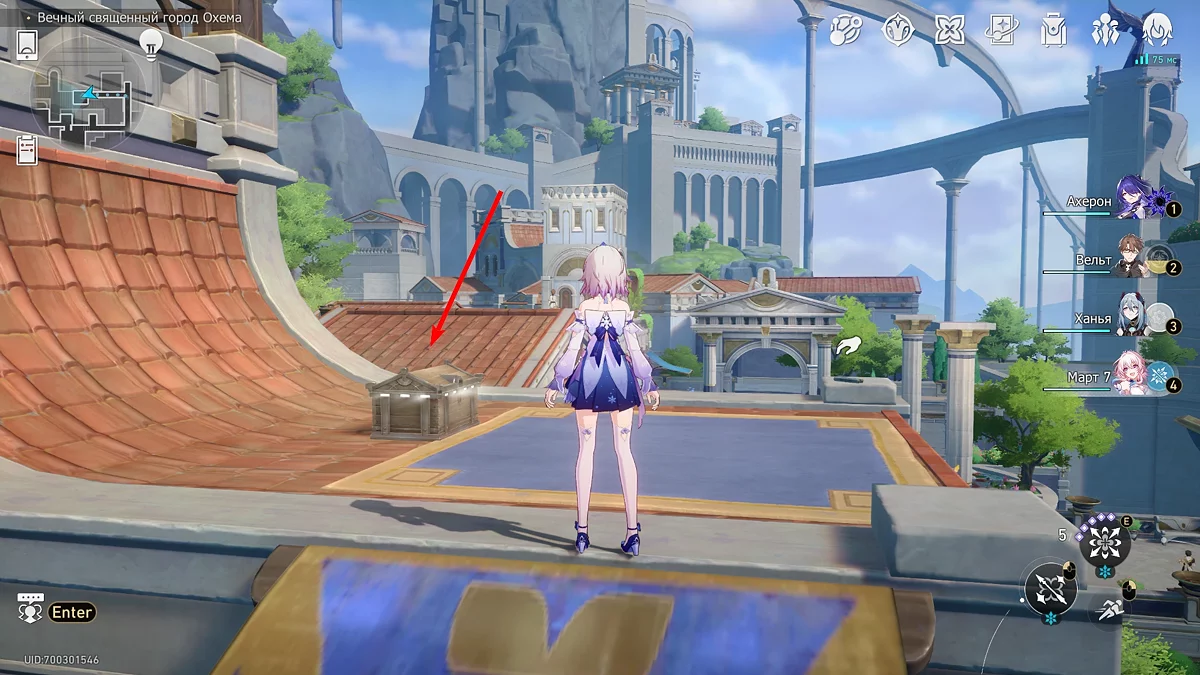
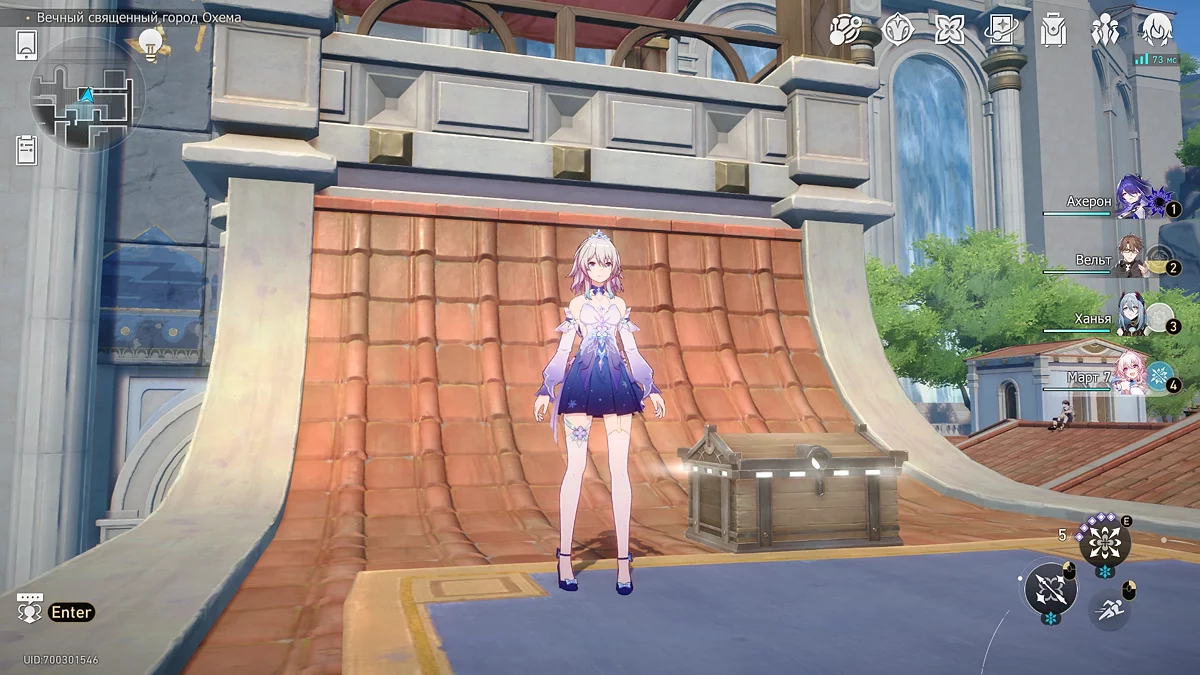
Chest #45
From the previous treasure chest, turn in the opposite direction and walk along the strip of blue fabric to get onto the roof of another house and take the last ordinary box in Ochema.
Other guides
- How to Get Free Polychrome in Zenless Zone Zero
- All Chests and Puzzles in the House of Chains in Honkai: Star Rail
- Guide for Zenless Zone Zero Beginners: Tips and Tricks
- All Clockwork Mechanisms in Origami Academy in Honkai Star Rail: How to Find and Get Achievements
- All Origami Birds in the Origami Academy in Honkai Star Rail: How to Find Them
- All chests in the Origami Academy in Honkai: Star Rail — map and routes
- All Chests and Puzzles on the Skybreaker in Honkai: Star Rail
-
How to Get Free Polychrome in Zenless Zone Zero
-
All Chests and Puzzles on the Skybreaker in Honkai: Star Rail
-
All chests in the Origami Academy in Honkai: Star Rail — map and routes
-
All Chests and Puzzles in the House of Chains in Honkai: Star Rail
-
Guide for Zenless Zone Zero Beginners: Tips and Tricks
