All Riddles and Puzzles in Silent Hill 2 Remake

The Silent Hill series is famous for its interesting puzzles that really make you use your brain, not just assemble another sliding puzzle. The developers at Bloober Team didn't just port the original puzzles from the second part to the remake but significantly changed and improved them. Even dedicated fans of the sequel, who know the game inside out, won't be able to just enter the pre-known answers. In this guide, we will tell you how to solve the puzzles and where to find the items in the locations that will be required to progress through the main story.
Silent Hill 2 Guides
- Full Silent Hill 2 Remake Walkthrough at 100%
- All Riddles and Puzzles in Silent Hill 2 Remake
- All lock and safe codes in Silent Hill 2 Remake
- How to get all weapons in Silent Hill 2 Remake
- How to find all scenes from the past in Silent Hill 2 Remake
- Boss Guide for Silent Hill 2 Remake — How to Win
- How to Find All Strange Photos in Silent Hill 2 Remake
- How to find the flashlight in Silent Hill 2 Remake
- All endings of Silent Hill 2 Remake — how to get the secret endings
Jukebox Puzzle in Neely's Bar
Location: Eastern part of South Vale

The first important plot-related puzzle you'll find is in Neely's Bar, which is on the corner of Neely Street and Sanders Street. Enter the premises and remove the cover from the jukebox. It's located in the far right part of the bar. You'll get half of a broken vinyl record. Take the note from the bar counter, which lists the missing parts. The necessary locations will appear on the map.

Where to find the jukebox button
Head southwest from Neely's Bar to the Saul Street Apartment Complex. Enter through the red door next to room 16. Inside, just past the office, there will be a map which we recommend examining. You need to get to the ninth room on the third floor. To the left, there will be a cabinet that can be moved. This way, you will enter the office where you will find the key to the apartment complex and a small note.

Exit the office and go up to the second floor. Turn right. Before the seventh room, there is a small crawl space in the floor. Use it to take the note from the window. Crawl back and go to room five. Open the door with the key. There you will see a gap in the wall. Then wake up through the second and exit through the window onto the stairs. Climb up. Enter the room through the window and go into the bathroom. Reach into the hole in the wall. Do this two more times until the main character finds the jukebox button. Now you can leave the apartment complex through the open roof on the left. Go down the stairs.


Where to find glue and the broken record
Head north on Neely Street until you reach Groovy Music. The store is on the left side of the street. Enter and kill two enemies. Take the note from the counter. Break the glass along the back wall to gain access to another room. There, on the table in the middle, you will find glue and the second half of the vinyl record. Now you have all three necessary parts to create the item. Open the inventory and combine both halves of the record with the glue.


Where to find the coin
The last item we need for this puzzle is located in the Texas Cafe. It is on the east side of Katz Street. Once inside, take the healing potion from the refrigerator behind the bar counter. Interact with the cash register. Turn the key and press the button down to get the coin. After this, an enemy will attack you. Kill it and return to Neely's bar.

Jukebox Puzzle: How to Solve
Interact with the machine after collecting all the items. Start by lowering the blue gear so that the combined green and red gears can move and accept the glued record. At this point, the stack of vinyl will rise to the top part of the jukebox. Select the missing button and insert it. Then insert the coin into the blinking slot. Choose the blue C button on the top panel. Then 2 on the bottom panel. The record you selected will start playing, and you will receive a key.

How to get the code for the Grand Market supermarket
Location: Eastern part of South Vale
The supermarket is located at the corner of Katz Street and Neely Street. The main entrance will be boarded up, but there is a side passage with a combination lock. If you want to find the password yourself, you need to head southeast on Sanders Street. Next to a pickup truck, you will find a corpse with a note. It will have a hint with a sequence of numbers. The password we need will come after 4439. Return to the lock and enter the code. Inside you will find 3 packs of pistol ammo and 3 healing potions.


- Easy mode: 4442
- Standard mode: 4444
- Hard mode: 4446
Where to find the safe code in Jack's Inn
Location: Eastern part of South Vale
You will reach Jack's Inn after your first encounter with Maria. Go through Rosewater Park and exit onto Nathan Avenue. The place we need is right across. On the left side after entering, you will see an office. Inside, there will be a safe. The main character will mark it on his map. Take the note from the registration desk. Break the glass next to room 108. Now break the wall to get into room 107. On the table, you will see a memo from the toolbox. It will have a hint with the safe code. Inside, there will be a gate key.


Safe code (any difficulty): 0451
How to get the safe code in room 206
Location: Woodside Apartments

Inside room 206 there is a safe standing in the middle. The walls and ceiling are covered with writings. You need to find the safe code yourself. Start by using the hint on the wall:
In the place where roofs pierce the night,
There are traces leading to a house without a host.
Please answer: did he find the house?
Or does the stream of memories lead straight to his own hell?
This hint tells us in what order we need to enter the parts of the code you found. Examine the waves in the corner. There you will see the number 11. Next to the set of houses, you can notice the number 13. With the group of footprints, there is the number 7. Gather all parts of the code and enter them in the order indicated in the hint. Inside you will find a coin and a steel key.


- Safe code in room 206 (easy difficulty): 15 right, 11 left, 13 right.
- Safe code in room 206 (standard difficulty): 13 right, 7 left, 11 right.
- Safe code in room 206 (hard difficulty): 13 right, 7 left, 11 right.

How to solve the riddle and coin puzzle
Location: Woodside Apartments

The coin cabinet is located inside the office area on the first floor, opposite the main entrance. While exploring the Woodside apartments, you will find emblems that need to be inserted into the puzzle. After that, you need to move the coins through the holes based on the conditions of the riddle that will appear at the top. Eventually, you will get the key to room 201.
Where to find the coin with the man
The coin can be found inside the safe in room 206. The full walkthrough is in the description of the previous puzzle.

Where to find the coin with the woman
You will first see the coin in the laundry chute on the second floor. At this point, you won't be able to do anything. Continue exploring the location. At some point, you will get the key to the small staircase on the second floor. Through it, you can get to the third floor. Head to room 310. Inside, there is a balcony through which you can get to room 312. Use the crawlspace to get to another laundry room.

Take the juice pack from the table. Use it on the laundry chute. This way, you will move the coin to another place. Now you need to go down to the first floor. Go out into the yard. The coin will be lying on the ground.
Where to find the coin with the snake
After you find the coin with the woman, return to the northern staircase. Go down the left corridor to room 116. There you will meet Eddie. After the cutscene, you will find yourself near a window leading to the pool. Climb into the new area and kill all the enemies. Search the red stroller in the pool. Inside, you will find the coin.

Coin puzzle: how to solve the riddles
Insert the coins into the puzzle slots. To solve it, you need to move the coins through the slots and flip them based on the conditions of the riddle.

First riddle:
- Easy difficulty: silver coin with a man in the first slot. Gold coin with a woman in the third. Bronze sunflower in the fifth. Press the button. Do not move or touch the coins to avoid disrupting the riddle's narrative.
- Medium difficulty: silver coin with a man in the first slot. Gold coin with a woman in the third. Bronze sunflower in the fifth. Press the button. Do not move or touch the coins to avoid disrupting the riddle's narrative.
- Hard difficulty: silver coin with a man in the first slot. Gold coin with a tombstone in the fourth slot. Bronze snake in the fifth. Press the button. Do not move or touch the coins to avoid disrupting the riddle's narrative.
Second riddle:
- Easy difficulty: silver coin with a sword in the first slot. Gold coin with a woman in the third. Bronze snake remains in the fifth slot. Press the button.
- Medium difficulty: silver coin with a man in the second slot. Gold coin with a woman in the fourth. Bronze sunflower remains in the fifth slot. Press the button.
- Hard difficulty: gold coin with a tombstone in the first slot. Silver coin with a sword in the second slot. Gold coin with a woman in the fourth. Bronze sunflower in the third slot. Press the button.
Third riddle:
- Easy difficulty: bronze snake in the first slot. Gold coin with a tombstone in the third. Silver coin with a man in the fifth slot. Press the button.
- Medium difficulty: silver coin with a man in the third slot. Gold coin with a tombstone in the fourth. Bronze snake remains in the fifth slot. Press the button.
- Hard difficulty: silver coin with a man in the second slot. Gold coin with a woman in the third. Bronze snake in the fifth slot. Press the button.
Fourth riddle (for all difficulties): place the coin with the snake in the top slot.

How to solve the clock puzzle
Location: Blue Creek Apartments
The clock puzzle is located in room 212. There is a hint on the wall to the left about the position of the clock hands, as well as a note on the table opposite. You need to explore the Blue Creek apartments and find the hands that need to be sequentially placed on the clock face. This must be done to open new doors throughout the apartment complex.

Where to find the hour hand
The hour hand is inside the radio, which is chained and hanging from the ceiling of room 307. To get there, you need to find the valve for the pipe located in the room on the right. Go to room 305 through the balcony of 307. There you will find the key to room 306. Head to this room. Next to the sofa, there is a crawl space that leads to room 304. There you will find the valve. Remove it and return to the pipe in room 307. Use the item to lower the radio. Search the item and take the hour hand. Return to room 212 and insert it into the clock face.


Where to find the minute hand
After you insert the hour hand into the clock face, the door marked with the letter H on the map will unlock. Go there through the right balcony and break the wall in the kitchen. Search the toilet three times to fish out the minute hand. Return to room 212 and insert it into the clock face.


Where to find the second hand
You will get the second hand after unlocking the lock in room 202. Below we will detail this location. After solving the riddle, the player must retrieve the arrow from the hole in the wall. Then return to room 212 and insert it into the clock face.

What time to set
Any difficulty: Hour hand at 9. Minute hand at 2. Second hand at 3.

How to solve the seesaw puzzle
Location: Blue Creek Apartments
You will find the seesaw puzzle in room 210. It is marked on the map with the letter H. You will be able to enter it only after inserting the hour hand into the clock face. You will need to find two figurines to place on the seesaw. To balance the setup, use the hint:
Place the pigeon on the very first position on the left. And move the swan figure 2 positions to the left from the farthest corner.

Where to find the figurines for the seesaw puzzle
The first figurine is in the same room as the puzzle. In the closet at the exit of the bathroom, there will be a wooden pigeon. Leave room 210 and head north down the corridor to room 209. Use the right door and go to the bathroom. Break the glass and take the part of the deformed statuette. Go to room 211. Kill two enemies and remove the swan's head from the hook. Open the inventory and combine it with the deformed figure.


What is the code for the lock in the room with moths
Location: Blue Creek Apartments

After you enter room 202, you will be locked in. To leave the place, you need to find the code for the lock. To the right of it, there is a hint related to three numbers that need to be entered. You need to count the moths with markings like in the picture and add/subtract the number from the die. The insects are on paintings and in wooden boxes. Move the cabinet near the wall to get to the second room. Now count all the moths and solve the simple equations.


Code for the lock in the room with moths:
- Easy difficulty: 582
- Standard difficulty: 373
- High difficulty: 522
What is the code for the lock in the hospital reception
Location: Brookhaven Hospital
In the reception area of Brookhaven, you will find a locked cabinet. There is a key inside. Head to the third examination room. Break the glass at the entrance door and climb inside. In the drawer of the right room, there is a nurse's memo. It contains the clue for the combination lock: find nurses, doctors, and trees. Return to the lobby and examine the pictures on the walls. Note the number of objects and subjects and then enter these numbers into the lock code in the reception.


Code for the lock in the reception:
- Easy difficulty: 287
- Standard difficulty: 724
- High difficulty: 152
How to get the code for the lock in the nurses' office
Location: Brookhaven Hospital
To get into the medical room on the second floor, you need to enter the code on the digital lock in the nurses' office. To find it, you need a textual hint, which is in the doctors' lounge. You will be able to access it after exploring the pool and the greenhouse. On the paper, there will be lines with buttons that directly indicate the sequence of numbers to enter.


Code for the door:
- Easy difficulty: 3578
- Medium difficulty: 3578
- High difficulty: 7456
Puzzle with the hand and bracelet
Location: Brookhaven Hospital
To solve this puzzle, you first need to find the bracelets that are hidden in the location. After you collect them, you need to place the bracelets in the correct order. If you pay attention to the hand itself, you will see marks that match the bracelets. First, place the bloodstained bracelet. Then the bracelet with markings. And at the bottom should be the dirty bracelet.

Where to find the bracelet with markings
Head to ward L1. The hero will fall into a hole between the walls. Crawl to the end to find yourself in the room with medical records. In the corner of this room lies the bracelet.

Where to find the dirty bracelet
The item is in ward D1 on the third floor. To access the place, you need to solve the X-ray puzzle. Below we will separately analyze it and explain what needs to be done.

Where to find the bloodstained bracelet
The bracelet is in the pool on the first floor. You need to drain the water first. To do this, you need to combine the medical tube (it lies in the adjacent shower) with the bent needle (you will find it in the storage room). Use the hook on the drain located in the pharmacy. This will open the grid with the deposit. Drain the pool and jump down. Break the wall to access the bracelet.

Code on the safe in the director's office
Location: Brookhaven Hospital
After solving the bracelet puzzle, you need to open the locked door opposite the save point. Inside you will find a button for the safe and a collection of books that you need to arrange so that a lion image appears on the spines. Return to the safe and insert the button into the slot.

Now you need to enter the symbols. Use the numbers that were on the bracelets in the puzzle. On any difficulty: 92, 45, 71. Now match the numbers with the symbols on the spines. Enter the resulting combination on the safe.


How to solve the X-ray machine puzzle
Location: Brookhaven Hospital
On the third floor, there is an X-ray room with a puzzle. Nearby, there will be a note and an X-ray of the pelvic area. Place it on the machine and head to the procedure room, which is behind the nurses' code lock. There you will find a moldy X-ray lying in the bathtub. In the inventory, combine it with the mold remover (can be found in the storage room on the first floor). Return to the X-ray machine and place the image on the machine.


You need to align the images on the board, focusing on the black marks and notes. At the end of the solution, you will get the code: (any difficulty) 4, 37, 12.

How to open the box with chains and two locks
Location: Brookhaven Hospital
On the second floor, next to the nurses' station, you will find a box with chains. It is locked with a code lock, a digital panel, and a key. You need to collect all the elements of the puzzle solution to progress further in the story.

Where to find the key with the lobotomy tool
Head to the left part of the second floor. Climb the stairs to the third floor. Visit the fourth examination room. A mannequin will be sitting on the surgical chair. Use the tool lying next to the mannequin. Go to ward D2. Break the hole in the wall and enter ward D1. Descend the stairs to the kitchen on the first floor. Go through the hole in the wall and take the Bliss Key. Return to the mannequin and use the item. You will receive a key that can be used on the chained box.


How to unlock the code lock on the chained box
Head south to the restroom. Push the cart to the crawl space to enter ward L1. From there, go to ward M3. Break the wall to get into the adjacent room. Take the calendar page. Examine it. You will get the number 1. Look at the sink. Count the pills. Interact with the clock. Count how many times the light blinks. Ultimately, you will have the code: 1622. Enter it into the code lock.


Where to get the code for the digital lock
Head to the laundry room on the second floor. Through it, you will get to ward L2. Move the cabinet and push the metal cart. Climb it to the adjacent room. Through ward L3, you will get to the observation room. Take the director's office key from the table and head there. Climb the stairs to the third floor. Follow the red wire to the opening in the wall. Start the generator and return to the stretcher. Turn on the system to get the code: 9659.


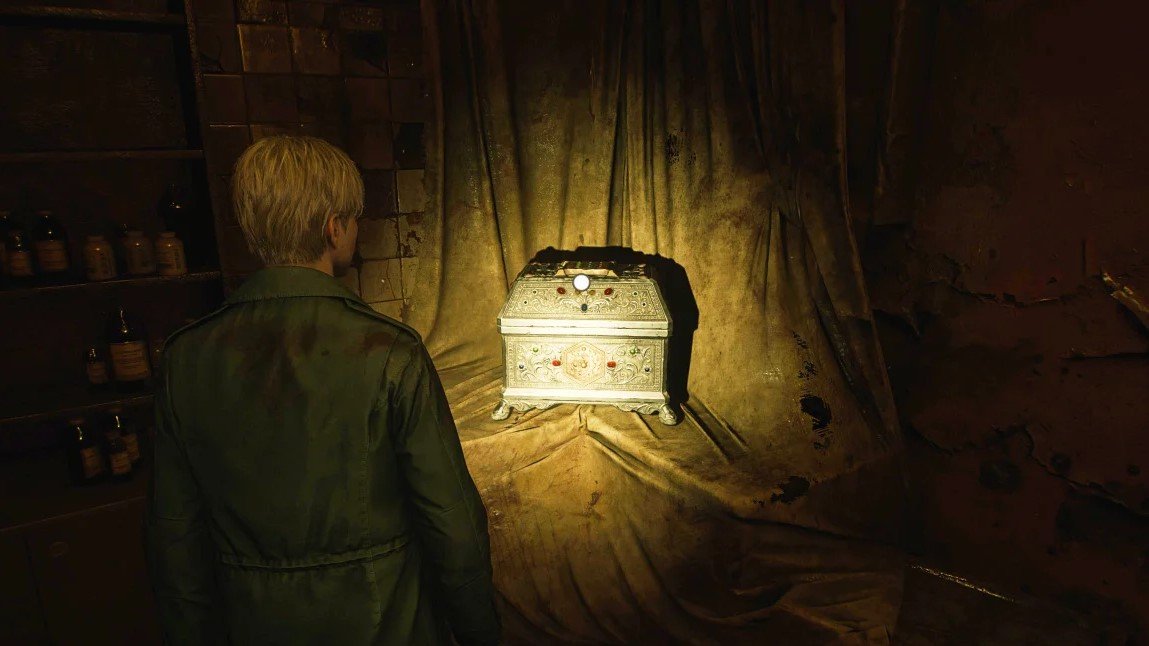
How to open the decorative box
Location: Brookhaven Hospital
The box is in the pharmacy department on the first floor. To open it, you need to enter the answers to the questions previously asked by the announcer in the elevator. Answer: 231.
What is the code for the lock in the insect room
Location: Silent Hill Historical Society.
After jumping down, you will see doors with holes. Enter the one with the light on. Continue to the rusty door. Take the key from the center of the room. Your flashlight will go out, and insects will appear around you. You need to quickly enter the code on the lock to get out. Carefully examine the panel. You need the keys that are not smeared with blood: 2, 3, and 9. The code is always set randomly, so there is no exact correct solution.


All possible combinations for the lock in the insect room:
239, 293, 329, 392, 923, 932.
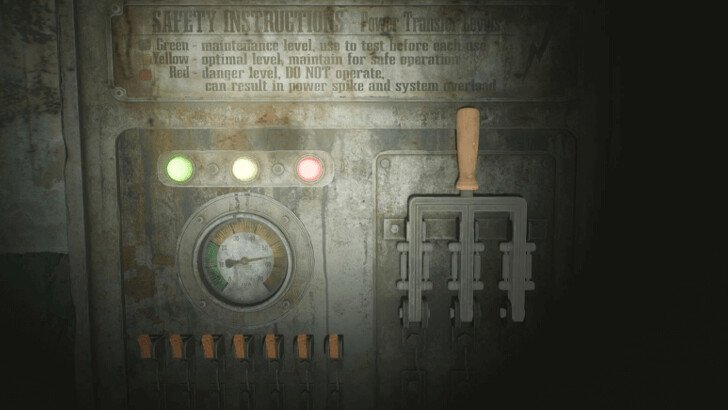
How to turn on the generator in the witness room
Location: Toluca Prison
When you reach the death row cell on the first floor, you will need to turn on the generator. To solve the puzzle and open the door, you need to switch the levers in a specific order. That is, move the value to the red area. Start your actions from left to right: 2, 5, 2, 1, 3, 2, 4, 2, 1, 3, 2, 5, 6, 5, 2, 1, 3 and 2. At the end, pull the lever.

Solution to the weights and scales puzzle
Location: Toluca Prison

You will find the scales in the prison yard. Remove the cloth from them to inspect the details. There is a stand for weights in front of the scales. So far, there is only one weight on it. You need to find the rest to pass the puzzle.

Where to find the heavy weight
You will find the heavy weight in the chapel. Return to Block B and go to the armory. Then turn north. The item will be on the altar. Return to the scales. Place the heavy weight on the right side and the light weight on the left. You will open the Headless Snake door.
Where to find the medium weight
Head to the death row room. Restart the generator. Detailed instructions are in this guide. Enter the witness room. Here you need to switch the toggles so that they are in the upper position. Order of actions:
- Easy difficulty: 4, 5, 2, 1, 3.
- Medium difficulty: 6, 4, 5, 1, 3, 2.
- Hard difficulty: 4, 5, 2, 1, 3, 6, 7.
After this, take the medium weight from the electric chair. Return to the scales. Place the light and heavy weights on the left side. The medium weight on the right. You will open another door.
Where to find the second heavy weight
Go to the second floor and enter the Hornless Ox door. Take the key to Block D from the guard room. Go to the new block and open cell D5. Take the key and return to Block C. Open cell C4 and crawl through the passage to the pipes. Reach the restroom and turn into the shower section. Take the weight from the hole in the wall. Return to the scales. Place the light weight on the left side, and the rest on the right.


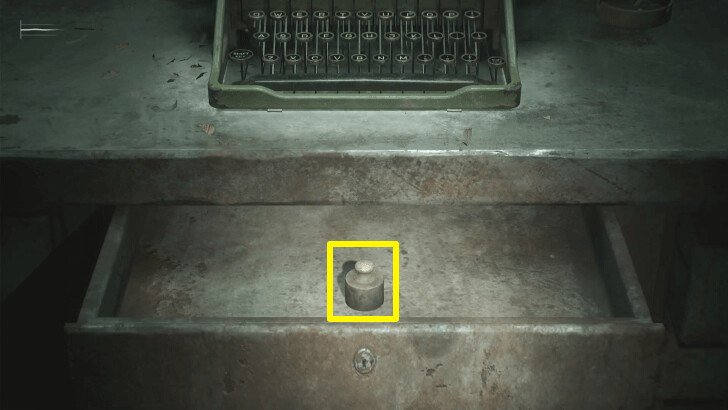
Where to find the second light weight
Go to the infirmary. Take the key from the table and use it on the ladder near the restroom. Climb up. Type the word SICK on the typewriter to open the box with the light weight. Return to the scales. Place the medium weight on the right side. Place the rest on the left.
Where to find the tiny weight
Through the open door, head to the basement. Take the weight from cell F6. The door will lock. Do not panic. This is a temporary phenomenon. After some time, it will open. Go to cell F9 and break the wall. In the adjacent room, there will be a ladder leading out of the basement. Return to the scales. Place the light, medium, and heavy weights on the right side. On the left: tiny, light, and heavy weights.
How to pass the Gallows puzzle
Location: Toluca Prison
After the weights puzzle, a gallows will appear in the yard. Insert the lever into the slot on the puzzle. The first half of the poem will appear on the gallows. You need to correctly match the pieces of text. The puzzle has 2 sets of sentences that fit each poem. They are issued randomly. Below we have written the first part of the poem and the lines that match it.
First Riddle:
- Easy difficulty: Sacred was the place, burned down. Innocent: It was a refuge of evil.
- Medium difficulty: I do not beg for your mercy, oh flame that I released. Sisters screamed, and children cried, no one got out alive. Innocent: Though I mourn the death of the young. Guilty: I saw them burn.
- Hard difficulty: Under the cover of night, in the ink of twilight. Innocent: The death of the innocent, a damned sin. Guilty: Twisted cold dances on his spine.
Second Riddle:
- Easy difficulty: This one took from others. Guilty: Stole not to eat.
- Medium difficulty: I took the wealth of others. Innocent: The reason, if I must say. Guilty: What were those reasons.
- Hard difficulty: In the embrace of twilight, a cunning thief appears. Innocent: With trembling hands, he grabs what he must. Guilty: His greed drives every cunning theft.
Third Riddle:
- Easy difficulty: This one kidnapped. Guilty: In a fit of rage.
- Medium difficulty: I took the child, you are absolutely right. Innocent: Forgive me, child, for I could not. Guilty: My only daughter, the joy of days.
- Hard difficulty: In the shroud of twilight, the story unfolds. Innocent: A cruel twist of fate, an unforeseen outcome. Guilty: A tragic fruition, a mother's despair.
Fourth Riddle:
- Easy difficulty: This one broke the lock. Guilty: Another place to loot.
- Medium difficulty: As soon as the sun ceased its reign. Innocent: So my guilt is evident. Guilty: I left in haste.
- Hard difficulty: With secret steps, led by darkness. Innocent: Among the moonlight, a desperate truth. Guilty: Under the moonlight, a villainous scheme.
Fifth Riddle:
- Easy difficulty: This one dared to deprive. Guilty: Did it just for pleasure.
- Medium difficulty: Dear mommy, sweet mommy. Innocent: You broke my legs, I could not walk. Guilty: You were, oh, so kind to me.
- Hard difficulty: With falling feelings, she watches, mouth agape. Innocent: It was a perverse fate.
Sixth Riddle:
- Easy difficulty: This one clenched a fist. Innocent: Turned against his abuser.
- Medium difficulty: I waited long, I waited for my hour. Innocent: Truth be told, he was not much of a man. Guilty: Truth be told, I did not hesitate.
- Hard difficulty: In the shadow cast, the hunter lay in wait. Innocent: The death of the innocent, a damned sin. Guilty: The victim's eyes wide with horror and fear.
How to solve the book puzzle
Location: Lakeview Hotel

In the reading room, several books will be scattered. Nearby, you will see an empty shelf. You need to select the books and arrange them in the correct order. Pay attention to the painting hanging next to the shelf. It has characters that correspond to the signs on the spines of the books. Arrange the books in the order they are depicted in the painting.


Order of Arrangement: Revelations: New Understanding (Icarus), The One Who Soared (Eagle), Enduring to the End (Bull), Pride Before the Fall (Lion).
What is the code for the suitcase lock
Location: Lakeview Hotel

Enter room 205 and take three photographs (images change depending on the difficulty). Head to the conference room and move the cabinet away from the wall. Break the wall to get to room 318. Take the red paint from the table. Go up to the third floor and visit the utility room. There will be bolt cutters on the shelf. Take them. Go down to the garden and break the chain on the gate near the fountain. Pick up the light bulb. Now you need to shoot the window of room 217. This needs to be done from the balconies. A can opener will fall into the restaurant area. Enter the establishment and take it. Open the can of paint with the opener. Use the paint on the light bulb. Return to room 205 and screw the resulting item to the mirror. The code phrase will appear on the glass.


Codes for the suitcase lock:
- Easy difficulty: DARK WISH
- Medium difficulty: DEED DONE
- Hard difficulty: LOVE LUST
How to open the safe in the hotel lounge
Location: Lakeview Hotel
Head to the hotel's service sector. There will be a lounge room. To open the safe on your own, you need to find three precious stones. Head to the cafeteria. Enter the kitchen and take the green stone from the table. Now go to the pantry. Open the freezer and take the blue stone. In the room with the TV, you need to push the cabinet to open a gap in the wall. Enter the room. There will be a red gem in the box. There will also be a jewelry box. Place the stones in the center of the box. Examine the painting and arrange the items according to the scheme depicted on it. Inside, there will be a note with the password.

Safe code:
Any difficulty: 7414
How to solve the music box puzzle
Location: Lakeview Hotel
Place the figurines on the puzzle. The Little Mermaid on the top disc. Cinderella on the right disc. Snow White on the left disc. Now you need to align the tracks so that the figures reach the doors. To do this, you need to turn the keys.
Key Turns:
- Easy difficulty: First seven times. Second two times. Third one time.
- Standard difficulty: First seven times. Second five times. Third one time.
- Hard difficulty: First one time. Second one time. Third one time.
Where to find the Cinderella figurine
Head to the conference room. Above the fireplace, there is a board with the key to room 107 and a note. Go to room 107. Visit the gazebo in the garden. In the mop bucket, there is the fireplace key. Return and open it. Pick up the figurine.

Where to find the Little Mermaid figurine
Go down to the basement and enter the maintenance room. Pick up the valve and shut off the gas near the boiler room. Enter the room and take the bar key from the red pipe. Return to the valve and turn it again. Head to the bar. On the left side, there will be a jukebox. Near it, there will be a figurine. Pick it up.

Where to find the Snow White figurine
To get the figurine, you need to solve the mirror puzzle. Below we have explained in detail what needs to be done.

How to solve the mirror puzzle
Location: Lakeview Hotel
Head to the second-floor hall. Take the key to room 202 from the couch and the apple from the small table. You can also take the rotten apple lying outside the hotel. It is on the ground to the right of the main entrance.

Go to room 202. Inside, there will be a mirror with a clue. First, go to the bedroom and take the shard from under the bed. Place the apple on the round table. The choice of fruit does not affect the plot or progress. You need to assemble the mirror from the shards.


Other guides
- Boss Guide for Silent Hill 2 Remake — How to Win
- How to get all weapons in Silent Hill 2 Remake
- All endings of Silent Hill 2 Remake — how to get the secret endings
- All lock and safe codes in Silent Hill 2 Remake
- How to find the flashlight in Silent Hill 2 Remake
- How to find all scenes from the past in Silent Hill 2 Remake
- How to Find All Strange Photos in Silent Hill 2 Remake
- Complete Silent Hill 2 Remake Walkthrough at 100%
- Silent Hill 2 (Remake) Review. The Triumphant Return of the Cult Horror
- Silent Hill 2 Remake Sells Over One Million Copies
- Gamer Shows Silent Hill 2 Remake with Fixed Camera — Now It Looks Like the First Resident Evil Games