4 Ways to Take a Screenshot on PC

There are often moments when you urgently need to show your friends what's happening on your screen. In this guide, we'll detail the simplest ways to take a screen capture.
Print Screen Key
The easiest way to take a screenshot is by using the Print Screen key. Here's what you need to do to capture your screen:
- Press the Print Screen key. By the way, it is often abbreviated on keyboards as PrtSc, prt sc, or prt scr. All these mean the same thing.
- After pressing Print Screen, the image is saved to the clipboard, meaning the computer holds it in RAM. To save it as a file, you need to use a graphics editor.
- Press the «Start» key, then go to the «All apps» tab, and in the drop-down menu, select «Standard». Now open Paint.
- In the window that opens, find the «Paste» icon (located in the upper left corner) or press the Ctrl + V keys.
- In the editor window, click on the floppy disk icon to save the picture.
That's it, the screenshot is ready and saved on your computer.
Snipping Tool
To create a screenshot, you can do without Paint and the Print Screen key. Among the standard Windows applications, there is the «Snipping Tool», which allows you to take a snapshot of the entire screen or a specific area.
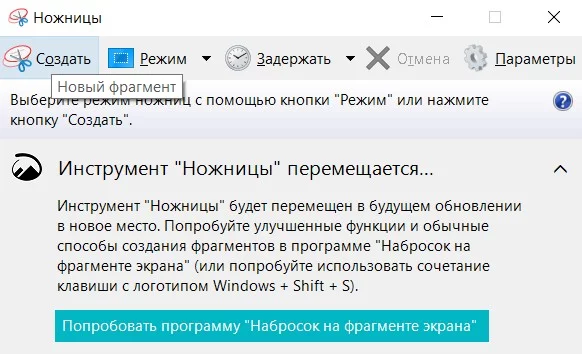
- Press the «Start» key, then go to the «All apps» tab, and in the drop-down menu, select «Standard». Now open «Snipping Tool».
- In the upper right corner of the window that opens, press the «New» button.
- Use the mouse to select the necessary area on the screen.
- Click on the «Save Snip» button, which is also depicted as a floppy disk.
- Choose a folder and press «Save».
Snip & Sketch
In Windows 10, there's another tool for working with screenshots — «Snip & Sketch». To take a screenshot using this program, do the following:
- Open the «Start» menu.
- Find «Snip & Sketch» in the list of programs and open it.
- In the window, press the «New» button.
- Select the type of screenshot you want to get: rectangular snip, free-form snip, or full-screen capture.
- Choose the screen area and take the screenshot.
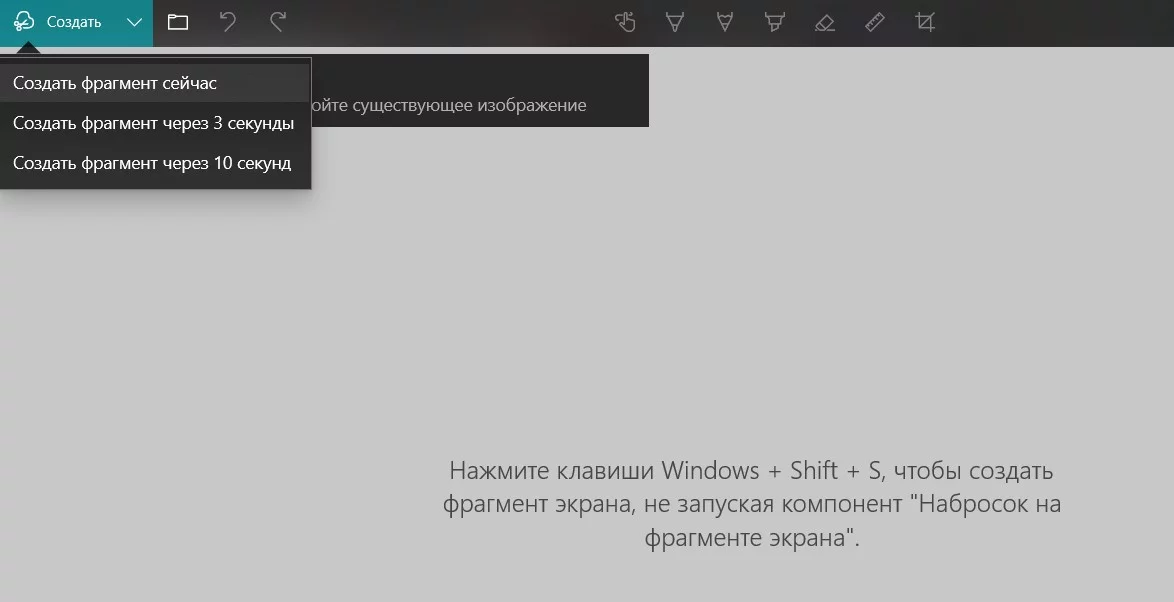
The program is easy to use, but its functionality is much richer than that of the Snipping Tool. For example, screenshots can be edited and uploaded to the cloud. Moreover, in the «Snip & Sketch» application, you can take a screenshot with a delay by setting a timer.
Using Third-Party Programs
In addition to the standard Windows tools, you can also use third-party programs to take screenshots, of which there are a vast number available. We will mention just a few of them.
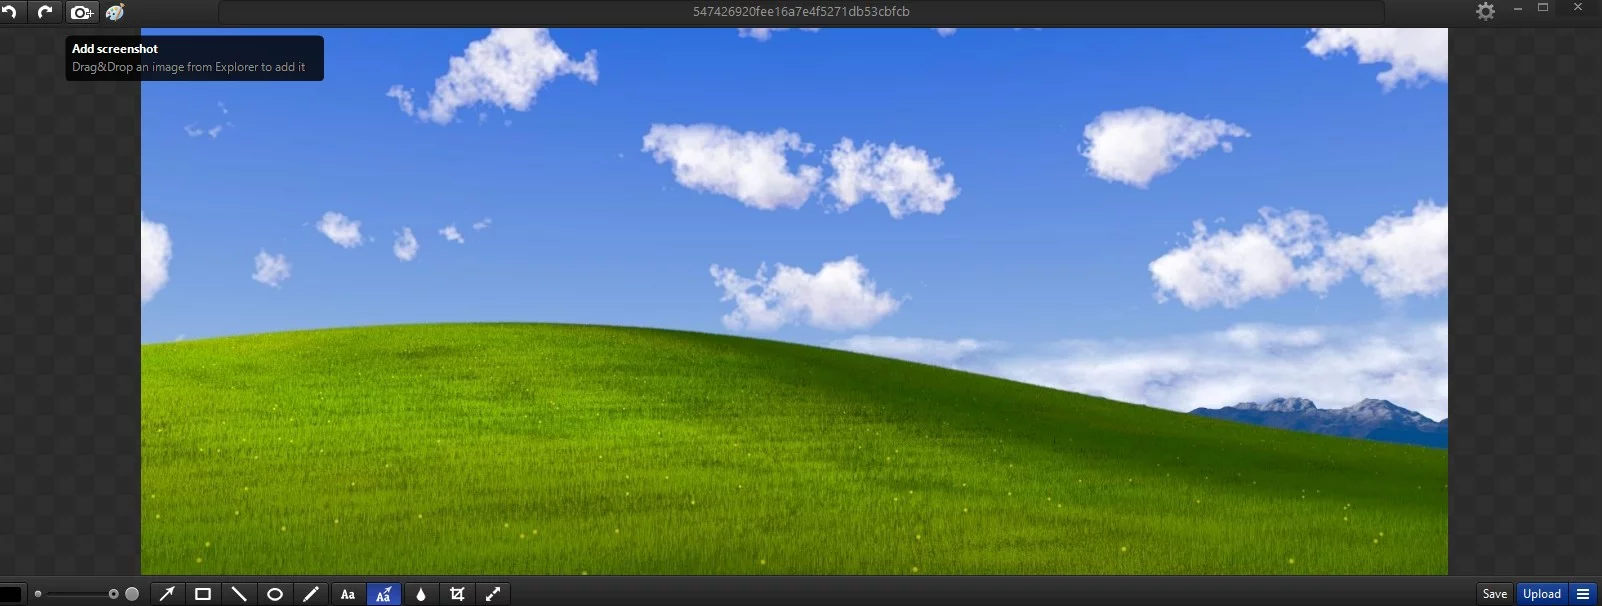
Monosnap is a free and user-friendly program for taking screenshots. Due to its focus on «cloud» services, the app allows you to quickly send the captured image via social networks or upload the picture to a server and share the link. Moreover, Monosnap enables you to add notes to the screenshots and edit the images.
- Go to the official Monosnap website and register.
- Click Download and save the installation file to your computer.
- Run the file and install the program.
Apart from Monosnap, there are many other programs with similar functionalities, such as Joxi, ScreenCapture, Lightshot, or ScreenHunter. Each application has a website from which you can download the installation file.
***
As we mentioned at the beginning, taking a screenshot is a fairly simple task that absolutely anyone can handle.
-
How to Have a Romance With Every Companion in Baldur's Gate 3
-
Where to find hellish ore for Karlach in the quest «The Hellion's Heart» in Baldur's Gate 3
-
How to Save the Gnome Wulbren and the Tieflings in Baldur's Gate 3
-
How to Open the Gilded Chest in the Owlbear Cave in Baldur's Gate 3 — Guide
-
How to Save and Get the Owlbear Cub in Baldur's Gate 3
-
How to Disable Steam Overlay and Increase FPS in Games
-
Where to Find All Iconic and Legendary Weapons in Cyberpunk 2077: Phantom Liberty
-
How to Increase Your Relationship with Johnny Silverhand to 70% in Cyberpunk 2077
-
Cars in Cyberpunk 2077: Where to Find the Best and Fastest Cars in the Game
-
Legendary Animals in Red Dead Redemption 2: How and Where to Find Them
-
Riddles, Puzzles, and Secrets of Fontaine in Genshin Impact
-
Dragon's Dogma 2: All Bugs, Known Glitches and Problem Solutions
-
How to Permanently Disable Updates in Windows 10, Windows 11, and Stop Background Application Downloads
-
How to Get the Best Horse in Red Dead Redemption 2
-
Where to Find or Buy Cor Lapis in Genshin Impact: Why You Need It
-
A Beggar's Tale in Dragon's Dogma 2: How to Start and Who to Give the Garment To
-
How to Upgrade Your Camp in Red Dead Redemption 2: Boost Morale, Increase Satchel and Food Supplies
-
How to Check CPU Temperature in Windows 10 and Windows 11
-
Sons of the Forest Walkthrough: How to Find All Keycards and Ancient Armor
-
All actors in Alone in the Dark (2024): who played Edward Carnby, Emily Hartwood, and others