V Rising Server Guide: How to Create, Configure and Delete Your Own Server

V Rising is an isometric survival game dedicated to vampires that has become incredibly popular in a short amount of time. If you want to use cheats and personally manage certain aspects of the game, you will need administrator rights, which only the creators of the server have. In this guide, we will tell you how to set up your own server in V Rising.
How to Choose a Dedicated Server
There are three different ways to set up a dedicated V Rising server:
- Rent a server from GPortal (paid).
- Set up a server using SteamCMD (free).
- Set up a server from Steam itself (free).
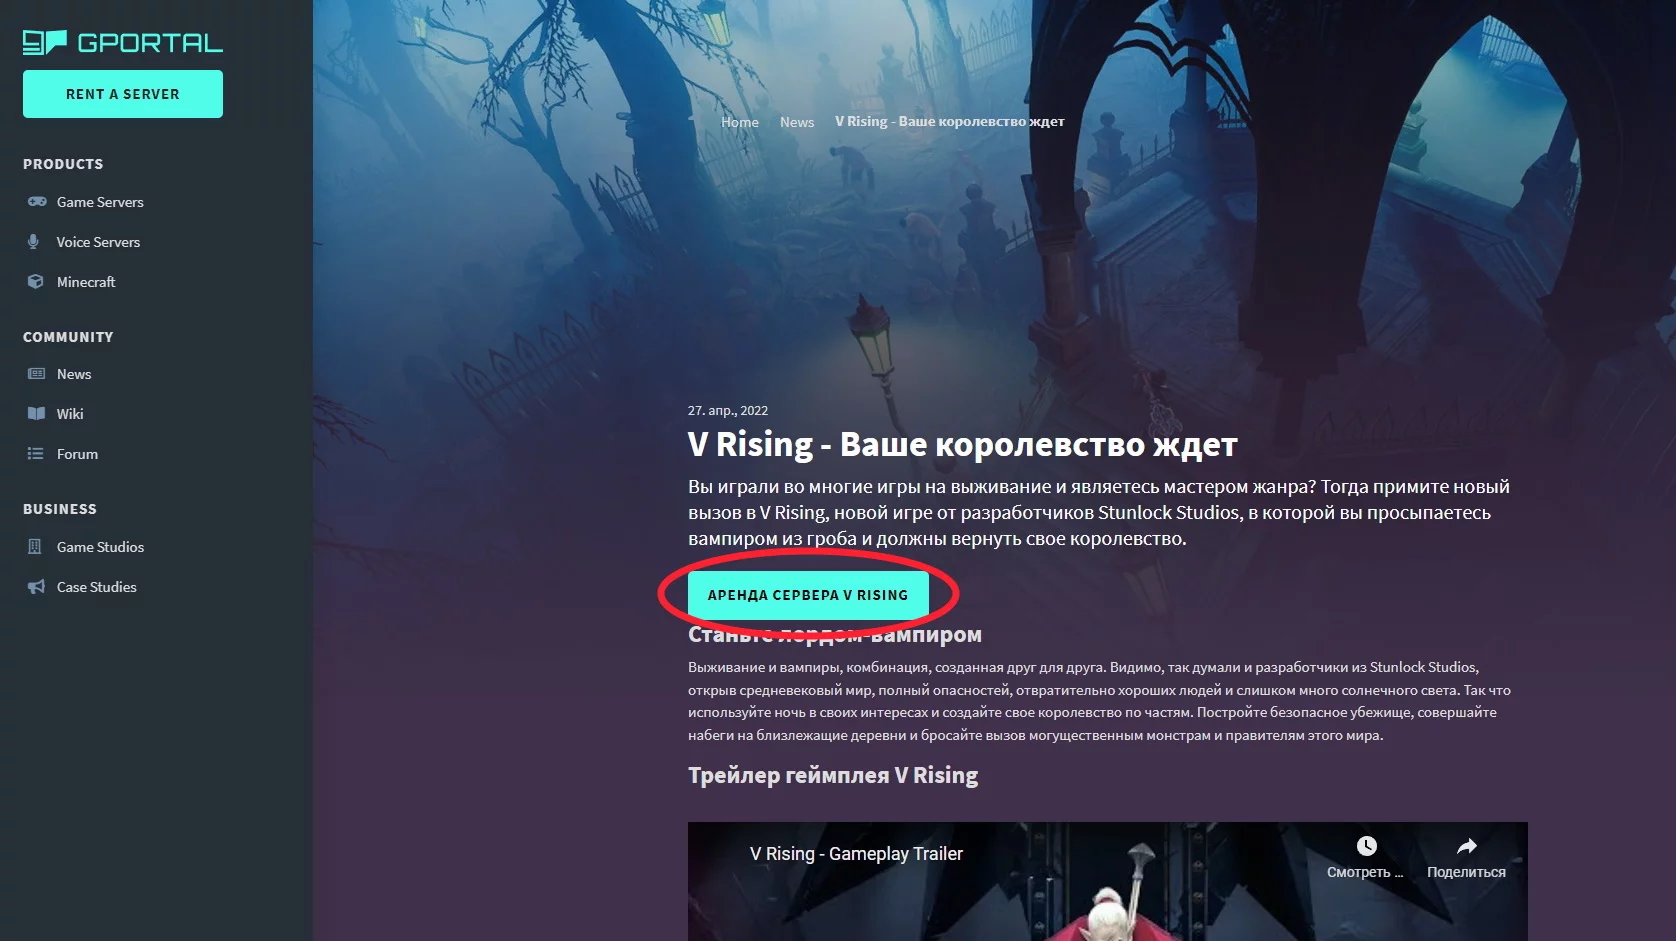
How to Rent a Server from GPortal
This option is suitable for those who are willing to pay for server use. Simply go to the section related to V Rising on GPortal, then choose the server that suits you best or create your own configuration. The advantages of GPortal include ease of use and high performance.
How to Set Up a Server Using SteamCMD
Using Steam CMD is a popular way among players to host their own dedicated servers. The action algorithm is simple:
- Download SteamCMD.
- Extract the contents of the ZIP archive into a new folder and rename it to steamcmd.
- Run steamcmd.exe in the folder and wait for the installation process to finish.
- Enter login anonymous in the opened window and press Enter. Wait for SteamCMD to download the data.
- Enter App_update 1829350 in the window and press Enter. Wait for the server files to download.
- After the process is complete, enter exit and press Enter.
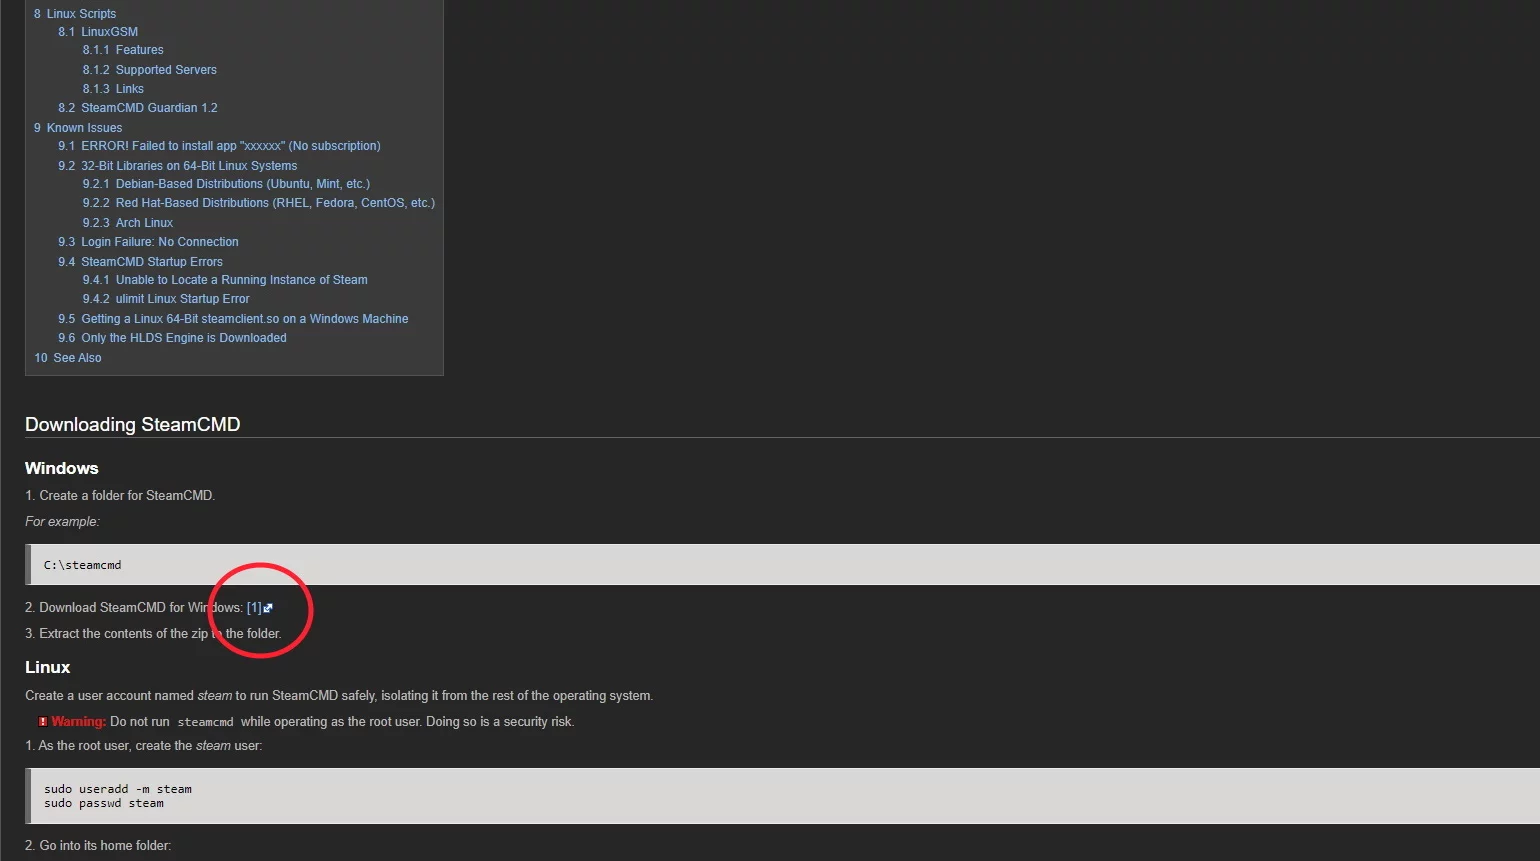
Your server files will be located in the folder located at steamapps\common\VRising\DedicatedServer\steamcmd.
Set Up a Server from Steam Itself
There is another way to create your own server, without using Steam CMD.
- Open the Steam library and enter V Rising Dedicated Server in the search bar.
- Install the V Rising Dedicated Server tool as a regular game on Steam.
- Go to the V Rising Dedicated Server window in the library, then select Manage, and then Browse Local Files.
In both this and the previous method, you should see a folder with your server files. It will be needed for further configuration.

How to Configure Your Server Settings
Navigate to your server folder. Right-click on the file start_server_example.bat and select Edit. Immediately go to the last line and make the following adjustments:
- Add your server name in quotes after the word -serverName. This name will appear in the V Rising server list in the game itself.
- Specify the save name in quotes after -saveName. This name will appear in your save files outside the game.
- Save the changes and close the file.

Then go to the folder located at VRisingServer_Data\StreamingAssets\Settings. Here are four important files:
- adminlist.txt. Add the names of those players who will be administrators on your server.
- banlist.txt. In this file, you can specify the names of players who will not be able to join your server.
- ServerHostSettings.json. Edit this file to change the server settings. First of all, replace the words Name and SaveName with the server name and save file you specified earlier in the file start_server_example.bat. If desired, you can add a password and a brief description of your server. In addition, you need to specify numbers next to the words Port and QueryPort. They will be needed in the future.
- ServerGameSettings.json. Here are set various game settings, which we will talk about separately below.
List of game settings:
- GameModeType: choice between PvP and PvE modes.
- CanLootEnemyContainers: if you set this to true, players will be able to loot each other's containers.
- BloodBoundEquipment: setting this to true will allow players to keep all items after death.
- ClanSize: determines the maximum number of players in a clan.
- SunDamageModifier: determines the damage dealt to players by sunlight. The default is 1.
- CastleDecayRateModifier: you can set the rate at which the castle heart decays.
- DayDurationInSeconds: setting the time for the day and night cycle (in seconds). The default is 1080.
- CastleLimit: this parameter indicates how many castle hearts are available to each player. The default is 2.
- VSPlayerWeekdayTime and VSPlayerWeekendTime: you can specify the time of day when players can attack each other on PvP servers.
- VSCastleWeekdayTime and VSCastleWeekendTime: the ability to set the time of day when players can raid each other's castles on PvP servers.

How to Start and Shut Down a V Rising Server
After finishing the setup, you can start the server. To do this, click on the file start_server_example.bat. A black window with a couple of lines of text should appear. This means your server is running. To shut down the server, hover the cursor over the black field and press the key combination Ctrl+C. You will be prompted to end the work. To confirm, press Enter or Y.
How to Make a Private V Rising Server
If you want to play with friends only, you need to create a private server. Start by following all the previous steps mentioned above. Join your server, create a new character, then exit the game and completely shut down the server.
The next steps are as follows:
- Go to your save folder, located at save-data\Saves\v1\[your server's save name]. Delete all files except for SessionId.json.
- In the Windows Explorer address bar, enter %Appdata%\..\LocalLow\Stunlock Studios\VRising\Saves\v1. Here are all your saves.
- Select the save that will be on the private server. Copy the contents of this folder and paste it into save-data\Saves\v1\[your server's save name], where you deleted all files.
- Again, enter in the Windows Explorer address bar %Appdata%\..\LocalLow\Stunlock Studios\VRising\Saves\v1. Copy the files ServerGameSettings.json and ServerHostSettings.json.
- Navigate to %Appdata%\..\LocalLow\Stunlock Studios\VRisingServer and paste these files.

After that, start the server and the game itself. You will be able to continue from where you left off last time, but now on a private server.
How to Configure Port Forwarding for Your V Rising Server and Allow It Through the Firewall
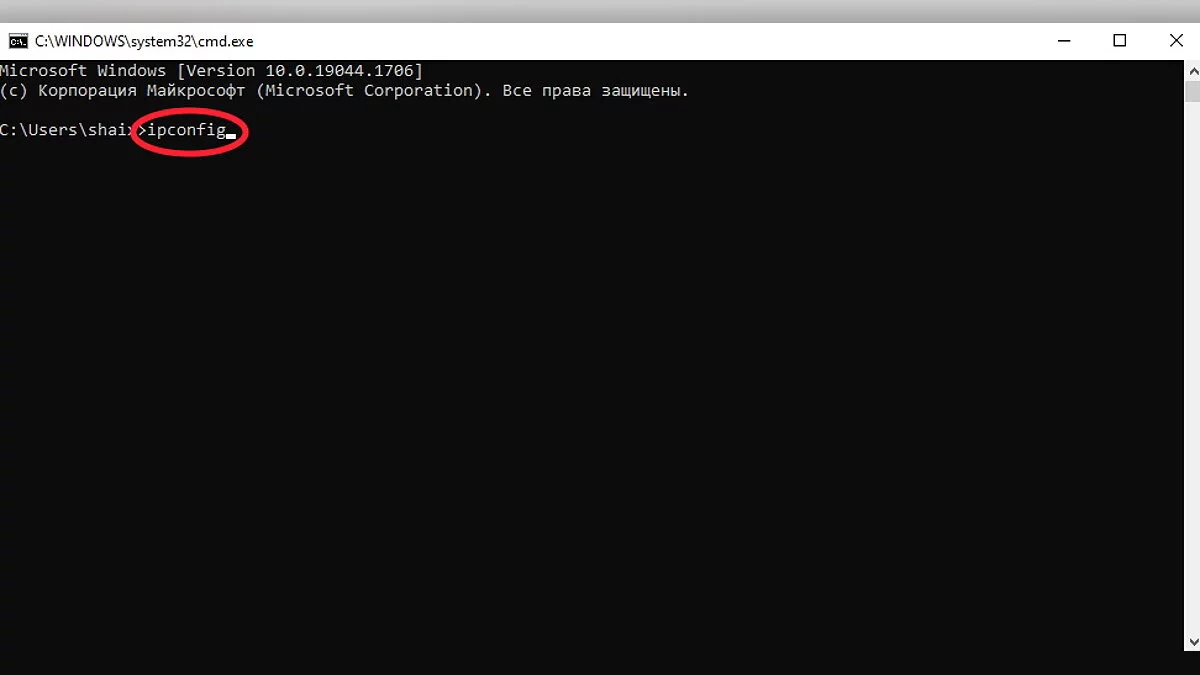
First, you need to set up port forwarding on your router. To do this, you need to find out the internal IP address. It's done as follows:
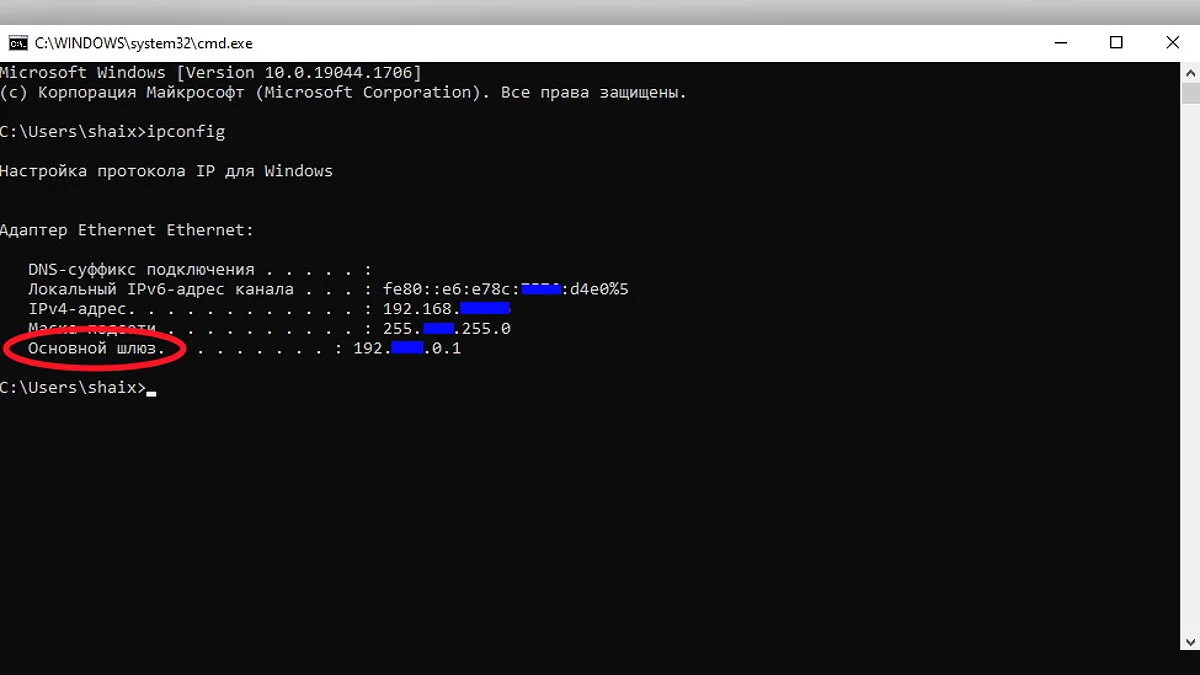
- Press the Start+R key combination. Enter the command cmd and press Enter.
- In the window that opens, enter ipconfig and press Enter again.
- The string of numbers next to the words Default Gateway is your IP address. Write it down or copy it.

Port Forwarding for Your Server
After that, enter the IP address into your browser's search bar. Next to the lines Port and QueryPort, you need to enter the numbers you specified in the ServerHostSettings.json file.
If you need the IPv4 address, you can find it in the same place where the IP address is listed.
Getting Through the Firewall
This procedure is necessary so that other players can connect to your server.
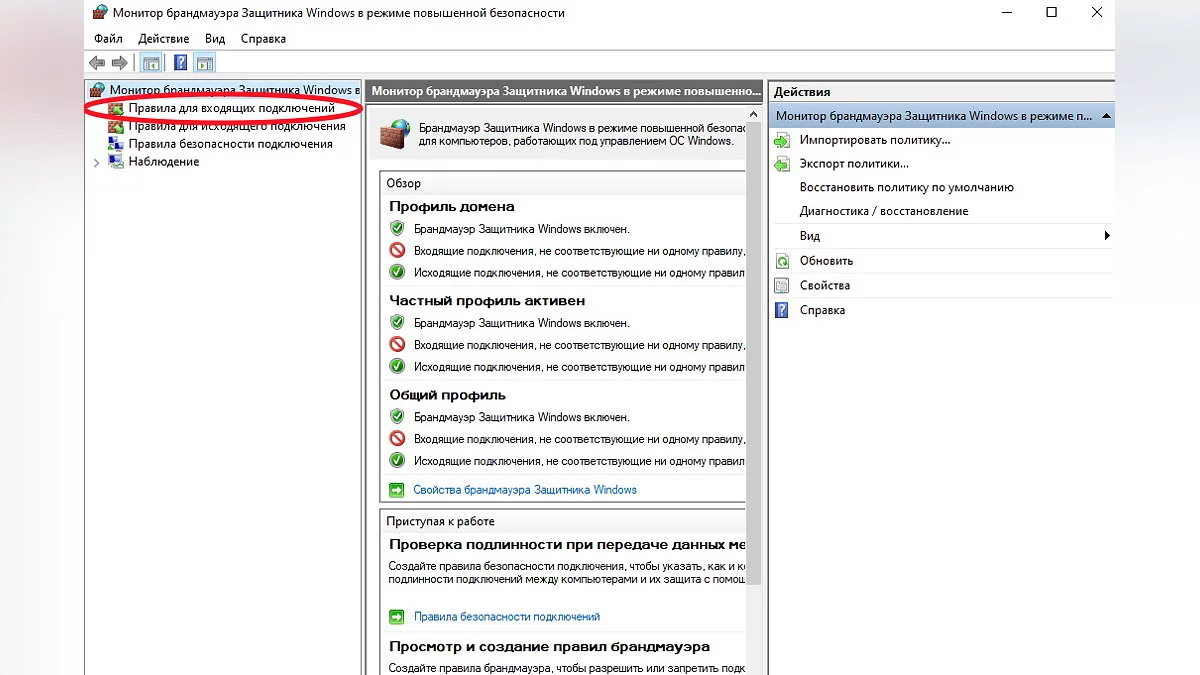
- Press the Start+R key combination, then enter the command wf.msc.
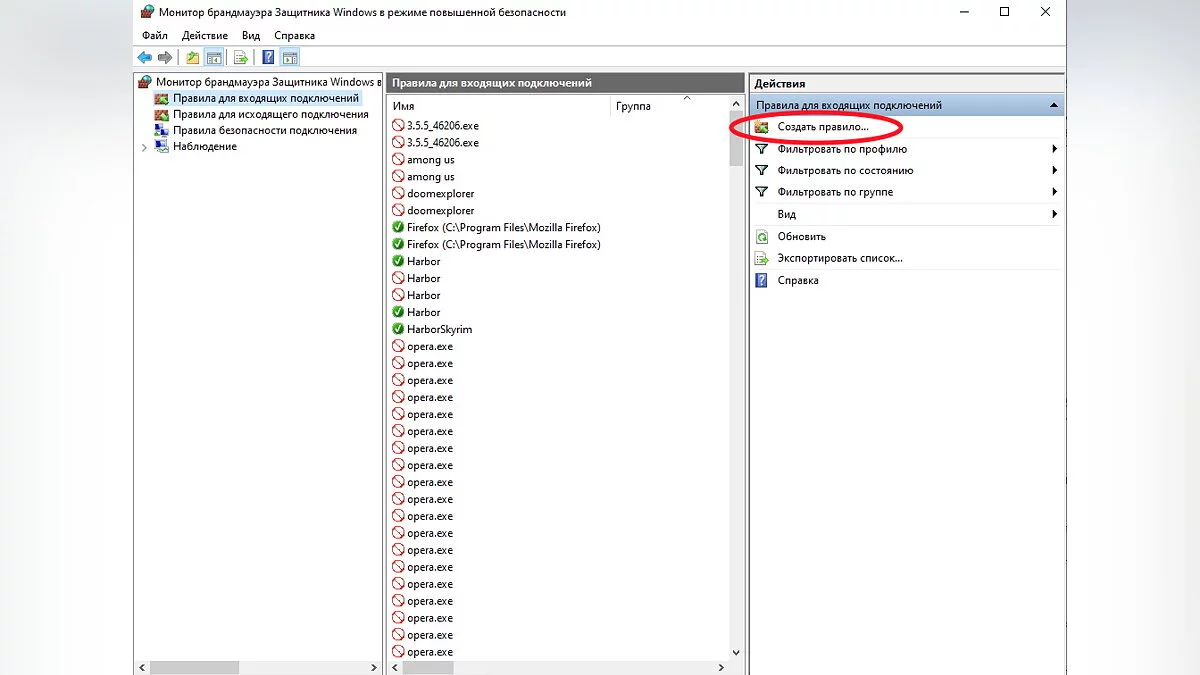
- In the settings, find Inbound Rules and select New Rule.
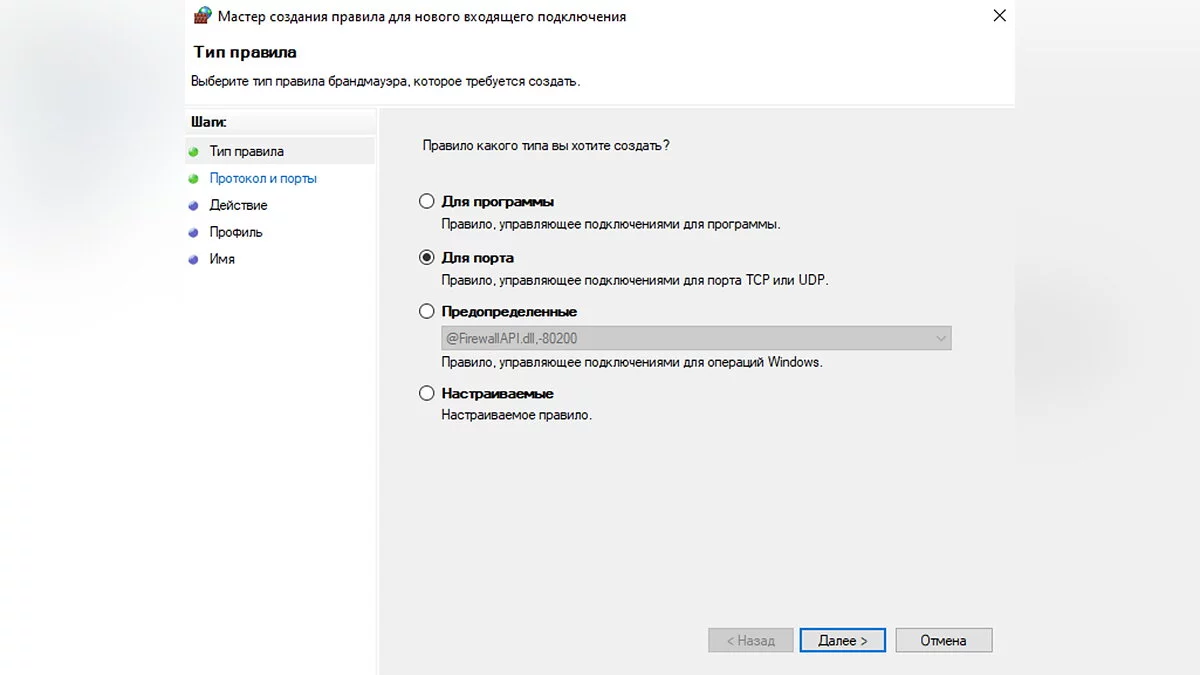
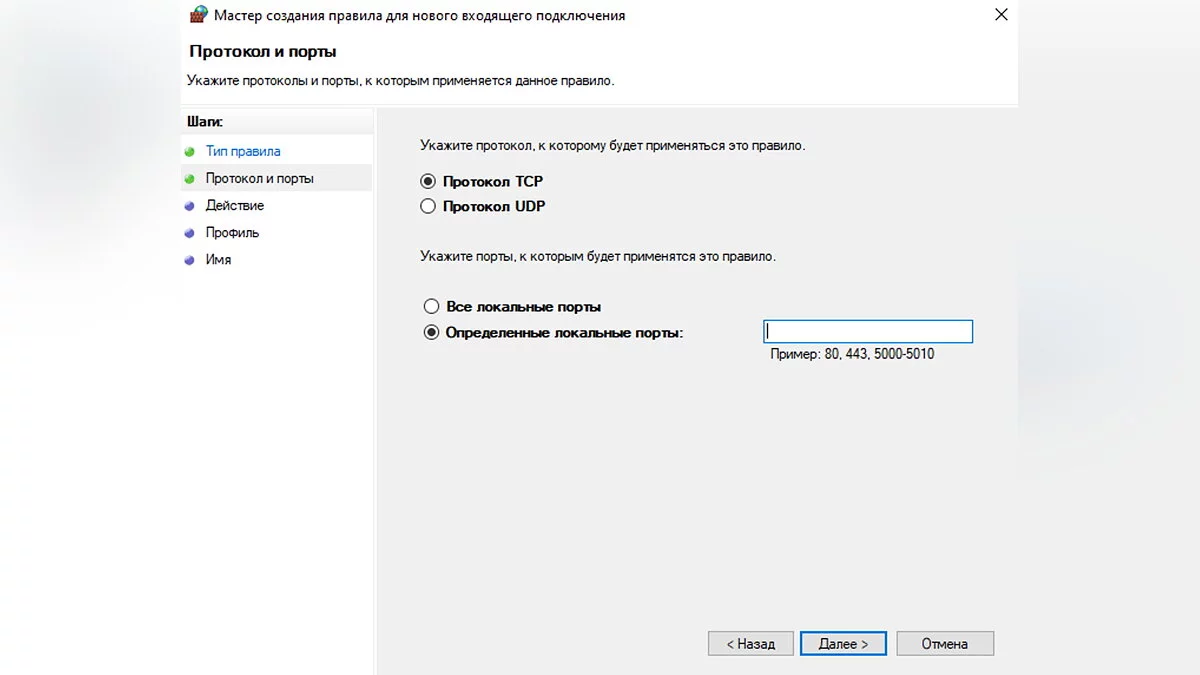
- Choose Port, then TCP Protocol, and in the Specific local ports line enter the two required ports (Port and QueryPort) separated by a comma.
- Click on Allow the Connection, check the appropriate boxes, and give the rule a name, for example, V Rising.
- Repeat the procedure starting from step 3, but instead of TCP Protocol choose UDP Protocol.

How to Join a Private Server
- Start the game.
- Select Play, then Online Play, Find Servers, and Display all Servers & Settings.
- Enter the name of your server in the search bar. If it doesn't appear, carefully check the filter on the right. Perhaps some settings are incorrect.
- Connect to the game.
How to Play V Rising in Offline Mode
After the update 0.5.41448, players got the ability to play V Rising in single-player mode. The algorithm for going offline is as follows:
- Open Steam. Click the Steam button in the upper left corner of the screen and select Go Offline.
- Start V Rising.
- Select Play, then Private Game, and then check the box for LAN server. Then start the game.
If you want to join an offline LAN server, use the algorithm described in the section How to Join a Private Server. But when you get to the direct connection, before entering the IP address, check the box next to LAN Server.
Other guides
- Crafting Guide in V Rising: How to Create, Repair, and Upgrade Weapons and Gear
- Servants Guide in V Rising: Why You Need Servants and How to Manage Them
- Blood in V Rising: How to Change Quality and Blood Type
- How to Get Leather and Build a Tannery in V Rising
- Handwerksanleitung in V Rising: Wie man Waffen und Ausrüstung erstellt, repariert und aufrüstet
- Leitfaden für Diener in V Rising: Warum Sie Diener benötigen und wie Sie sie verwalten können
- Wie man Leder bekommt und eine Gerberei in V Rising baut