Split Fiction: Final Down — Chapter 4 Walkthrough
The fourth story chapter in the game Split Fiction tells one of Mio's stories about warriors trying to destroy a factory producing toxic substances. In this guide, you will find a detailed walkthrough of all the chapter levels, as well as tips and advice on eliminating bosses and finding additional missions.
Infiltration
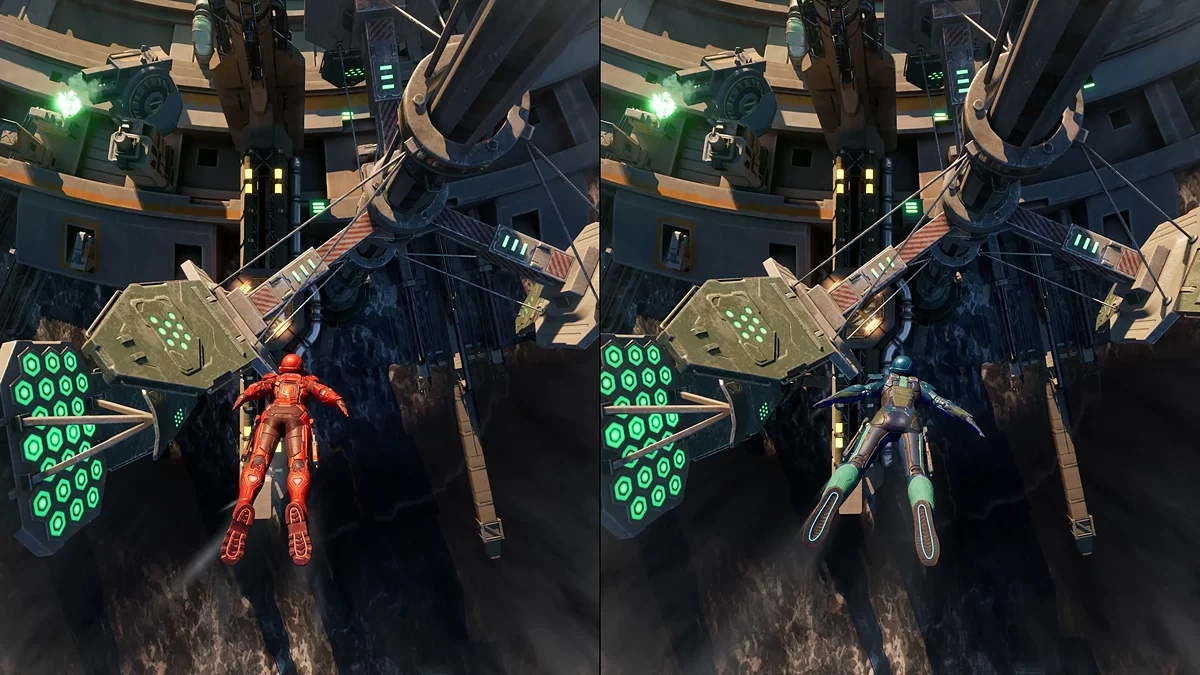
The level begins with the main characters jumping out of a spaceship and heading towards the toxin-producing factory. You will encounter various obstacles along the way: rotating platforms, metal debris, and others. Use the stick or keyboard controls to avoid them. Eventually, you will find yourself underwater. Interact with the gateway to surface.
Mio and Zoe have blasters whose shots match the color of their equipment. Some puzzles will be based on this, which we will discuss later. Once you are on the platform, you will see large bright buttons in blue and red colors. Shoot them with the corresponding blaster to get rid of the obstacle. Note that the obstacles will return to their places over time.
After a short cutscene, destroy the drones hovering over the toxin to cross to the other side. A little further awaits the same obstacle, but this time you should avoid the toxic liquid pouring from above.
Use the rotating platforms to climb higher and open one of the two passages. You can grab and climb into a pipe. Here you will first encounter turrets — these are simple opponents, but they will be upgraded in the future. Just shoot them with blasters.
Upon reaching the large hall, activate the rotating platform in front of you, hook onto it with hooks, and follow it to the platform in front of the pipe with toxin. Jump onto the lift, then onto the rotating platform. Pay attention to the obstacles in the form of pipes, as well as the only turret here. To lower the next lift, you will have to shoot the appearing marks alternately.
In the next room, Zoe destroys a capsule with red energy, and Mio sends it into the barrier. This is preparation for upgrading your weapon, where each player will have to destroy barriers of their color. Note that the hole in the energy barrier gradually closes. Repeat the same actions in the second chamber and interact with the console.
How to Defeat the Robot
Descending into the arena, a new opponent will appear before you. First, just shoot at him, and when the enemy has slightly more than half of his health left, he will activate a shield. You can get rid of the robot's defense by luring him closer to the corresponding capsule (note the color of the shield), then sending an energy sphere into it.
After ascending in the lift, activate the console and watch the cutscene with weapon upgrades.
Gun Upgrade
In addition to the standard blaster, players will have an alternative attack: shoot at the barriers to secure the projectile, then press the alternative attack button again to detonate it. This will temporarily open a passage. Use this principle to move forward and jump into the chamber below.
Upon opening the next door, you will encounter several machine-gun robots with energy armor. But now you can destroy it yourself using the alternative attack, which is necessary to defeat all the enemies. Repeat the actions in the next chamber, after which you will need to reach the outer door, avoiding mines.
Mines appear in a group once at a certain time interval. We recommend staying closer to each other to timely break the barrier in the floor and destroy all explosive devices at once. Doing this, move forward and shoot the buttons.
When the device with mines is destroyed, turn right and run along the walls, then jump onto the flying platforms. With their help, you will have to jump over obstacles, timely opening passages in the barriers in front of you, and also fight mechanical enemies. Try not to get too close to your buddy, as you will knock each other down.
Stop in front of the monorail and coordinate actions with your partner: the entire next path you will need to timely open passages for each other. If one player rushes ahead, the second won't be able to help, and the segment will have to be started over. Also, we advise against detonating projectiles too early, as the hole in the barrier gradually closes.
Additional Mission. Kites
As soon as you pass the monorail segment, you will find yourself in a toxin manufacturing workshop. This will begin the "Toxic Tumbers" section, but before completing it, we recommend proceeding further down the tunnel to discover an additional mission — you will see a small island standing out from the rest of the map.
This mission doesn't require much description, as your goal here is to run forward, hook onto highlighted objects, and fly through large rings that give speed boosts. Once you reach the finish, the mission will be completed.
Toxic Tumbers
After completing the optional mission, return through the tunnel and open the passage with blasters to interact with the console. At this point, familiar robots will start appearing in the arena, but fighting them is not necessary: instead, destroy the barrier on the floor along their path, so the enemies fall down and break.
Open the next door and turn the camera in any direction. You should run along the wall, removing obstacles along the way with blasters. The first player must open the metal partition, while the partner makes a hole in the energy barrier.
You will enter a large room with a toxin sprayer, which you can hide from under the energy domes. Wait until the sprayer moves further away, then continue moving. Note that the toxin changes the color of all barriers to the opposite, so it's worth sticking together.
After the cutscene, stop at the edge of the platform. Zoe opens the blue barrier, after which Mio immediately shoots at the second one and also opens it. There is enough time for both characters to cross to the opposite side.
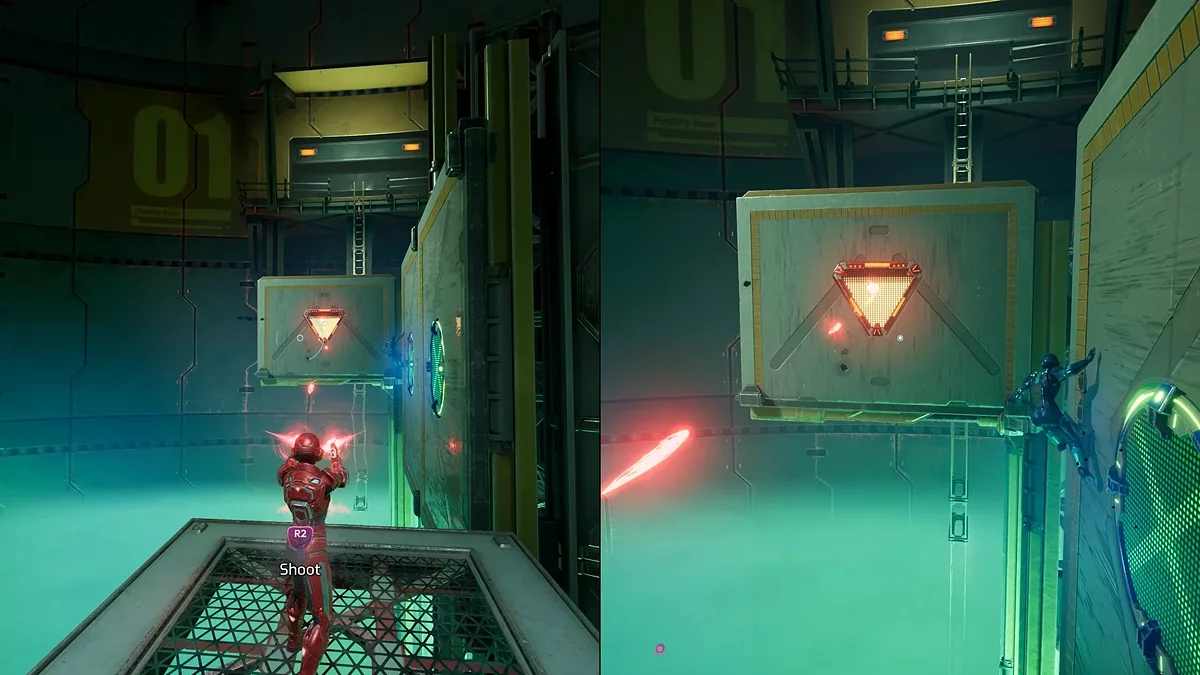
When you find yourself in front of large gates with blue and red barriers, release an alternative attack projectile between them at the yellow marker, then simultaneously detonate them.
Jump onto the moving platforms on the left and cross to the opposite side. This way, you will find yourself outside the building, but still inside the complex.
Factory Entrance
After the video clip, two flying robots will appear in front of the balcony. They have no protection, so just attack them with blasters. Descend on the elevator below and prepare to timely clear the path of obstacles, then climb onto the metal rods on the left. Note that some rods have green objects moving on them, which will destroy the hero upon contact. Move first to the left part, climb higher, then move to the right part to exit.
Opening the next door, you will find yourself on a giant pipe with knives moving at certain intervals. A double jump won't suffice here — you'll have to use the platforms hovering above the ground to hook on.
You will see several toxin sprayer platforms. The easiest way to cross here is one at a time: one player shoots the buttons of their color while the other overcomes the obstacle. Then they switch, as the gamer on the opposite side can also see these buttons.
Destroy the cover on the pipe and hook onto the drones, after which a brief flight down awaits. Here the red player jumps onto the trampoline, and the blue one activates it with the blaster. Mio interacts with the terminal and opens the passage for Zoe. Now you need to help each other to move further.
To do this, the blue player attaches their color projectile to the large toxin tanks moving towards the red player. The first gamer must timely open the red barrier so that the projectile ends up on their side. If this is not done, the blue player's projectile will simply be destroyed. Then the blue player detonates their projectile near the corresponding barrier. Once on the opposite side, you can open the passage for your partner by destroying the red barrier.
Next is a small puzzle to be completed synchronously: lift two counterweights on the right and left, attach the projectile to the yellow mark and simultaneously detonate them. Devices will appear, allowing you to fly higher and reach the desired platform.
Test Chamber. How to Defeat the Factory Warden Boss
First, you need to activate the battle with this opponent. On the right and left, you see shielded chambers of red and blue colors. Help each other climb inside and activate the console. As soon as both players do this, the enemy will appear.
First Phase
In the first phase, shoot the robot's legs: first with one color, then with two for complete destruction. At this stage, the opponent uses a not too wide range of attacks. He will constantly try to hit the nearest player with his paw, and after destroying the next tentacle, small flying devices with toxin will fly out of the giant. As the battle progresses, don't forget to use the hook for dodging.
When about half of the legs are destroyed, the robot will introduce a new attack: he will start spinning his head, scattering explosive projectiles. In addition, now after each destroyed tentacle, the enemy will start jumping, and upon landing, will release a fire ring that expands across the arena over time.
Another new attack will be fire spewing from the mouth — this is a very treacherous move that can burn your hero in seconds. If you notice that the enemy's head in this state is turning towards you, use the hook and escape as quickly as possible.
Second Phase
When the first phase of the battle ends, two huge buttons of red and blue colors will attach to its back, and a pool of toxin will appear in the center of the arena.
The main, but not the only attack of the giant, will be spraying poison across the arena. Player hits in toxic puddles are not dangerous, but immediately after spraying the poison, the enemy will start igniting it with fire. So we advise using the hook more often.
Your task in this segment of the battle is to use devices that allow you to toss your partner, who in turn will deal damage to the giant by shooting the buttons on its back. One cannot cope here alone, so you will have to switch platforms alternately to destroy the device.
Third Phase
Only in the third phase will the opponent acquire a health bar and a name. As you have already understood, to defeat the enemy, you simply need to attack the robot's body with a regular blaster. However, you will first have to knock down the constantly appearing energy barrier. As usual, it can be of several colors.
The opponent will often close in on one of the characters and spray poison on them. Don't forget about the hook, which will help you break the distance with the boss.
When you manage to temporarily disable the robot, it will fall into the arena. Climb onto its body and open the hatch to deal more damage.
After doing this, the arena will be destroyed, and instead, various objects will float in the toxin, which you need to move across. Pay attention to the spotlight: if it shines on platforms near you, it's best to move to the opposite side, as the boss will soon activate his main attack.
To destroy the enemy, continue to knock down his energy shield and deal damage. Soon he will land on one of the platforms, and you can repeat the hatch trick and deal a lot of damage.
If you did everything correctly, in agony, the boss will try to fly away but will end up on a conveyor that will lead him to a chamber with a press. Shoot the buttons to deal damage to him and finally destroy him.
Move to the next location, shoot the platforms so that they form two walls, which you can run across. Do not rush to follow the plot further, because at this moment you can find a passage to an optional story.
Additional Quest. Moon Market
This story will become available immediately after destroying the Factory Warden boss. In the large hall, you can observe the main path — blue and red passages on the right, as well as locked gates a bit to the left. Shoot the buttons to open them and reach the story.
Once in Zoe's story, move forward and get into the boat to arrive at the Moon Market. There are many additional activities for fun and references to various characters and games, so you may not hurry to complete the main quest. The main task is to find the cats, which can be used to open the gates in the market.
First Cat
If you turn right from the main entrance to the market into the first passage. Pick up the flashlights (it doesn't matter which color you take), then approach the cliff and jump across the coffins to the opposite side.
On the left, you will see a huge cat: the first gamer needs to interact with the harp and press the keys appearing on the screen in time while the partner reaches the cat.
Second Cat
Use the second passage to the right of the main entrance to reach the second cat. As soon as it notices you, it will hide behind a massive door. You can open it by drawing a cat on the ground using plants. The main thing is that all lines match the color depicted on that very door. Interact with the giant mushroom under which the cat is hiding.
Returning the same way won't work: find a cliff with water spheres slightly to the right. Use them to return.
Third Cat
The last cat is hiding from you in a small house. From the main entrance, run into the only passage on the left and move across the platforms to the building. When you enter, the cat will run to a large house on chicken legs.
Stand on the edge of the platform and wait for the flying books to appear in front of you. Grab onto them and climb onto the roof of the building, where the cat is hiding in a chest.
Run and Gun
After completing the additional activity, return to the fork and look around. There are two platforms here that you need to activate for each other to cross. However, they will be active for a short time, so we recommend not delaying. Jump down and shoot the large buttons. This will activate the lift.
While in the cage, pay attention to the press in front of you. If you don't turn it off in time, the heroes will be crushed. To do this, shoot the buttons above the passages.
This level is called "Run and Gun" for a reason. One of the first segments of the level will be sliding down, where you will have to dodge obstacles and at the end open a passage for your friend on the upper level. Now take turns opening passages and try not to get caught under the press, poisonous liquid, and other obstacles along the way.
At this point, the game will turn into a 2D platformer, and you will have to solve simple puzzles to progress further in the story. Shoot the buttons, then destroy two devices with toxin. When you reach the rotating platform, do not touch it, as you will die. On the lower level, activate two more buttons, this will allow the platform to descend.
Get rid of the turret and approach the large gates. You need to attach your shells to the moving device, then activate the buttons on the right and left. When the mechanism comes into action and passes by the red and then blue barriers, detonate the shell of your color.
A little further down, open the red sphere and climb inside. You can stay here for an unlimited amount of time, so there's no need to rush.
Destroy the turret and head to the portals. Use blasters to shoot into the portal and press two buttons. Note that at this moment, drones will start appearing from this and the neighboring teleport, which will also need to be destroyed.
Soon you will reach a small arena where familiar robots with energy shields will appear. There will only be a few enemies, so you should deal with them quickly.
In the next segment, shoot the platforms in the poisonous liquid. After a while, they will begin to lower, so try to move quickly or shoot the platform you're on again.
Quickly destroy the devices with lasers above your players, eliminate several robots, and use portals to move to the opposite side.
This will bring you near a platform where you'll need to work a bit to progress further. One player jumps into the portal and stays on the yellow platform for a short time. This time is used by the partner to move the platform with the portals to the right.
When the platform under the first player's feet disappears, they will again enter the teleport, and upon exiting the other side, use a double jump and dash — this time should be used by the friend to move the platform to the right by two sections. Thus, the character will jump into the portal and immediately exit onto the platform. Repeat all actions again for your partner.
How to Defeat the Boss The Overseer
First Phase
Main attacks of the boss:
- Acidic Orbs: the enemy launches large acidic orbs at the heroes. They fly quite slowly, so they can be easily dodged;
- Mine: a huge mine appears in the arena, moving from side to side. Use a double jump and shoot it to explode;
- Drones: the boss releases two flying turrets with a protective barrier. Destroy the shield, then the drone. If one of the turrets descends, it will soon fly across the entire lower part of the arena, knocking characters down and dealing damage;
- Shielded Mine: differs from the standard mine only by the presence of an energy shield.
When the enemy has three-quarters of health remaining, it will begin to flood the arena with toxin. Use platforms and portals to climb higher as quickly as possible. Moreover, you will have to help each other — shoot the obstacles of your color.
Second Phase
Upon arriving at the new arena, you will view it from a second-person perspective, specifically through the boss's eyes, which is very rare and unusual in games. Your task here is to shoot the barrels in the arena, then interact with them, sending them back to the robot.
At first glance, the task is not difficult, but at some point, there will be many barrels, and each of them releases a pillar of fire, dealing damage to the characters. You can dodge the fire using a jump.
Third Phase
The enemy will start chasing your heroes, preemptively sending several fiery barrels. As in the previous arena, such items are color-coded and can only be destroyed by a specific character. We recommend switching with your partner: one destroys barrels of their color, while the other attacks the boss.
After this, the chase will continue. Dodge pipes using double jumps and avoid the laser from the robot's eyes. It's important to keep shooting the enemy — this way, you can deal more damage.
Fourth Phase
In the final battle, dodge falling scrap metal and shoot blasters at the mechanisms to close the gates on the right and left of the heroes. When the boss opens the gates again, avoid laser attacks from the robot's eyes and continue dealing damage.
Soaring Desperados
From this point on, you will have a new gadget — a jetpack. With its help, you can cover long distances in the air, but remember that the device's charge is not infinite. In the 2D segment, the charge can be tracked above the character. When the game returns to 3D, pay attention to the battery on the jetpack itself.
Additional Quest. Notebook
Before continuing with the storyline campaign, you can check out the floating platform to the left of the giant pipe and participate in an additional story. You can reach it using the recently acquired jetpack.
In this story, the author (Zoe) will write the plot right before your eyes, so the introductions will constantly change. Cross the bridge and overcome the chasm via clouds. When you receive swords, attack the appearing enemies on the right and left. Soon the author will replace the weapons with bows, and flying monsters will appear above the characters.
Reach the next bridge and stop before the giant cyclops. It will start asking questions — you can answer them, or you can simply spam arrows to destroy the enemy.
Now Mio transforms into a horse. Zoe climbs onto her friend's back and jumps onto a higher platform, where she can activate the lever and open the passage.
Next, you'll encounter some platforming levels. Climb up the pole, then jump to the island on the left and use a double jump and dash to get to the opposite side. When you try to jump onto a small island, the author will erase it and draw another one slightly higher. Keep climbing up, and as soon as you see a huge boulder, descend and hide behind cover.
Next, you'll have two mountain goats at your disposal, which you'll use to reach a cave. Jump on stalactites and stalagmites here until you find yourself in darkness.
When the light reappears, get rid of several flying enemies and choose one of the bosses you want to fight. It doesn't matter who you choose, as you'll have to see all of them in turn.
The tactic for fighting all opponents is the same: dodge attacks and shoot the enemy with a bow. Eventually, a handsome prince will appear, chained. To free him, make an accurate shot at the target. To complete the quest, reach the ship and watch the cutscene.
The Escape
After escaping the additional story back to the floating platform, use the jetpack and move to the huge pipe, and from there to the platform on the right. In front of it, you'll see another object with two buttons — fly up and synchronously activate them with blasters. This will give you a chance to catch your breath and replenish the energy of the gadget on your back.
A little further, you will see red and blue screens. Fly through them to replenish the jetpack's energy and accelerate forward. Use them, as well as the hook — this will help you get to the next area.
On a large platform, you will see several turrets. Right above them are two screens: you can either stay in the air and destroy enemies or land on the platform and shoot them from there. Soon flying drones will join the stationary turrets.
When there are no enemies left, look around and find the huge multicolored lock. Attach a blaster charge to the yellow point on the right and left, then shoot the buttons so the rod enters the structure. When both rods are inside, detonate the charge.
Inside, place the jetpacks on the stands and proceed forward. On the left, you will see a ventilation shaft that you can go through to enter a room with an optional quest — a kind of shooting gallery. To win, you need to shoot fighters of your color and score a total of at least 1000 points.
When you're ready, get in the elevator and watch an extended cutscene with a creature used to create the toxin.
For most of the next segment, you need to follow forward on a scooter, overcoming obstacles and dodging various hindrances. Don't forget that your transport can dive underwater and stay in that position for an unlimited amount of time.
System Fail Safe Mode
Completing the mission won't conclude the chapter, as Ryder will apply a new protocol. Now the heroes are bound together by an energy chain, just like gamers in the game Chained Together. But while in that project you can't move far from your partner, here a large gap will lead to the death of one of the friends.
Navigate along the only path and reach the button. One character climbs onto the platform in front of it, while the other stands on the button to raise the platform. At the top, you'll find a similar device. Wait for the slab to lower, then stand on it and lift your friend.
There won't be any particular difficulties reaching the next button: jump from platform to platform, then slide down and run along the walls. Once you reach the button, one player stands on it so the other can climb onto the platform and press a similar device. When this happens, the previous platform will rise higher.
The gamer below moves onto the slab without a button and waits for the friend to stand on the button. Now they need to jump a little early, as the platform will rise very quickly and there is a chance of not making it.
A bit more parkour and the game will switch to 2D mode. There won't be any particular difficulties in this segment until the very end. At the end, you need to act as synchronously as possible and reach the platforms with the buttons simultaneously. If you don't, the beam passing between the platforms will cut your bonds, and you'll have to start over.
Other guides
- Split Fiction Walkthrough Guide
- Split Fiction: Neon Revenge — Chapter 2 Walkthrough
- Split Fiction: Hopes of Spring — Chapter 3 Walkthrough
- Split Fiction: Rader Publishing — Chapter 1 Walkthrough
- Razdeljena fikcija: Upanja pomladi — Vodnik po 3. poglavju
- Fiction Divisée : Vengeance Néon — Guide du Chapitre 2
- Fiction Divisée : Rader Publishing — Guide du Chapitre 1