WARDOGS Mortar Guide: How to Build and Aim Using Map Coordinates
 Alexander Klingen
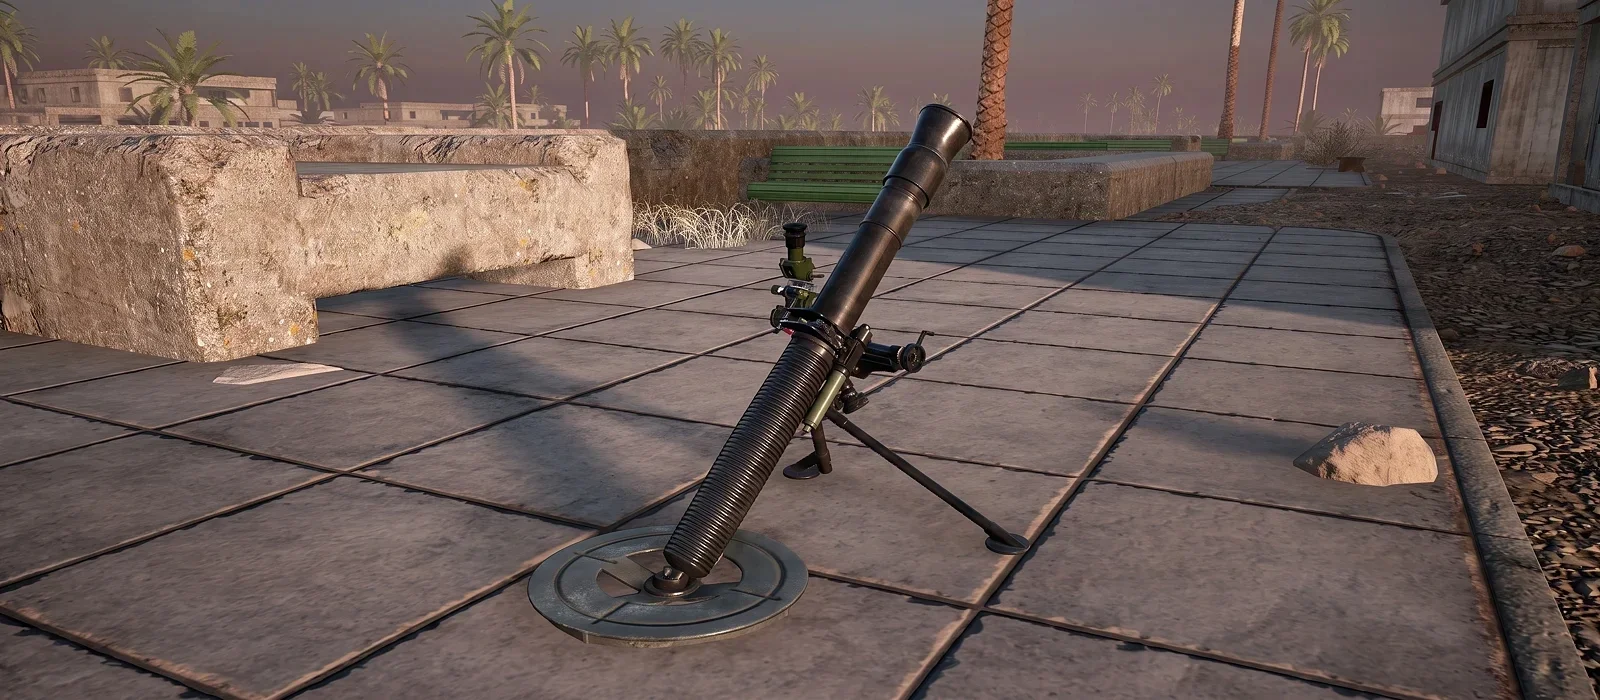
WARDOGS is a tactical shooter from BULKHEAD that entered Steam Early Access on PC in September 2026. One hundred players split across three teams fight over a central zone on destructible Eastern European maps, while money, logistics, and structures such as Forward Operating Bases, mortars, and towers matter just as much as gunplay. The L81 is the game's stationary mortar emplacement. In this guide, we'll explain how to build a mortar, aim it, and hit your target.
Quick Version: What You Need and How to Fire
The mortar can only be built with a Large Hammer and costs 150 Build Supplies. On level ground, its effective range is roughly 130-685 meters. The basic workflow for an accurate hit is simple: ping the target on the map, align the tube using the compass, set the range using RNG or map coordinates, fire one ranging round, correct your aim, then fire a barrage.
What You Need to Buy
You cannot build a mortar without a Large Hammer. The Medium and Small Hammers do not have this option. A Forward Operating Base weighs 6.5 kg and does not fit in the starter backpack, which catches many new players out.
- Large Hammer: unlocked at Support Level 8 for $75,000, after which each hammer costs $2,400. Only the Large Hammer can build the L81.
- Forward Operating Base (FOB): $7,500. This stores Build Supplies and Ammo Supplies and starts with 1,250 Build Supplies. For more on placing and fortifying one, see our WARDOGS FOB building guide.
- Large Backpack: $2,400, unlocked at Wardog Level 55. It has 24 slots, so the FOB fits inside.
- Ural: unlocked at Driver Level 3 for $35,000, after which each vehicle costs $5,000. It is sold by the Garage Vendor under Logistics.
- Build Supply Pallet: $400 for 1,800 Build Supplies. This is the cheapest way to transport building resources in the game.
- 2 Ammo Supply Pallets: each contains 1,800 Ammo Supplies. Delivering two pallets into the Hot Zone pays $2,500 for each one, or $5,000 total.
For self-defense, bring a rifle and a couple of magazines. Each mortar round consumes 75 Ammo Supplies from the FOB's stock. Mortar rounds are drawn from the FOB supply pool and do not need to be purchased separately.

Where to Place the Mortar
Around 600 meters from the target is ideal. According to current community firing tables, the L81's practical range on level ground is roughly 132-684 meters, which leaves you some room if the battle shifts.
- Dead zone. At very short range, mortar rounds will always fall short. You cannot use the mortar to hit enemies right outside your own walls.
- Level ground. On a slope, HESCO walls can leave gaps along the bottom.
- Cover. Hide the position behind a ridge, tree line, or buildings so the FOB cannot be seen from the road.
- Avoid unnecessary elevation. Placing the tube too high or putting a roof directly above it reduces the practical firing envelope and exposes the gunner's head to snipers.
- A FOB cannot be moved or rotated after placement, so bring everything you need on the first logistics run.
How to Build the Mortar Step by Step
Here's how to build a mortar position step by step.
Where to Place the Mortar and How to Protect It
How to set up the mortar position:
- Stand on level ground and place the FOB so its build radius covers the entire planned perimeter.
- Unload both Ammo Supply Pallets from the truck, then transfer the Build Supplies into the FOB.
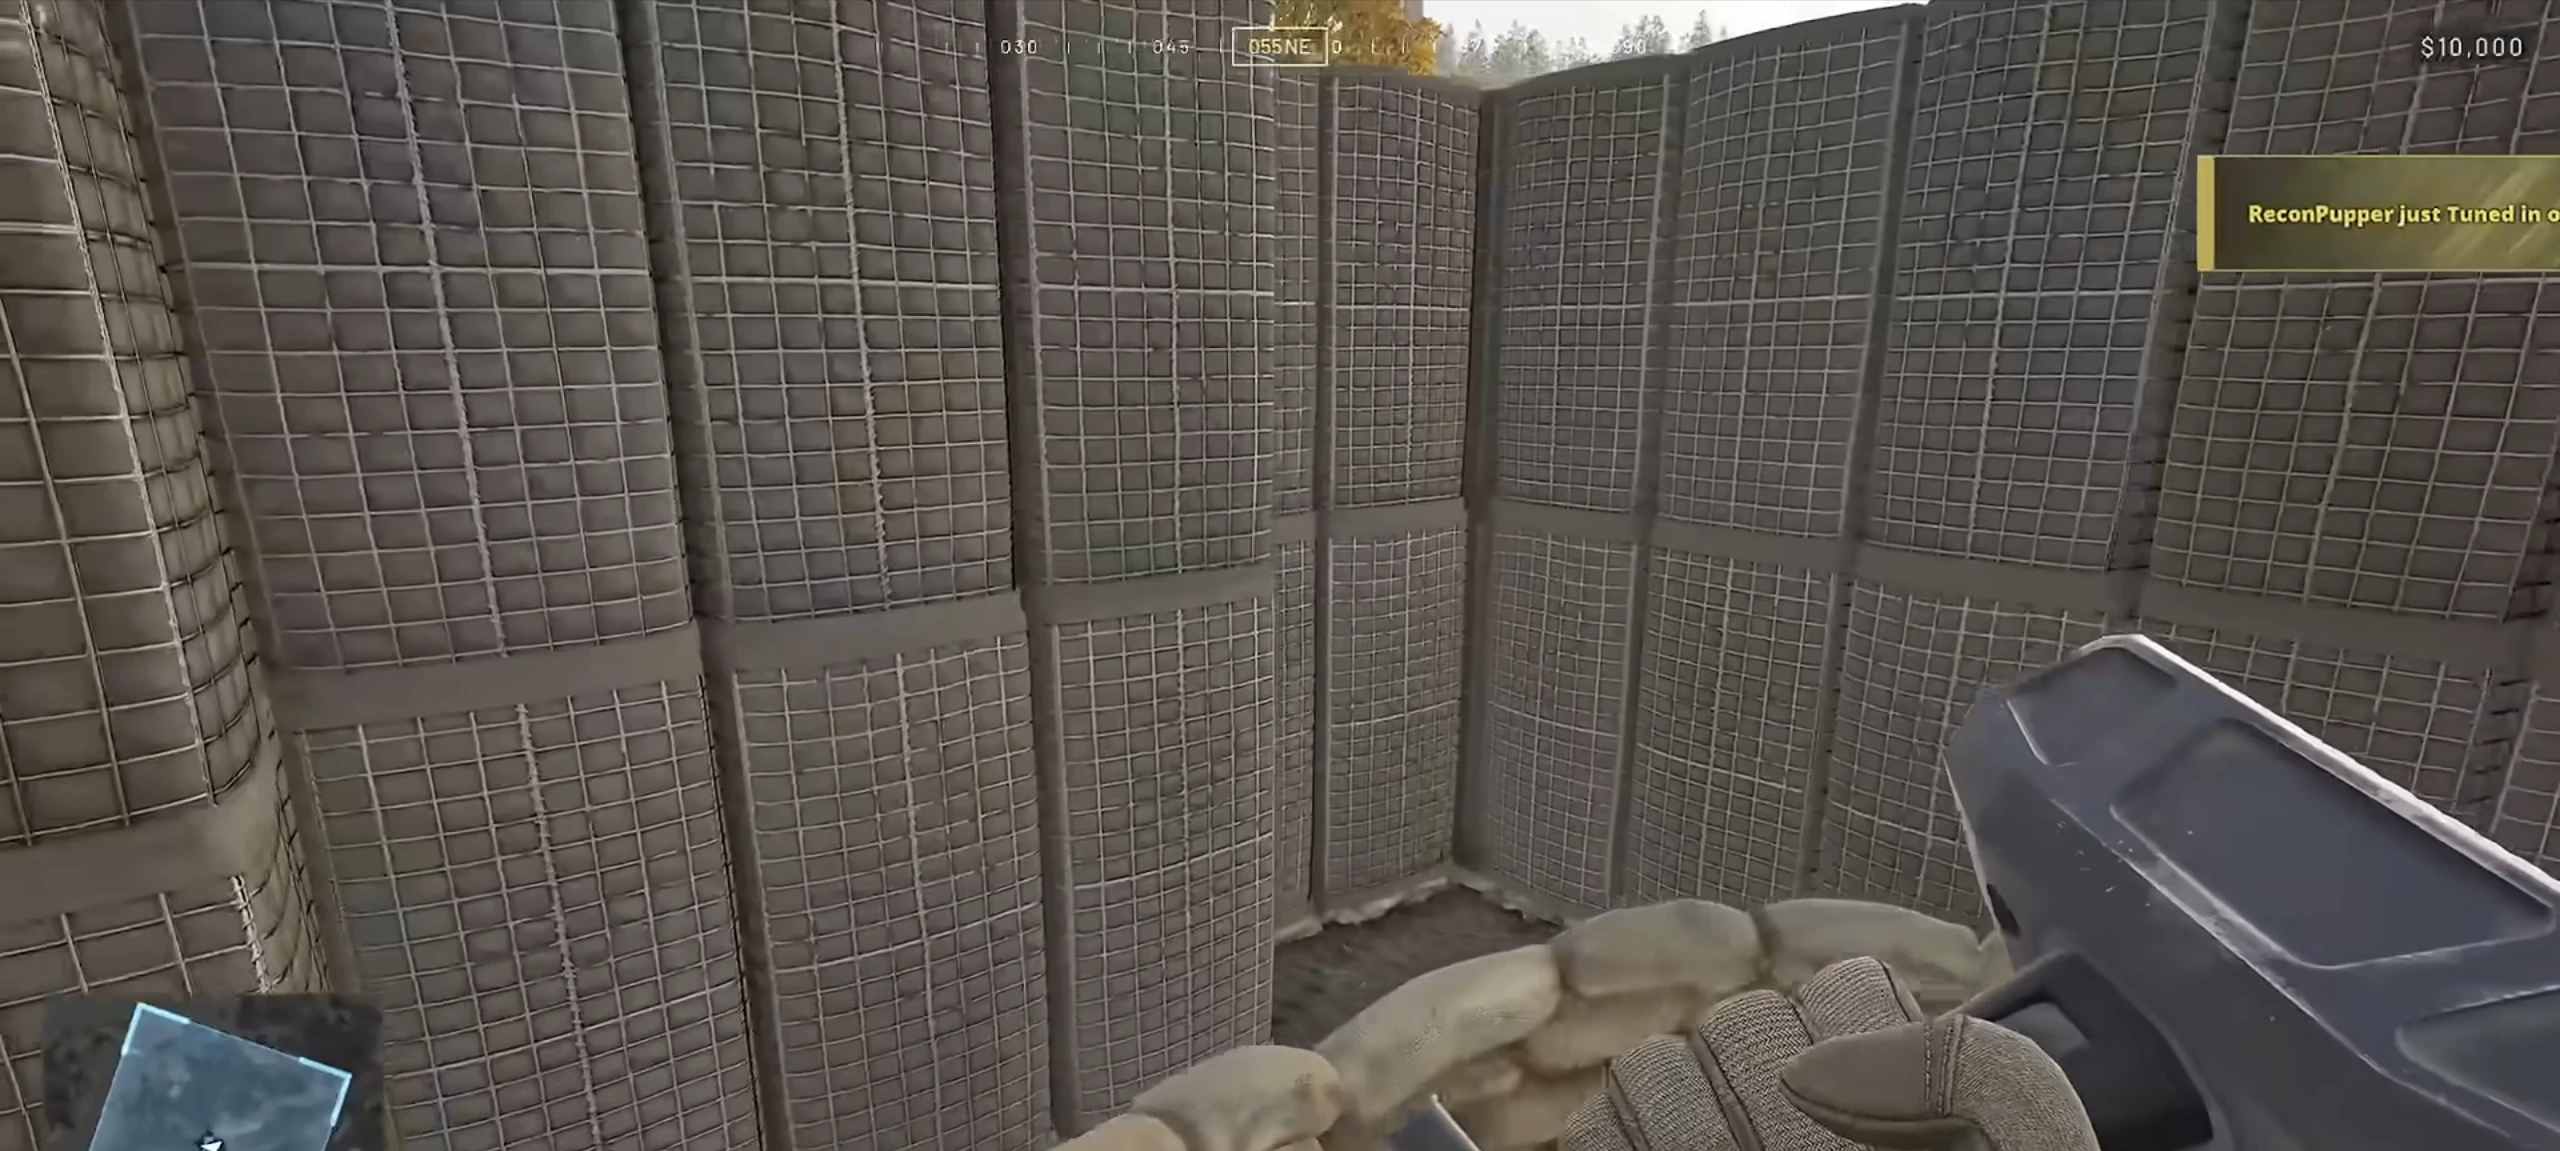
- Surround the position with HESCO walls four blocks high, at 75 Build Supplies per section. Snap the first section to the edge of the FOB with snapping enabled, then connect each new section to the previous one. Keep the rear and flanks tight, but fan the walls outward on the firing side. This leaves more than 210 degrees of open firing arc.
Do not add doors because they create a weak point. If you need to get out, destroy one wall section.
Green doors are noticeably more vulnerable than a solid HESCO wall, so do not leave them in the perimeter unless you really need one.
In the center, build a small 3x3 HESCO platform. This raises the tube slightly above the wall while keeping the gunner behind cover.
Build the Mortar Itself
Open the Large Hammer build wheel. On page three, select the tile on the left labeled L81 MORTAR. A wooden outline will appear on the ground.
Keep hitting it with the hammer until construction reaches 100%. A normal hit adds 1-2%, while striking the yellow cross immediately adds 10%. The same mechanic works on walls.

Testing the Position and Common Mistakes
Check the firing arc. Sit on the mortar, rotate the tube to both edges of the available sector, and fire one round at each side. If a round clips the wall, remove one block from that section.
If you placed the mortar in the wrong spot, press V to dismantle it, but the materials are not refunded.
If enemy artillery is actively targeting you, the mortar can be placed inside a covered observation tower. You will need to break through the roof first, and the available firing arc becomes narrower.
Mortar Interface and Controls
The mortar screen shows three main values: the compass at the top indicates firing direction, range appears on the left panel, and elevation in mils appears on the right. The higher the mil value, the closer the round will land.
- Rotate the tube left / right: A / D.
- Elevation (range): W / S or vertical mouse movement.
- Fine adjustment: zoom in with the mouse wheel to reduce the adjustment step.
- Ping a target on the map: middle mouse button.
- Show your coordinates or a point's coordinates: right-click on the map.
- Exit the projectile camera early: C.
- Dismantle the mortar: V.
These are the default controls.

Quick Aiming: Ping + Rangefinder
The fastest method is to set direction first, then range.
- Open the map and ping the target with the middle mouse button. The marker will appear on the mortar compass.
- Use A / D to line up the center of the compass with the marker. The direction is now set, so there is no need to calculate azimuth manually.
- Hover over an enemy marker on the map, such as one placed by a Recon player. You will see RNG for exact range and ASL for altitude above sea level.
- Use W / S to set that range and fire.
If there is no marker, estimate the distance using the map's range markings or calculate it precisely from coordinates as explained in the next section.

Calculating Exact Range From Coordinates
Map coordinates are measured in hundreds of meters: a difference of 1.00 coordinate unit equals 100 meters. The range is the hypotenuse between your position and the target.
- Right-click the map to get your X and Y coordinates, then do the same for the target.
- Subtract the two values on each axis, ignoring the sign, then multiply each difference by 100.
- Square both differences, add them together, and take the square root.

Example 1
Mortar: (98.77, 111.00). Target truck: (95.36, 108.79).
- ΔX = 3.41 = 341 m. ΔY = 2.21 = 221 m.
- D = √(341² + 221²) = √165,122 ≈ 406 m.
- The nearest marks on the range scale are 385 and 430 m, so set the sight between them.
Example 2
Mortar: (96.67, 109.11). Target: (95.55, 106.36).
- ΔX = 1.12 = 112 m. ΔY = 2.75 = 275 m.
- D = √(112² + 275²) ≈ 297 m.
You do not need to calculate direction from the coordinates. A map ping places the bearing directly on the compass.
Elevation Correction
The range calculation assumes level ground. Compare your ASL with the target's. If the target is above you, the round will fall short, so increase the range setting. If the target is below you, the round will overshoot, so reduce the range. Determine the exact correction with a ranging shot.
Additional Tools
There are also external community calculators for working with map coordinates. One example is this WARDOGS artillery calculator.
Ranging Shots and Corrections
Always start with a single ranging round rather than a full barrage. This prevents you from wasting ammunition before you know where the rounds are landing.
- Fire one round and follow it through the projectile camera.
- If it falls short, increase the range by using fewer mils. If it overshoots, reduce the range by using more mils. If it lands to one side, correct with A / D.
- Once the correction is set, fire a barrage.
- Press C as soon as you see the impact so you can immediately exit the projectile camera and return to the mortar controls.

When to Bracket the Target Instead of Chasing Perfect Accuracy
Against a moving target or an enemy mortar crew, fire a series of rounds while shifting the range one step up and down between shots. Covering an area is faster than trying to perfect a single shot while the enemy is locating your position.
The mortar is most effective against stationary and clustered targets such as vehicles, supply crates, and infantry around contested towers.
Defending the Position
The main threats to a mortar position are enemy mortars, artillery, helicopters, and infantry that manage to get through the wall.

Counter-Battery Fire
If new enemy mortars appear near the target, expect return fire and make them your highest-priority target.
Roof Cover
A covered observation tower forces the enemy to destroy the roof first. The tradeoff is a reduced firing arc. If you need coverage in several directions, build multiple protected positions.
Infantry
The mortar cannot deal with close threats because of its dead zone. Between barrages, check the courtyard and keep your rifle close.
Logistics
Keep Ammo Supply Pallets close to the tube so you can replenish the position without moving far.
Quick Reference
Here is a short checklist of the main things to remember:
- Large Hammer, FOB, Large Backpack, Ural, and supply pallets.
- Place the position about 600 m from the target on level ground and behind cover.
- Build HESCO walls four blocks high, avoid doors, and fan the walls outward toward the firing sector.
- Build a 3x3 platform, then the L81 for 150 Build Supplies, and hit the yellow crosses while constructing.
- Check the firing sector with test rounds.
- Ping target > compass with A/D > RNG rangefinder or coordinate formula > W/S.
- Correct for elevation using ASL, fire one ranging round, then a barrage, and press C to exit the projectile camera.
Other guides
 WARDOGS APC Guide: How to Use and Destroy the Spawn Vehicle
 WARDOGS Best Settings for Max FPS and Enemy Visibility
 WARDOGS Vehicles Guide: How to Unlock and What to Buy
 WARDOGS Helicopter Controls, Settings, and Flying Tips
 WARDOGS: How to Unlock All 10 Achievements
 How to Level Up Support Fast in WARDOGS
-
 WARDOGS Base Building Guide: How to Build, Supply, and Defend Your FOB
 -
 WARDOGS Medic Guide: Best Gear, Unlocks, and Fastest XP
 -
 WARDOGS Leveling Guide: Fastest XP Methods for Every Class
 -
 How to Fix WARDOGS Crashing, Freezing, and Not Launching on PC
 -
 All Elden Ring Endings Explained: How to Get Every Ending and Which Is Best