
Graveyard Keeper 2 Interactive Map: All Locations, NPCs, and Resources
 Maxim Tomilov
The world of Graveyard Keeper 2 opens up gradually. At the beginning, most of the map is covered in fog, which only clears in areas you have explored on foot. In this guide, we'll break down the Graveyard Keeper 2 map and all of its major locations, from the Inquisition Base to the Town sewers. We'll also explain who lives where, which quests you can pick up in each area, and which resources are worth returning for.
Interactive Map
You can use the interactive map to find resources, characters, and other points of interest. Below, we've also prepared a detailed overview of the game's main locations.
Inquisition Base and Surroundings

Home
Your home at the Inquisition Base contains a bed, Kitchen, build desk, and a ladder to the second floor. The starting chest contains 5 Berries and 8 Bread, so you will not go hungry during the first few days. Larry, the talking skull, also lives here. During Comrade Donkey, you need to bring him 2 Beer.
Basement Under the Base
The stairs beneath the base lead to the underground work areas: the Factory, Resurrection Lab, Writing Basement, and Supply Storage. Check the chest in the Resurrection Lab as soon as you gain access. It contains 3 Reanimation Liquid, 3 Bronze Zombie Collars, and a note about resurrection. That is enough to raise your first workers. The basement also has a second entrance that leads to the Underground Well.
Abandoned Tower and Albert's Alchemy Lab
At the back of the base stands the Abandoned Tower, which contains the Alchemy Lab. Inside, you can build the Laboratory, Study Table, Flask Shelf, Distillation Cube, and Formulation Bench. The starting chest here is generous: Clean Paper, Science Kit I, 3 Alchemy Flasks, 3 Water, 3 Blood, and an Alchemist's Note.
Use the hatch in the Alchemy Lab to reach Albert, the Plague Doctor who hides underground and rarely comes outside. His first major quest, Sweet Dreams, requires you to bring him Dream Dust. The rewards include Alchemist's Clothes and two zombie workers, your first helpers at the base.
Graveyard, Church, and Morgue
This is the Keeper's main work area. Graveyard quality is shown by the wreath icons in the upper-right corner of the screen, and Herbert asks you to raise it during his first quests. From the Graveyard build desk, you can place expansions, fences, paths, benches, monuments, flowerbeds, lamps, columbaria, and the Crypt. The Milestone near the Graveyard costs just 1 Faith to activate.
The Church stands nearby and has its own quality meter represented by a cross. This is where you deliver sermons, and much of Agatha's questline revolves around the building: decorating the hall, assembling a Choir, and installing an Organ. The Organ requires Special Wood, which you eventually have to obtain from Harold the woodcarver in Town.
The Morgue is accessed from the Graveyard. It contains Autopsy Tables and Embalming Tables, Corpse Pallets, a Resurrection Table, and the Crematorium. The Morgue meter shows how many bodies are currently stored compared with its total capacity.
Yard and Garden
The Yard beside your house quickly becomes your main crafting area. You can build Timber and Stone Stockpiles, Sawhorses, Woodworking Workbenches, Anvils, Furnaces, a Potter's Wheel, Spinning Wheel, Loom, and most of the game's other crafting stations here. The basic chest in the Yard contains 2 Boards, 1 Beer, and 100 Water.
The Garden has plots for Beets, Wheat, Cabbage, Carrots, Pumpkins, Onions, and Flax, as well as an Orchard, Apple Tree, Berry Bushes, and Blueberry Bushes. There is also a Water Well and a fishing spot beside the house where you can catch Roach, Gudgeon, Crucian, and Pike. This is one of the easiest places to complete The Quiet Art for Herm because he specifically asks for a Roach and a Gudgeon.
Vineyard
This work area is located on the western edge of the base and is reached by a separate bridge. You can build Vine Trellises, Beehives, and plots for Hops and Grapes here, while the surrounding trees provide roughly 8 Logs. Beneath the Vineyard is the Vineyard Basement, which contains a Wine Press, Fermentation Barrels, a Brewing Stand, and Wine Barrels. Wine is useful for more than selling. Later, the mercenaries in Town will agree to fight for gold-quality Wine instead of money. The Vineyard Milestone costs 2 Faith to activate.
Riverside
Riverside, west of the base, is where you can gather Sand and Clay. The area also contains Stone and Rhododendron bushes. Once you have zombie workers, you can use the local build desk to set up Sand Digger and Clay Digger stations so they gather resources without your involvement.
Sawmill
The abandoned Sawmill lies southwest of the base. At first, it is little more than a pile of boards, but after upgrading it you can build a Lumberjack Stand and Timber Stockpile. The chest here contains 2 Reanimation Liquid and Inquisitor Notes I, so the area is worth visiting even before you develop it.
Quarry and Old Mine
South of the base is the Quarry, your main source of Stone, Iron Ore, and Marble. Its Milestone is the most expensive one around the base and costs 6 Faith. The Old Mine entrance on the Quarry side is blocked and can only be opened with Dynamite. Later, you can also open a second route from the Factory. You receive the explosives from the forest bandits during Can't See The Forest for the Iron, which we cover in more detail in the Forest section below. Inside the mine is a chest containing 2 Reanimation Liquid, Inquisitor Notes II, and 2 Explosive Dust. Later, you can also assign a Zombie Miner here.
Sauna
This building is only available to players who pre-ordered the game. The Sauna stands on the other side of the bridge and grants the Steamed Up effect for 60 minutes, causing food to restore 10% more Energy. Keep in mind that once the effect expires, the bonus turns into a penalty of the same size and remains that way until your next visit to the Sauna.
Village

Village Tavern and Januarius
The heart of the Village and one of the places you will visit most often. Januarius, the tavern keeper, quickly offers you a useful deal: he buys Burial Certificates, effectively paying you for every body you bury in the Graveyard. He also sells Beer, Berry Pie, Town Gratitude, and Exhumation Certificates. This is also where you first meet Agatha during Holy Moly!.
Head of the Village Jully
Jully also stays at the Village Tavern, but he will not come out on his own. Ask Januarius to call him. The grumpy Head of the Village distrusts anyone from the hill and initially bans you from entering the Forest, but he knows more about nature than anyone else in the Village and understands how to summon fairies. He only starts helping once you prove that you are working for the good of the Village. Good Fellow requires Village reputation 10, which you can earn through Herm's and the twins' quests.
Later, Jully becomes one of the key characters in the story. He asks you to repair the Royal Services mailbox and gives you a Forest Pass, then later performs a ritual for the Goddess in the Swamp in exchange for 100 Faith.
Herm's Store
Herm, the Village merchant, sells Seeds, Saplings, crops, Chicken Eggs, Jugs of Milk, Bronze Scrap, and Flax Thread. He buys River Fish Fillets and Firewood, so you can sell spare logs here. Your introduction to him begins with Supply and Demand, where you ask him to help the Village with supplies. This immediately opens four additional objectives.
Royal Services
The Royal Services mailbox stands beside the Tavern. Jully first asks you to repair it, then you need to collect a Temporary Head of the Village Certificate from it. Later, you use the same mailbox to obtain a Royal Pardon for the forest bandits. The bureaucracy is absurdly straightforward: first pay a 5-silver fine, then refill the mailbox with 3 Ink, and only then collect the document.
Twin's Land
The brothers Jeffry and Heffry live south of the Village, across the bridge. When you first meet them, they are arguing after sinking a boat carrying the Clay Plates Herm was waiting for.
Jack also stays here early in the game. He is building a boat to reach the Port and during Jack in a Boat asks for 5 Wooden Planks followed by 5 Bronze Details. The final step is the trickiest: you can only convince the brothers to row Jack to the Port once your Village reputation reaches 10. Completing the entire Jack in a Boat chain rewards Smith's Clothes and +20 reputation with Jack. After he sails away, sleep one more time to receive a letter that unlocks the Magic bell recipe.
Hangman's House
A gloomy building on the southern edge of the Village. The house itself is barely used, but it serves as a useful landmark because Village guards gather around a nearby campfire at night. Bring them treats during Yummies, and they will teach you new cooking recipes in return.
Fishing in the Village
The Village has its own fishing spot where you can catch Roach, Gudgeon, Crucian, Herring, Bream, and Magic Carp. Another beginner-friendly fishing spot can be found along the road from the base to the Village. The Village Milestone costs 2 Faith to activate.
Forest and Swamp

Forest Guard Post
The Forest lies west of the Village, and guards block the road at first. They are convinced the woods are crawling with goblins and will only let you through if the Head of the Village vouches for you. Jully gives you the Forest Pass after you repair the Royal Services mailbox and bring him the Temporary Head of the Village Certificate. Show the pass at the guard post to open the route.
Bandit Camp
Deep in the Forest near the bridge is the camp of the bandits Hans and Sven. They will not let anyone pass without a Royal Pardon, so you first need to complete the Royal Services mailbox quest in the Village. The funniest part comes afterward. The bandits still revere their late leader Robert the Skeleton, and only he knows where the explosives are hidden. The solution is obvious: convince Larry to impersonate Robert, give him a Simple Candle, and the bandits will hand over the Dynamite. This is what opens the Old Mine at the Quarry.
Heart of the Swamp
The Swamp lies at the southern edge of the map, with a statue of the Goddess of Nature deep inside. To reach it during the story, you need the Swamp Map from the fairy in Chasing Fairy Lights. The Goddess explains that you need to find and restore a magical portal and track down the Old God. After that, Blue Crystals appear near the statue once per week on Envy day.
You can catch Frog, Catfish, Silver Carp, Swamp Ghost, Eel, and Elder Catfish in the Swamp. The Milestone here is the most expensive on the entire map at 8 Faith, but walking all the way back through the Forest takes considerably longer.
Fishing in the Forest
The Forest fishing spot on the river is one of the best in the game. You can catch Carp, Pike, Golden Carp, Salmon, Trout, and the rare Heavenly Salmon here. There is no Milestone in the Forest, so you will need to remember the route.
Town

Crossroads
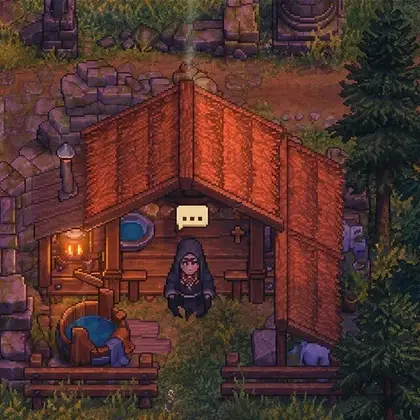
The Crossroads is the junction east of the Graveyard where the road splits toward the Village and Town. It has a Milestone that costs 1 Faith and is also home to Agatha, the Nun. Her house is not present at the beginning of the game and appears as the story progresses. Agatha gives more than a dozen quests, ranging from bringing her writing supplies to upgrading her home during The House at the Crossroads, which requires 2 Wooden Kit II and 2 Furniture Kit II. There is also a separate entrance to the underground areas beneath the base here.
Barracks
The Town Barracks stands directly beside the gates. This is where Herbert, Head of the Guards, is based. His storyline covers the military side of the game, including battle preparations, assaults on the floodgates, and the push toward the Stilt Houses. The Merc Leader is also based here. His fighters work for an upfront fee, and giving them 3 Iron Ingots or 3 Steel Ingots upgrades their equipment. After Inflation, they agree to accept gold-quality Wine as payment. The Barracks build desk lets you construct Barricades and Archer Towers for Town battles.
Jack's Workshop
Jack's Workshop stands just inside the Town gates. Jack is the inventor behind conveyor belts and automated workstations. You first need to reclaim the Workshop from the zombies. Afterward, Jack takes you on as an apprentice and introduces the Town Orders system. The first order, Supply: Iron, is accepted from the board in the Town Warehouse. Jack later becomes one of the key figures in rebuilding the Town. You can also find the rival Fisherman nearby. He challenges you to a fishing contest, and defeating him rewards the Pro Rod.
Square
The Market Square begins just beyond the walls, and it is the first part of Town you need to reclaim in Market Square Purge. Town contains 7 plots for Market Stalls and 4 plots for workshop yards. These can be used to open and upgrade shops run by the Apothecary, Tailor, Baker, Smithy, and other traders. Restored residential buildings provide Green Scrolls that can later be given to Linda.
Town Warehouse
The Town Warehouse stands near the Port and serves as the delivery point for goods produced through Town Orders. You can also sell surplus goods here. A staircase inside leads down to the Warehouse Cellar. Homobonus lives nearby and dreams of selling bottled water. He first asks you for bottles, and later begins buying Faith from you at a rate of 10 Faith for 5 silver.
Port
The Port Area lies on the eastern shore, and its Milestone costs 3 Faith. The battles Eastern Districts: Active Scouting and Eastern Districts Purge take place here, and this is also where you will find the Dockside Club. Linda runs the club. Once you reach the appropriate stage of her questline, you can give her Green Scrolls on Lust day, with each one increasing Town quality by 1. Davy the Dagger, leader of the looters, also appears here on Lust day. After completing Wharf Rats, he starts accepting looting orders in exchange for special keys, but they can only be placed on Lust day. The Retired Captain also spends his time at the club, sharing sea stories first in exchange for drinks and later for Faith.
Gunter's Astrologer's Tower stands on the waterfront. He sells Comet's Tail, Fireflies, Zombie goo, Reanimation Liquid, Blue Crystals, and Hypno-devices, and later becomes your PR agent.
The Trademaster works at the Main Pier. He needs 3 Lenses for floating beacons during Crystal Clear. Afterward, he opens his shop, and a new trade ship arrives at the pier once per week. The Port is also an excellent place for sea fishing, with Anchovy, Mackerel, Golden Carp, Tuna, Salmon, and Baby Kraken among the possible catches.

Stilt Houses
The Stilt Houses stand on the western lake in the northwestern part of Town. You can only reach them after winning Battle at the Lake during Herbert's Still Standing on Stilts. Harold, the easygoing master woodcarver, lives here and is the only source of Special Wood for the Church Organ. The Milestone here is free to activate.
Sluice Area
The canal floodgates are located in the northern part of Town. This is where you close the Western Floodgate and fight both parts of Closing the Eastern Floodgate. The Milestone beside the water is free to activate.
Sewers
The entrance to the Sewers is near the western Town gate. The underground area contains fights and arena battles, while Maurizio's cheese cellar is hidden somewhere behind one of the walls. According to the rumors, the Old God is hiding there. There is no door into the cellar, and you can only pass through the wall with the Red Eye. Eel is the only fish found in the Sewers.
Royal Foundry
The Royal Foundry is an old industrial site beneath Town, reached through the water tunnel. You can access it after the Steamy Royal questline and the push toward the bathhouse basement. The Foundry is now run by monks led by the Bishop, who sells Steel Ingots for 1 silver each. The Bishop also has the Magic Mirror, and he will hand over the first portal fragment in exchange for 3 Zombie Power. The Royal Foundry Milestone is underground and free to activate.
Palace
The Palace stands in the northeastern corner of Town near the castle district. It is one of the final locations in the story and is reached during Palace Politics, when you begin hunting for the last portal fragments. Davy the Dagger is also the one who sells you information about the Palace.
Inquisition Dungeon
At the far northern edge of the map near the castle district is the Inquisition Dungeon, where the game begins. There is no real reason to return later, but during your first visit make sure to collect everything lying in plain sight: the Inquisitor's Note and Medallion, the Royal Seal, and the Dungeon Key. Albert later needs the Medallion to enter the tower at the base.
The Graveyard Keeper 2 map is genuinely large and packed with characters, resources, and quests. We hope this guide helped you understand how the world is laid out and find your way around the kingdom.
Other guides


-
 Graveyard Keeper 2 Gunter Questline: All 9 Quests
 -
 Graveyard Keeper 2 Agatha Quests Walkthrough
 -
 Graveyard Keeper 2 Linda Quests Walkthrough
 -
 Graveyard Keeper 2 Town Orders: How to Accept and Complete Them
 -
 All Elden Ring Endings Explained: How to Get Every Ending and Which Is Best
 -
 Graveyard Keeper 2 Alchemy Guide: All Recipes and Runes
 -
 How to Increase Graveyard Rating in Graveyard Keeper 2
 -
 Graveyard Keeper 2 Polished Bronze: How to Get It and Repair the Bridge