
PRAGMATA Walkthrough & Guide: Complete Game Solution
 Vladyslav Shamshurov
PRAGMATA is a third-person shooter with platforming elements. You play as Hugh, a member of an engineering team who finds himself completely alone on a lunar base. He is accompanied by Diana, a friendly android with a high level of empathy. Together, they must face a rogue artificial intelligence and an army of robots. In this guide, we provide a step-by-step walkthrough for all story locations.
The main goal is to contact Earth so Hugh can return home. The lunar base has been taken over by an AI, so you will need to fight robots using various weapons and Diana's hacking abilities. You will also have a safe zone where you can upgrade your gear and the heroes' abilities.
Prologue
In the opening cutscene, the crew arrives at the lunar base, which has not communicated with Earth for a long time. Soon, you will take control of Hugh. For now, just keep moving forward until you meet Ken and Nicholas.
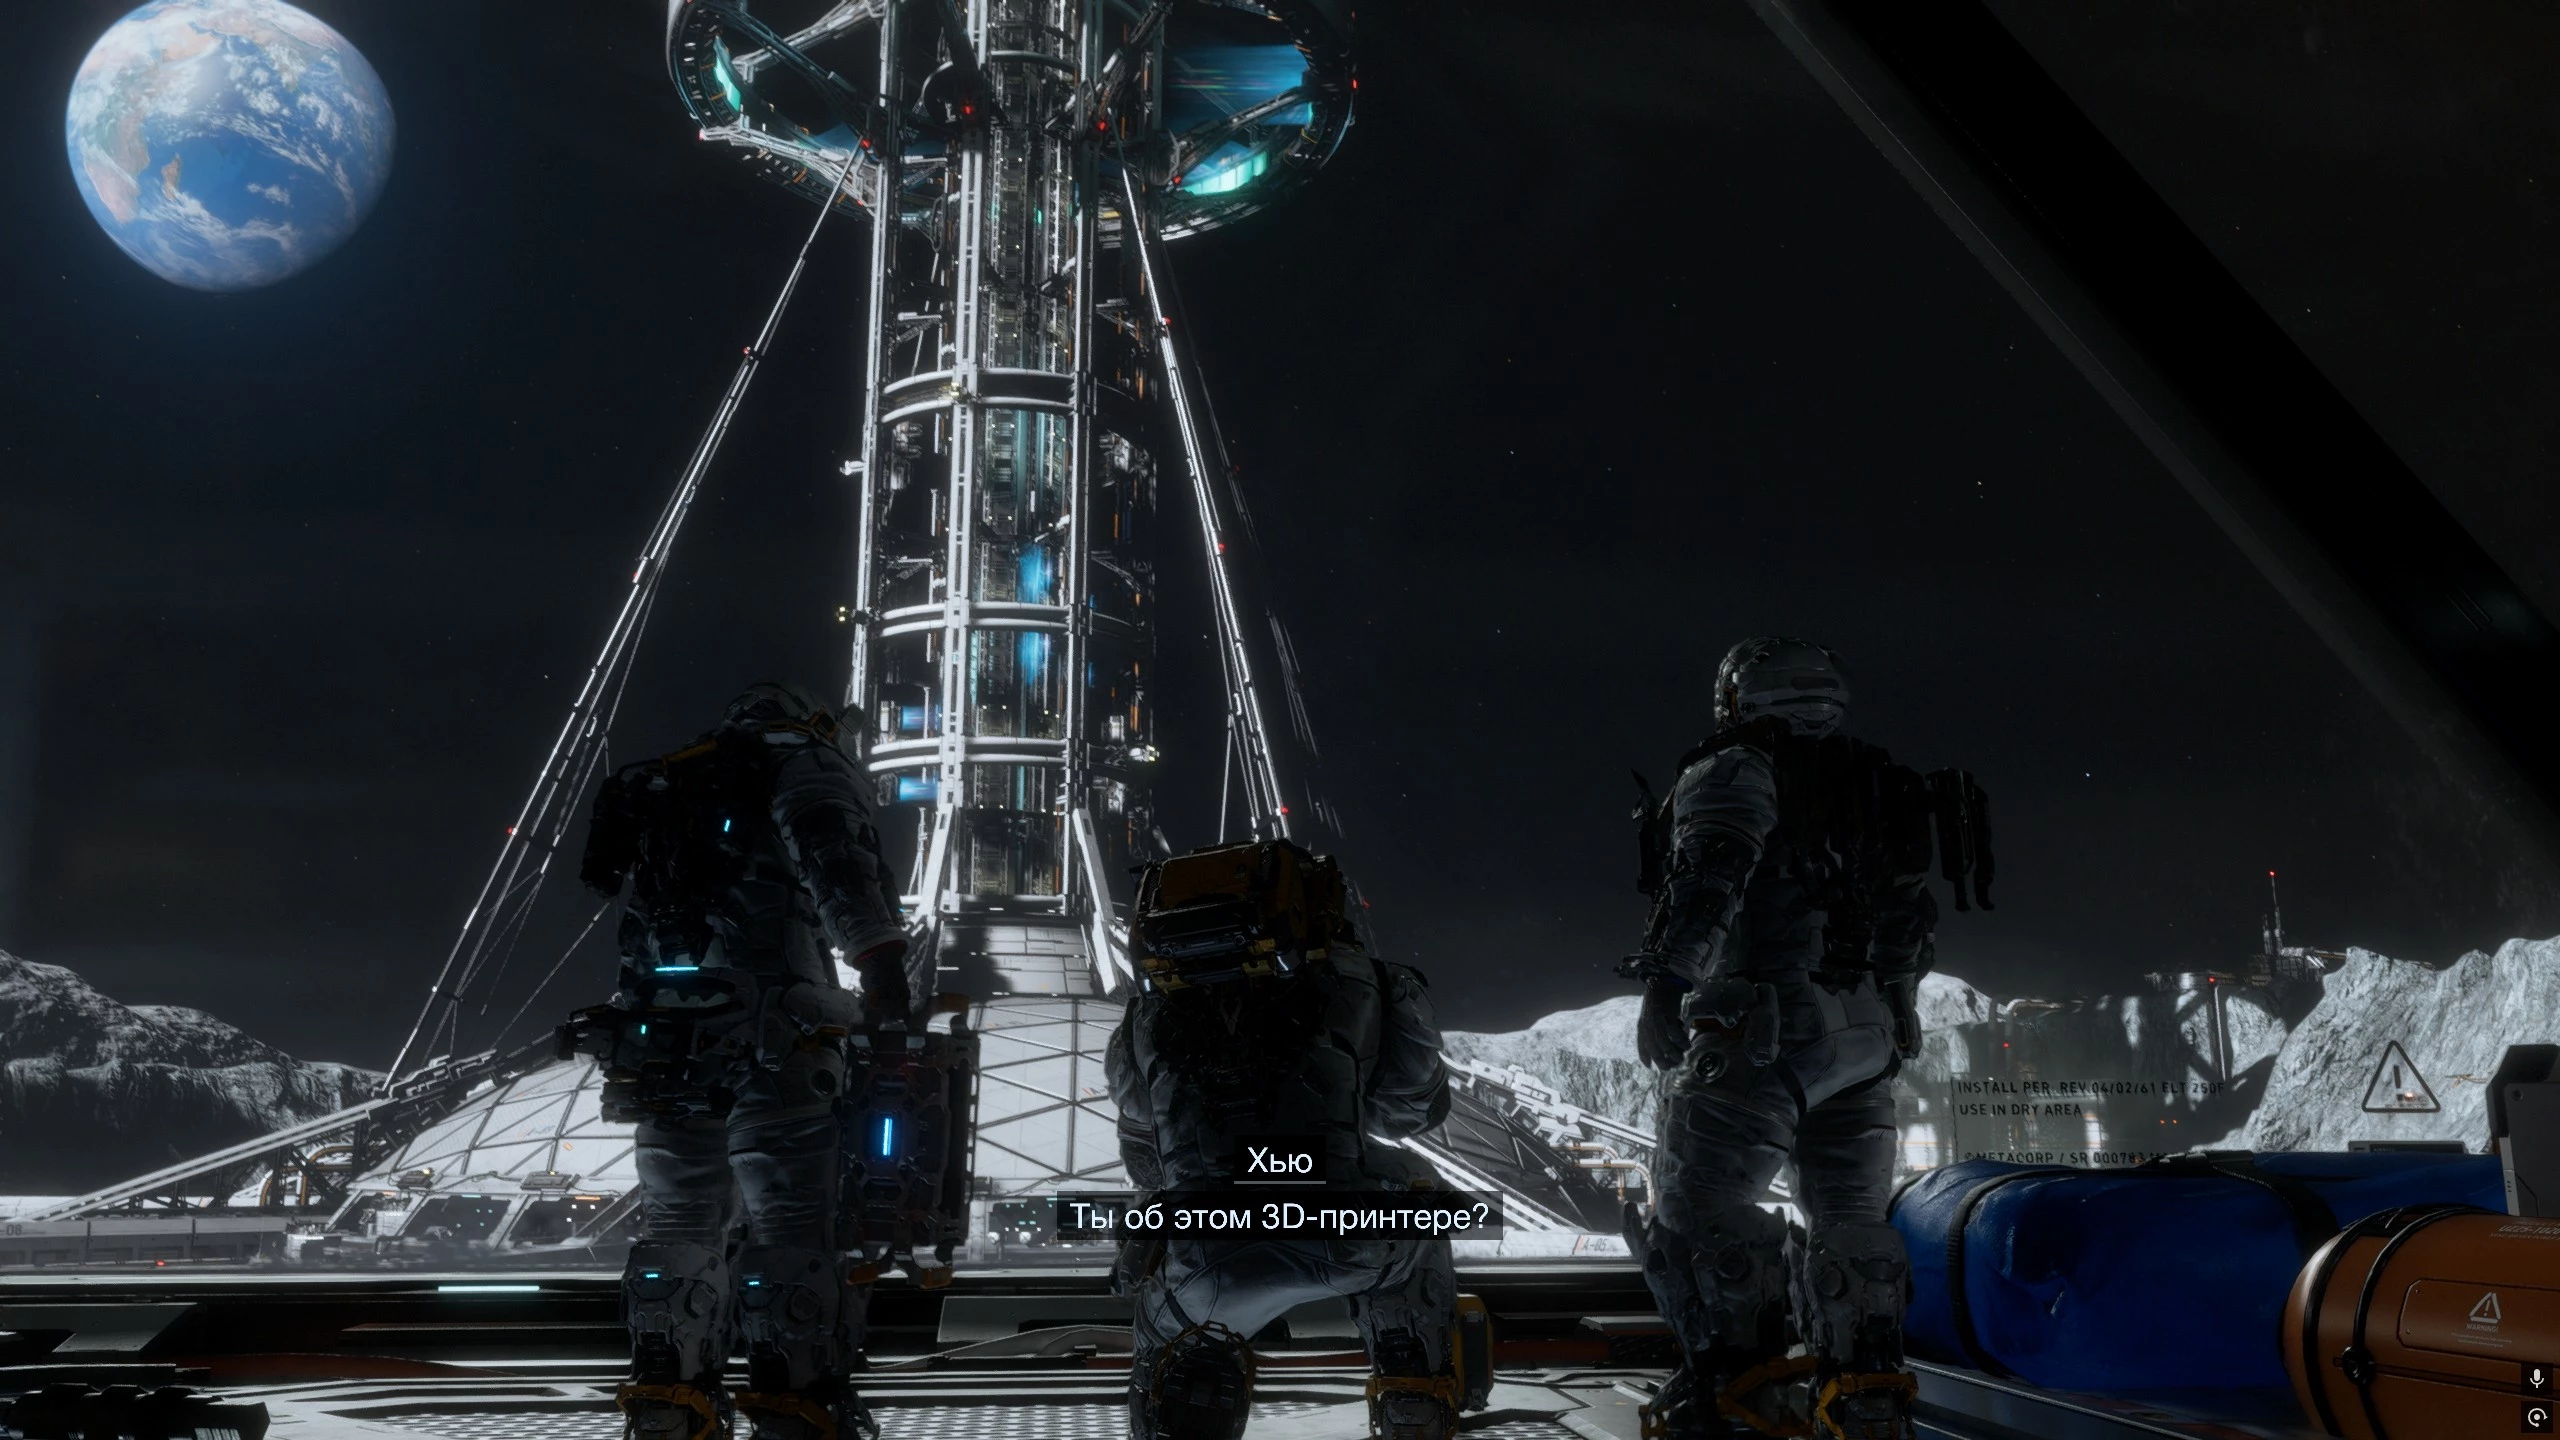
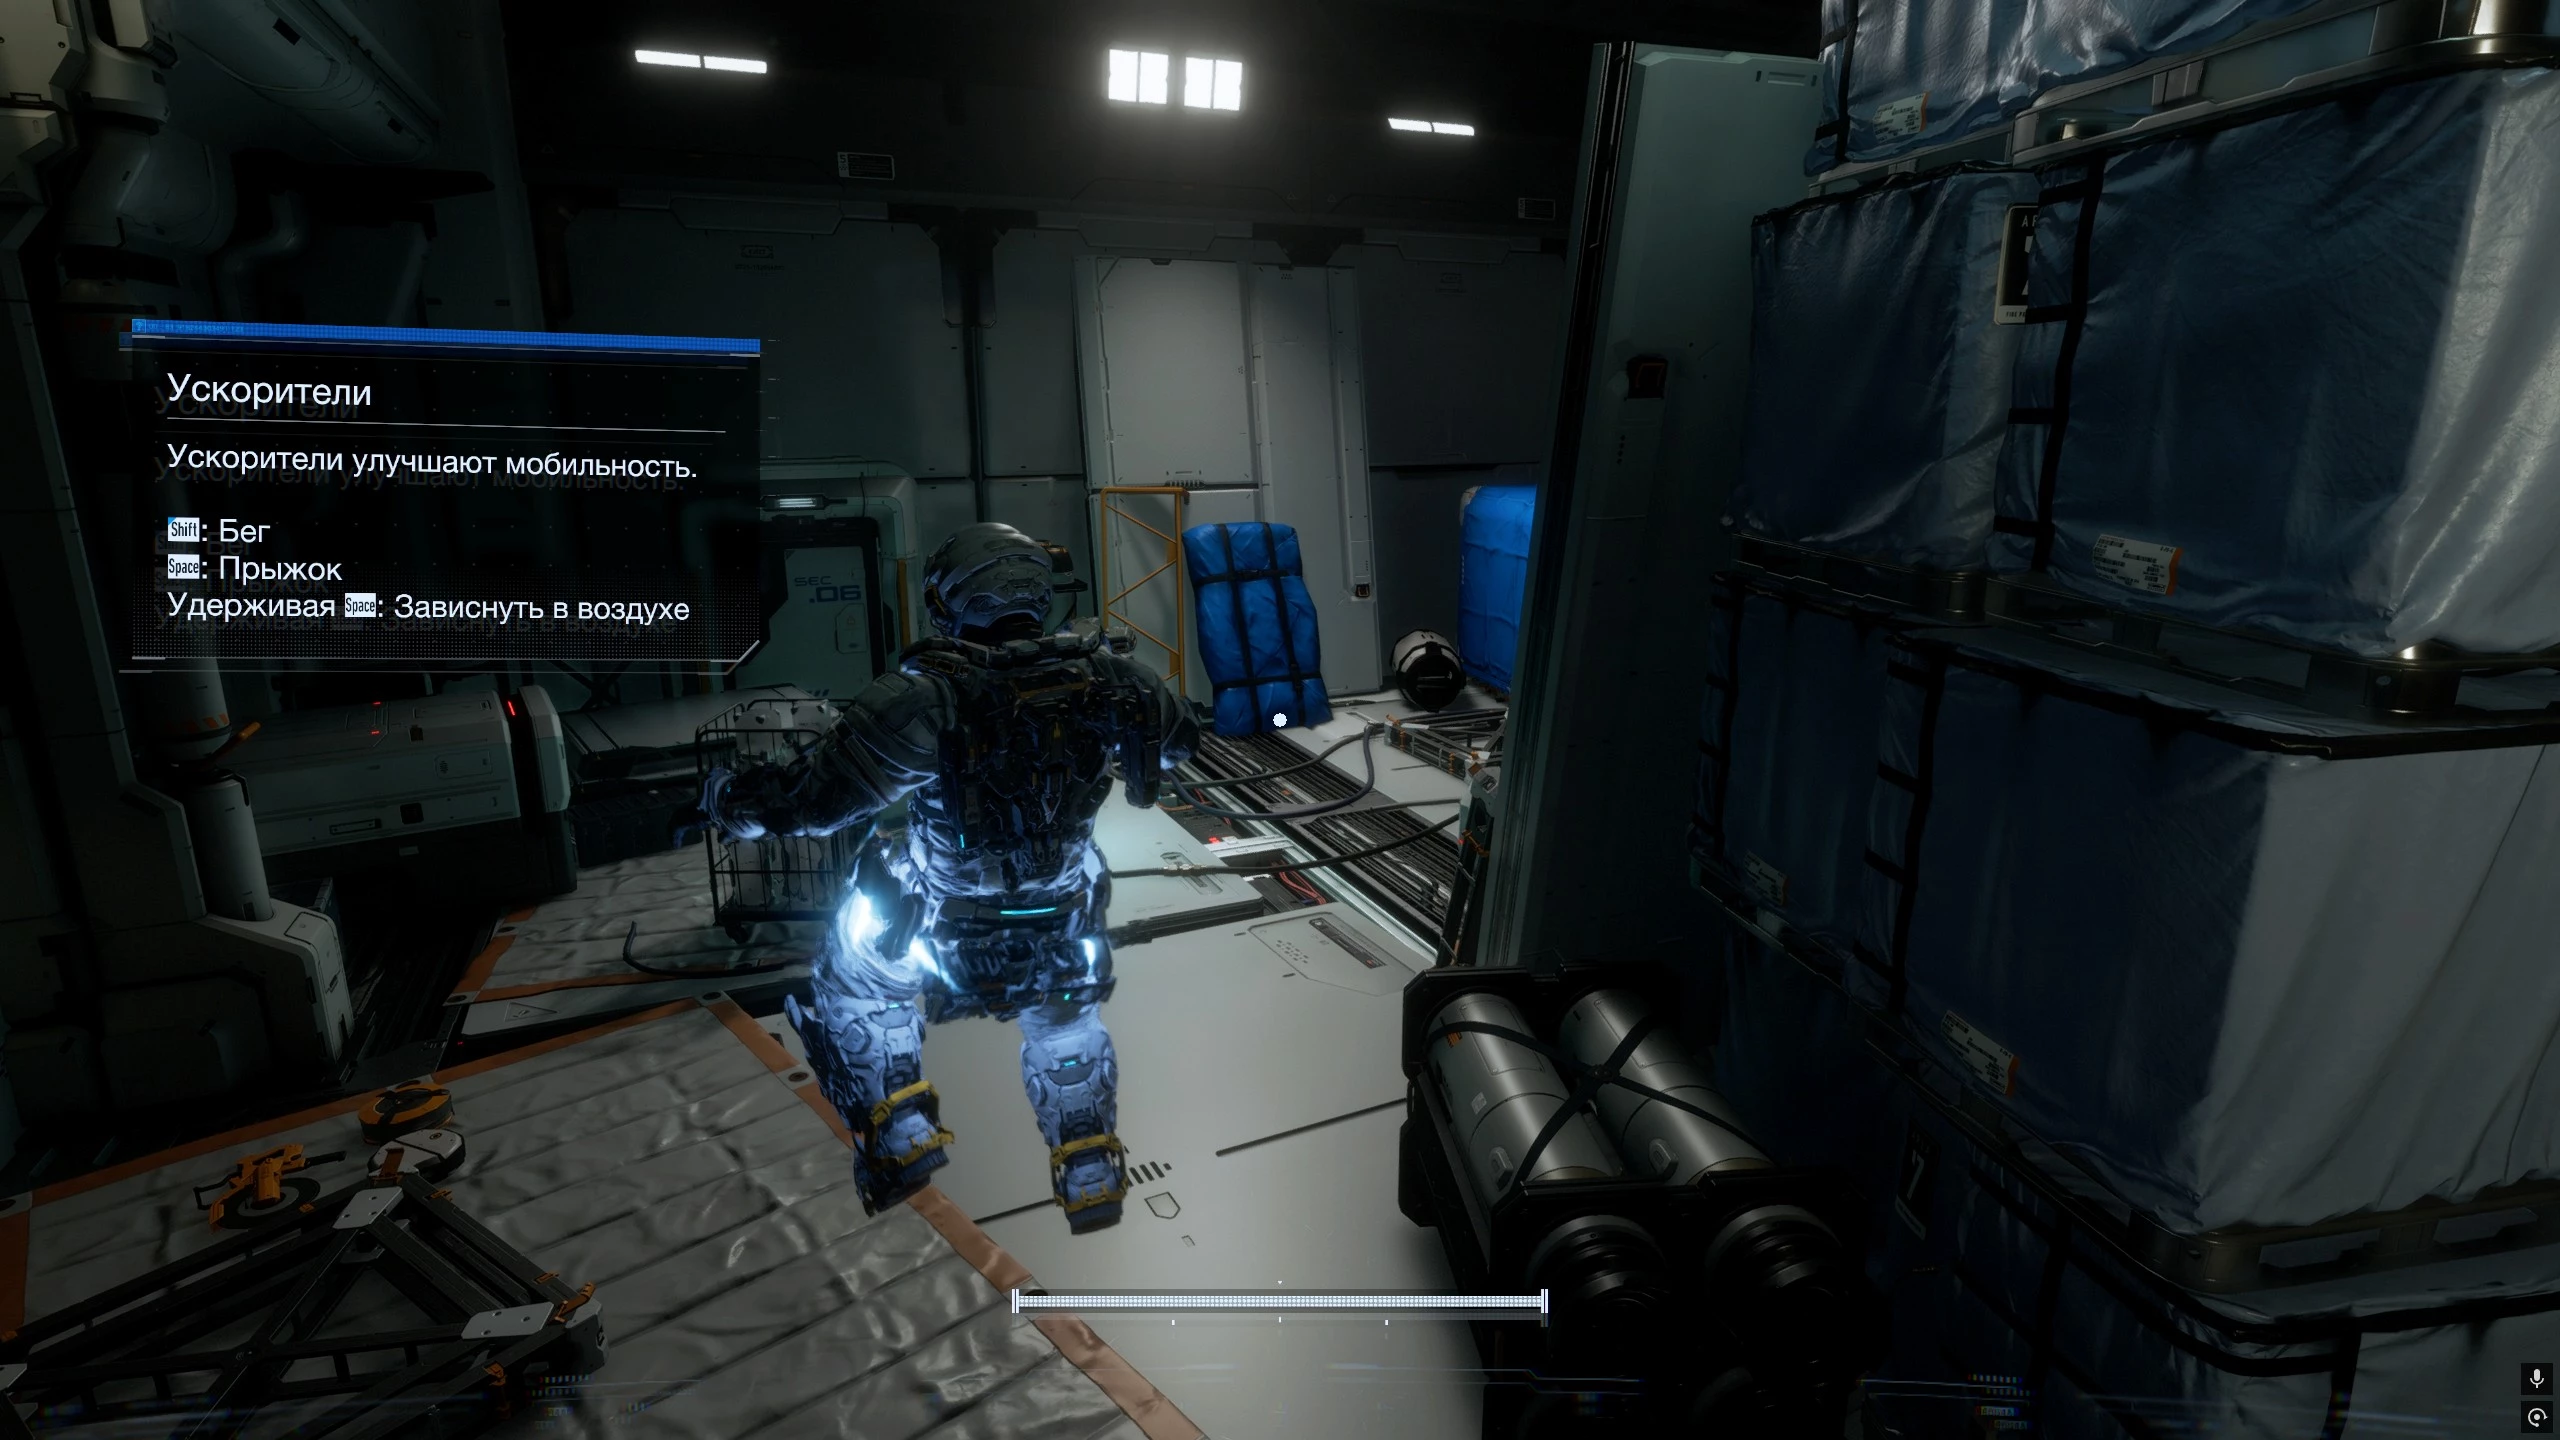
You can listen to a lecture about 3D printing technology. For the story, turn left and head toward James. Here, you will be introduced to the jet suit controls: with small thrusters, Hugh can jump high, run fast, dash, climb ledges, and glide through the air. Keep in mind that all these actions drain the stamina bar at the bottom of the screen.
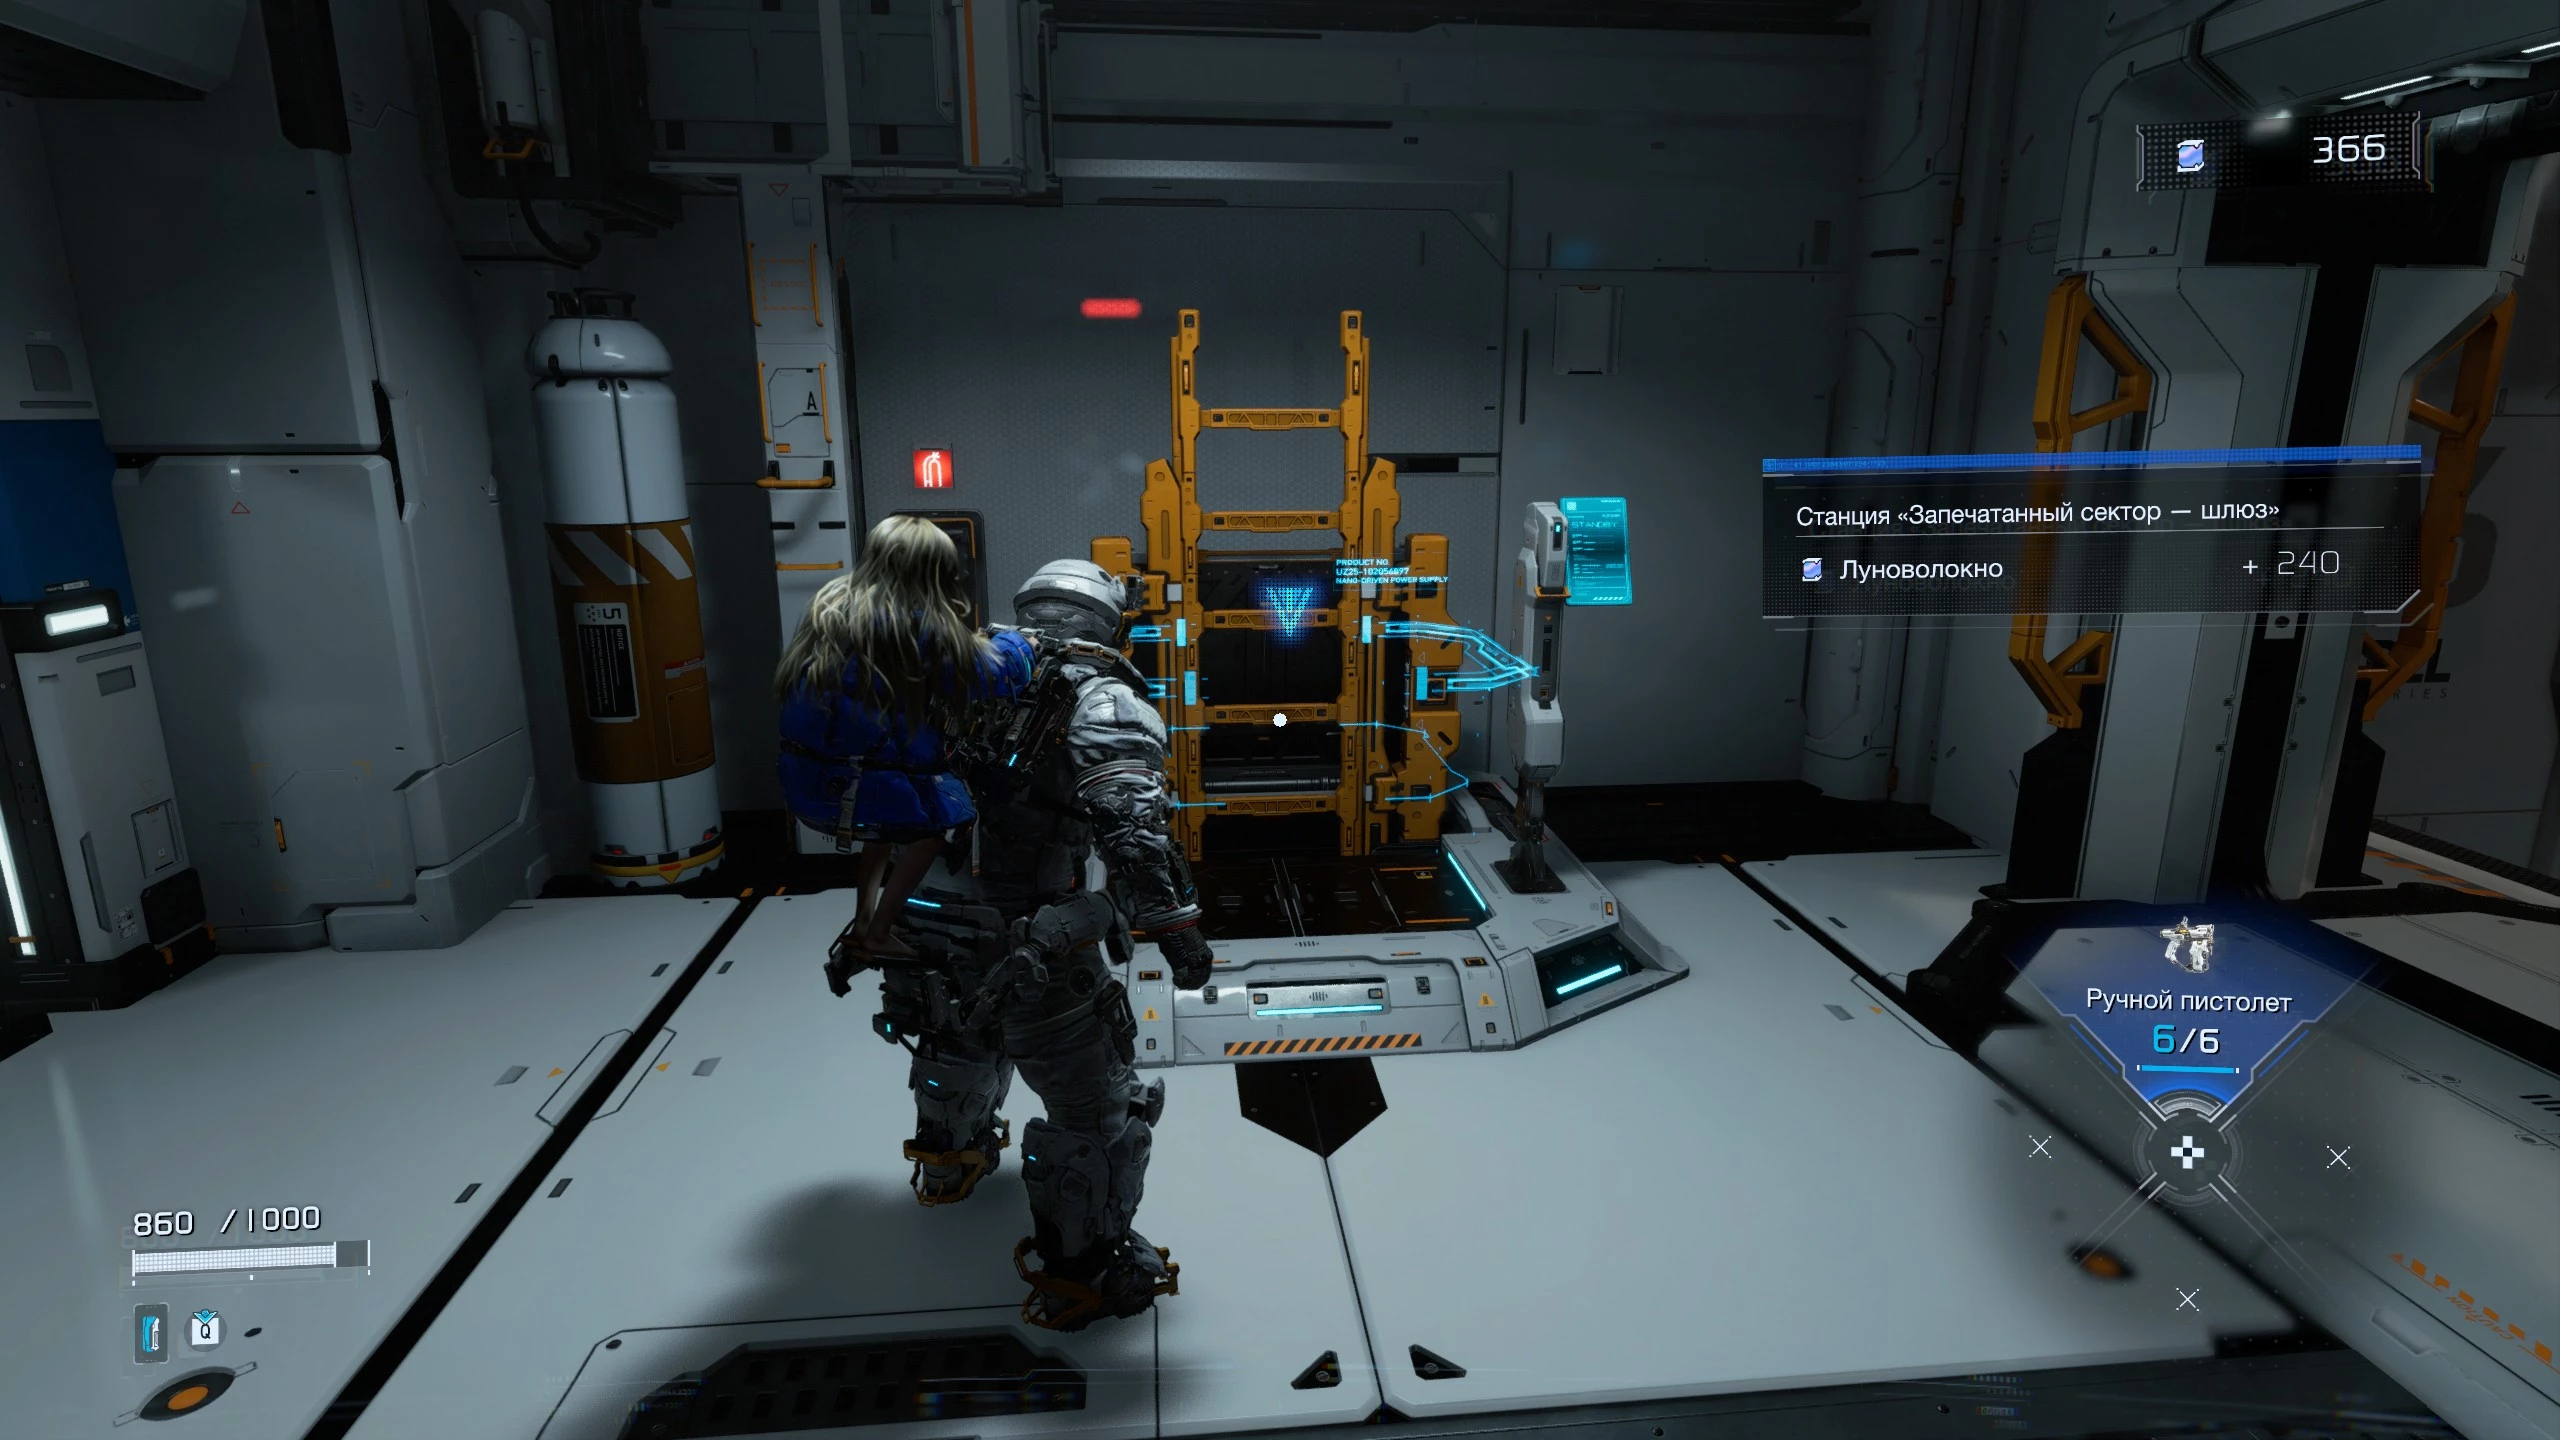
In this part of the location, you will also encounter Lunafiber for the first time. This material acts as the local currency and is used to buy all upgrades and modifications for the heroes.
Your goal is to reach the upper second level where James is. It is a good idea to stop here and practice jumping to get comfortable with the suit. As you explore, you will regularly encounter vertical gameplay elements.
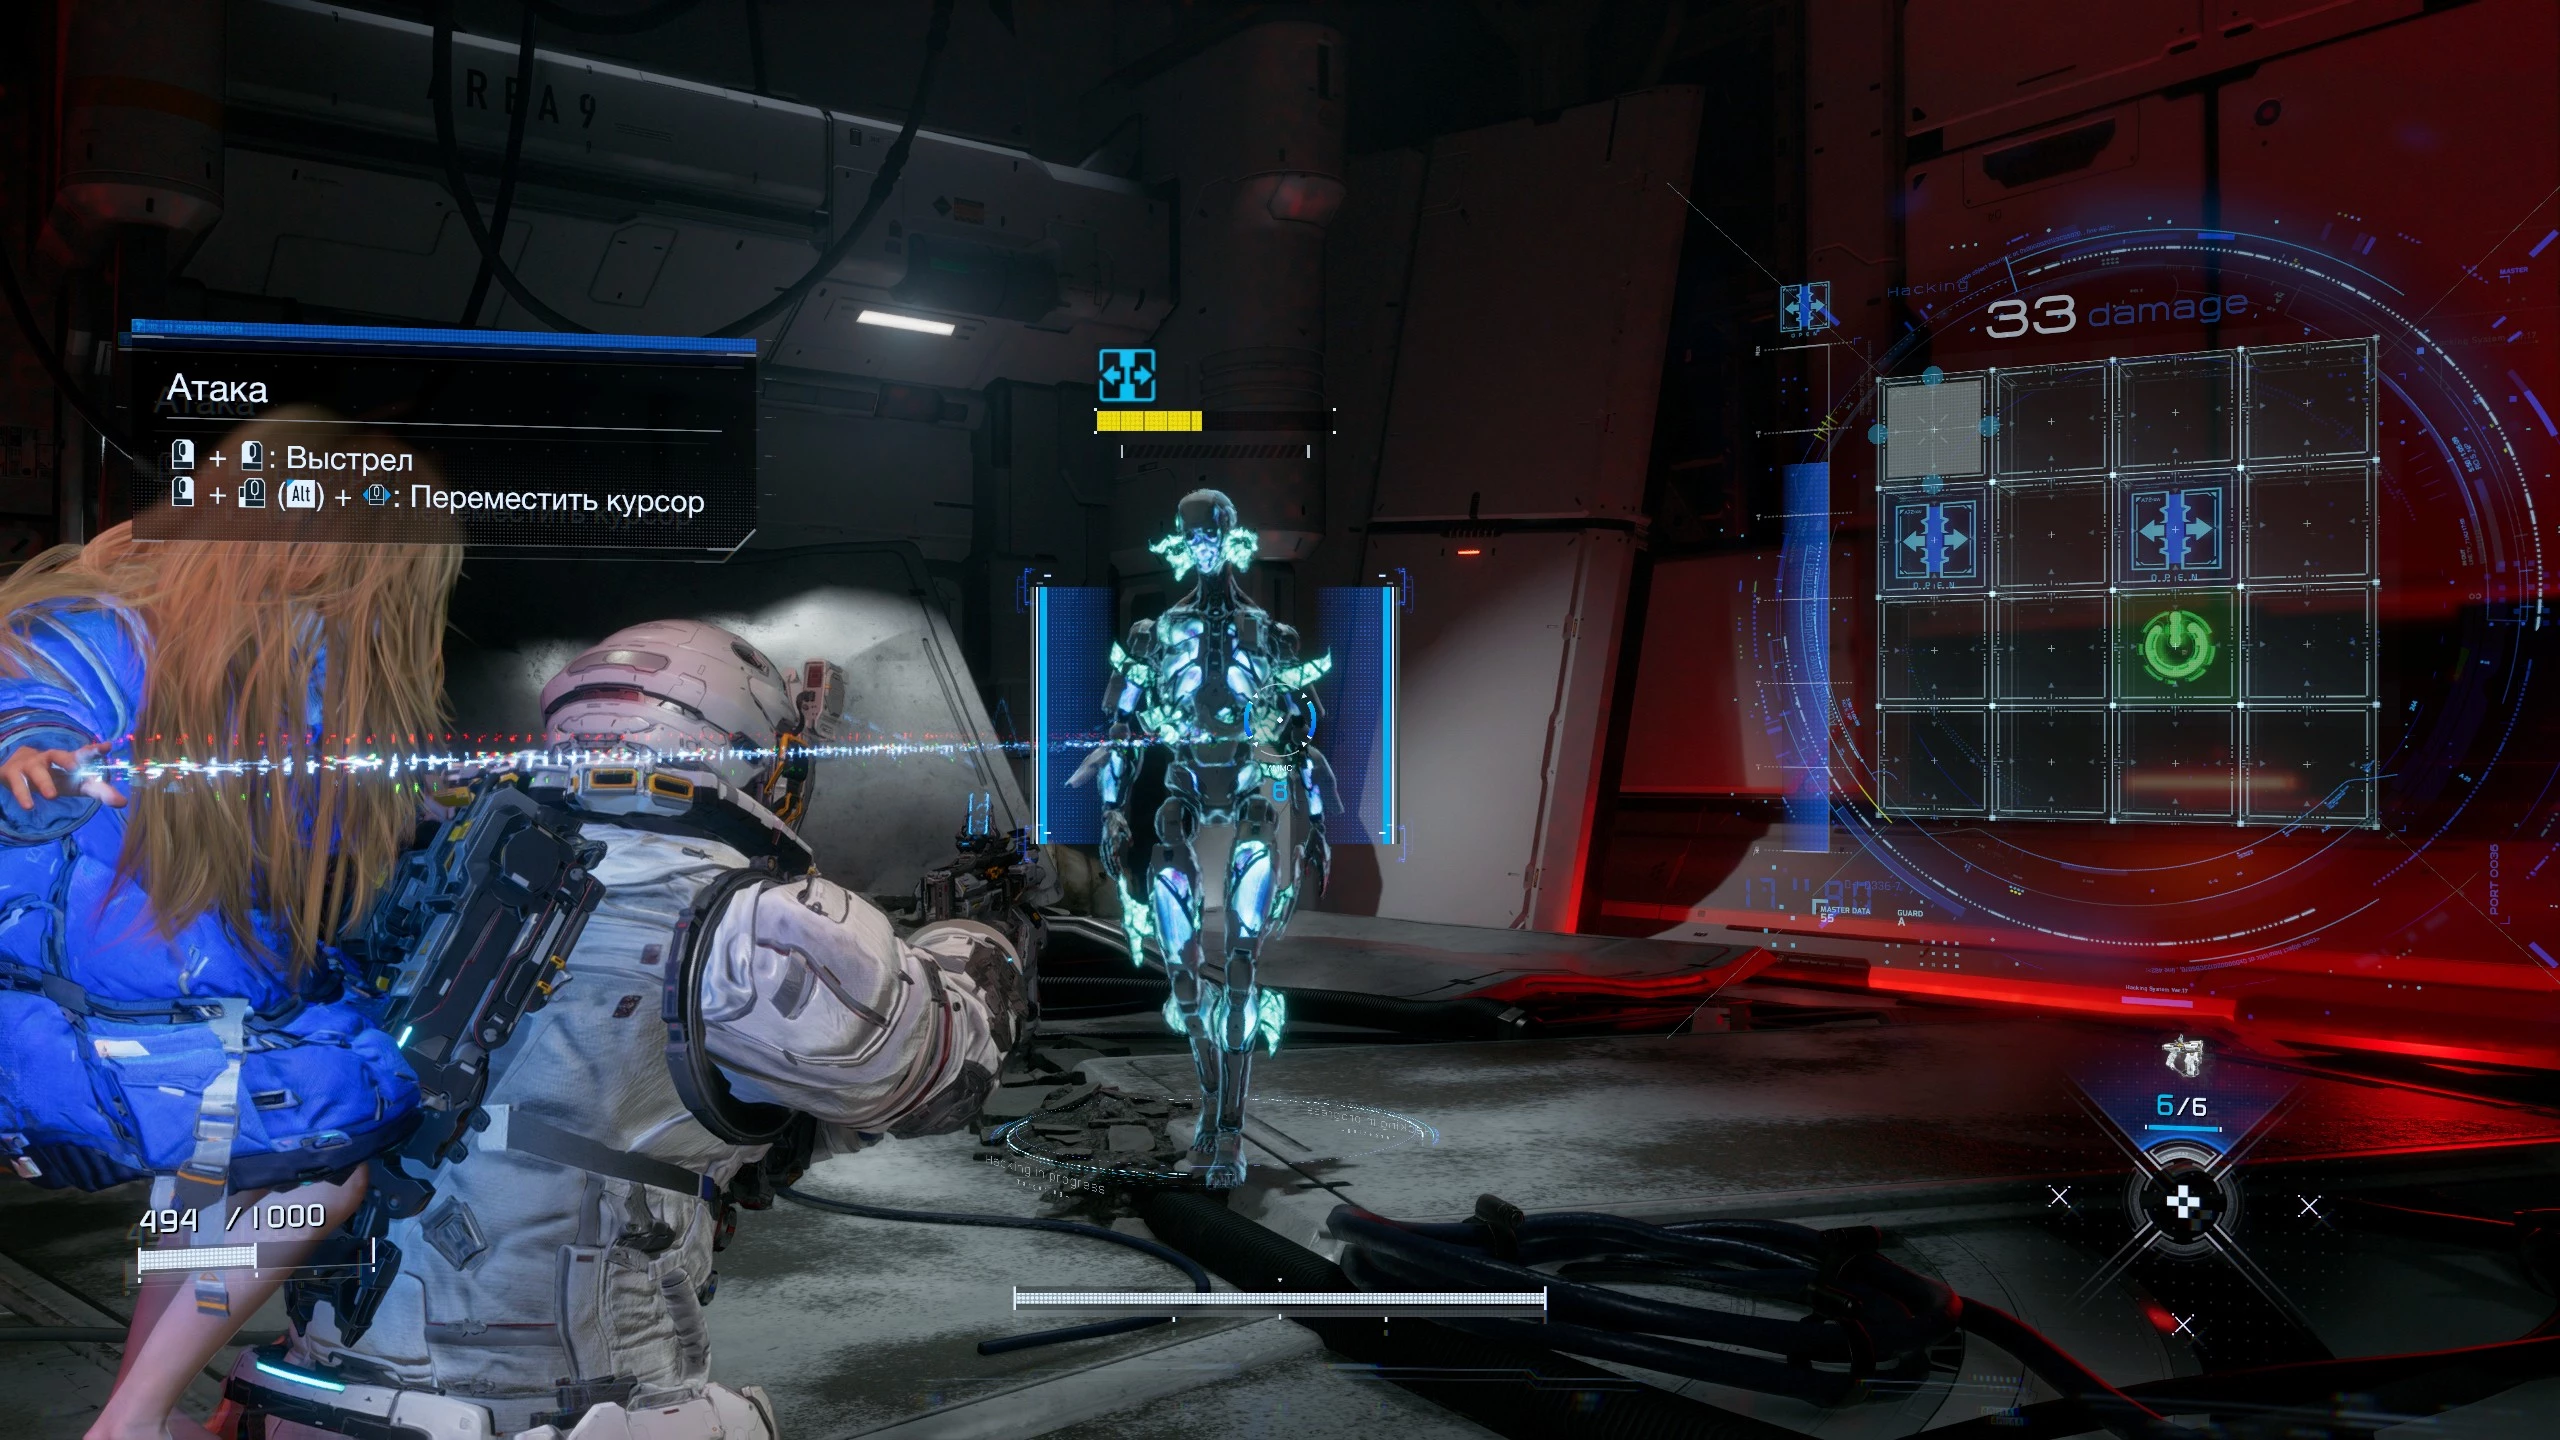
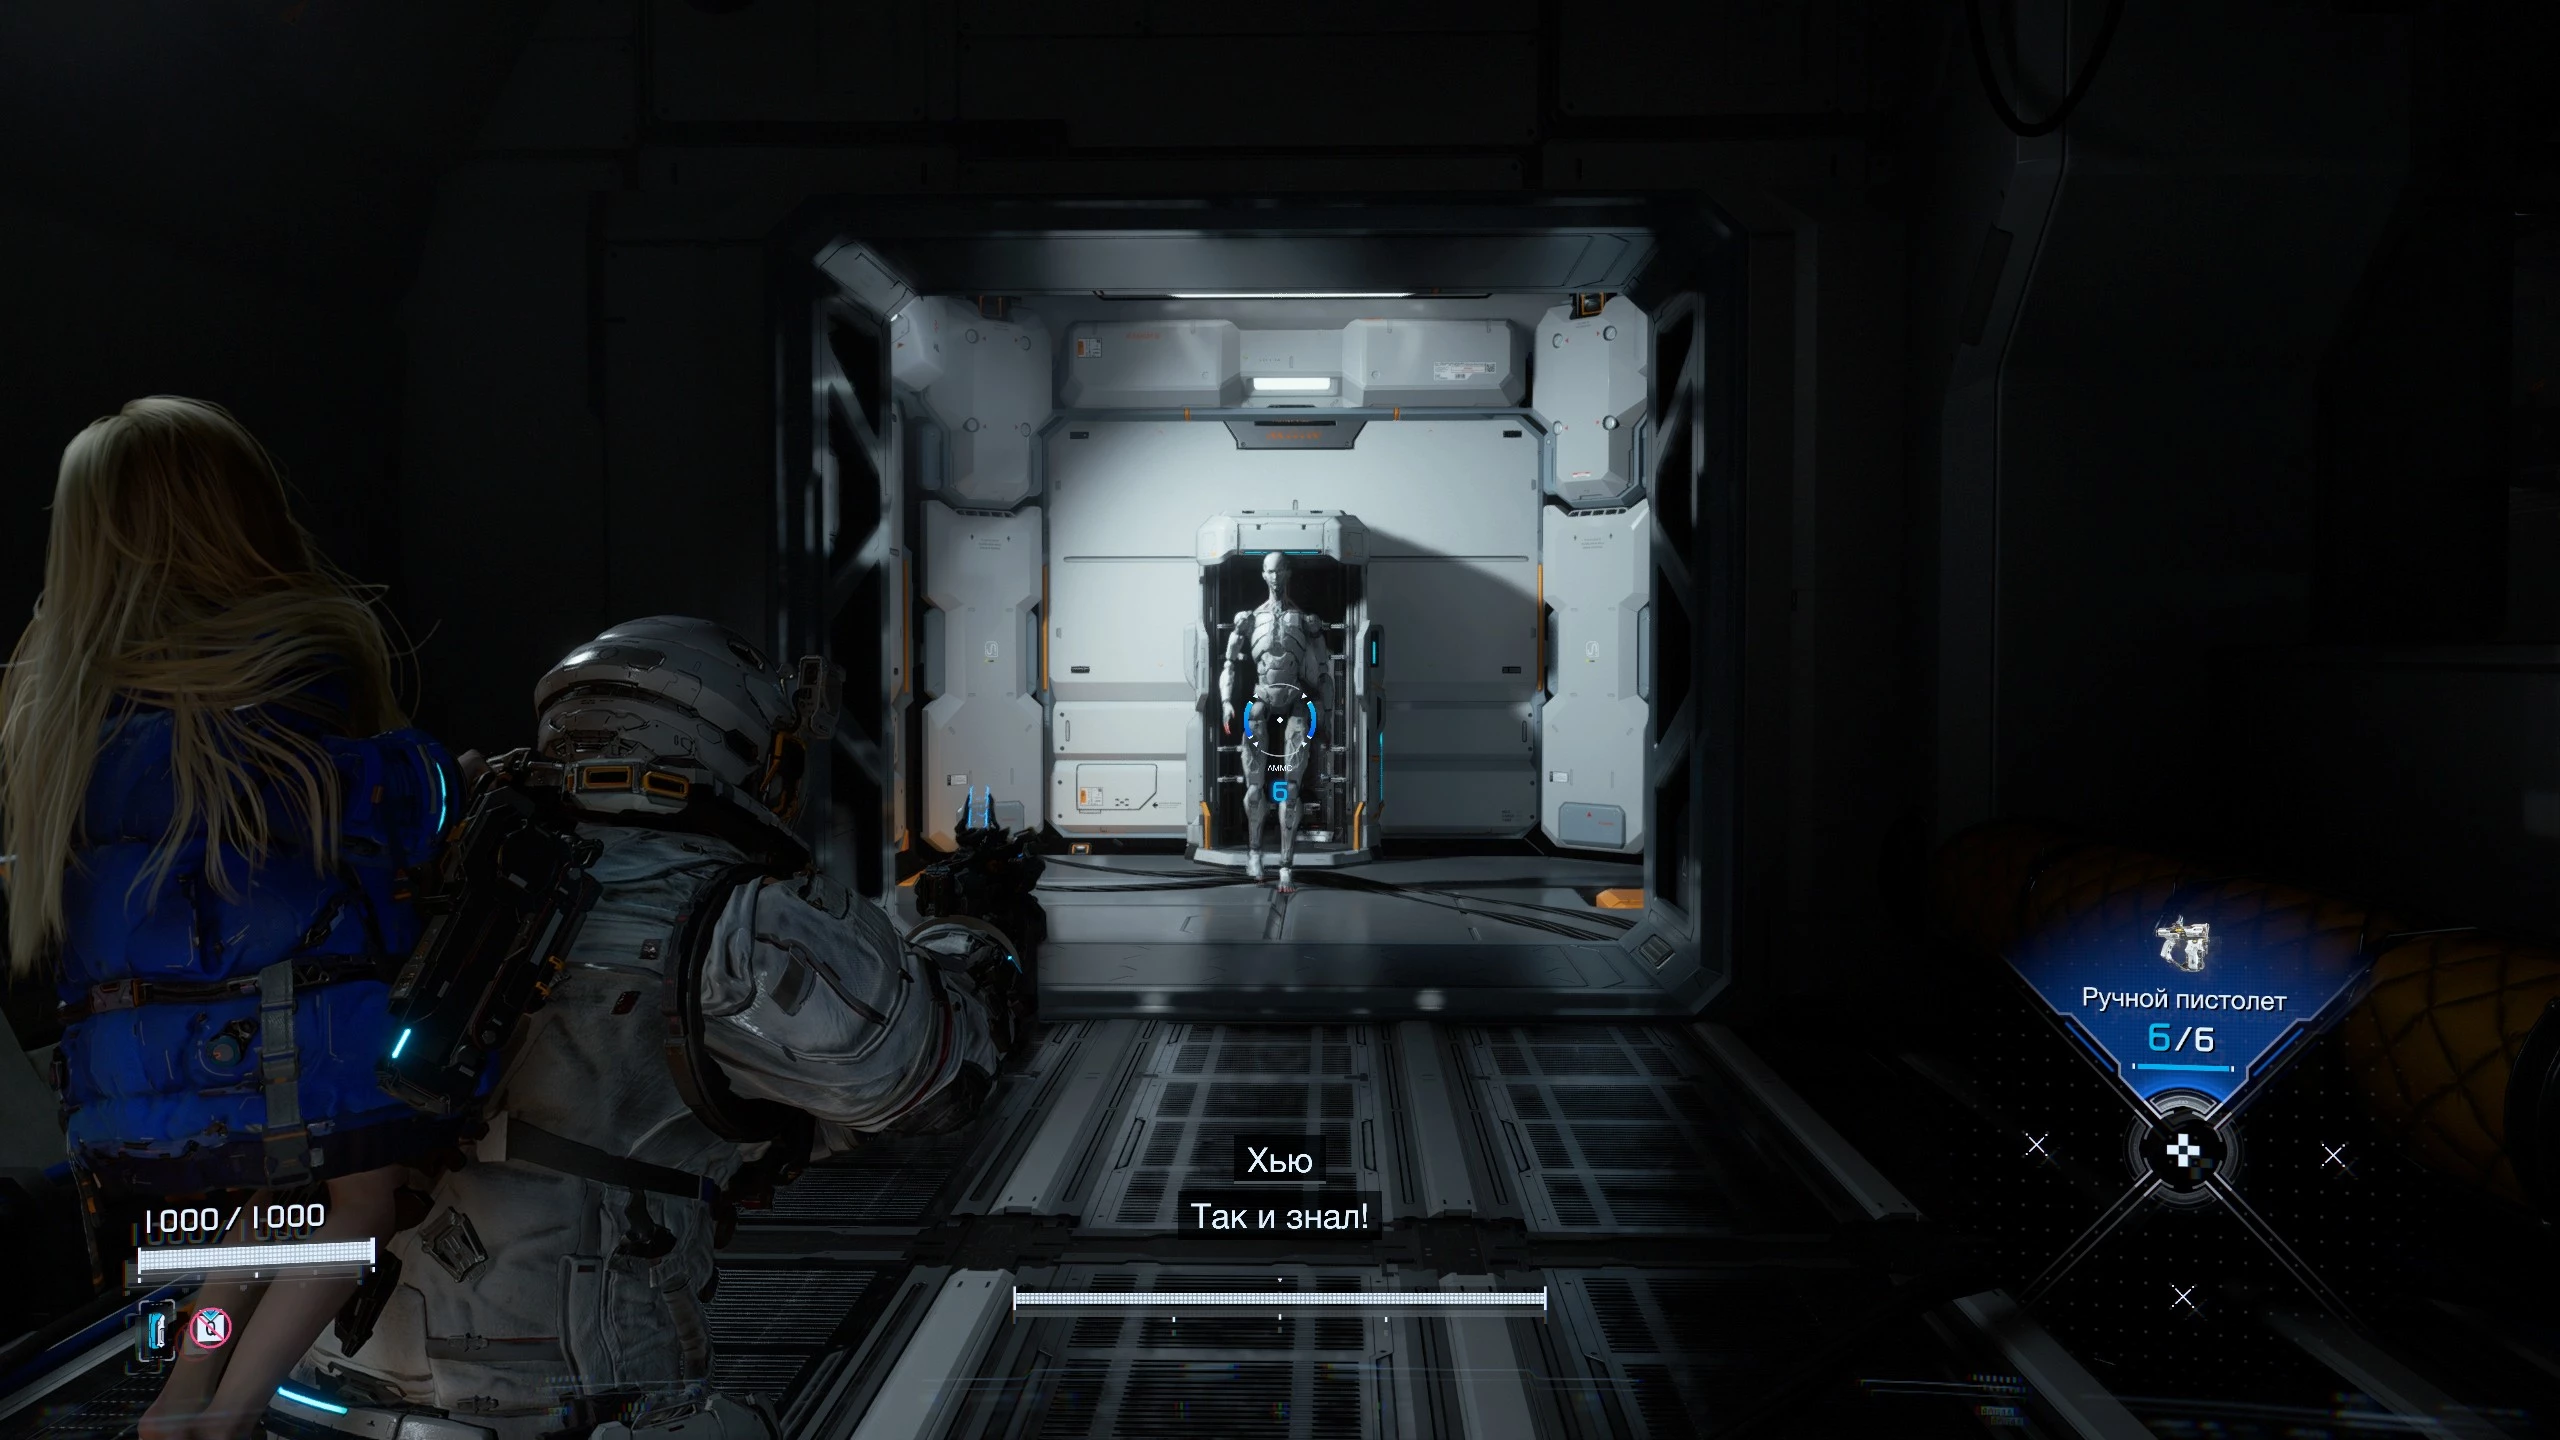
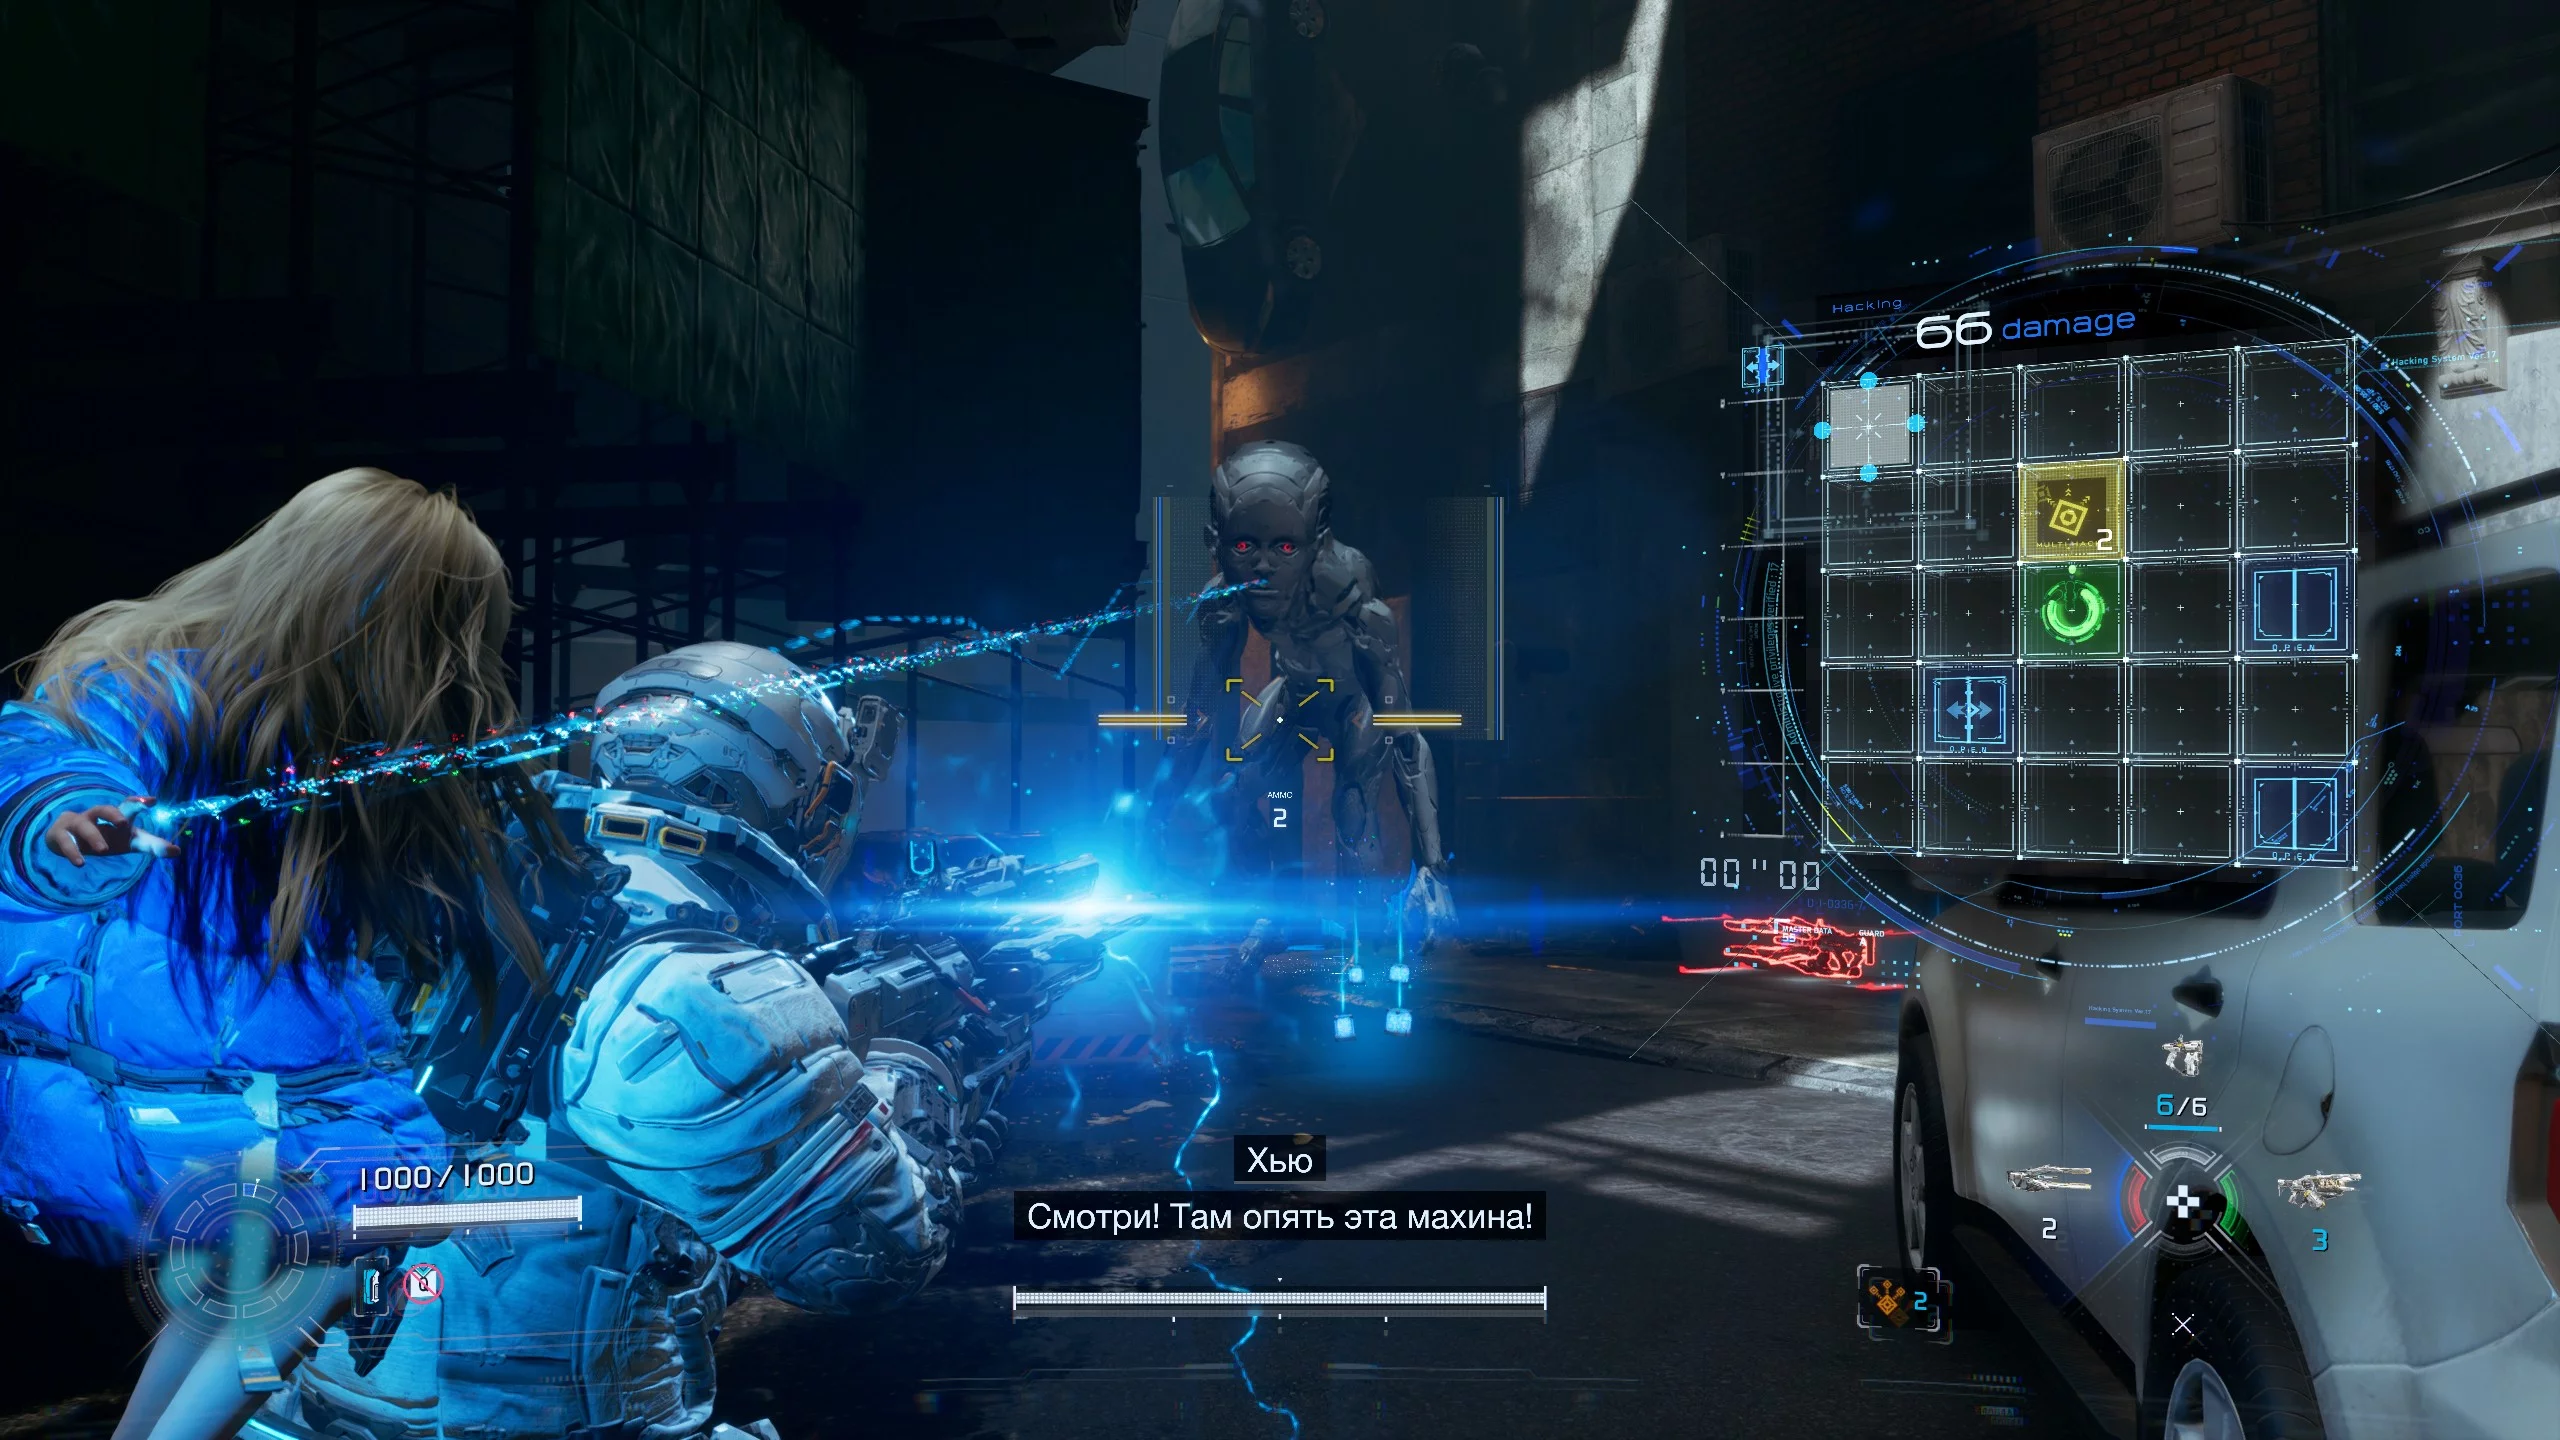
Move toward the debris, which will trigger a long cutscene where an earthquake causes the crew to lose contact with each other. The hero is saved by a girl with a healing gun, and then they are attacked by the Watcher—the first enemy in the game. At first, you need to shoot it with your sidearm.
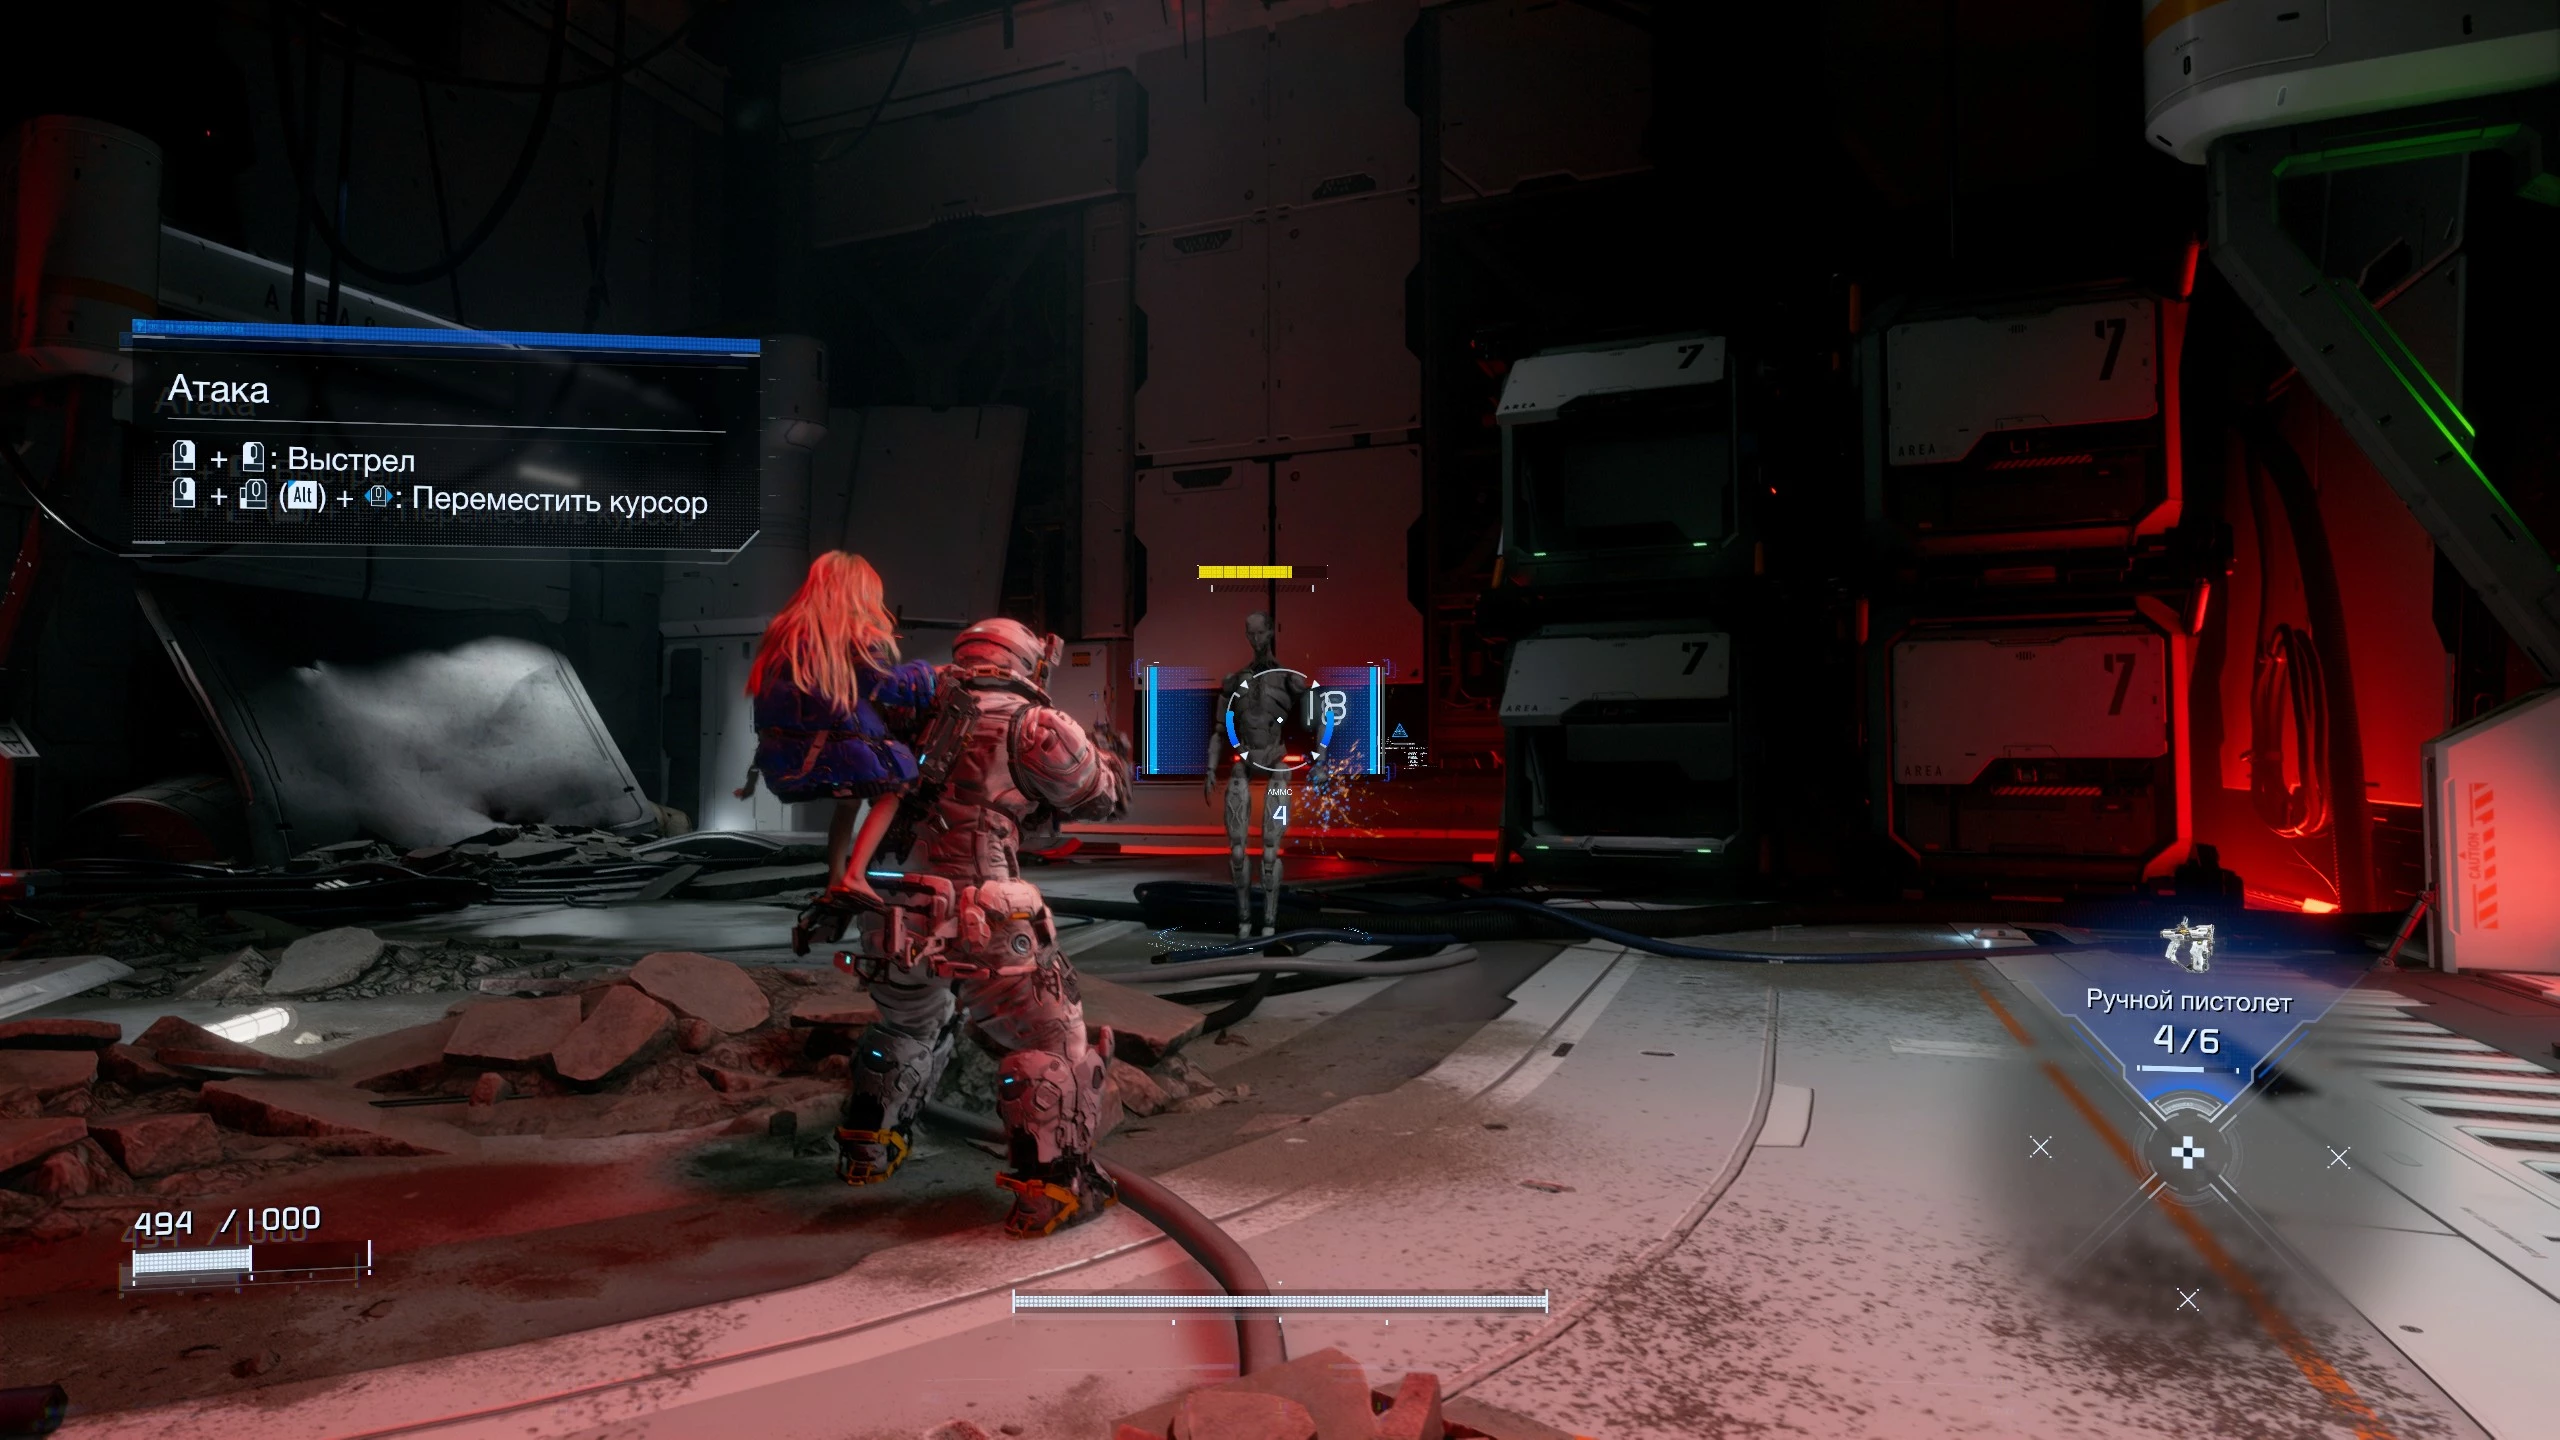
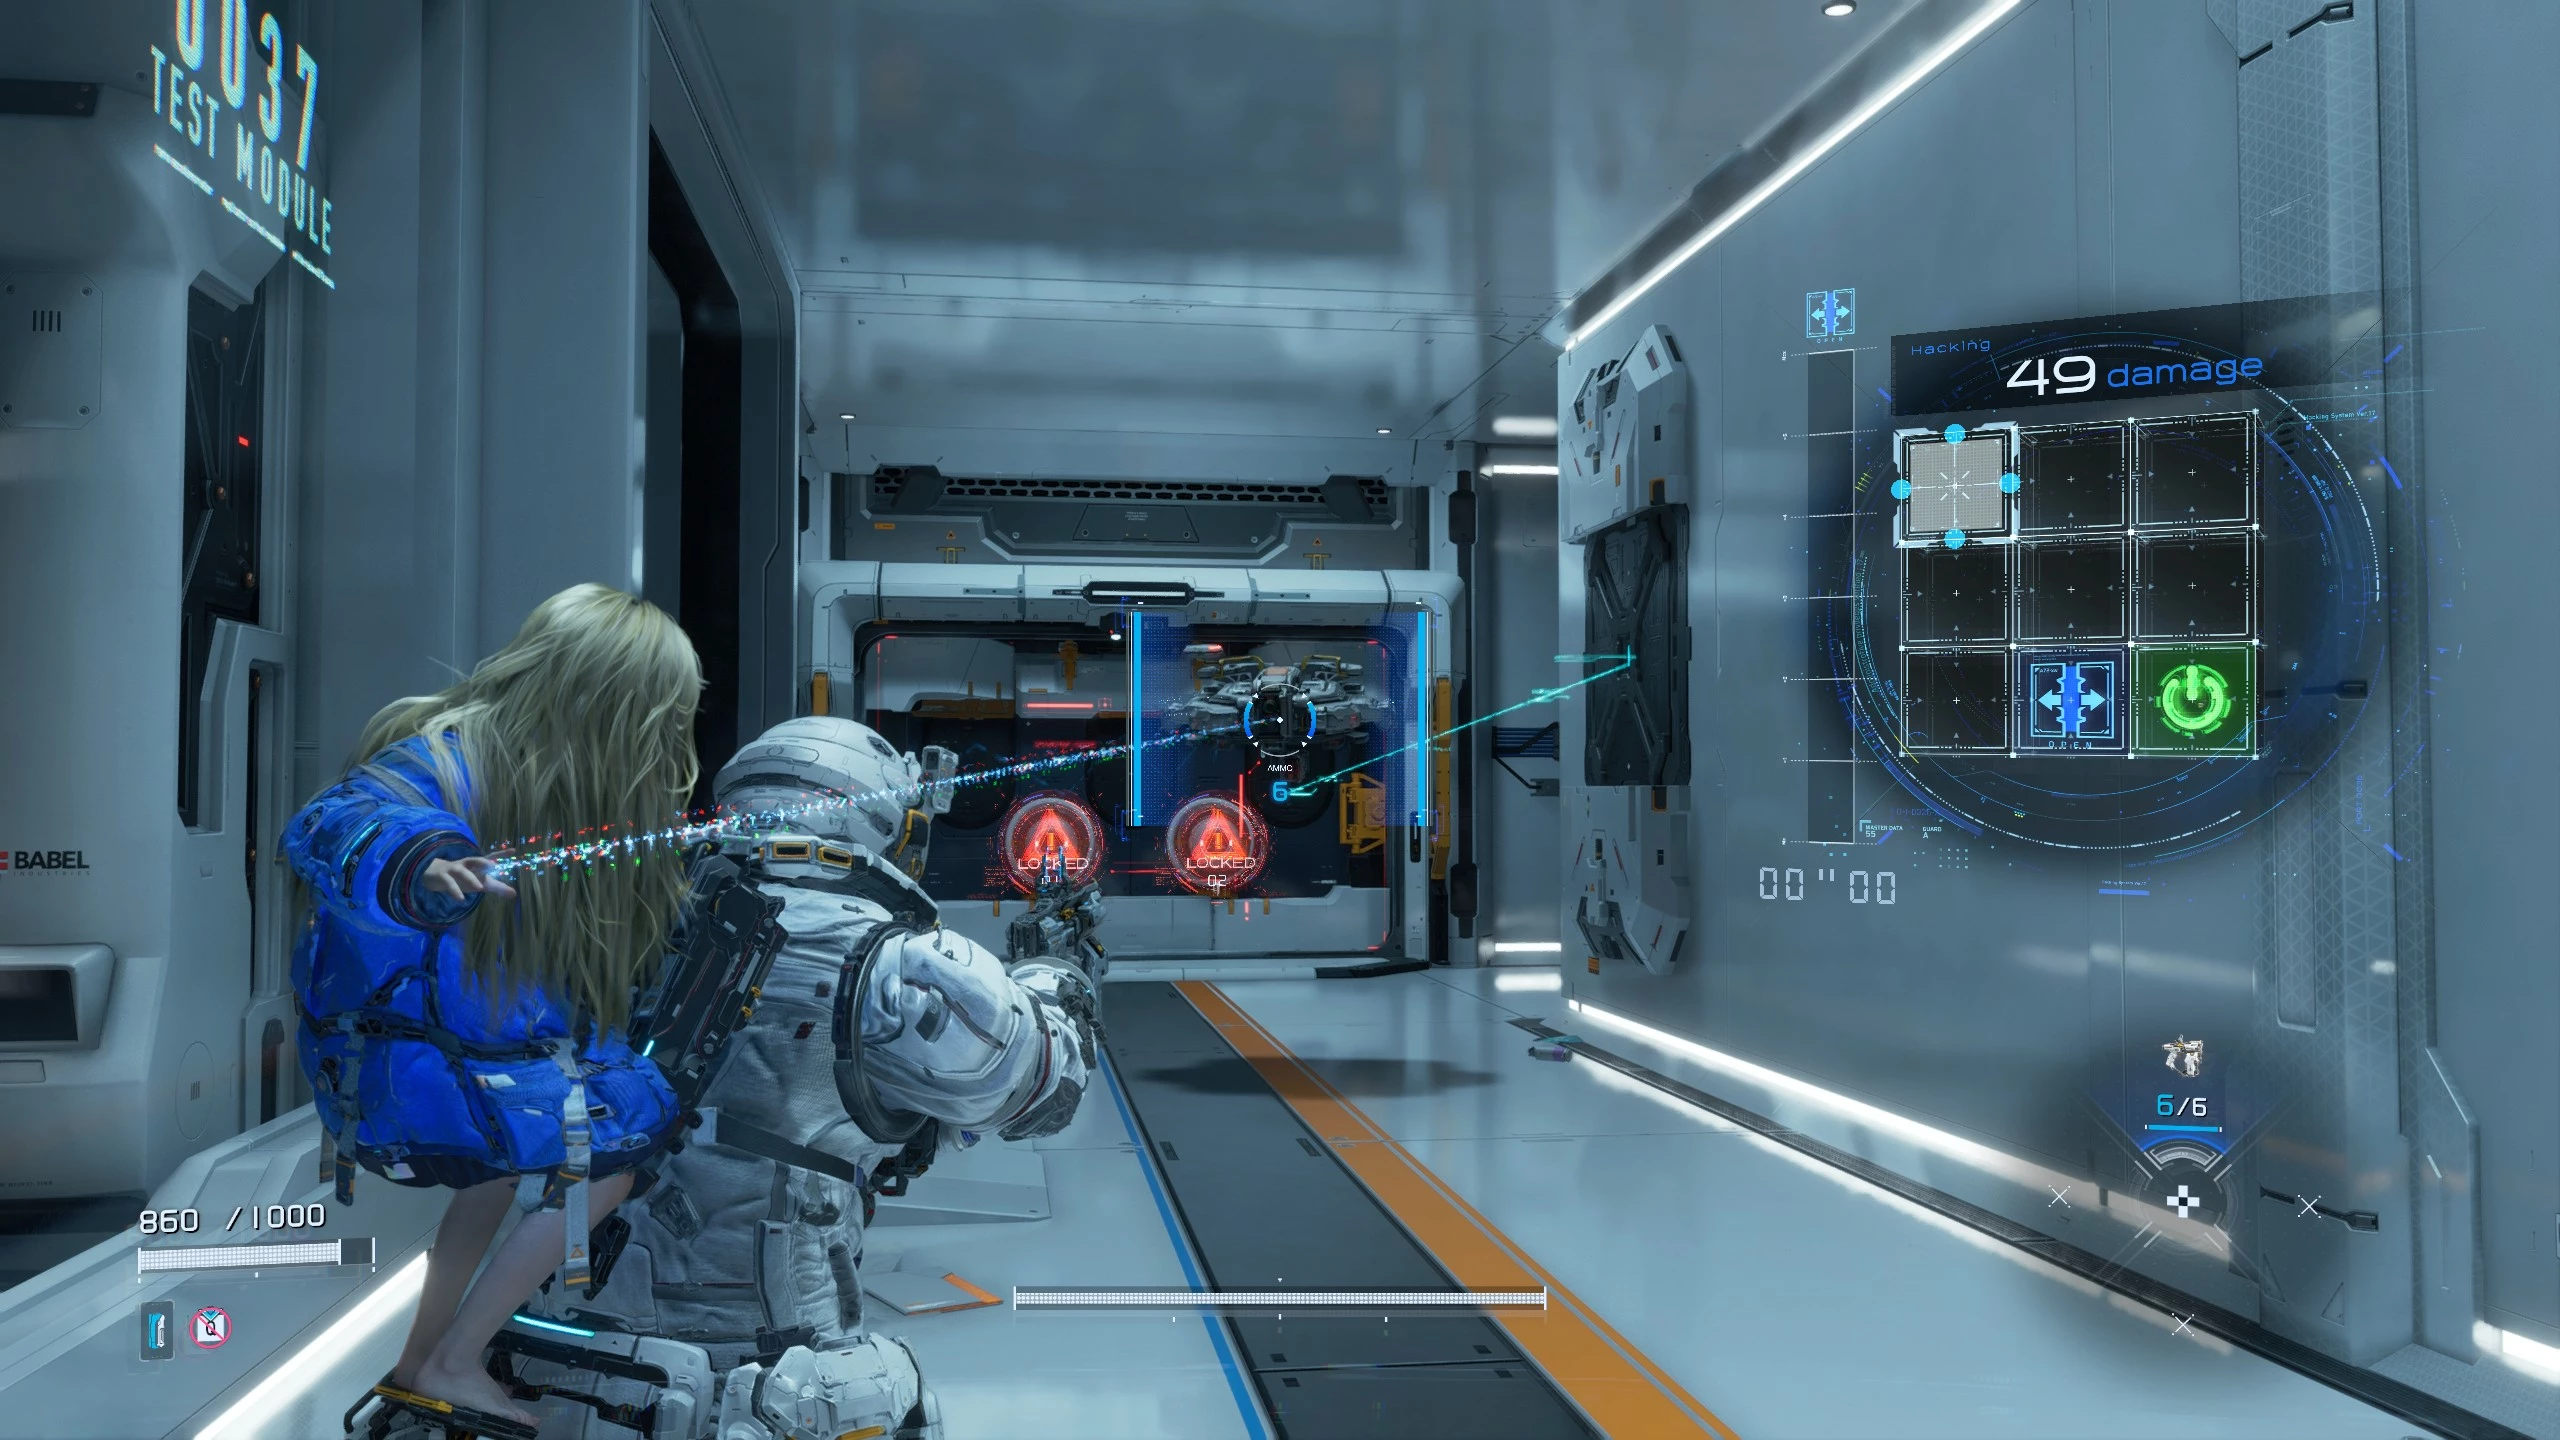
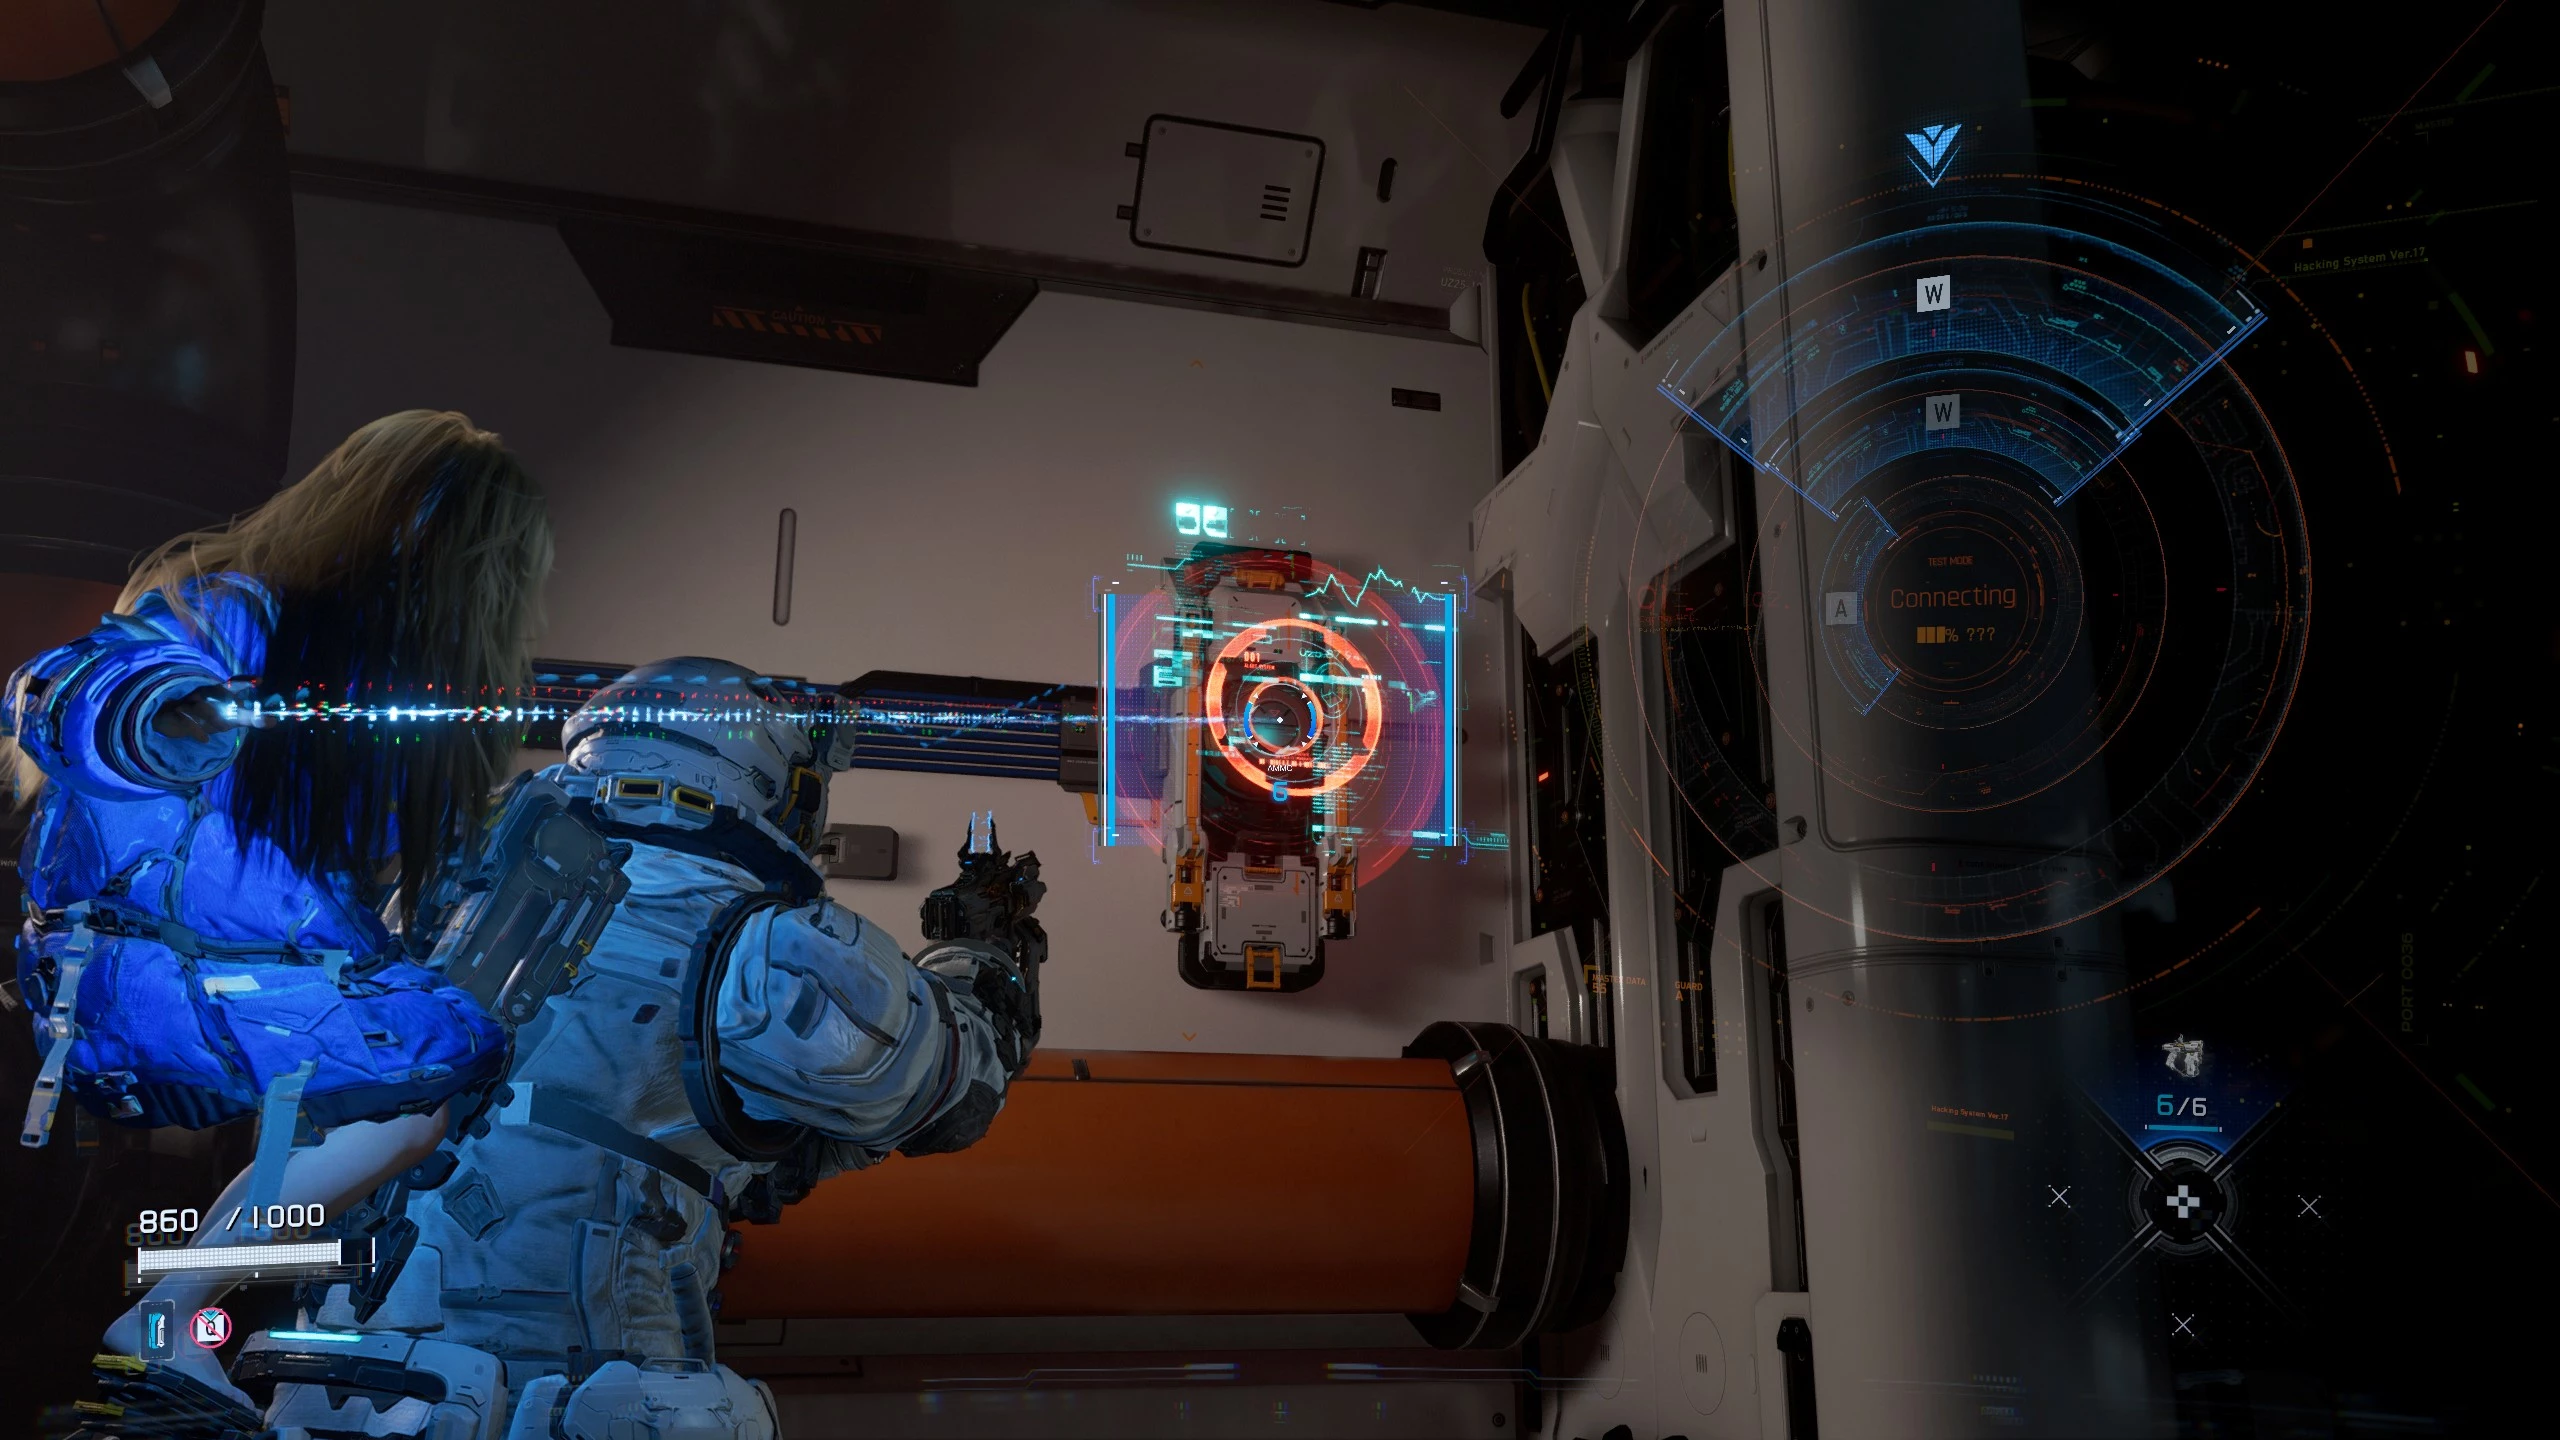
At a certain point, the girl will join the fight—she can hack robots. The key is that shooting androids is pointless at first, since you need to weaken their defenses to temporarily expose their weak spots. Hacking is presented as a mini-game where you move from the starting cell to the green cell. Hit blue fragments to deal more damage.
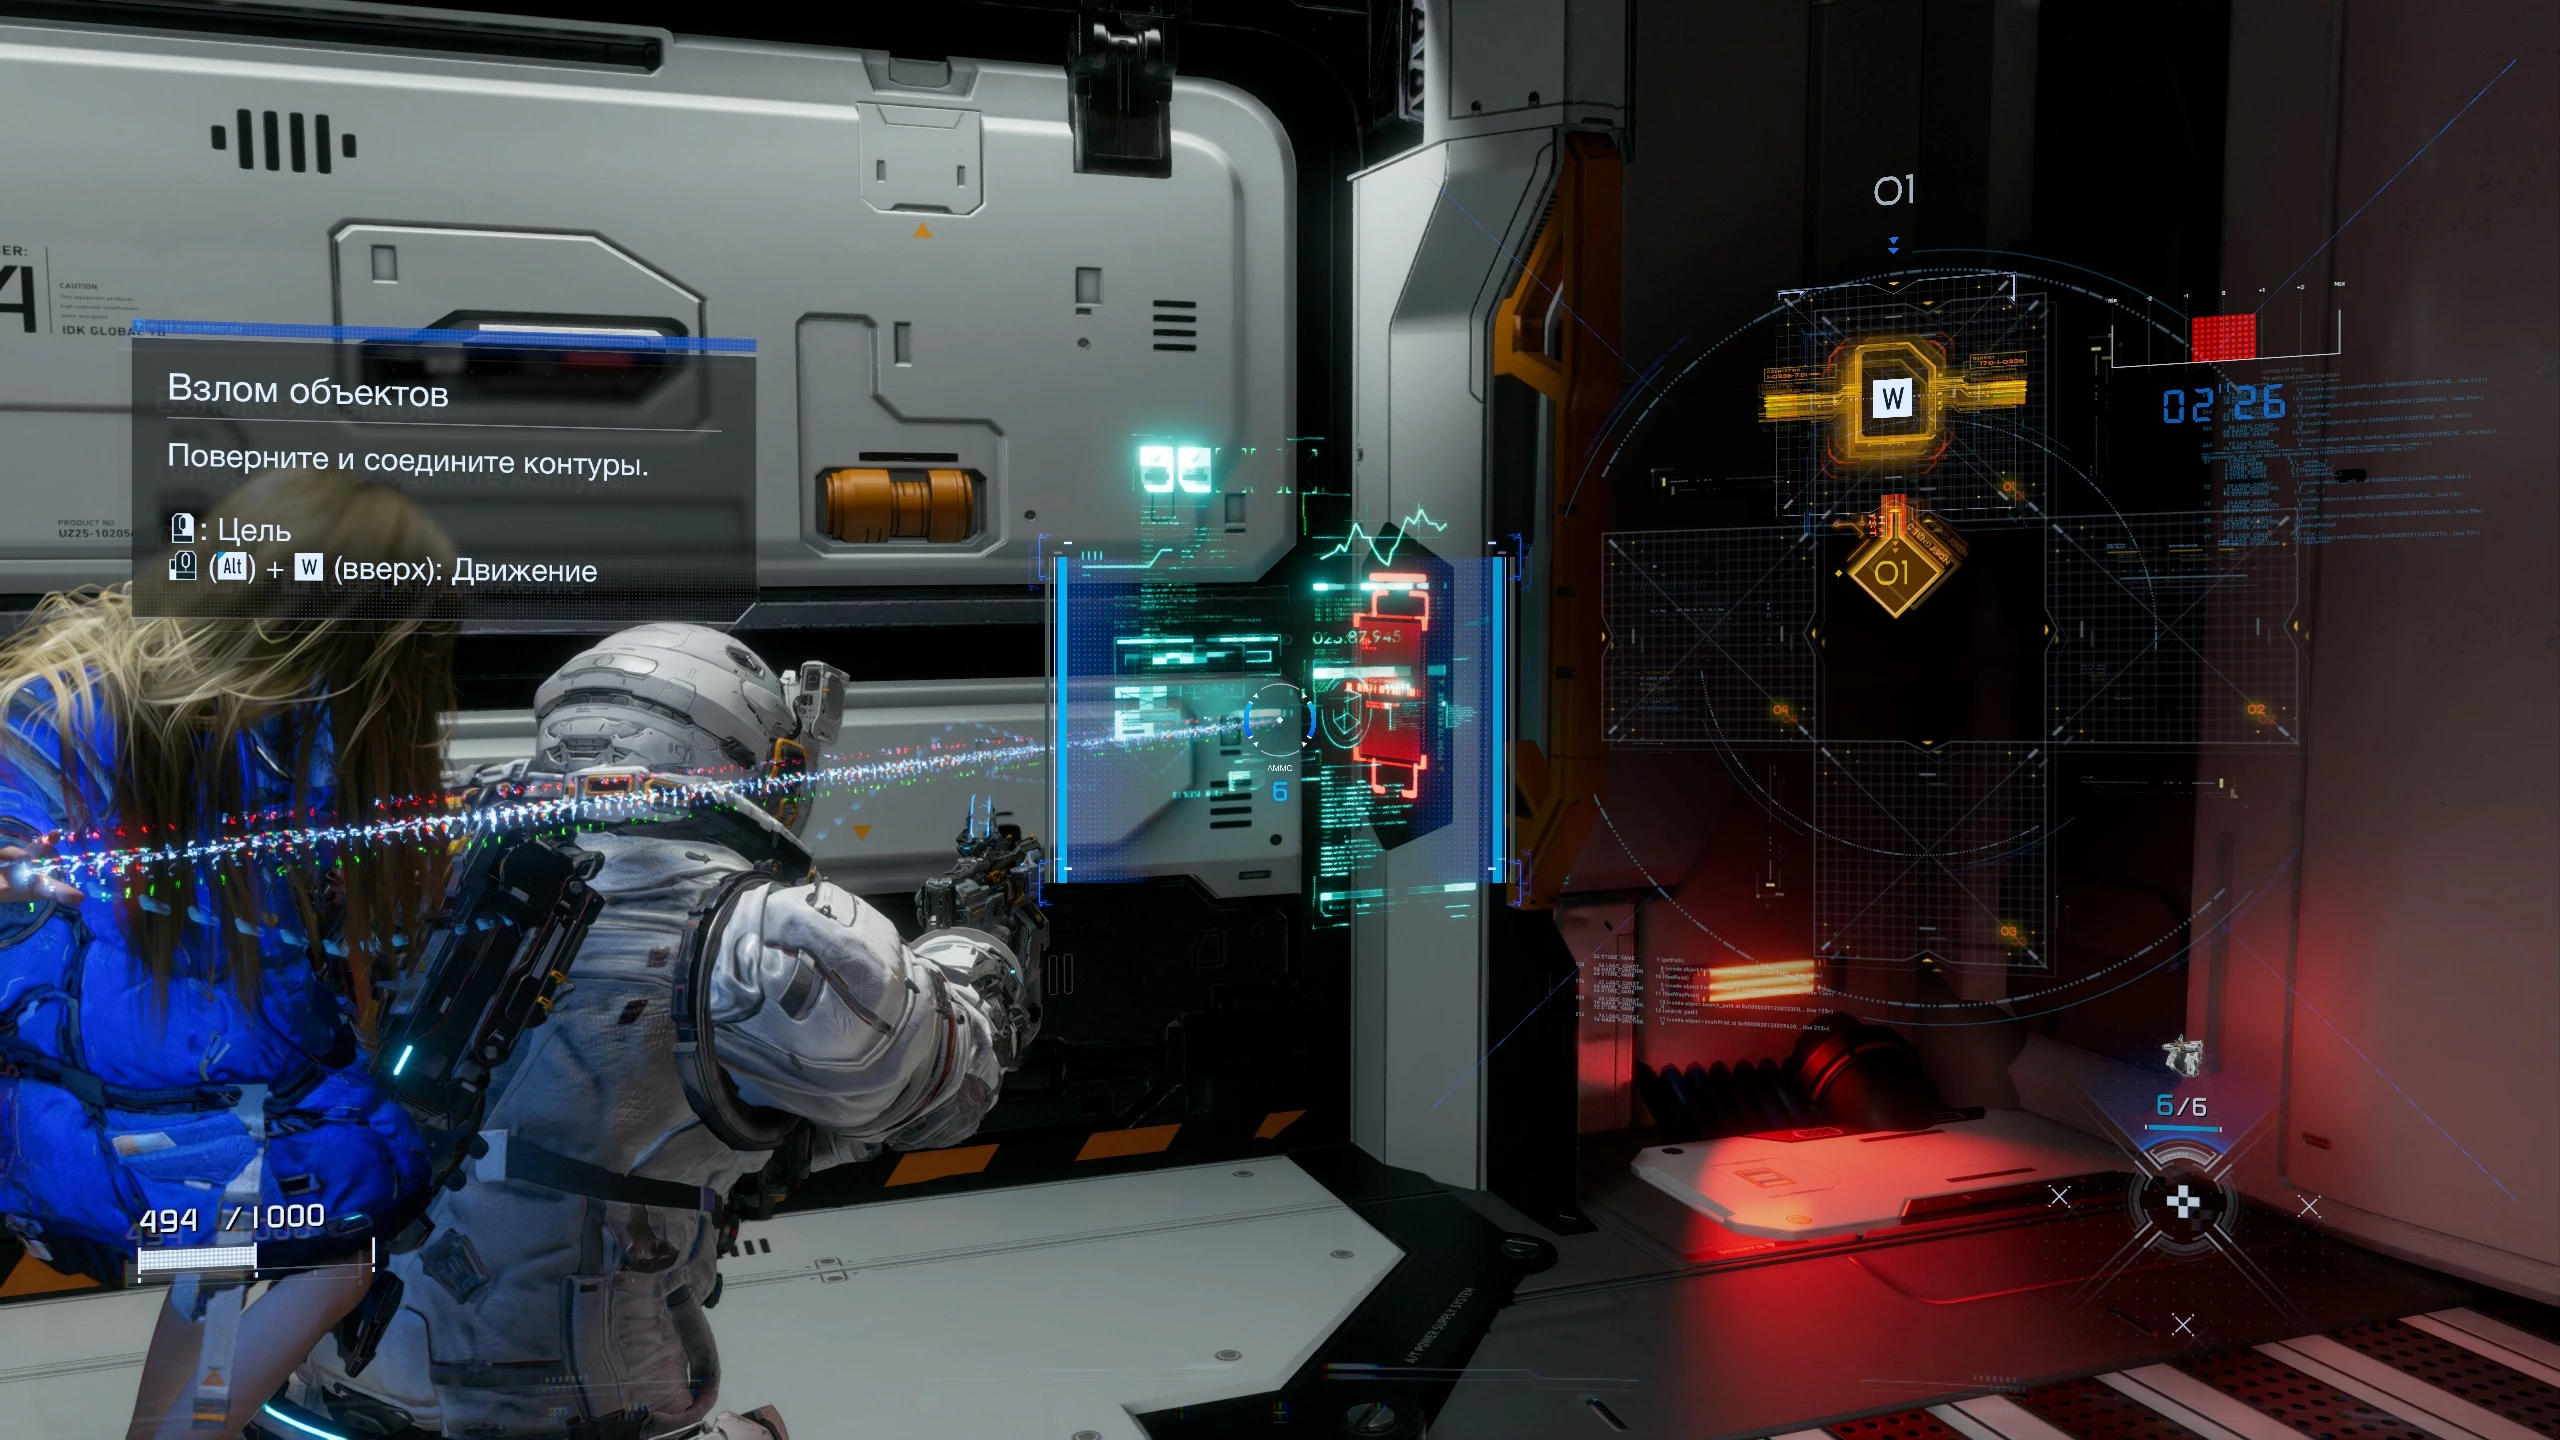
After the fight with the Watcher, you will need to hack a door. Switch to hacking mode and use your controller or keyboard to set all the elements in the correct order, turning them from orange to blue. This is how you activate many different mechanisms. Keep in mind that in most cases, you will have no more than five seconds.
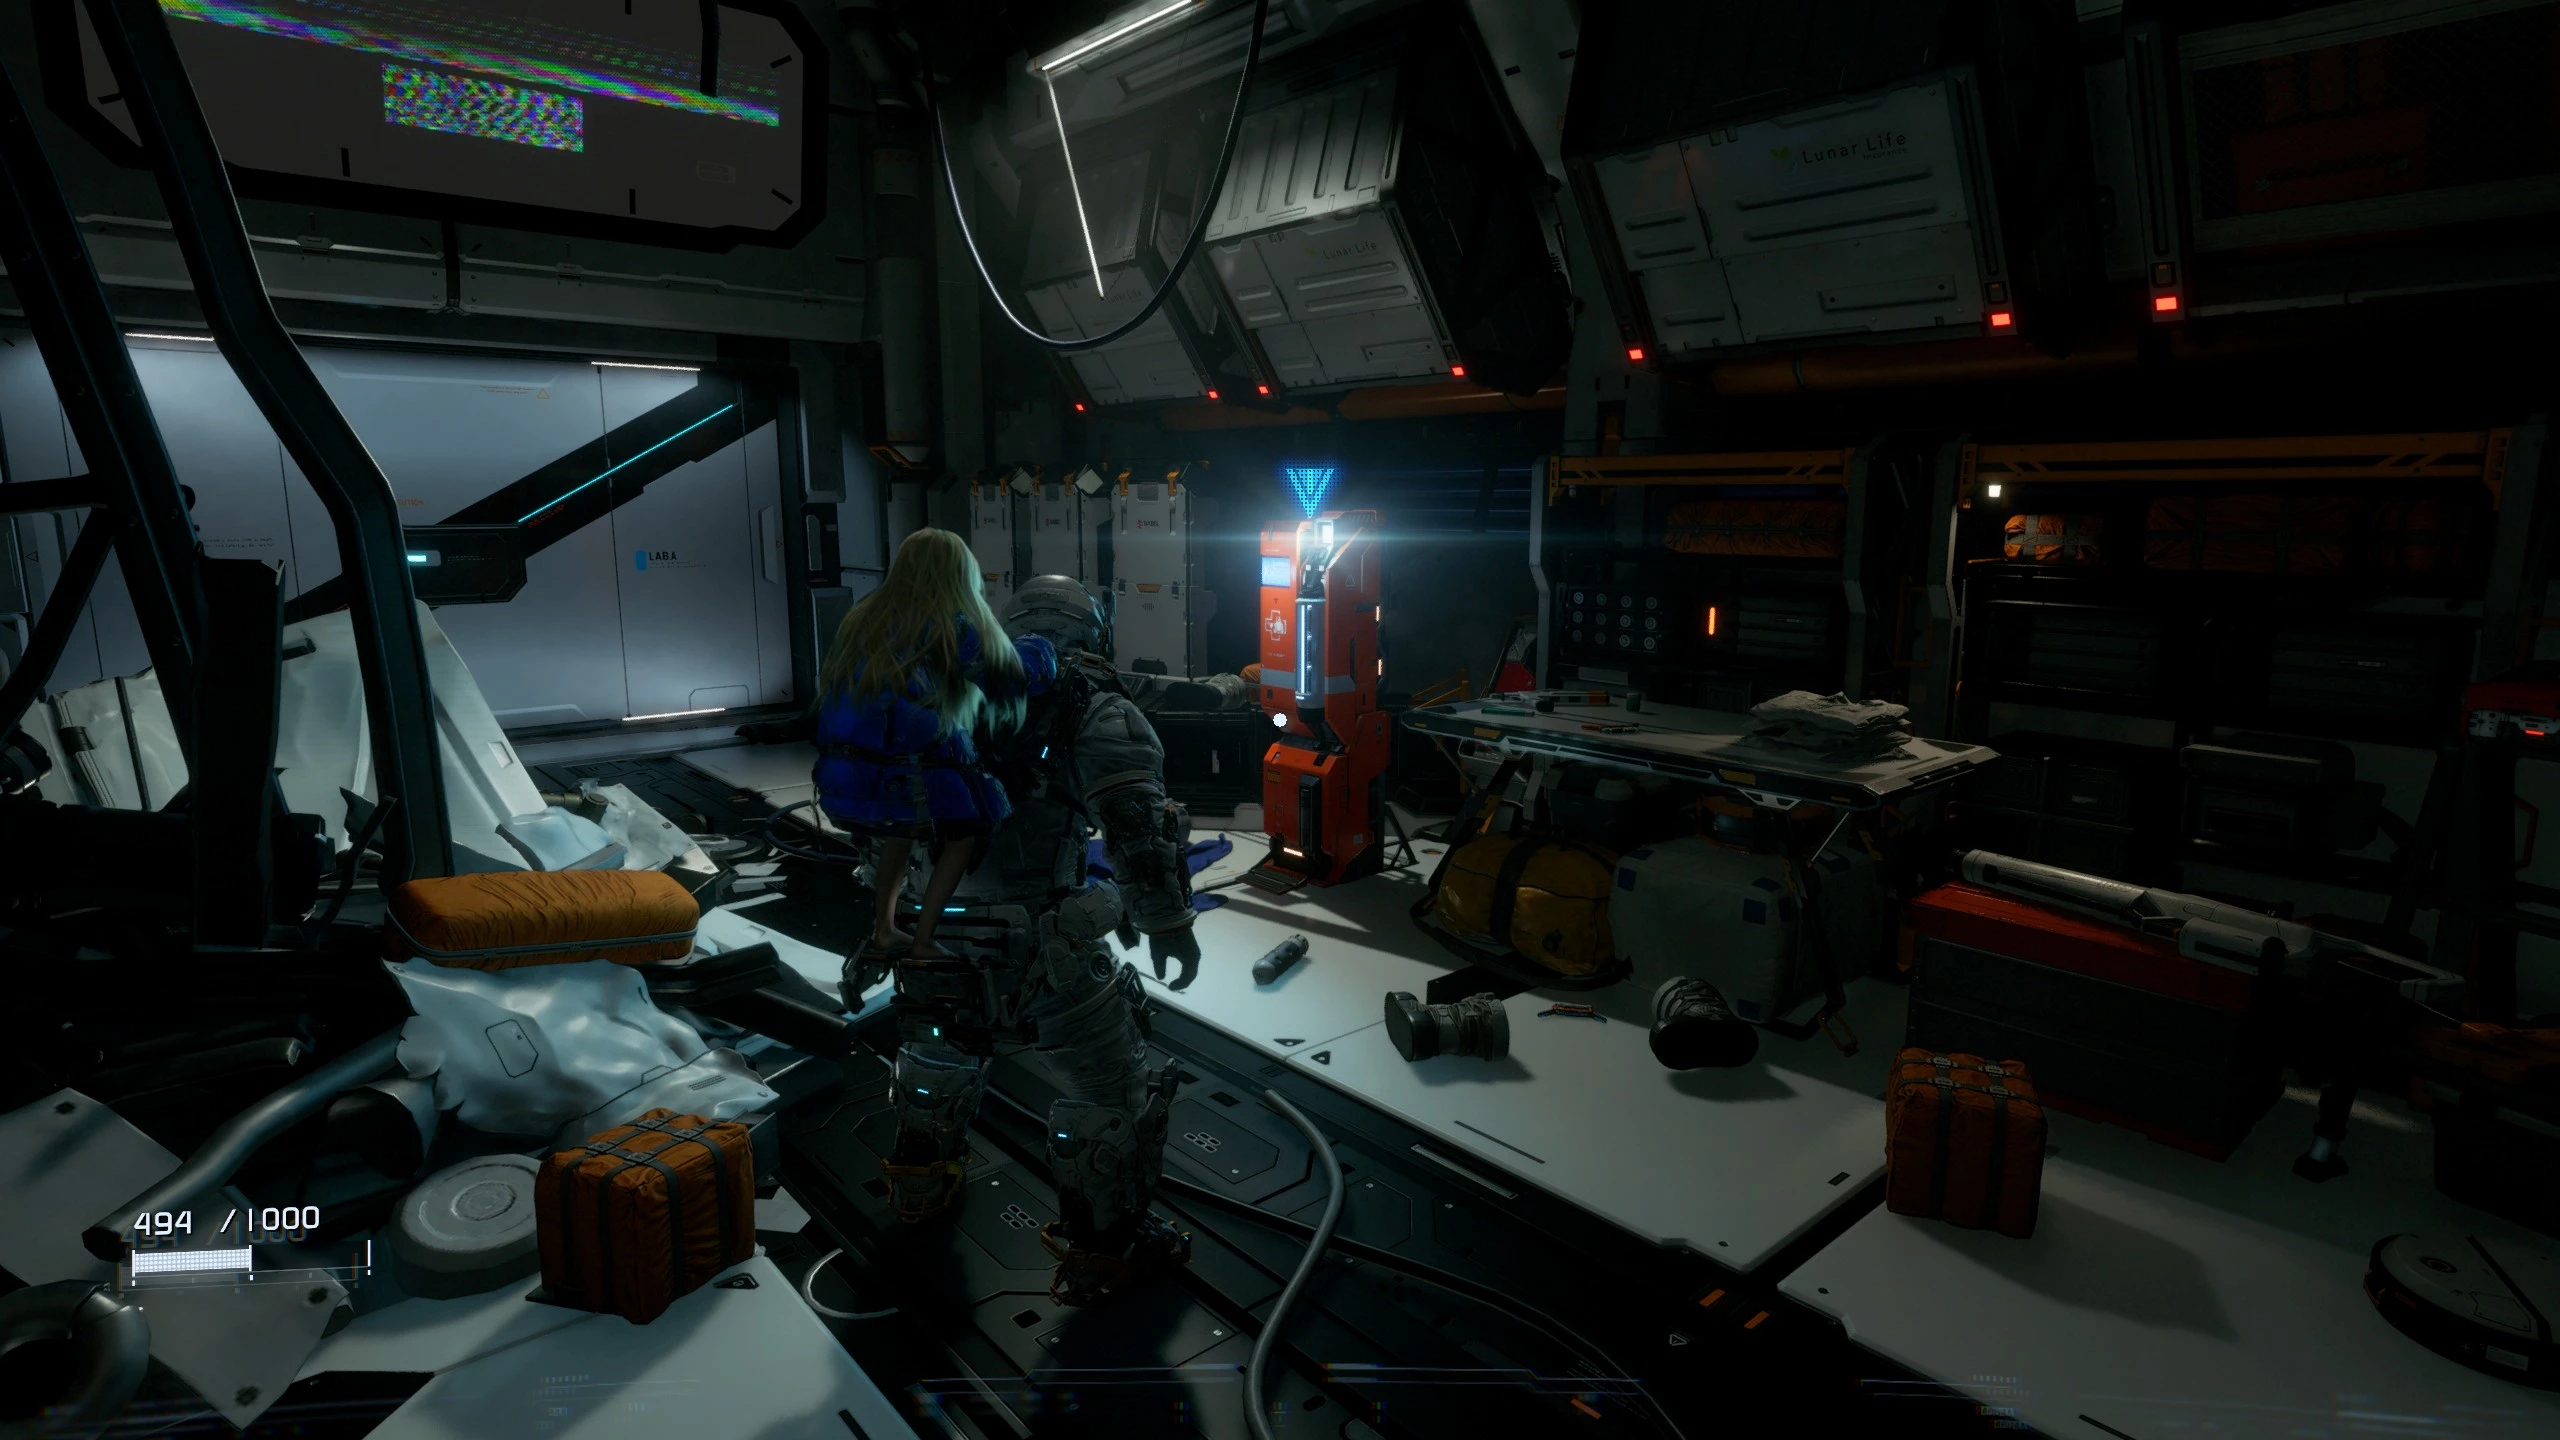
This will open a corridor with a terminal containing a repair cartridge. There is no classic health bar in this game; instead, you have suit integrity, which is restored with a repair cartridge. For now, you can carry only one repair kit, but later you will be able to increase the number of slots.
Next, you will find yourself in a giant hangar, and your goal is to reach the escape pod. Climb down from the broken bridge and move forward, taking out robots and moving suspended rail cars. At the end, a cutscene reveals that the girl is actually an advanced android, and Hugh decides to name her Diana.
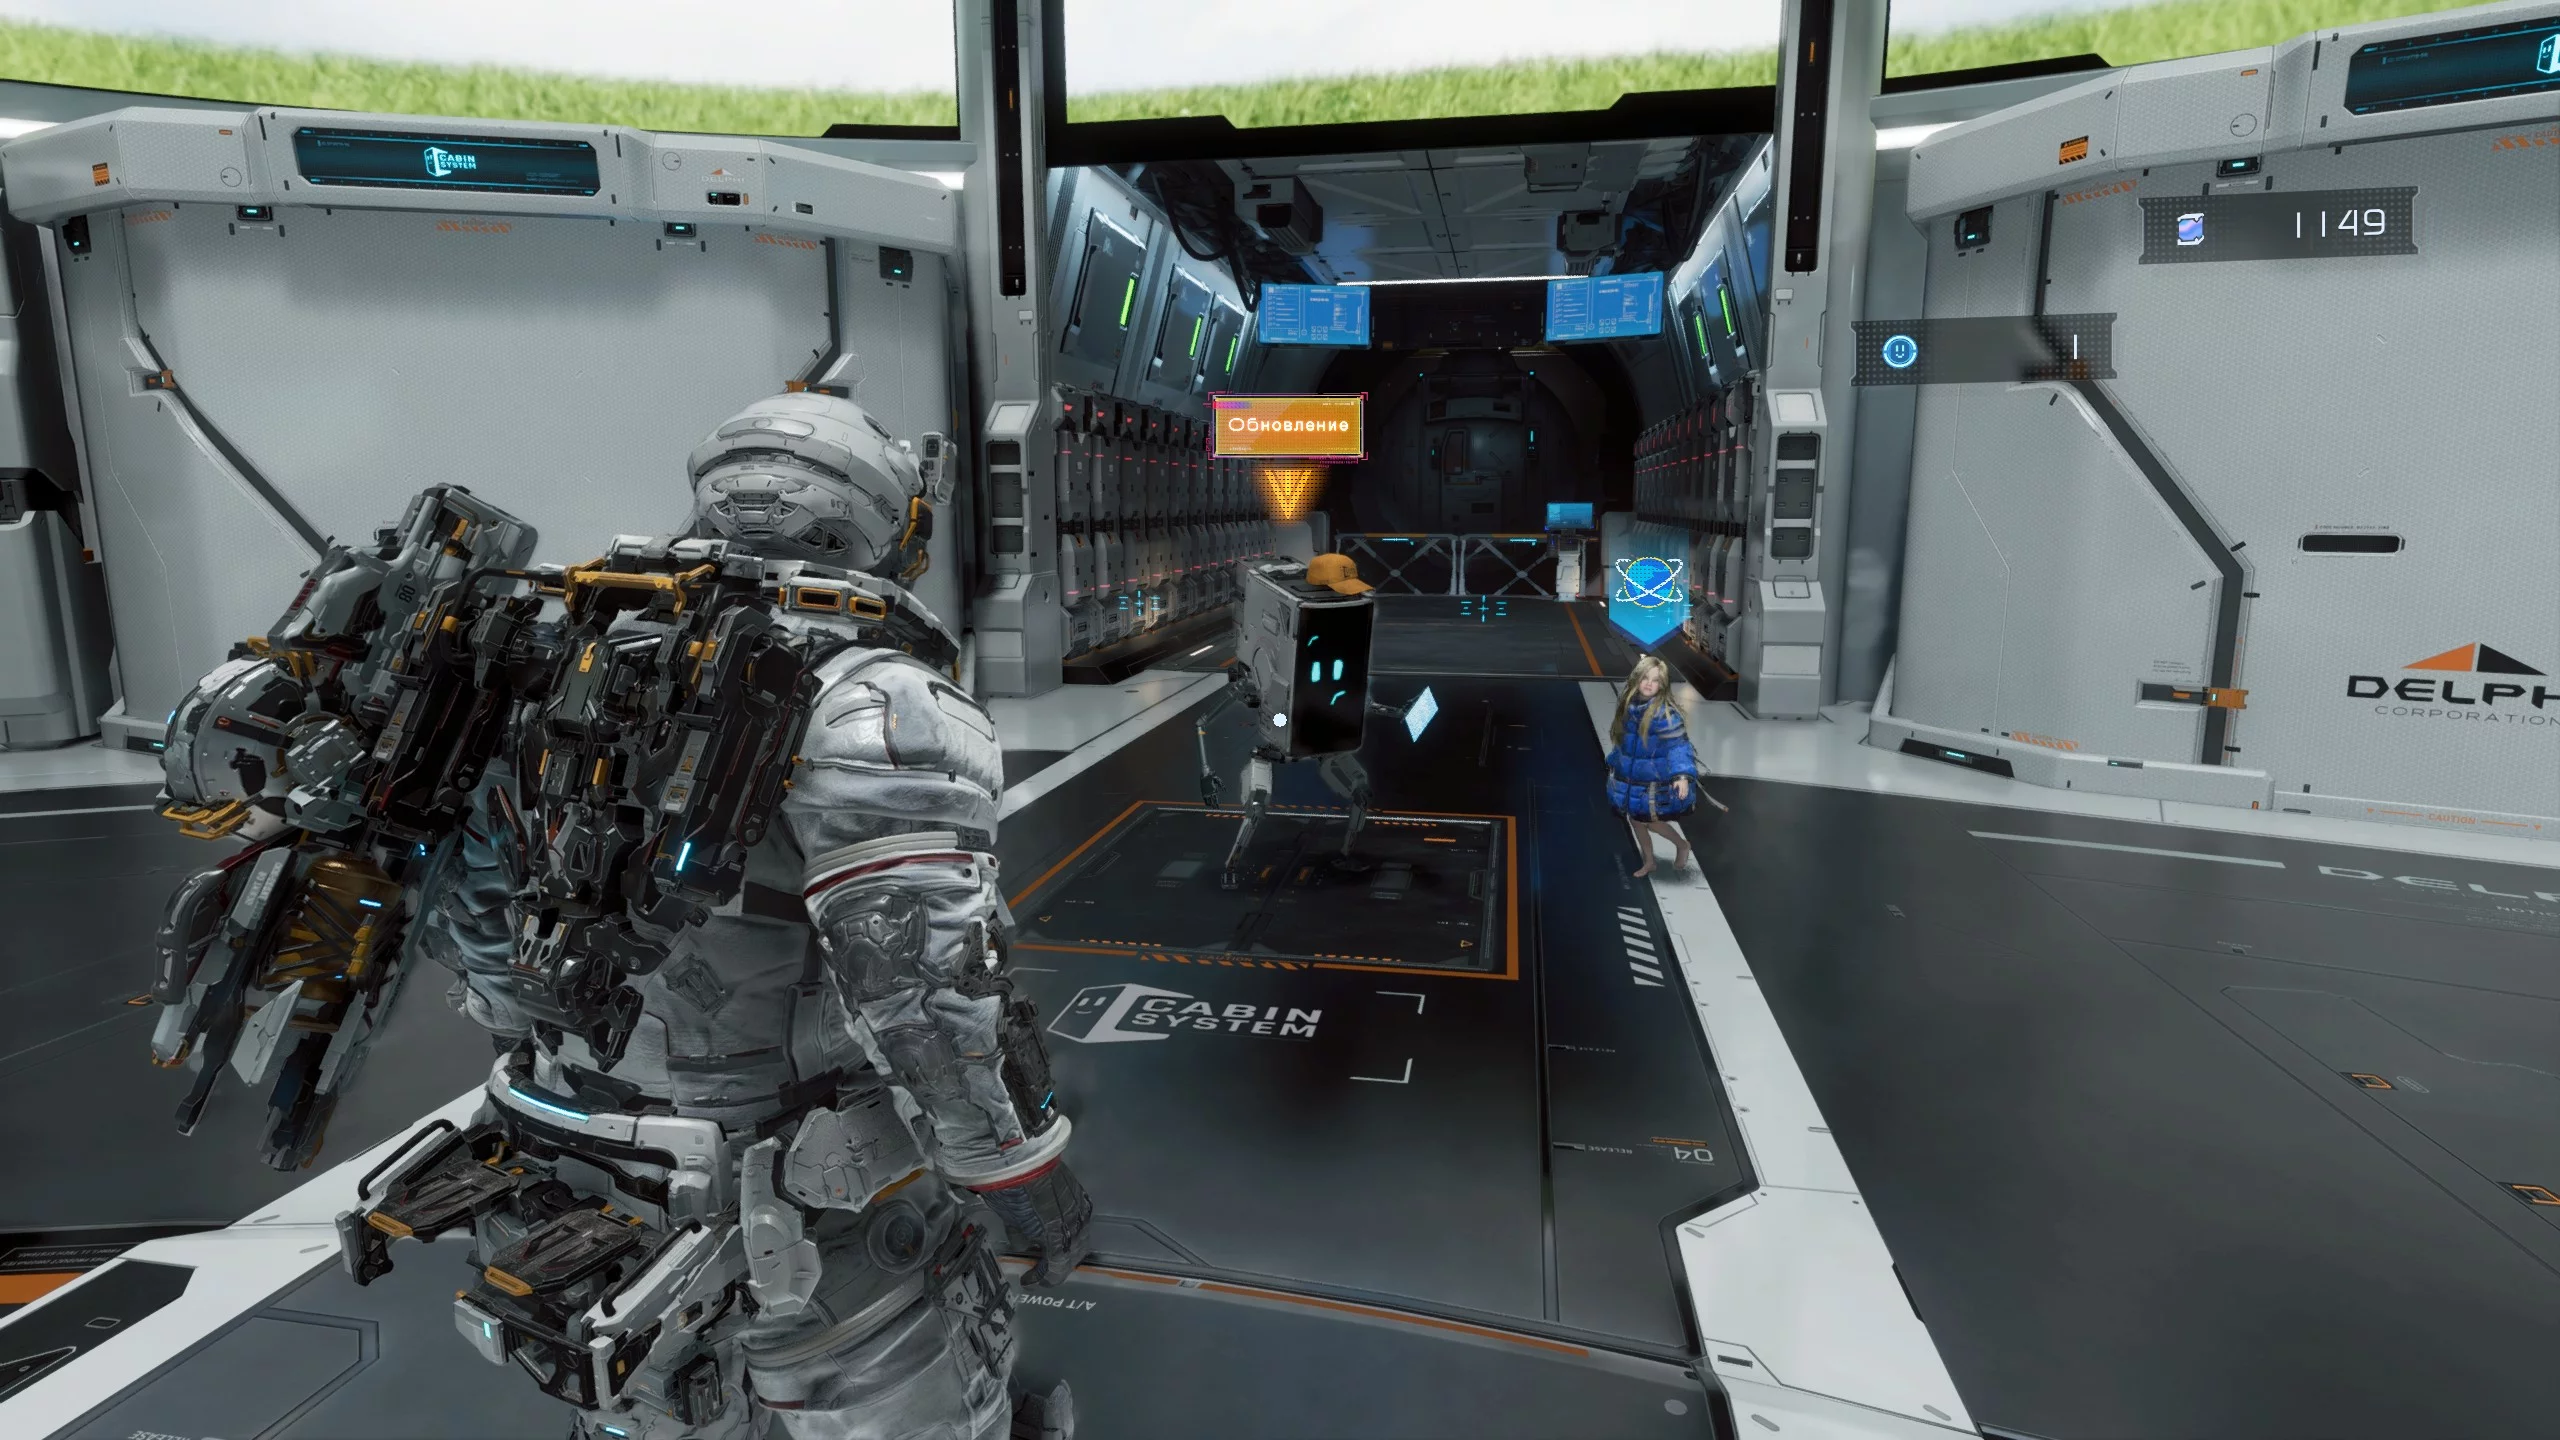
It turns out the pod can only move within the complex, and in an emergency, it takes you to a special safe zone. The first thing you will find is a repair area, which will restore Hugh's suit for free. The safe zone is where you can restock Hugh's supplies and upgrade his gear.
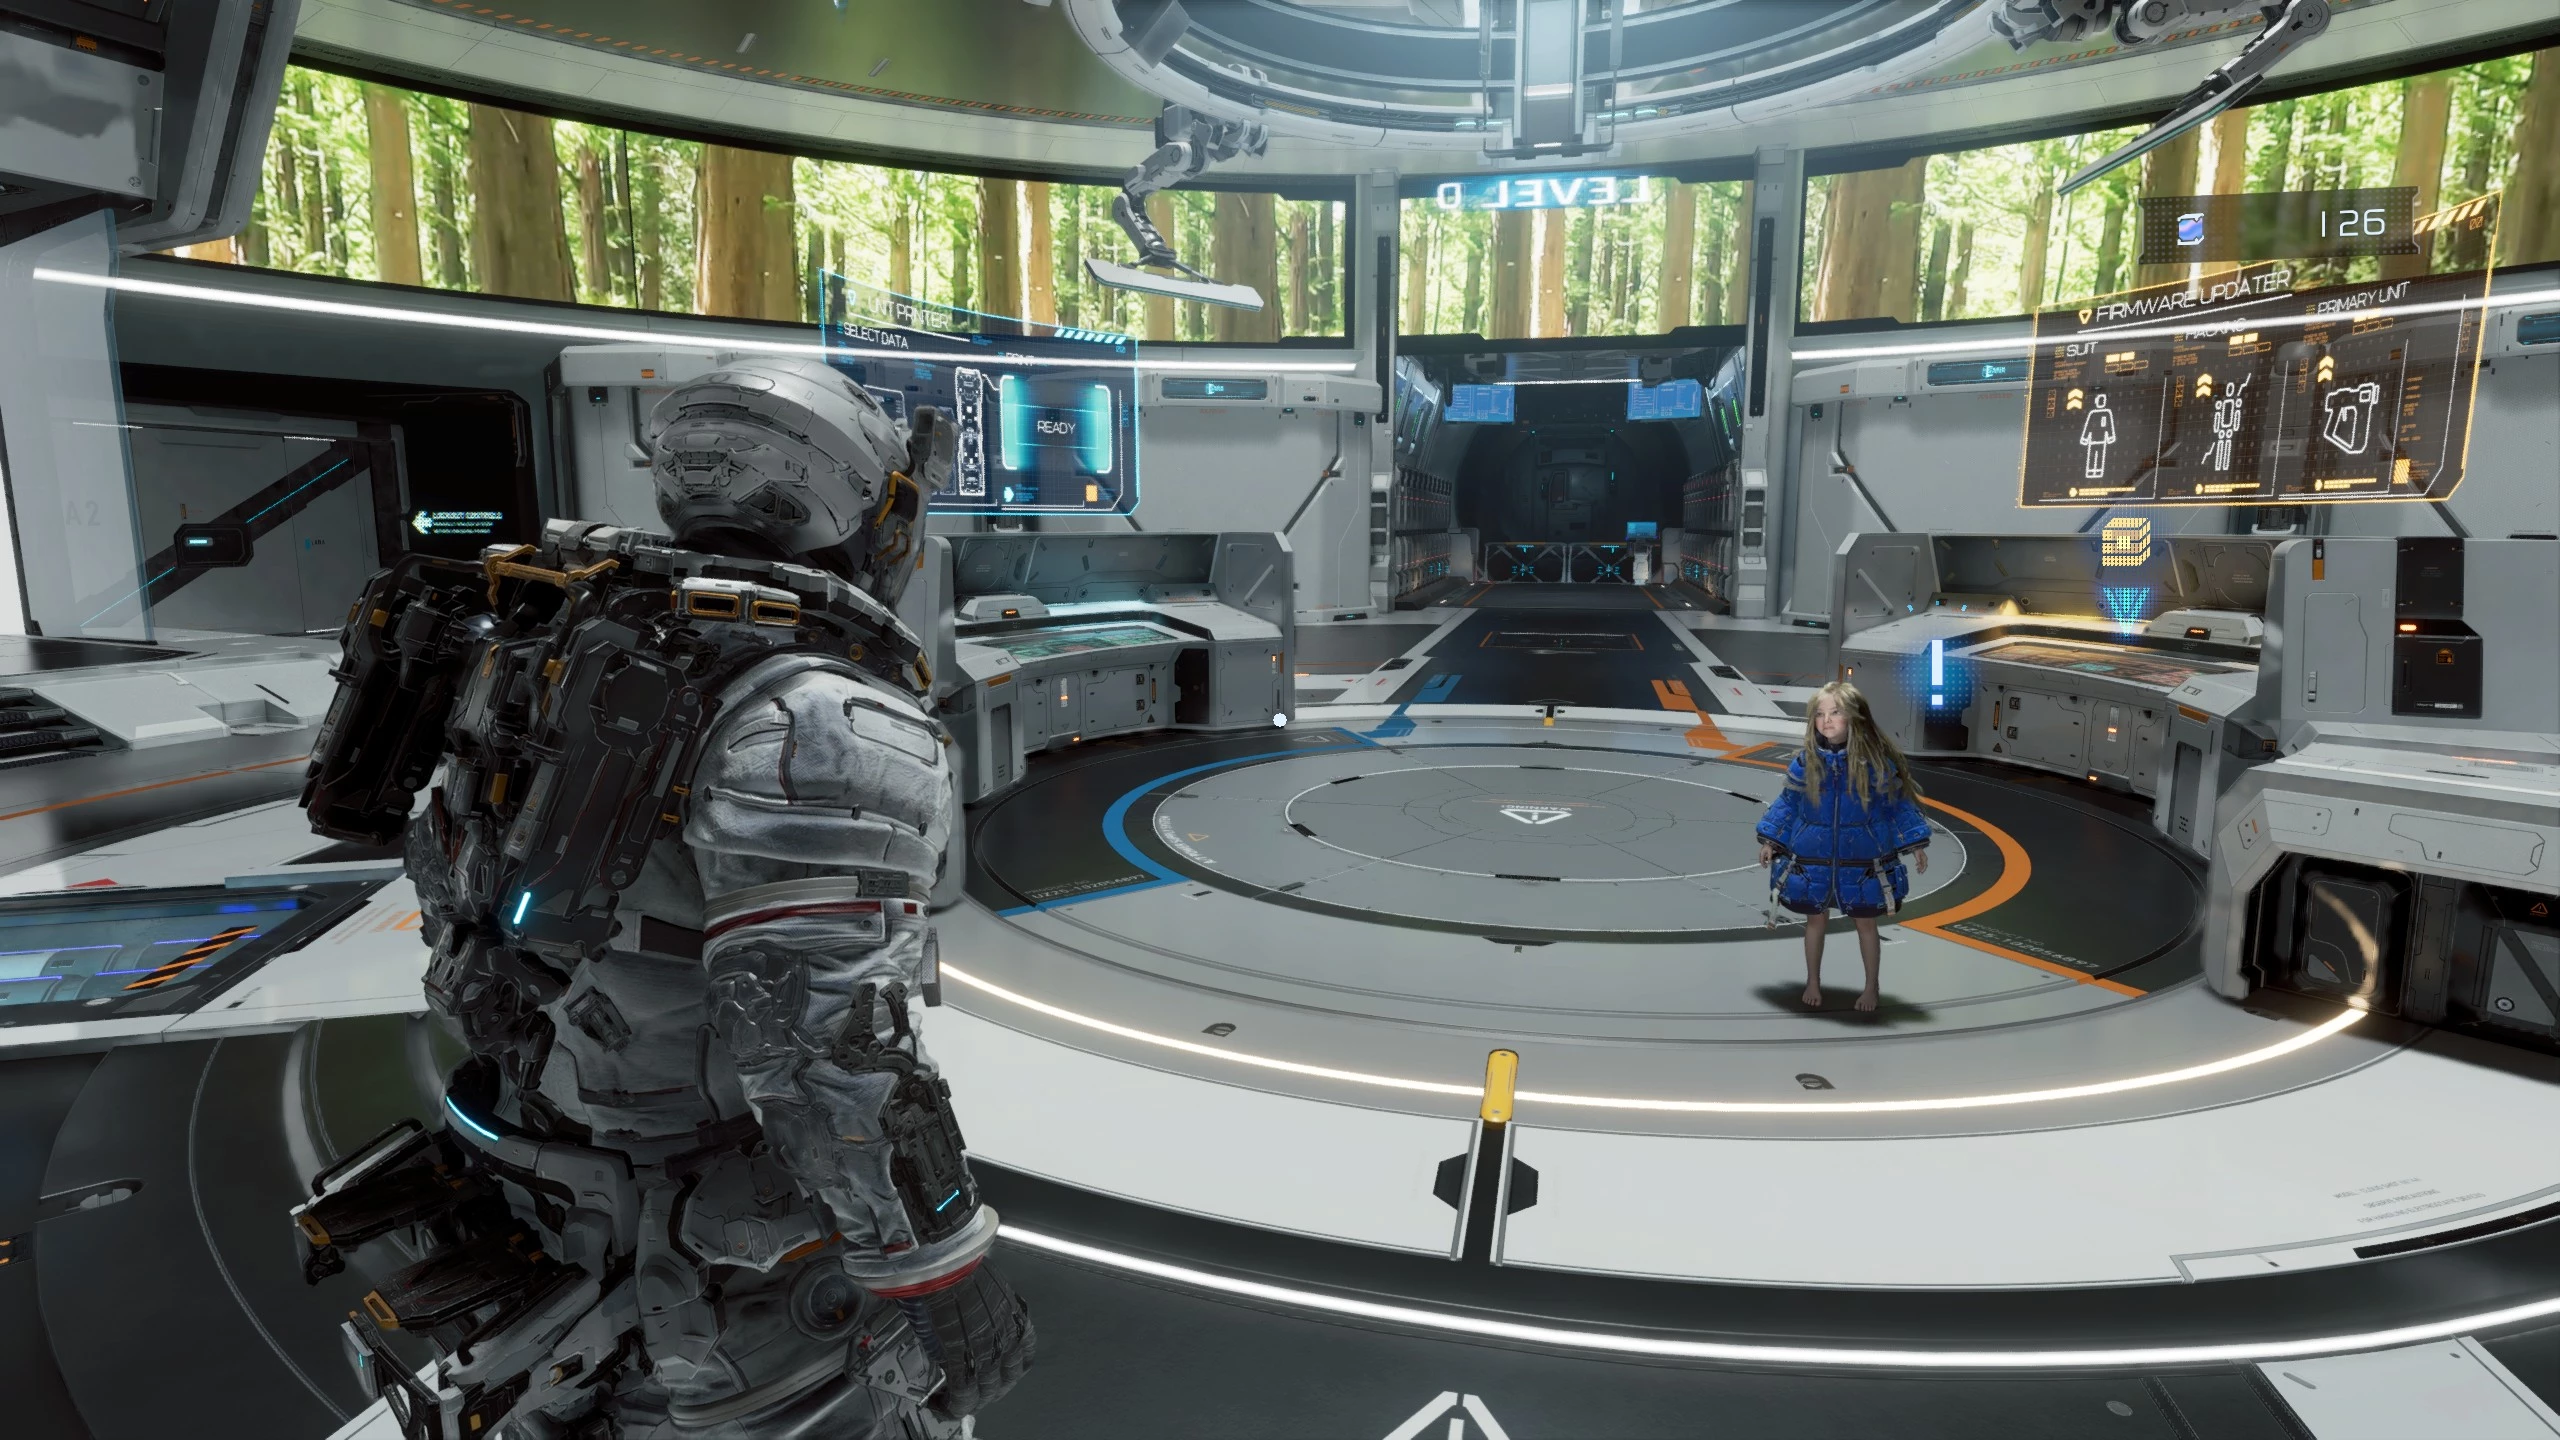
You will also find collectible items and blueprints for Diana here, which you can discover as you explore. At first, only the basic hub features are available. We will explain how to unlock everything else in a separate guide.
Solar Power Plant
The solar power plant is the first story location after the prologue. In each chapter, you can find plenty of notes, collectibles, and various upgrades. We will cover each episode in detail in separate guides. This walkthrough only describes the main story path.
At the start, move forward and examine the generator schematic. Turn right and follow the corridor until you find a switch. Use it to restore backup power, then head back, but be ready—androids will appear along the way.
Next, you will encounter your first laser trap. You will come across these quite often. In these situations, your jet suit thrusters will be very useful.
Return to the room with the schematic, take out the androids, and open the large gate to the right of the stand, then enter the corridor.
As you move through the corridor, you will find a passage blocked by blue crystals. Later, you will be able to destroy these growths—we will explain how in a separate guide. For now, just follow the story.
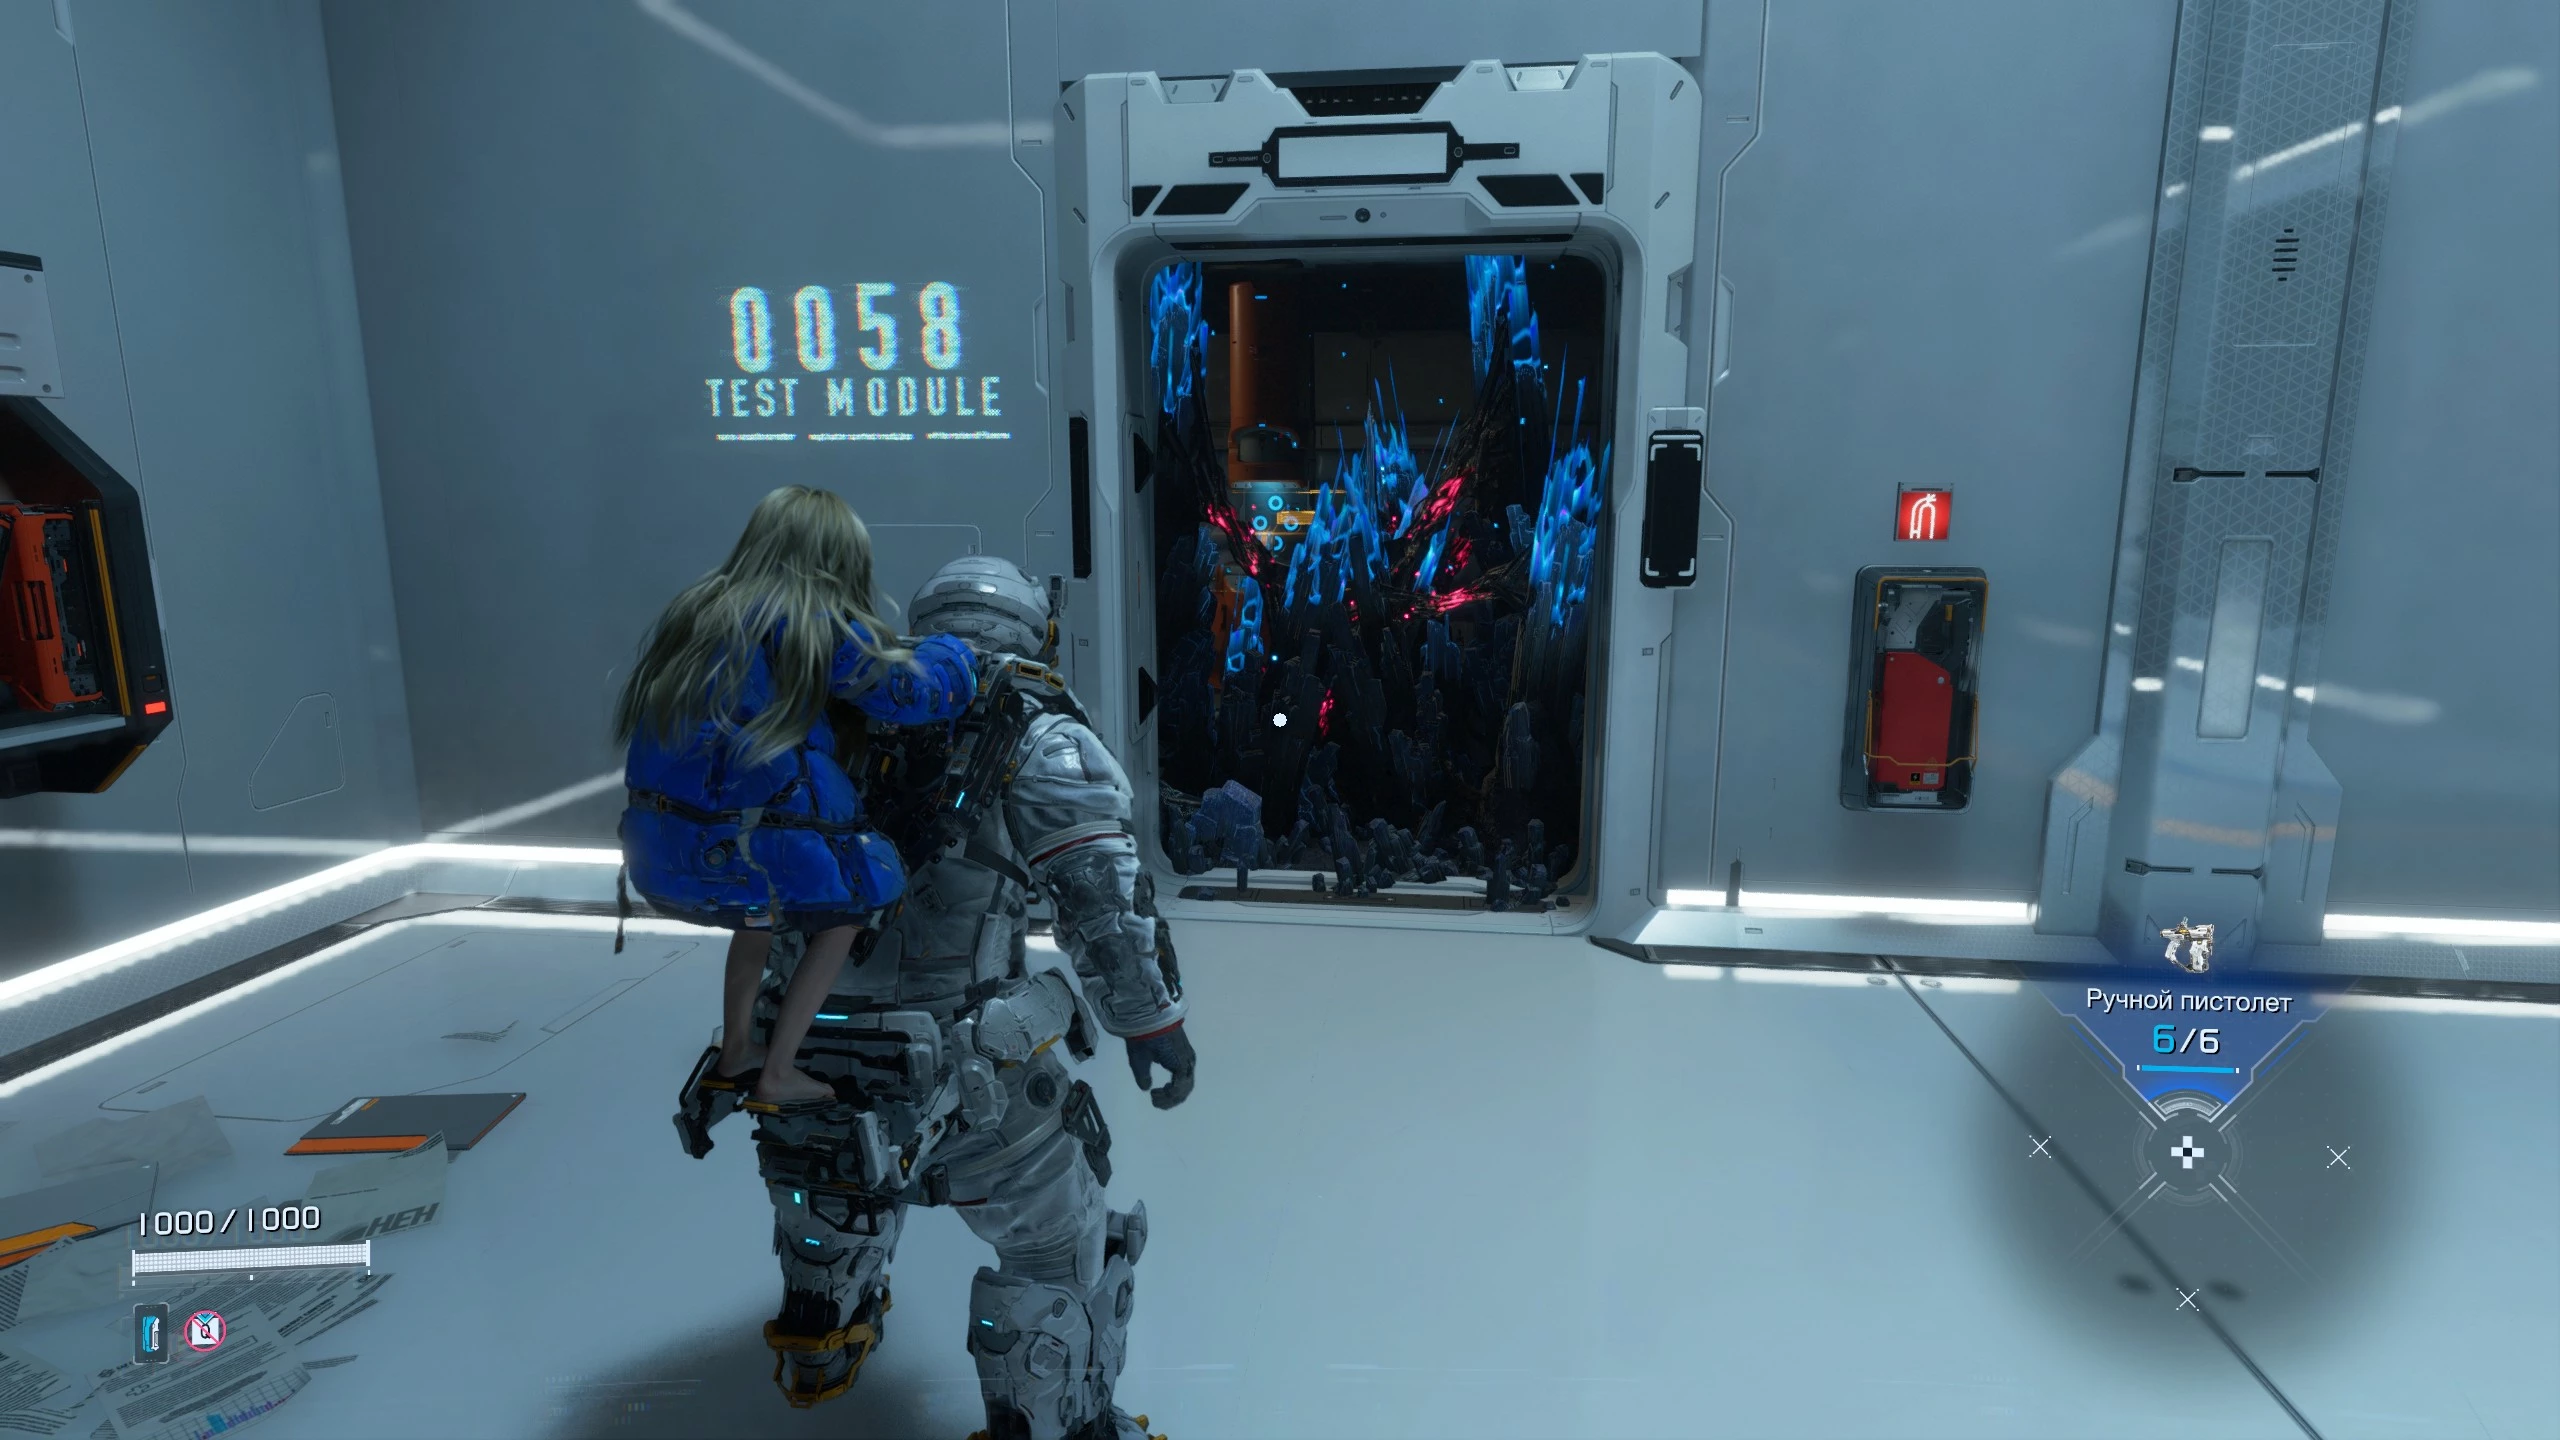
Up ahead, you will spot a drone—a new type of android. Usually, this robot stays still and periodically fires an energy shot at you. Watch for the red beam that it uses to aim at Hugh. Do not ignore these machines—try to take them out first.
Next is a puzzle where you need to activate two mechanisms. Look for the red circles, switch to hacking mode, and press the buttons in the right sequence three times.
Power Distribution Center
Go through the door and head down into the wide corridor, then defeat the drone and a couple of watchers. Ahead, you will find an airlock that lets you travel back to the safe zone and return. Keep in mind that if you leave and come back, all enemies will respawn.
Move forward and pass through the trap. Jump over the moving lasers, then dash forward. Turn toward the trap and tilt your camera up to find the mechanism that disables it.
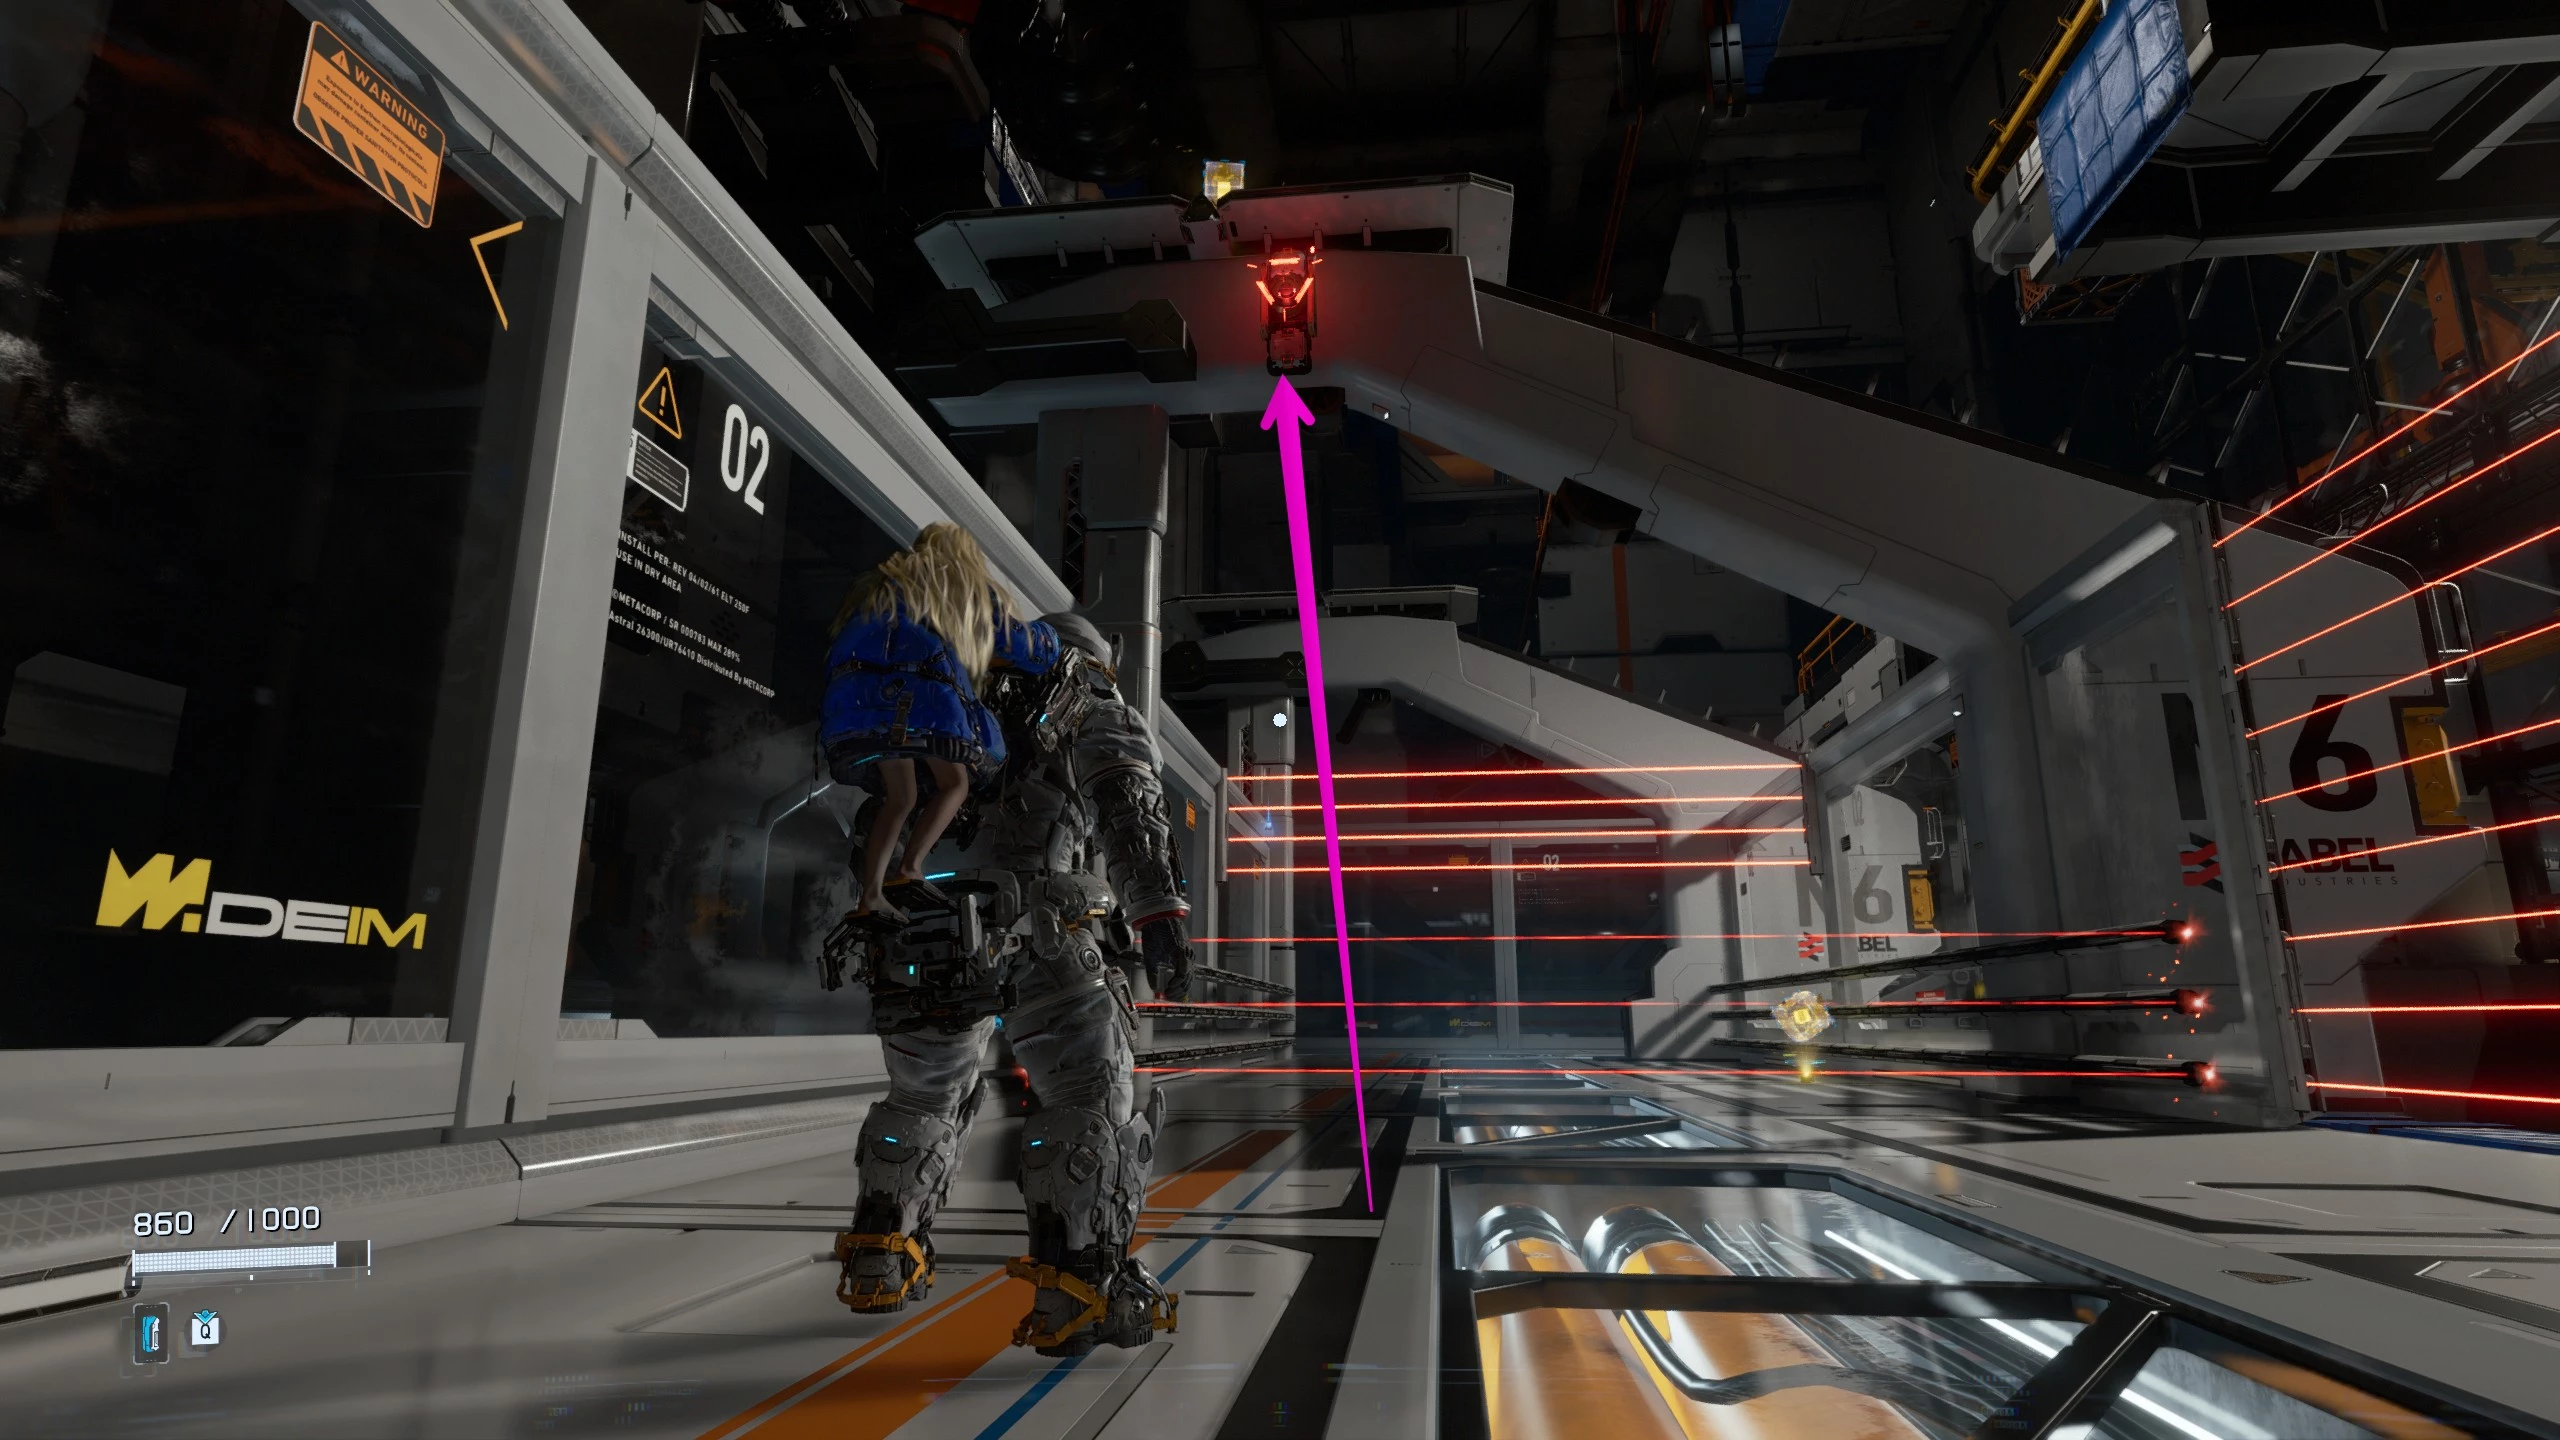
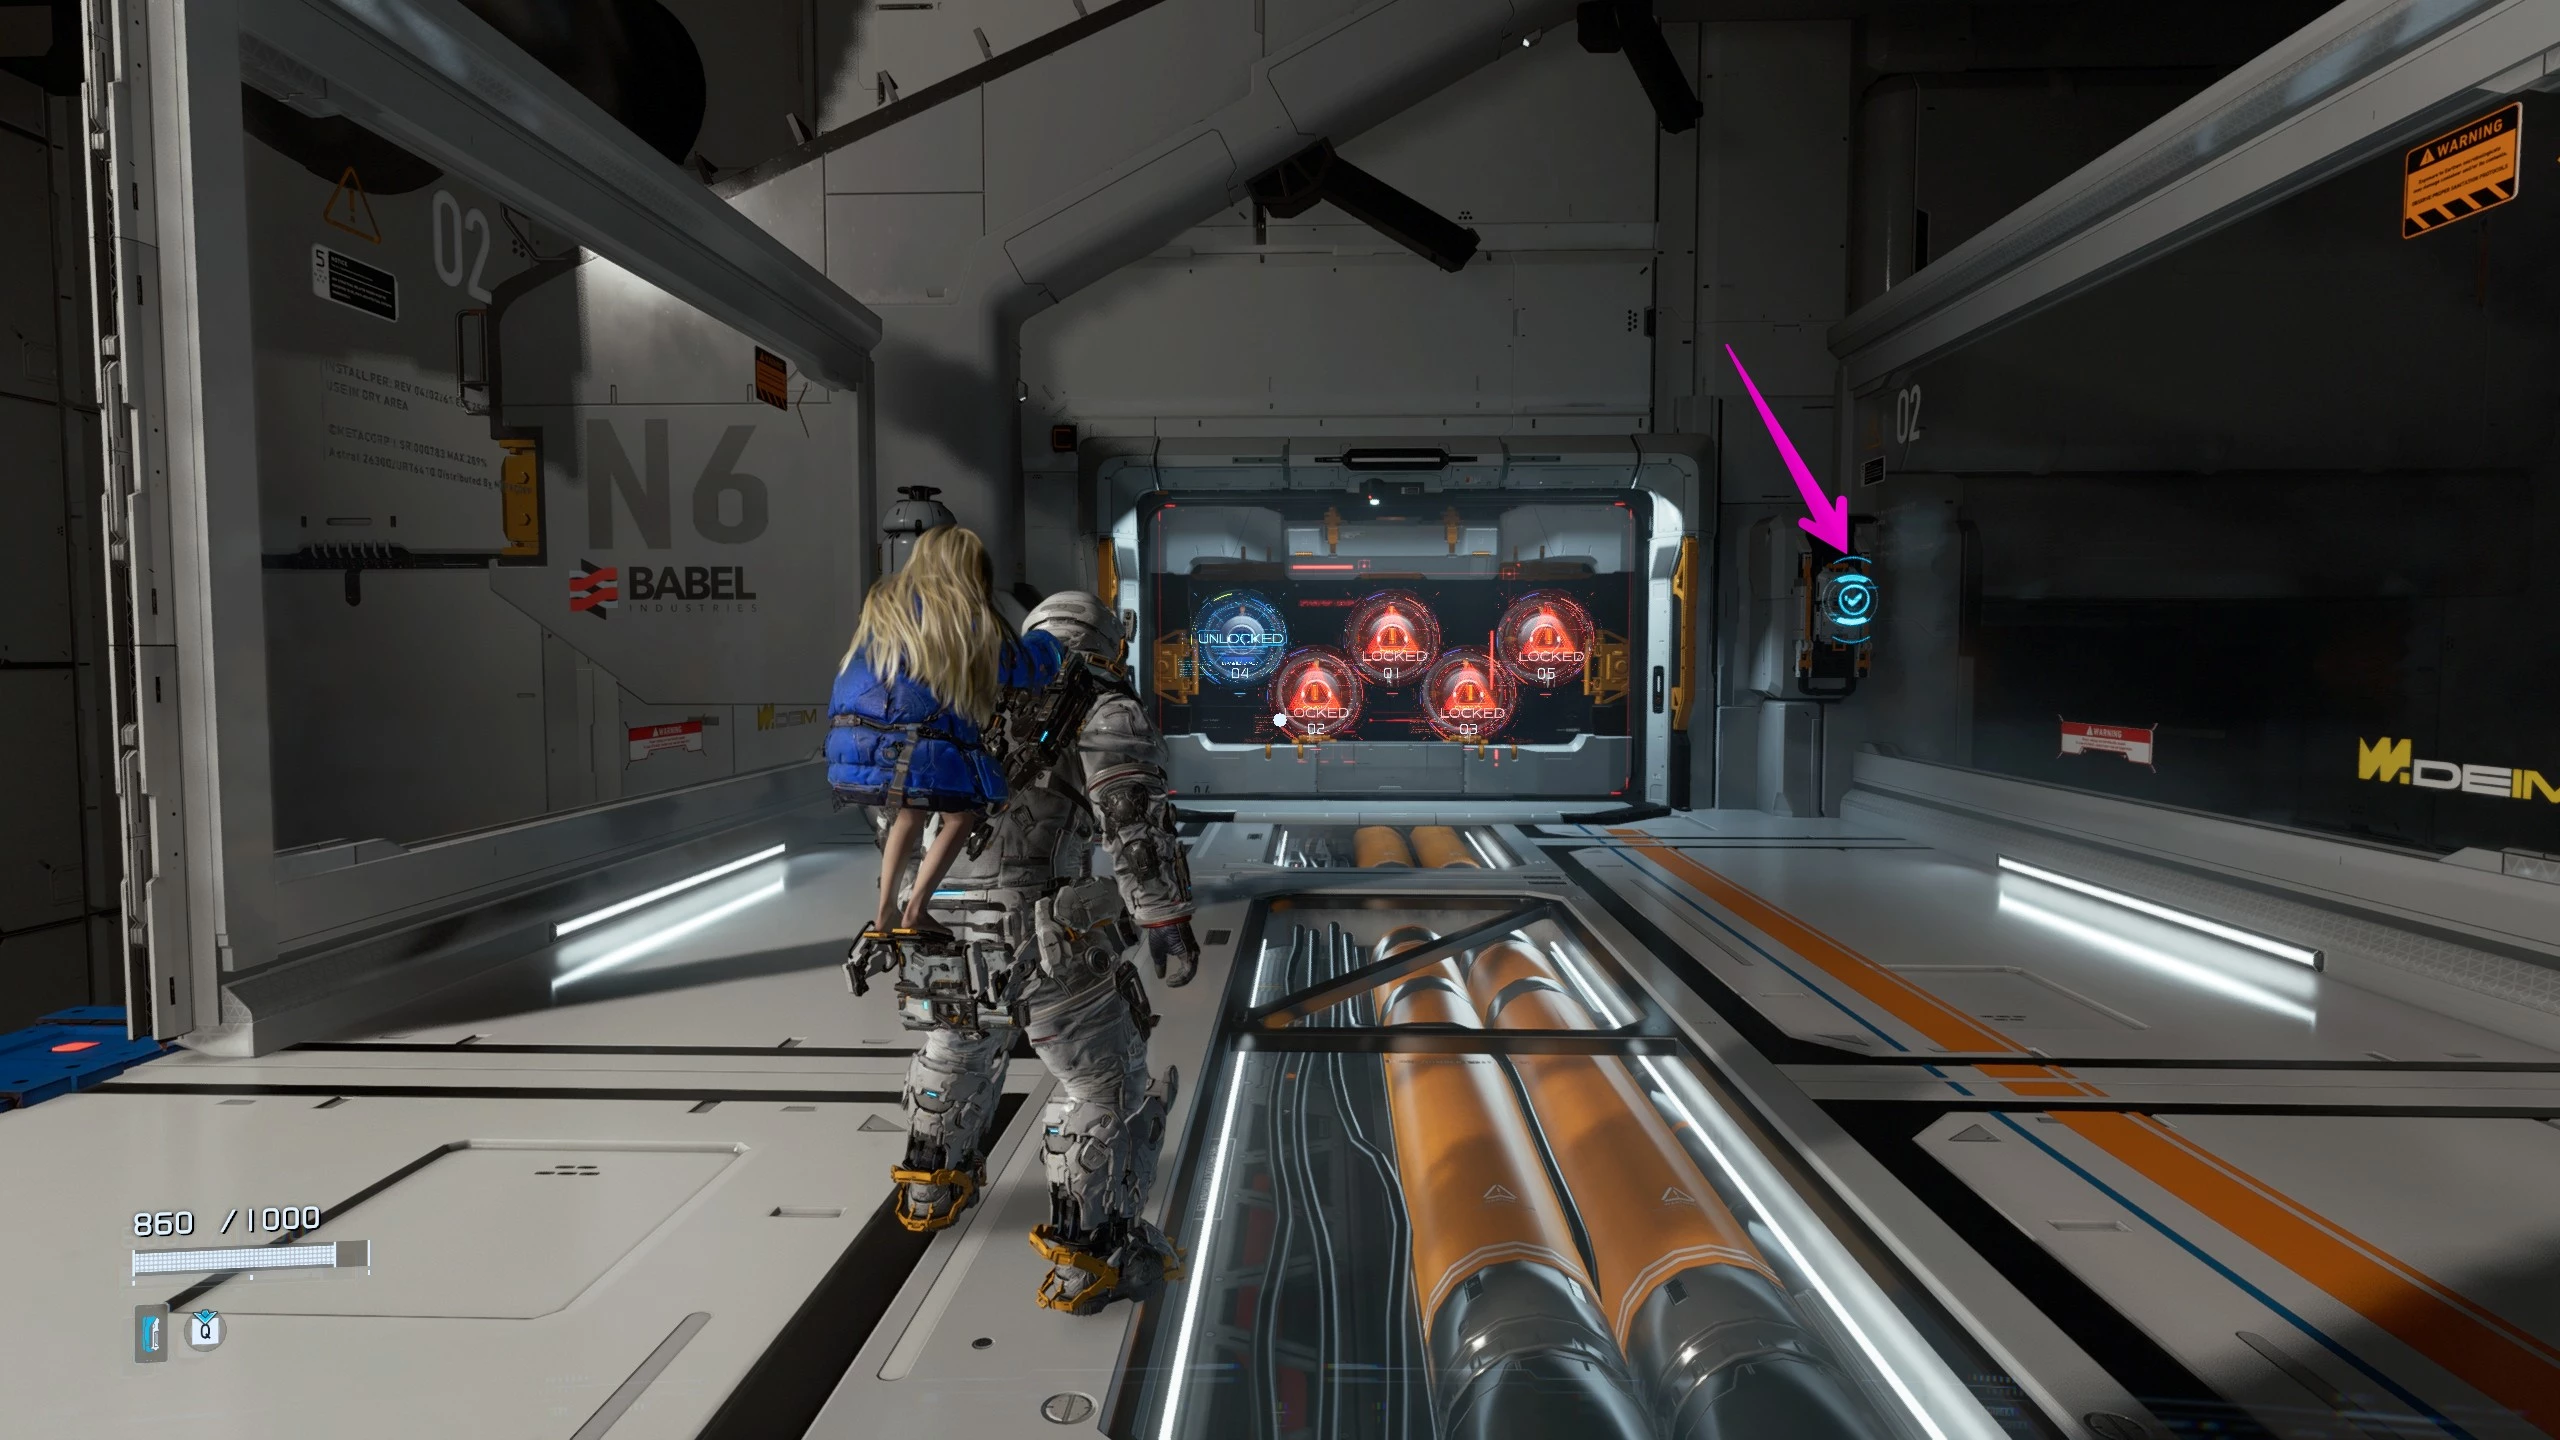
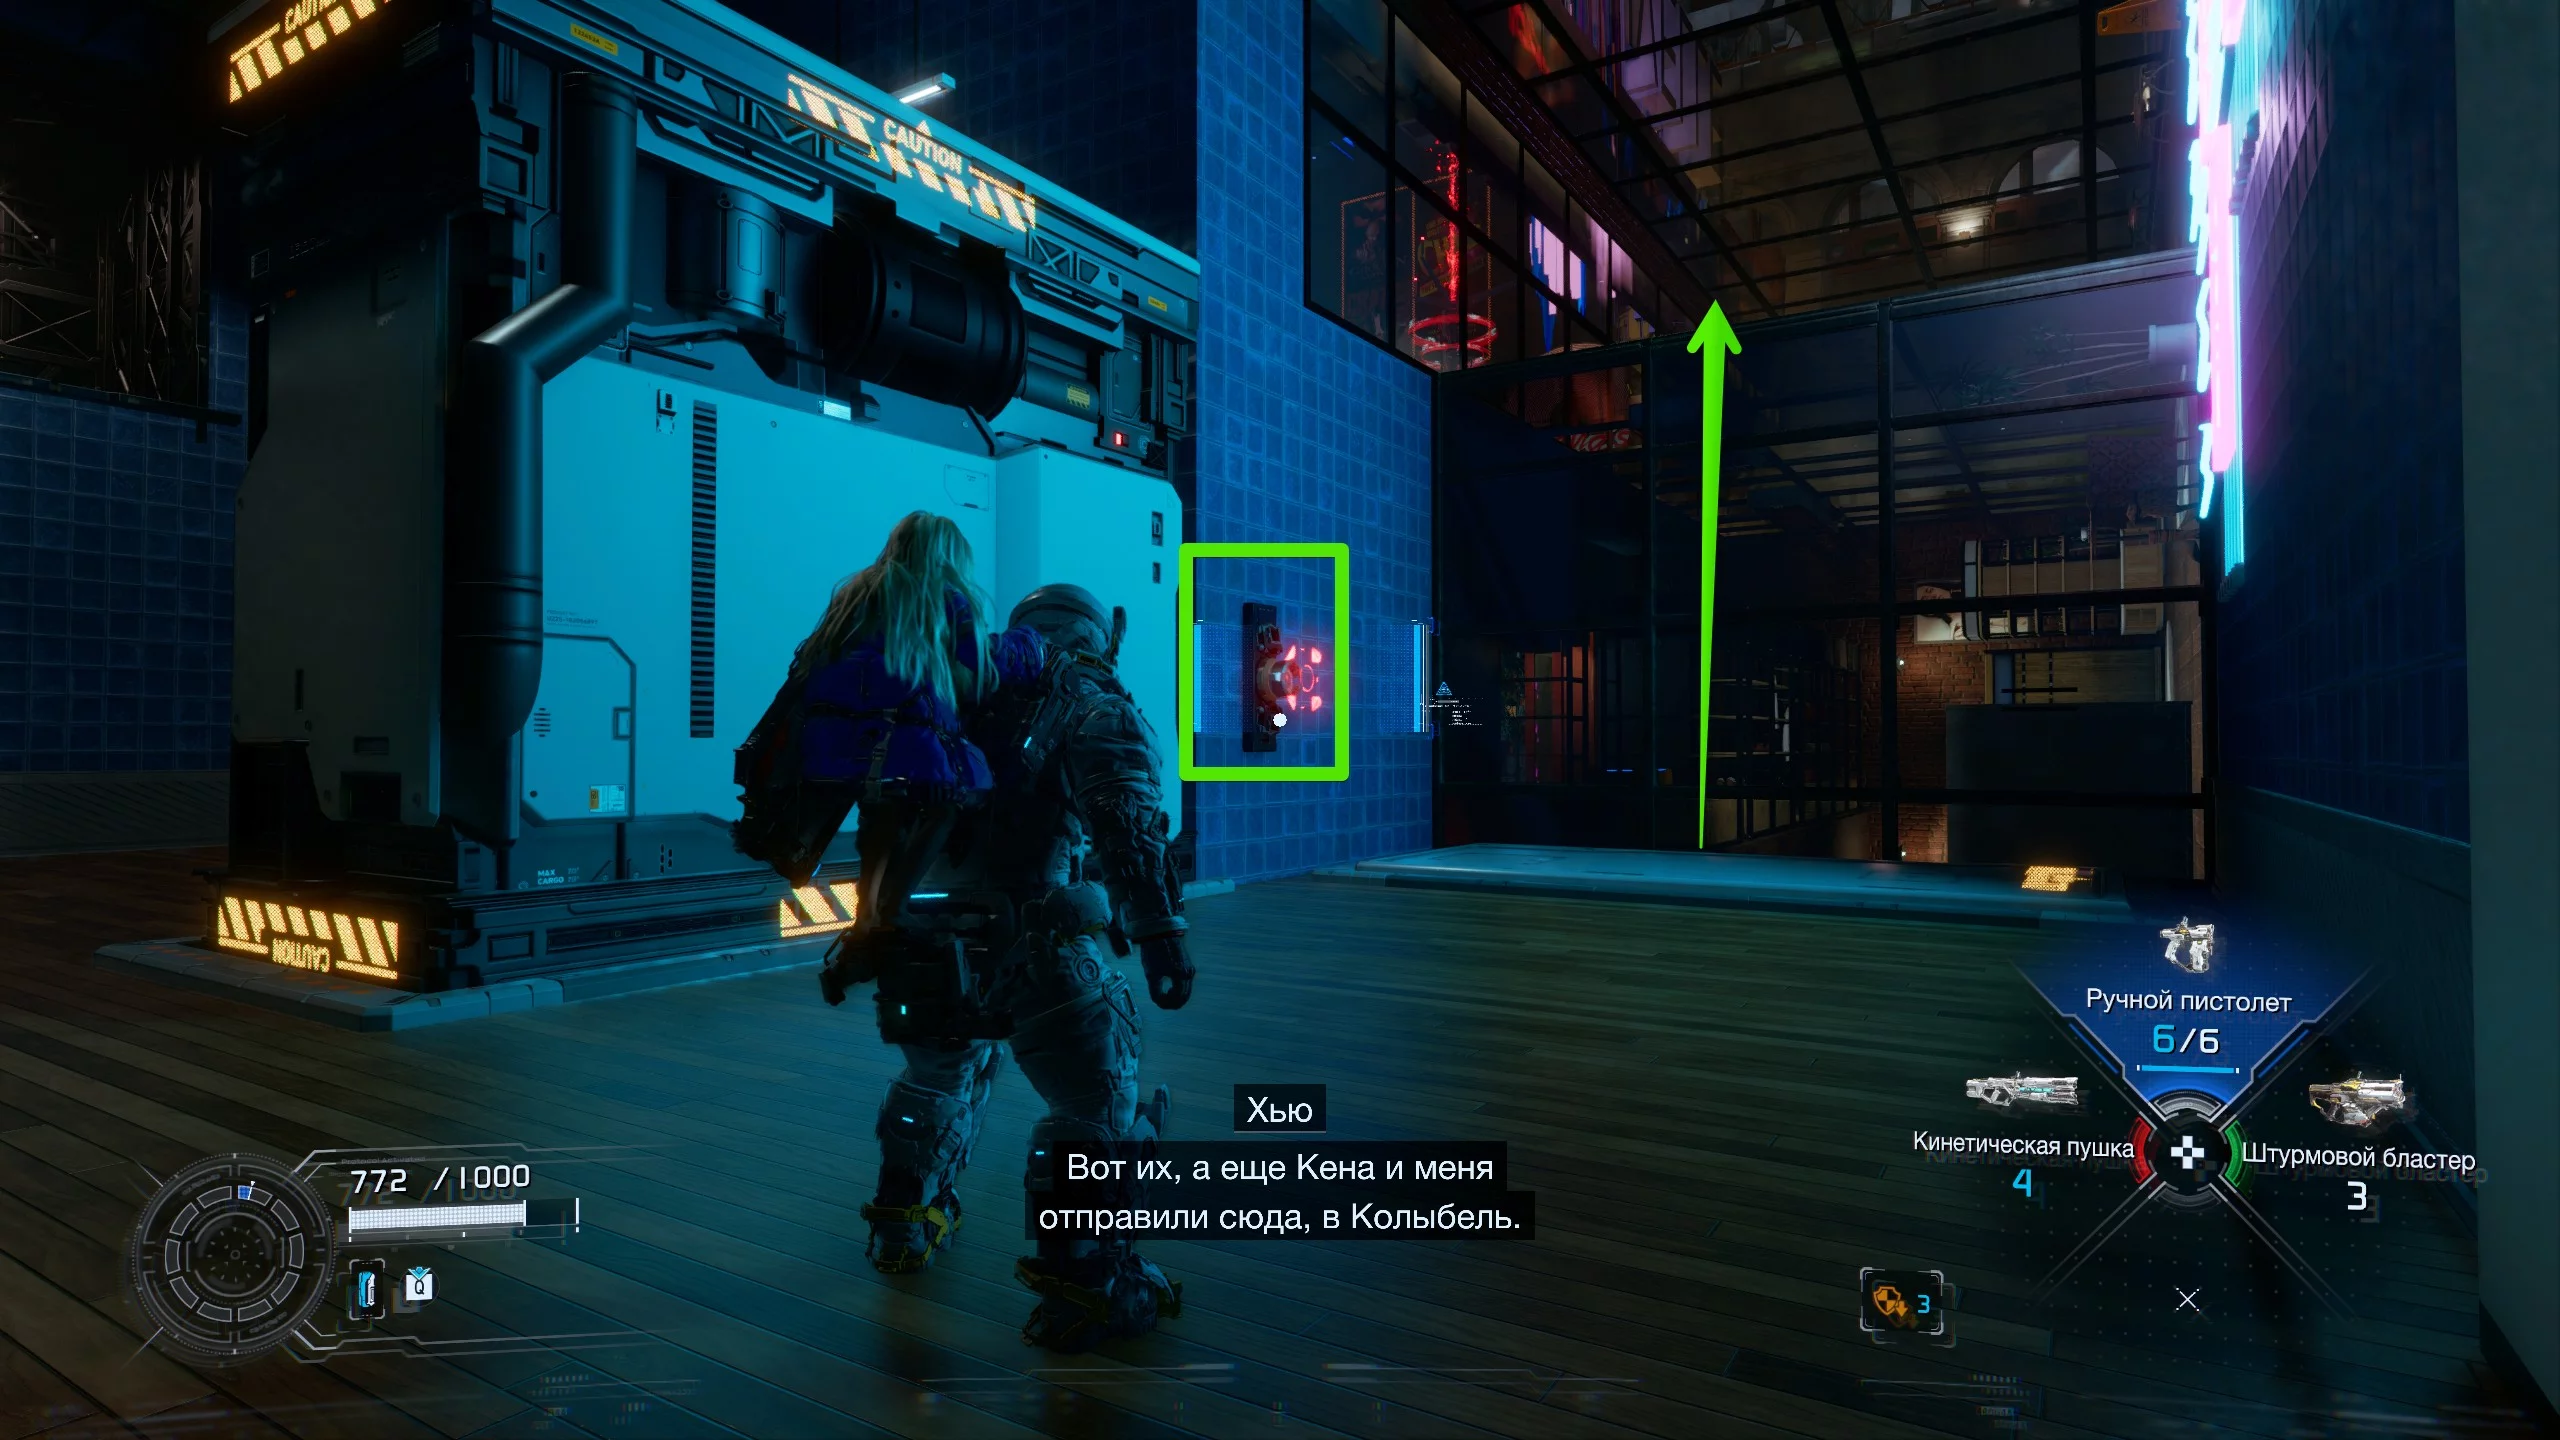
Next, you will find a door with five locks. To open it, you need to find and hack five mechanisms. The first one is to the right of the gate.
Turn left and drop down to the arena where you’ll find a kinetic gun. This weapon deals massive damage at close range, especially if the robot is stunned. Next, a new type of android will appear. It moves slowly, delivers powerful area attacks, and has a lot of durability. At the end of the fight, you’ll spot the second mechanism in the wall above.

Take the lift up to the next level. Ahead, you’ll face an android and a drone. Lead the robot away as far as possible and take down the drone. Then move right across the platforms and activate the panel.
Now, descend the platforms in the opposite direction and pick up the stasis net. This weapon holds three charges and fires orbs that slow down robots. The fourth mechanism is on the wall.
Enter the corridor, where you’ll encounter an android and a giant. Take them out using the stasis net, then look up to activate the final mechanism. Now you can return to the main gate.
Take the lift down to the living quarters. After a short cutscene, you’ll receive the “Globus” RVI. These blueprints should be used in the safe zone to improve your relationship with Diana. We’ll explain how to find all RVIs in a separate guide.

Head into the next room and activate the third airlock leading to the safe zone. Inside, you’ll find a room with a repair kit. For the story, go through door A2—this is the path to the first boss. It’s a good idea to return to base and upgrade your gear before moving on.
Main Lobby
At the start, you’ll come across the “Decoding” combat module, which is used during hacking. This effect boosts your damage. Next, reach the platform and survive an encounter with three robots. At the top, there’s an arena and lots of gear. To start the boss fight, activate the main panel.
The sector guardian attacks with dashes and homing rockets. Keep your distance and make good use of the stasis net. Break its defenses and go in for a heavy attack. At the end of the battle, Diana will unlock the “Reboot Protocol” ability, which paralyzes robots for a long time.

Pick up the level one access key for the safe zone, and the heroes will return to base. Now you can use RVI blueprints to increase Diana's trust level. You'll also meet Cube, a robot who helps you customize the camp.
Open the terminal and head to the mass printing sector. Move forward and after the cutscene, you'll encounter a new enemy. The spider robot transforms into a giant wheel and charges straight at you. Go into the corridor, turn left, and exit to the outside.
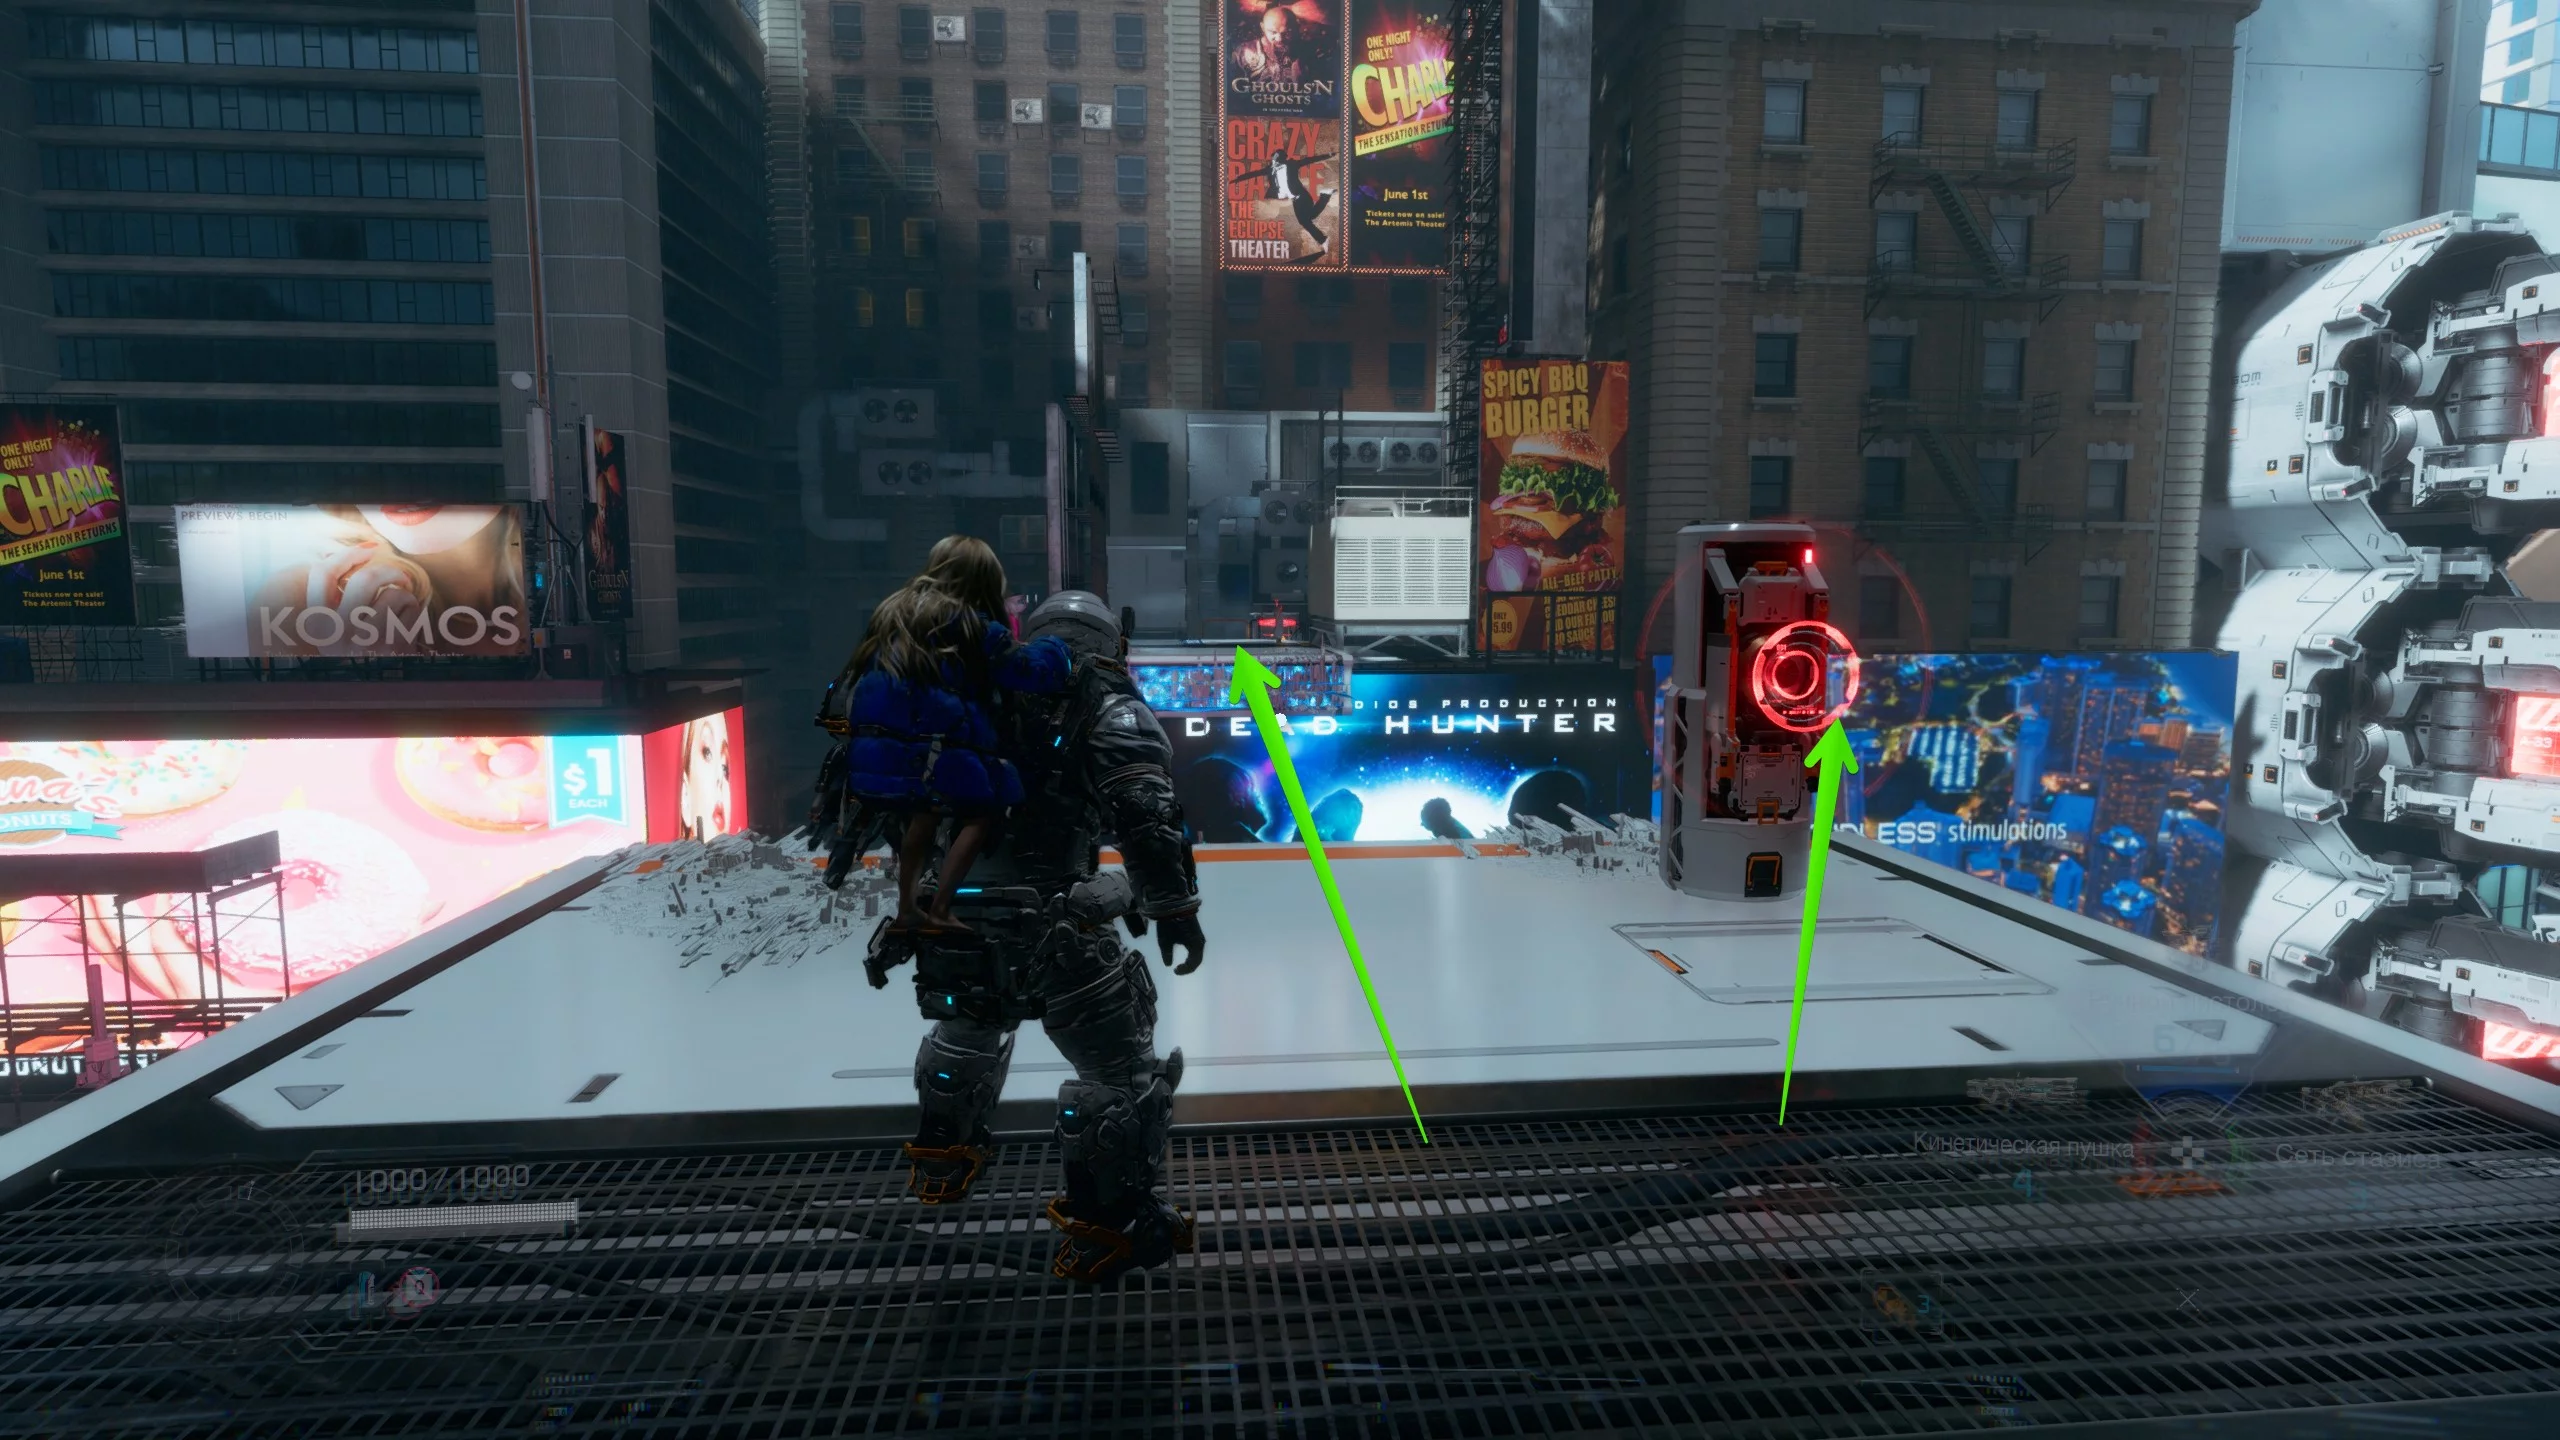
Climb down the scaffolding to the road and head forward. Soon you'll reach massive gates. To open the way, you need to activate six radio beacons. The first relay is right in front of you. Next, unlock the AREA 2 gates.
After facing the monster, you'll reach a transport airlock. Move ahead and pick up the assault blaster. Hugh can't carry all weapons at once, so you need to choose between different guns. The four-shot blaster fires grenades that can knock enemies off their feet.
Go into the cafe, turn left, and find the panel. It raises one platform and lowers another at the same time. Activate the mechanism, stand on the lift, and use it again. Defeat the large mechanoid and examine the mannequins with Diana.
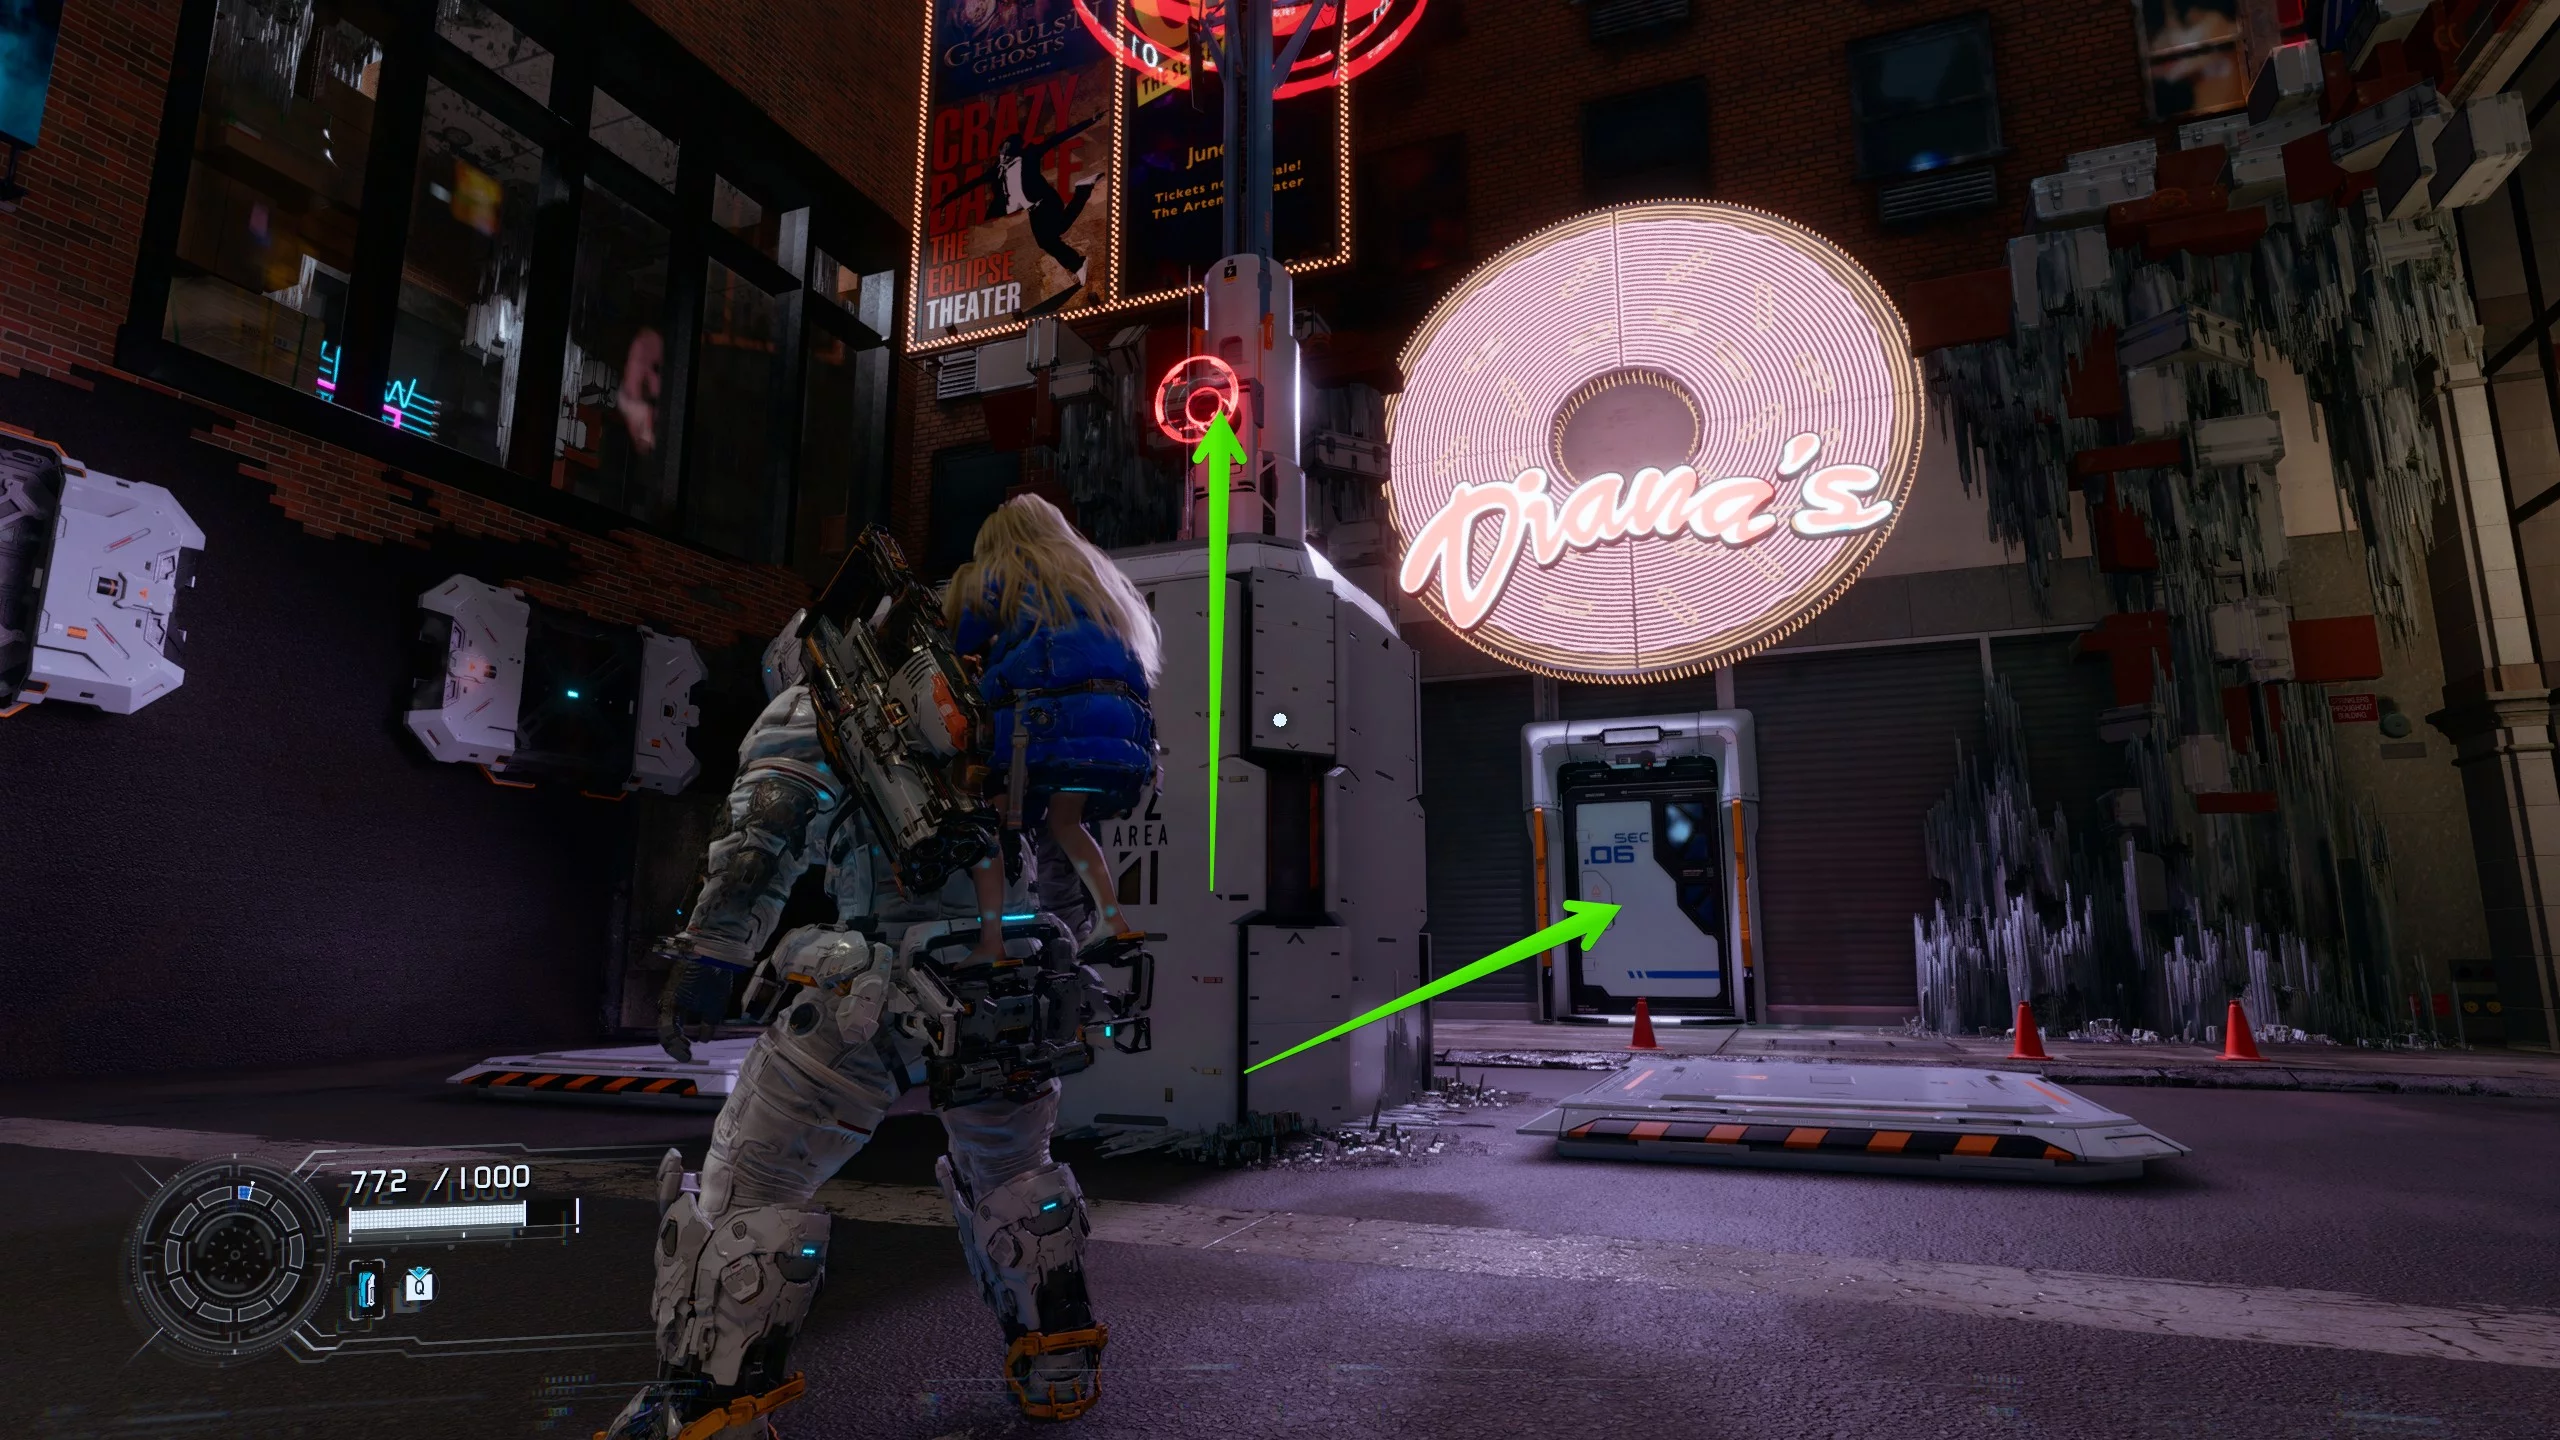
Turn right and take the elevator, then follow the corridor to pick up "Multihack". This ability lets you hack several robots at once, but they need to be close to each other. After that, go outside and head down to the second radio tower, then take out the robots and go through the SEC.06 door.
Keep moving forward, but watch out for mannequins—some of them are actually watchers in disguise. Eventually, you'll reach the rooftop. To cross the street, activate the mechanism and a bridge will appear. On the other side, there's an airlock leading back to the safe zone.
Climb down from the roof and pick up the railgun, which fires a powerful energy shot. The gun has four rounds, and you need to charge it before firing. Wait for the crosshair to turn from blue to orange, then shoot.
Ahead you'll face two drones and a giant. This new terrifying android deals massive damage, and can drop to all fours to charge at you. The robot is slow and can take a lot of hits, so keep your distance.
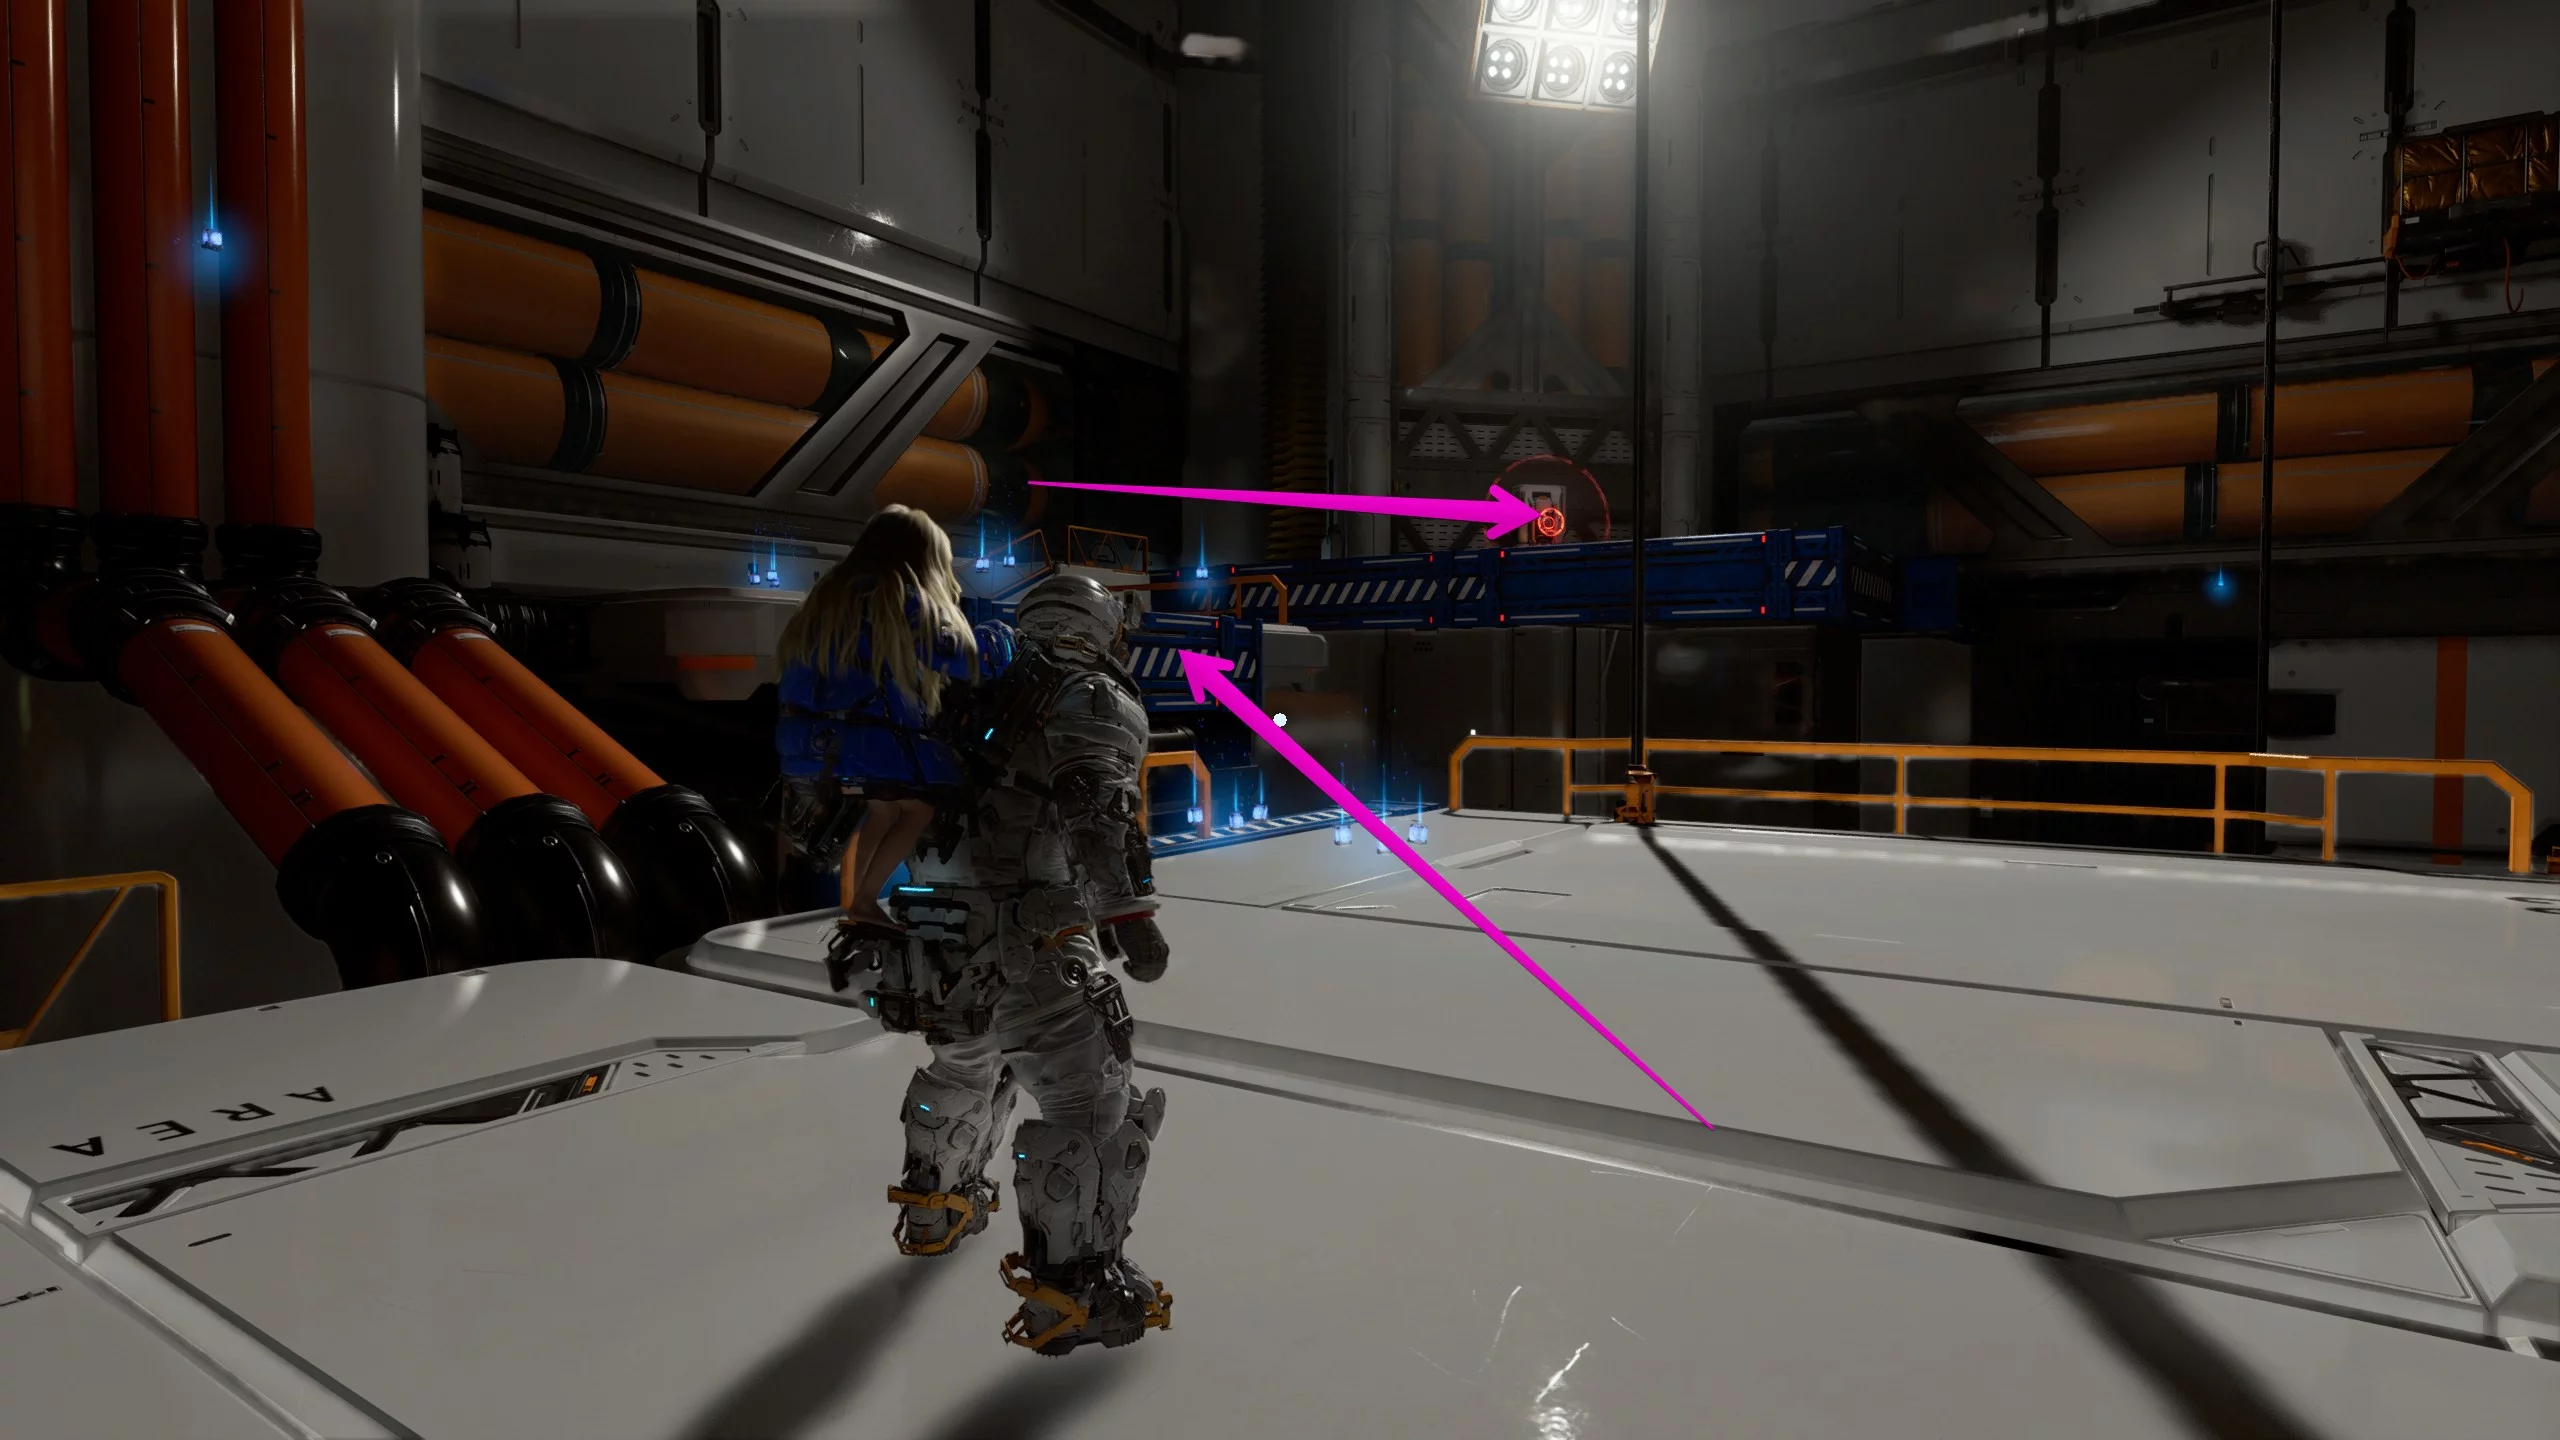
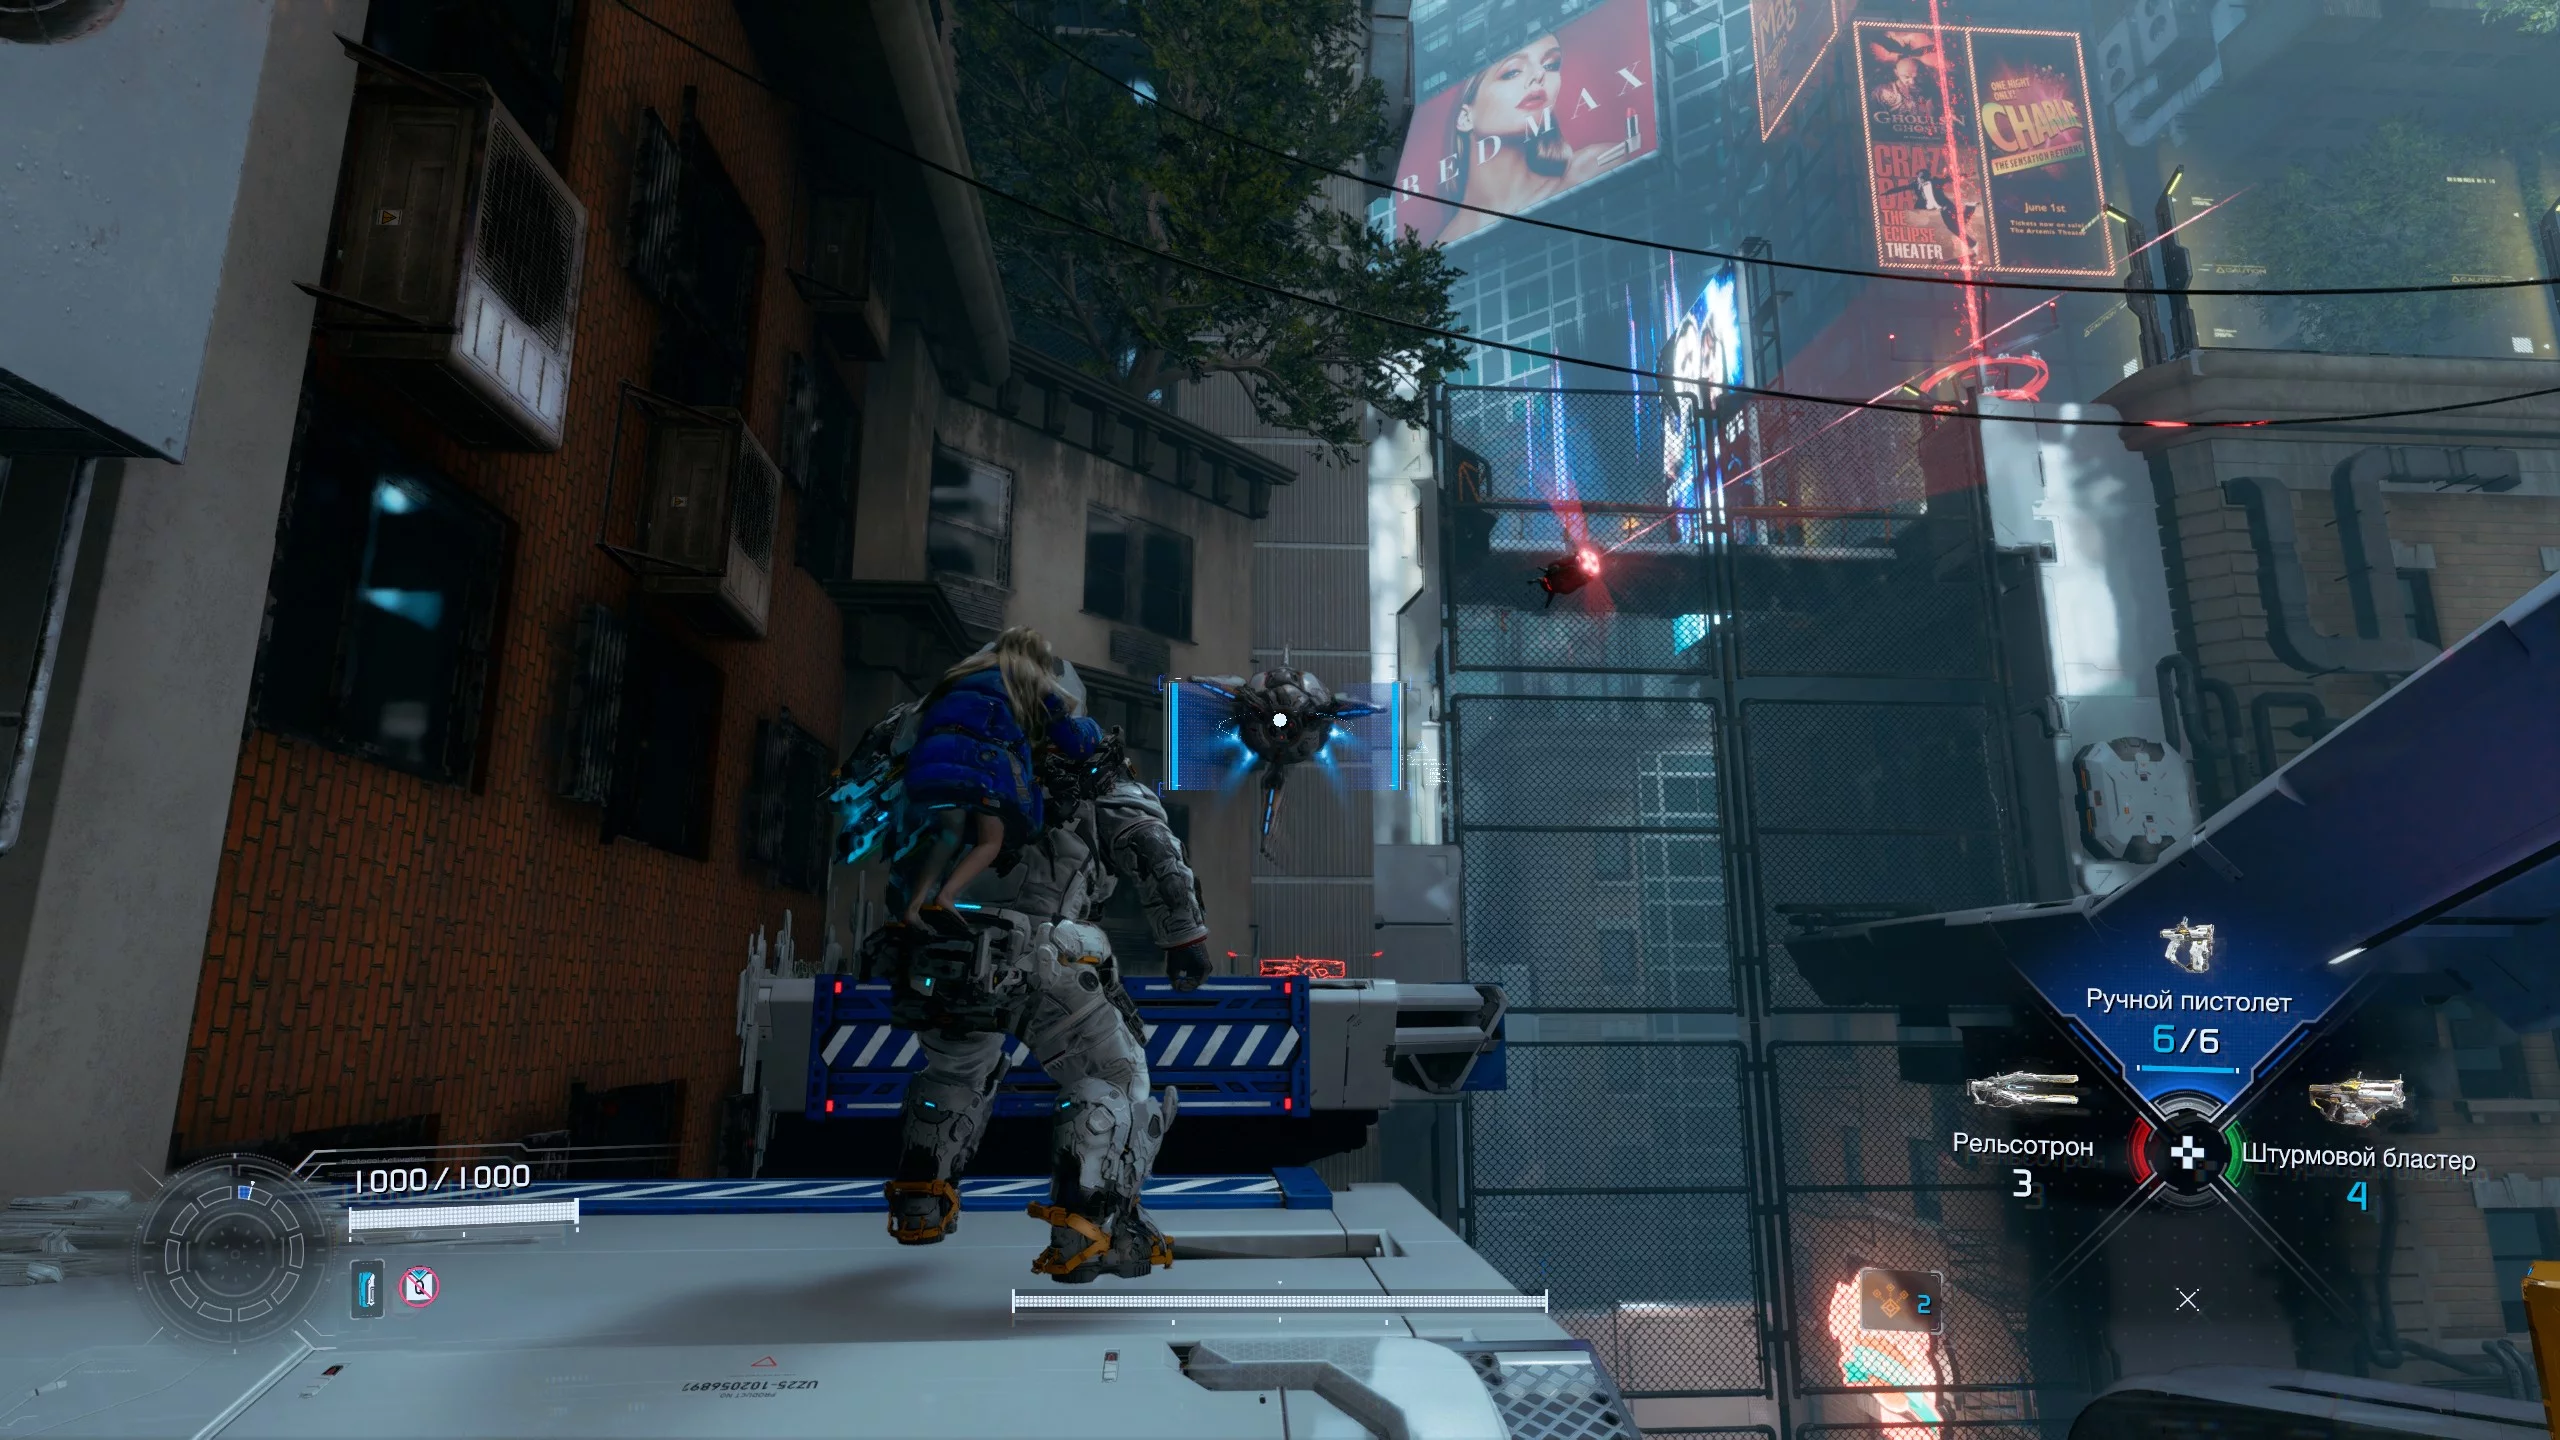
At the end of the alley, you'll find a mechanism that lowers a platform. Climb up to the roof and keep moving forward until you encounter a new type of drone. This drone fires homing missiles. Take out a couple of drones and activate the third radio beacon.
Look to the left and climb onto the neighboring roof, then use the elevator. Go through the floor and head down to the fourth beacon. Defeat two waves of robots and activate the tower. Next, cross the bridge and enter the room with another safe zone airlock.
Offices
Enter the hallway, turn left, and take the elevator up. Activate the next radio beacon and walk to the edge of the roof. Turn on the elevator on the left, then repair the crossing. Use the exosuit to cross the street.

Go through the door on the right and destroy the crystals using the mechanism. Head down to the next section and pick up the "Clone Generator," which lets you create Hugh phantoms. This way you can distract enemies for a while.
Next, go through the conveyor belt area and enter the corridor. At the end, turn right and pick up the NZI blueprint "Old CRT Television." Look down and jump, avoiding the red lasers. Kill the monster and enter the next room, where you’ll find an airlock leading to the shelter.
Recycling Center Station
In the next hall, three androids are waiting. You can make things easier: lure the robots to you and activate the lasers using the mechanism above. Then make your way through the laser trap and activate the stand, which gives you the new ability "Luun Eraser." Now you can destroy blue crystals — the artifacts of moonfiber.

Go back to the corridor, remove the crystals on the left, and take the elevator down. Enter the next section and survive three waves of androids. In the middle cell, you’ll find the last radio beacon. Turn right and return to the airlock, then head outside, making your way through the moonfiber artifacts.
Next is a tough fight with the second story boss — the "Creator." We recommend leveling up your character as much as possible. The robot looks like a four-legged beast with a hammer-shaped head. It deals heavy area attacks and shoots warheads at the hero. From time to time, you’ll need to jump onto buildings to avoid damage. To break its armor, use the stasis net and destroy the cylindrical tanks on the boss’s body.

Pick up the level two shelter key that drops after you defeat the robot and head to the tower. A cutscene will play where a cat hologram asks for help, and you’ll get access to the Greenhouse.
Greenhouse
After the mass printing sector, you’ll automatically be transferred to the shelter. Get Hugh ready for the next mission and head to the Greenhouse. Enter the bridge, turn left, and cross to the other side along a thick branch. At the end, a new type of android will appear. The mechanoid looks like a samurai with a distinctive hat. Before it strikes, it pauses, then lunges at the hero and attacks with a laser from its right hand.

Go inside the complex and reach the dead end. Activate the touch panel, turn around, and then activate the airlock leading to the base.
Main Elevator Station
Go through the new passage and talk to Vosem, the cat hologram. She’ll ask you to find two luva regulators to clear the building of overgrowth. After that, you’ll have two paths to choose from: the Plant Factory or the Eco-Modeling Lab. Pick either one — it doesn’t matter which way you go.
Plant Factory
Choose the Plant Factory door and enter the hall, then defeat two brutes and a samurai. Take the elevator and reach the fork. There are two paths, each made up of two arenas. Pick either side — you’ll have a chance to replay this stage later. In these areas, you’ll encounter disc-shaped robots that shoot energy orbs.
Next, head down to the third arena, where you’ll face an android that deals massive energy damage across the floor. Enter the next room, talk to Diana about the deer, and take the elevator. Pick up the pulse rifle — Hugh’s second main weapon. It holds 18 rounds and fires in short bursts, plus it has unlimited ammo. At the end, activate the touch panel.

This will clear some of the overgrowth and remove the protective glass. Now you can jump back to the start and head into the Eco-Modeling Lab.
Eco-Modeling Lab
Turn right and, together with Diana, check out the butterflies. Take out the robots in the next section and climb over the ladder. Turn left, destroy the flying robot, and pick up the "Generation Chip." Go back to the bridge and insert the card to extend the branch and reach the upper part of the level.

In the next area, you need to find three chips to grow the tree branches. The first one is near the ladder. Follow the path and pick up a new weapon — sticky mines, which speed up hacking. Kill the brute and grab the next card, then make your way to the next base airlock. Climb the ladder, go through two arenas with robots, and pick up the last chip at the end. Head back to the start and insert all the modules to cross to the other side.

Use the tables and tree to move forward, then go through gate 03. Two samurai and the boss "Sector Guardian" are waiting for you there. Move ahead and get two extra weapon slots. Then turn off the luva regulator, go back down to the start, and take the elevator. Repair the next shelter airlock and head up to Vosem.
Go down to the elevator and enter the Soil Researching sector. Make your way to the seashore and watch the cutscene where Hugh decides to take Diana with him to Earth. Turn right and find the next locked door. To open it, you need to activate four mechanisms.

The first module is hanging by the door, and the second one is on the wall to the right. Turn around and enter the cave. Head down into the underground complex, kill the invisible android, activate the third panel, then pick up the photon laser. This weapon fires a powerful beam. Take the elevator, fight your way through the robots, and find the last component.
Geoscience Lab
Go through the gate and activate the shelter airlock. Turn right, use the elevator, and deactivate the jammer. The jammer emits waves that block Diana’s hacking abilities. Use elevated platforms as cover or jump over the red circles.

Hack the jammer, go through the door, and take out the invisible android. Activate the touch panel and enter the door on the left. Head down to the lower section and clear out the robots. First, you’ll face an orange brute and a jammer. There’s nowhere to climb, so use the exosuit’s jet engine. Next, three wardens will attack. Orange robots are upgraded versions of regular androids. They move faster, deal more damage, and have tough armor.
Go into the next room and hack the door on the right. Drop down into the arena and survive two waves of androids. At the start of each fight, jammers will appear from the floor, so take them out first. After the battle, move forward and use the elevator.

Botany Lab
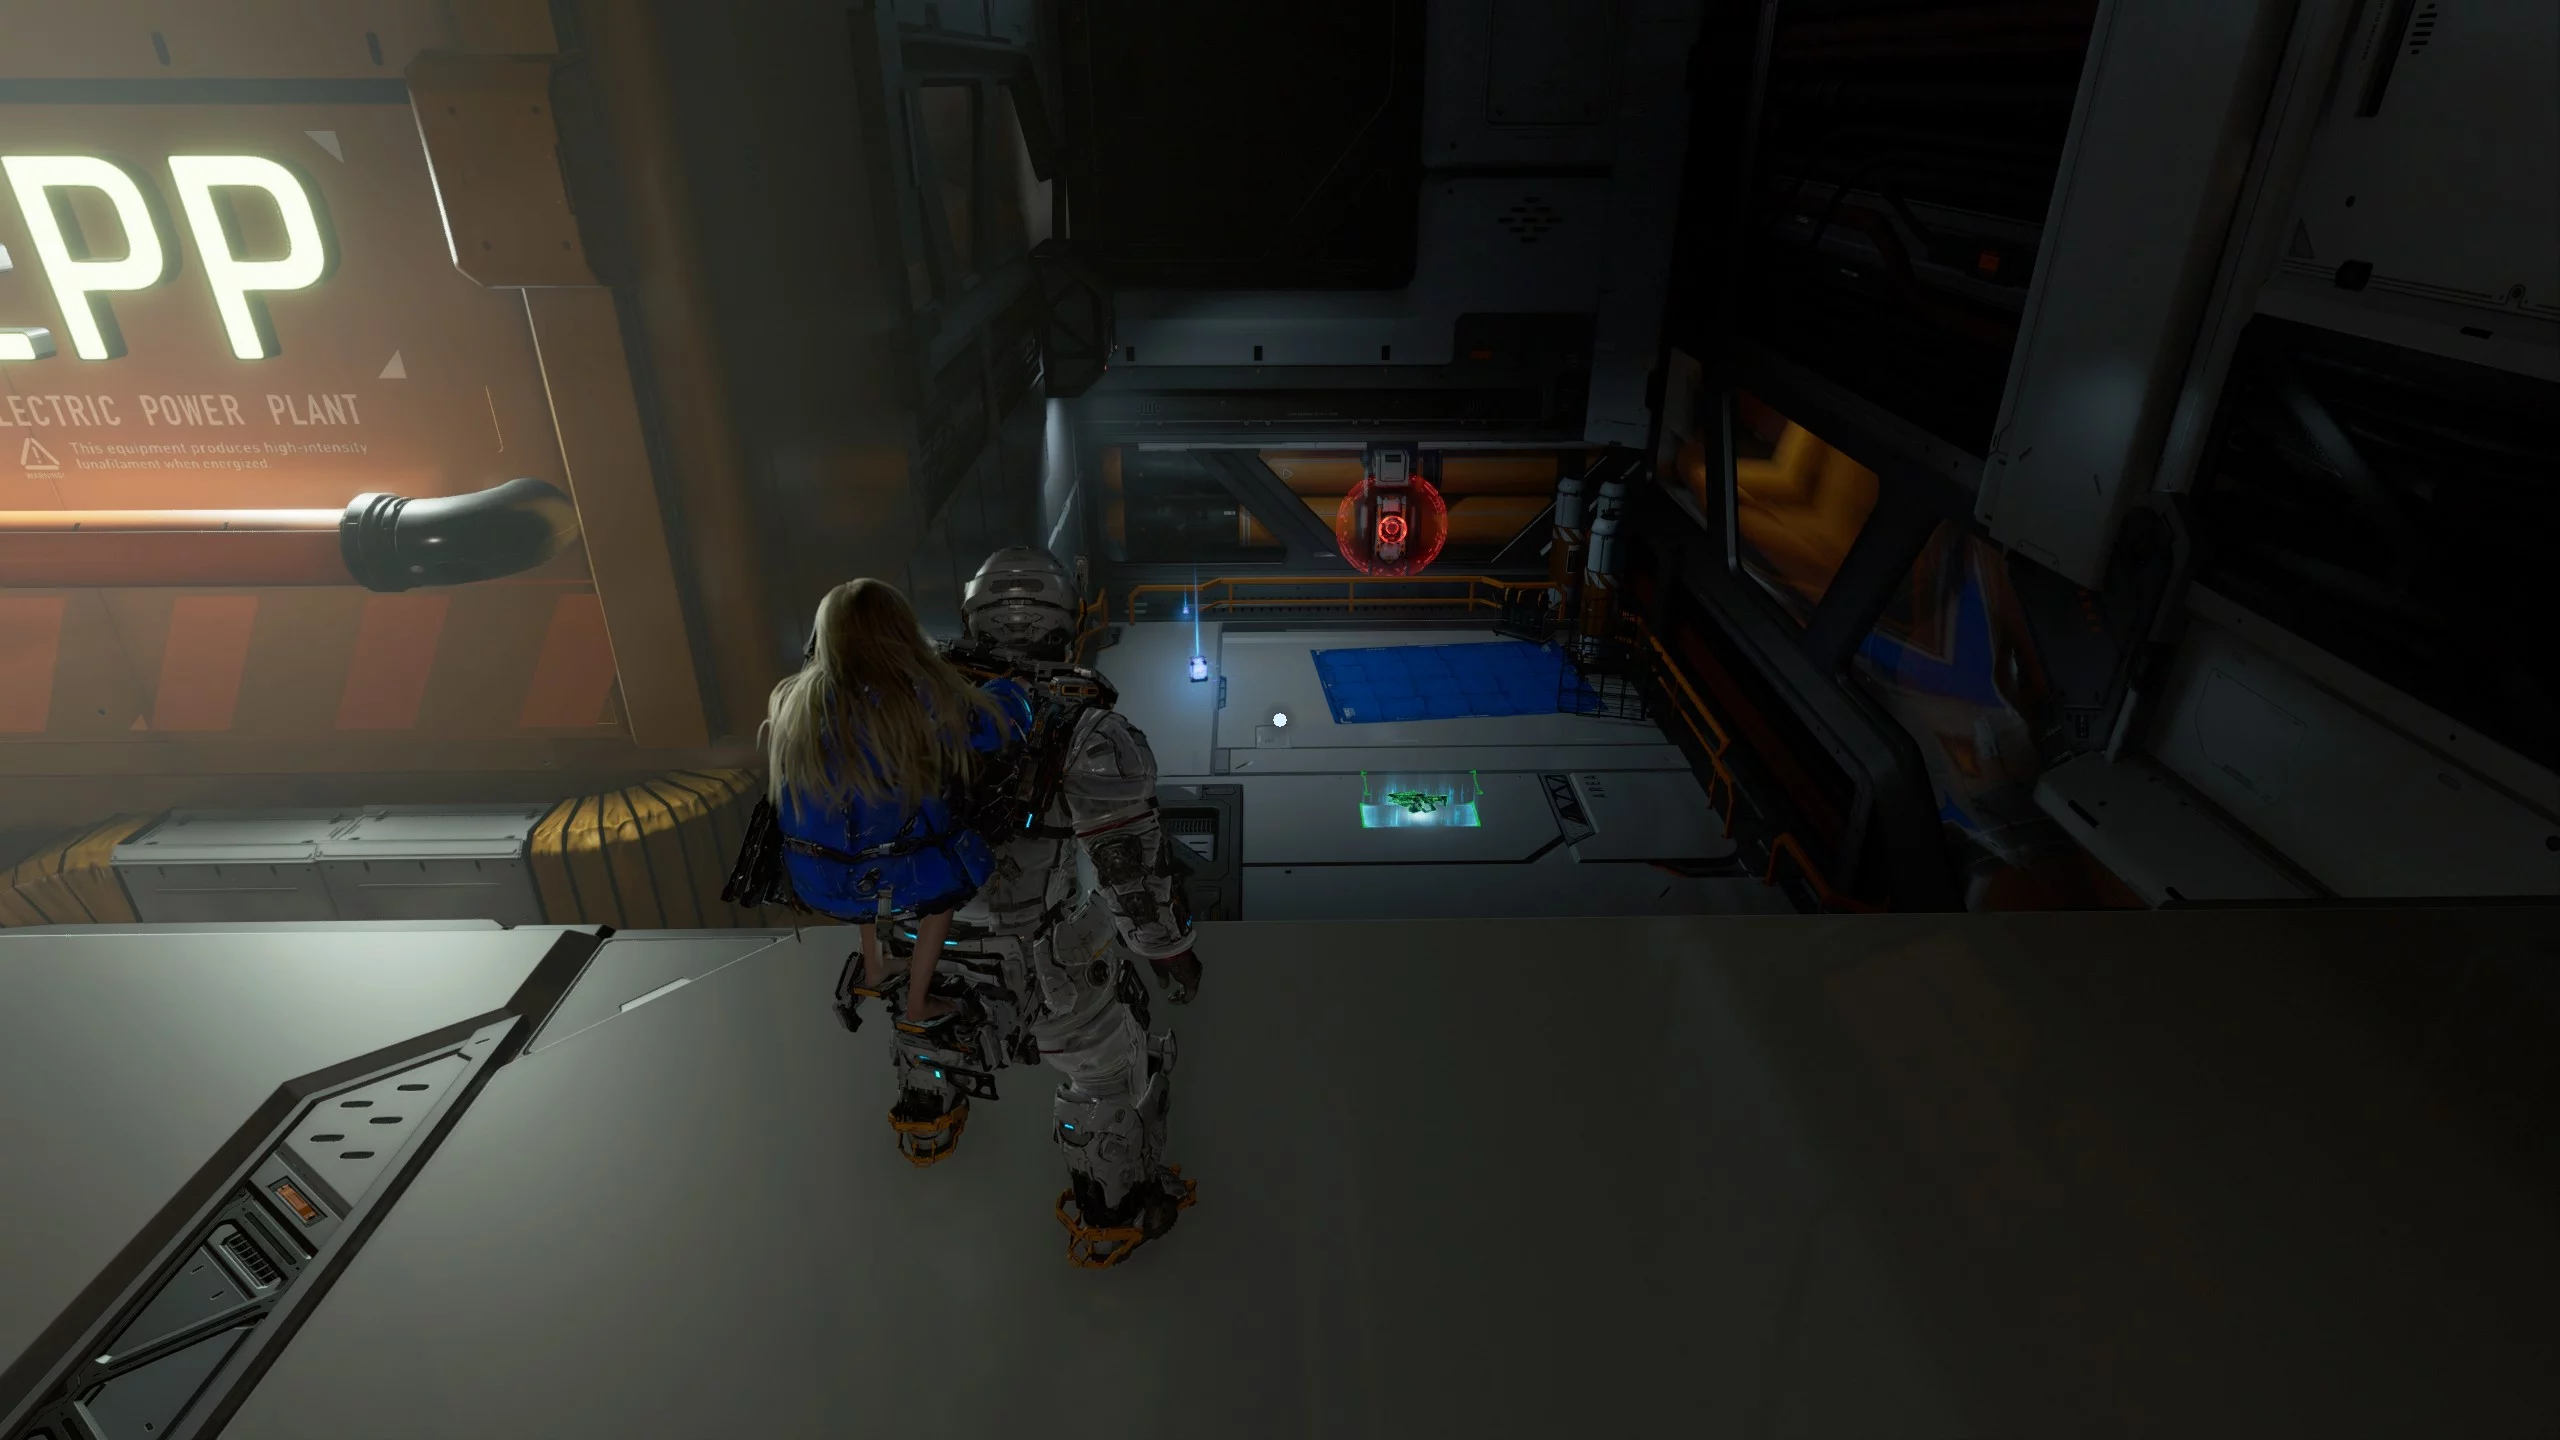
Repair the base airlock, go around the giant tanks on the left, and activate the panel to open the gate. Up ahead is a fight with the "Big Robot," so level up your character as much as you can. The boss is a robotic scorpion with a powerful laser instead of a stinger. It dashes, fires missiles at you, and spreads mines across the battlefield. You’ll need to destroy the projectiles. At one point, it’ll climb onto a column and fire bursts of red lasers — make sure to dodge them.
Pick up the cartridge to upgrade the shelter. After that, a cutscene will play where Vosem is freed and passes her data to Diana. But then IDUS intervenes, forcing the heroes to leave "Pragmata" and return to base.
Lunite Mines
Follow the story and pick up the homing missiles. This twelve-round weapon fires four projectiles per volley. Go down to the spiders and clear them out, then activate the mechanism on the white column to lower the platform. Cross to the other side and hack the gate.

A giant mechanical worm will appear here. The monster is sensitive to vibrations, so try not to step on the ground. If it catches the hero, you'll have to fight it off using Diana's hacking abilities.

Distract the worm, then run across to the door on the other side. Next, you'll encounter orange drones that deal more damage and can move through the air. Head up and activate the fast travel airlock.
Crane Control Panel
Pick up the barrier, which creates a dome that temporarily protects the hero from enemy projectiles and the giant worm. Make your way to the next area and keep moving to the end of the platform. Along the way, you'll face the mechanical worm and some androids.
Climb the tower on the right and take out the new type of android. This robot is a mix between a beetle and an artillery cannon. At long range, it fires surface-to-air projectiles, and up close, it uses a four-barrel machine gun. Activate the red panel and leave the area.

Warehouse Entrance
Up ahead, you'll see red cubes that can be pushed using hacking. The second box should be pushed forward and then back. Pick up the new "Overheat" module, which speeds up the overheating process for androids.
Take out the robots and solve the puzzle:
- Go around the cubes.
- Push the right box.
- Go around the boxes and push the top one.
- Then push the bottom one.
- Turn right and push the cube into the bottom one's spot.
- Go back to the first box and push the right cube.
- Go to the blue frame on the ceiling and activate the panel to open it.
- Climb onto the box and get to the upper level.
Next, you'll find yourself in an arena. First, defeat the initial wave of bots, then an android with shields and drones will appear. Break its shields, take out the drones, and then attack the robot.

Move forward, go through the warehouse with boxes, and take out the automatons. The next step is another cube puzzle. Your goal is to reach the upper tier, push the cube, and cross the collapsed area. Line up all the boxes in a row and arrange them to make a staircase, as shown in the screenshot below.

Warehouse Exit
Go down to the drill platform, activate the panel, and take out the robots. Then deal with the drone that attacks using lasers, rockets, and mines.
Mines — Control Panel
Head outside and walk to the spot with a view of Earth. Talk about it with Diana, then enter the door on the right. You'll come across black slime that slows Hugh down and turns robots into iron-organic symbiotes. The slime makes hacking harder. Every time you move to a new cell, you have to restart the hacking process, and you’ll need to keep doing this until you reach the green cell.

At the end, reach the shelter airlock and get ready for a tough section.
Logistics Control Center
This area is packed with tough enemies. Leave the complex and drop down into the first yellow container. Take out the mortar first, then move to the right section. Climb up to the arena, clear out the robots, and activate the panel to lower the second container.

Go down and head back to the start. Move from platform to platform to avoid attracting the worm’s attention. Use the yellow container to reach the next airlock.
Tower Access Airlock
Descend along the platforms and go through the tunnel in the rock. Take out the warden and the invisible enemy, then head to the lower section. Clear the robots and keep moving until you encounter the worm. Escape its grasp by solving a maze puzzle during the hacking sequence.
Once the worm retreats, you can move on. Continue until you find rocks with glowing blue veins. This is lunite, the material used to make moonfiber. Talk about it with Diana and reach the next airlock.
Central Processor Station — Entrance
Get ready for a fight with the Lunokop. Bring the barrier and homing missiles with you. Try to stay on higher ground and attack the worm when it surfaces. Finish it off with a final shot and pick up the level four shelter access key.

Enter the main tower and interact with the giant round door. A cutscene will play where Diana restarts IDUS. In the end, base administrator rights go to Vosem, who attacks the heroes. The girl is badly hurt, so she needs to be taken to the shelter.
Pragmatics Lab
Head to the Cube, open the Pragmatics Lab to the left of the main panel, and get into the capsule. Go to the main hall, watch the cutscene, and move through the left gate. Keep going until you run into a warden. Hacking will be more difficult because Diana is infected with necrofiber.

Make your way through the necrofiber and droids to the elevator, then continue to the next lift. The story then leads to the living quarters. Destroy the crystals and activate the mechanisms to remove laser barriers. The panel for the last trap is on the ceiling.
At the end, pick up the reactor and kill the drones. Diana will lose consciousness. Carry her back to the start of the area, where you'll have to survive an encounter with a combat robot. Fighting it is pointless, so just dodge its attacks and wait for your companion's update to finish, then return to the shelter.
From this point on, Diana can destroy red crystals. To do this, approach the growths and use the Luva Eraser. Also, the Overload ultra attack now affects all robots and deals more damage.

Central Port
Open the capsule in the shelter and head to the central port. Turn left, enter the vacuum area, and destroy the red crystals. Take out the androids, board the monorail, and activate the touch panel. You'll have to stop twice because of robot attacks.
Cargo Terminal
Leave the monorail, activate the airlock, and go down the stairs. Here you'll encounter androids covered in necrofiber. Use the Luva Remover and wipe out the enemies. At the end, turn right and activate the red panel to climb up to the upper section.

Next, you'll have to deal with a swarm of infected droids. Space is tight, so group the robots together and use the remover on the slime. Get to the platform and move down to the next section.
Research Sector — Airlock
Cross the platforms to the next mini-arena and take out the robots. At the end, a new android will appear with tentacles instead of arms. Hack its defenses and shoot the blue canisters on its back.
Research Sector — Lobby
From the airlock, turn right and move forward. Go through the laser trap and take out the group of enemies. Destroy the red crystals, activate the panel, and climb the platforms to the upper part of the arena. Next, you'll have to survive four waves of androids. Drop down to the mineral and clear the main corridor.
Communications Center
Here you need to find two panels to unlock the locks. There are two paths from the gate, each leading to its own mechanism. It doesn't matter which path you choose. In this case, the left corridor was picked. In the first section, you can burn the robots. In the second, you'll need to dodge lasers and destroy androids.

In the right section, you need to unlock the door by activating five mechanisms, just like in the power distribution center. Below are their locations, followed by matching screenshots:
- To the right of the main door;
- Opposite the door, but you need to break the blue crystals first;
- To the left of the door, up near the ceiling;
- Next to the previous mechanism, also near the ceiling;
- On the ceiling, across from the door.
Climb the ladders, take out the bots, and activate the second panel. Then return to the start of the area, go through the gate, and defeat the sentinel. Erase the necrofiber from the robot, weaken its defenses, and hit it with everything you've got. It's a good idea to use the slowing stasis. During the fight, it will absorb more slime, so you'll have to use the Luva Remover again.
Lab — Main Entrance
Go down into the pit and eliminate the group of enemies. In the next section, you'll need to cross pools of necrofiber, and at the end, face a mortar robot. After that, you'll have to make a three-stage climb. On the last step, there's a narrow corridor where a tentacled monster and several infected wardens will appear.
Orbital Elevator Entrance
Head up to the bridge and make your way to the main tower, then activate the airlock. Max out Hugh and Diana, because up ahead is the final boss fight. Vosem will absorb the necrofiber and transform into a combat android with multiple tentacles.

The fight has three phases. In the first, she uses standard attacks, then takes to the air and starts bombing the arena. At the end, you'll have to deal with a counter-hack—avoid stepping on the red cells. To defeat the boss, you need to strip off the necrofiber, break through her defenses with hacking, and shoot her in the head.

After the battle, Vosem disappears. Hugh and Diana take the elevator up to the evacuation platform. But on the way, a necrofiber monster attacks. The hero decides to use a giant cannon. Charge it up by hacking and shoot at the spots highlighted by a frame.

Diana will help destroy the bridge, and the heroes will reach the evacuation platform, triggering the final cutscene.

PRAGMATA also has an alternate ending. To unlock it, you need to finish the game and follow the steps described in a separate article.
Other guides
- Pragmata Best Upgrades Guide
- All Safe Box Locations in Pragmata
- Pragmata All Outfits Guide — How to Unlock Every Costume
- Pragmata Hide and Seek Guide — How to Find Diana and Unlock Peekaboo
- Pragmata Training Simulations Guide — All Missions and Rewards
- Pragmata Creator Boss Guide — How to Beat the Mass Production Array Boss
- Pragmata Hacking Guide — How to Hack Enemies and Terminals
- How to get and use Cabin Coins in Pragmata
- Pragmata True Ending Guide — How to Unlock the Secret Ending
- Pragmata Interactive Map — All Collectibles, Markers, Icons & Locations
-
 Pragmata Interactive Map — All Collectibles, Markers, Icons & Locations
 -
 Pragmata Hacking Guide — How to Hack Enemies and Terminals
 -
 Pragmata True Ending Guide — How to Unlock the Secret Ending
 -
 How to get and use Cabin Coins in Pragmata
 -
 Pragmata Creator Boss Guide — How to Beat the Mass Production Array Boss
 -
 Palworld 1.0 Best Pals for Early Game, Combat, Bases, and Mounts
 -
 Pragmata’s Diana takes over the game’s Twitter account — and the internet instantly falls in love all over again
 -
 Pragmata REM Locations — How to Find Diana’s Blueprints
 -
 A Heartfelt Story Moves Gamers — Pragmata Became “Therapy” for a Father After Losing His Daughter